|
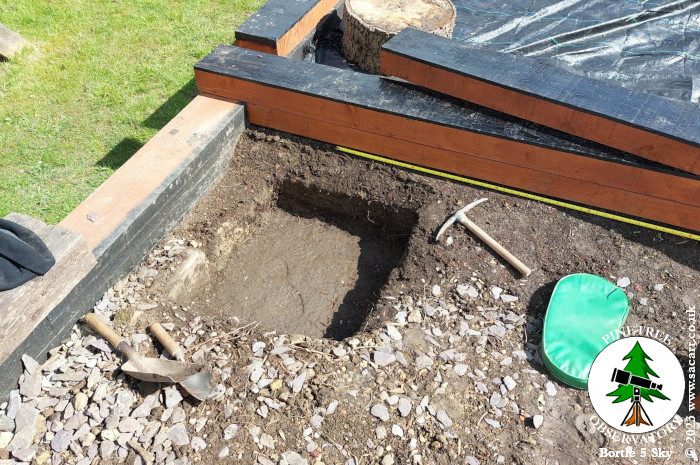
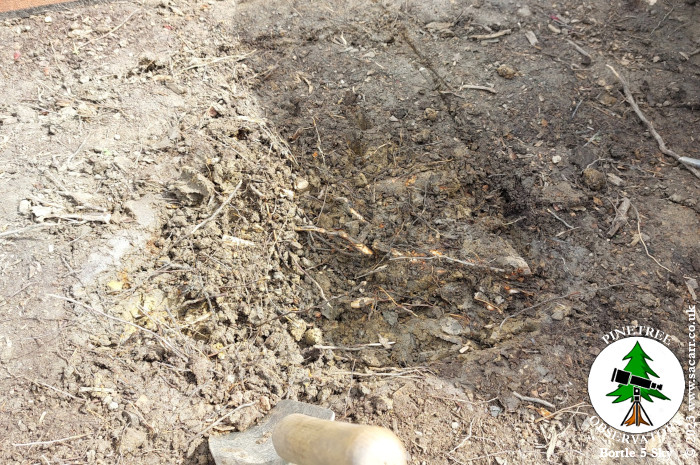
April 25th More digging! This time it
was the foundations for the level crossing gate. The first one wasn't
too bad, just a mix of gravel and clay soil. The second was a nightmare.
I don't think there's anywhere else in the garden with as many roots as
in that two feet square hole. Everything ranging from a fraction of an
inch to three inches diameter. I ended up with a wood chisel, hammering
it into the ground to cut through the roots in order to get a small
trowel into the ground to start digging. It was very slow going and took
most of the day to dig the two holes. I finished the day with a little
more work on bedding in the sleepers along the hedge. |
|||
 |
 |
 |
 |
|
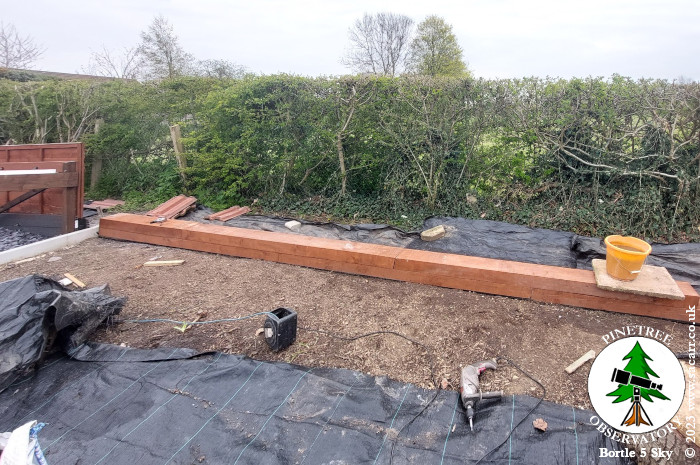
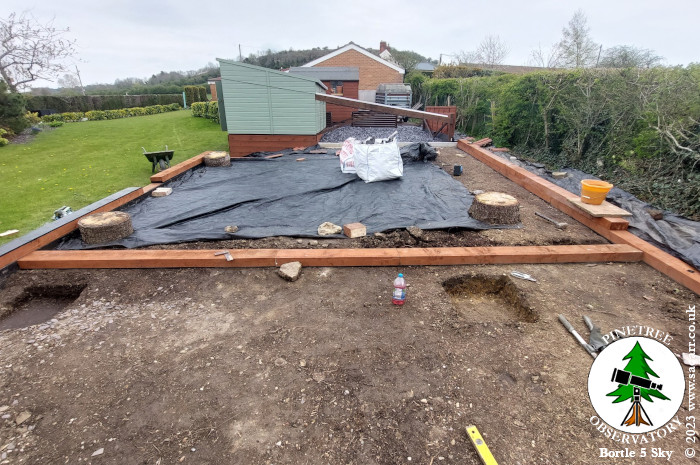
Yet more digging, but today,
I got three of the rear edging sleepers in place and two and a half
sleepers of the second layer screwed on top. The offcut from the half
sleeper was cut a little further to fit in the centre stretch of the
lawn/railway sleeper divide. These aren't yet pinned down. I want to put
a weed membrane under the railway and the edge will also go under the
lawn/railway divide sleepers. Before I can do that, I have to also get
the last sleeper and a half fitted along the hedge. |
|||
 |
 |
 |
 |
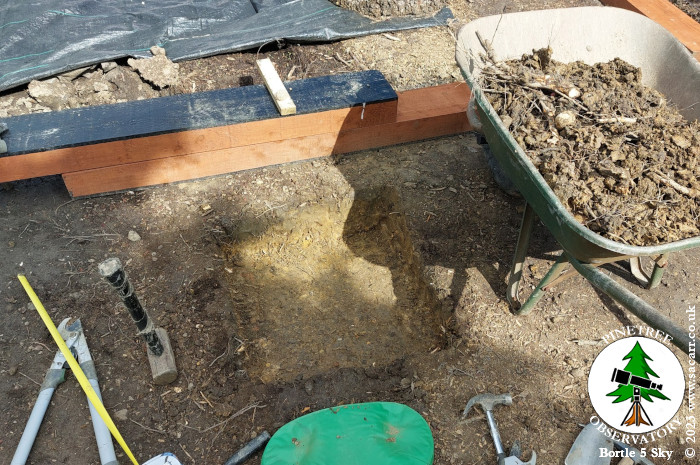
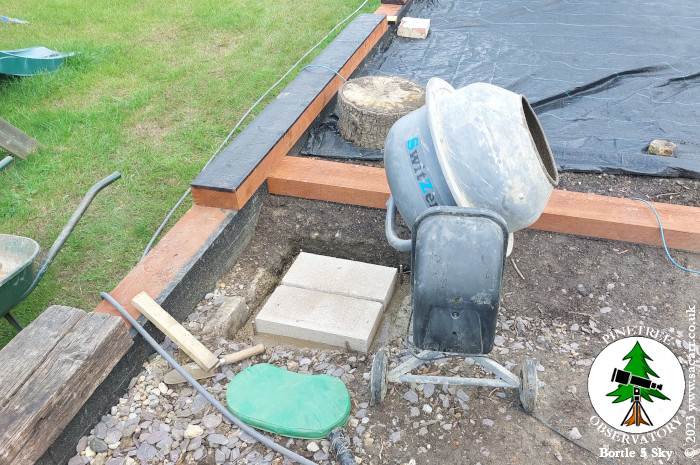
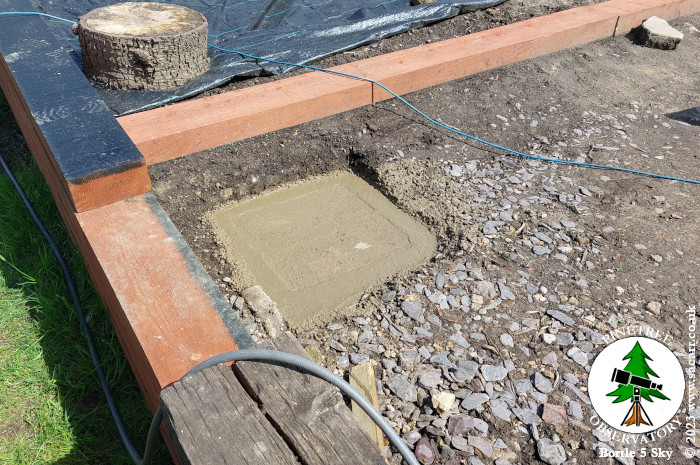
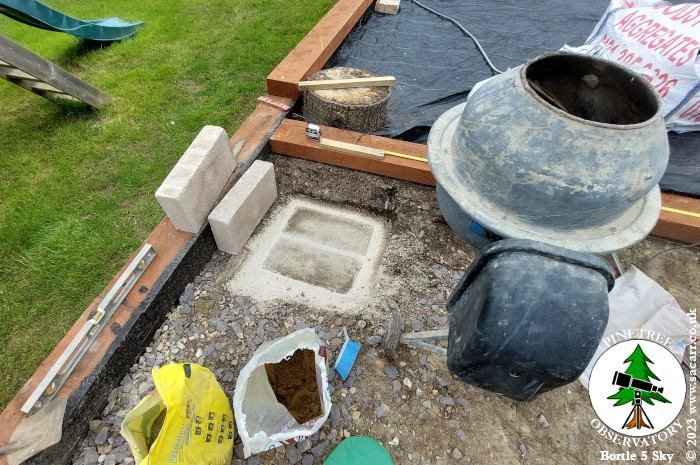
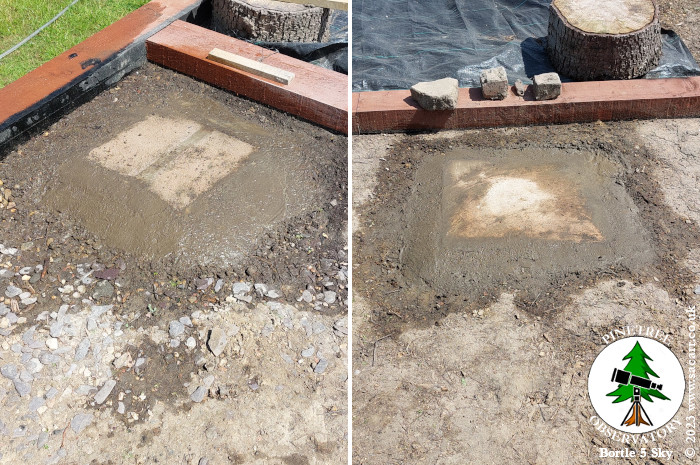
Nothing happened from the end of April to May 10th due to weekends away, heavy rain and when the rain did stop, the ground was too wet. Finally between showers on the 10th, I got some concrete and high density concrete blocks and got the first gatepost foundation mixed and laid. If it's dry tomorrow, I'll check the height of the other foundation hole and try to get the second one done. Four 10mm diameter, 500mm length re-bars, are concreted into the corners of the foundation to help anchor the footing into the earth. May 11th The second concrete gatepost
foundation was laid today. Due to the amount of clearance between the
bottom of the gate and the ground, I may need to raise the height of the
foundation, to bring it to a more realistic height in relation to the
track. I need to do some measuring of the sleepers, rail chairs and rail
to establish the final track height. I still also have some final
grading of the trackbed height. I also did some more excavation for the
sleepers that run along the hawthorn hedge, in order to lay the last 12
feet of these edging sleepers. |
|||
 |
|
|
|
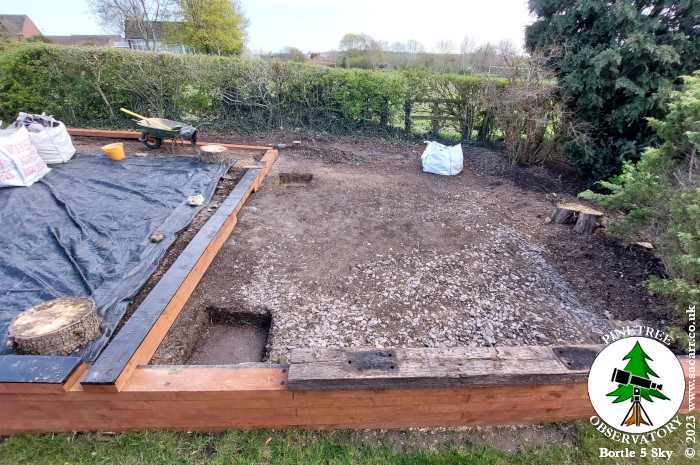
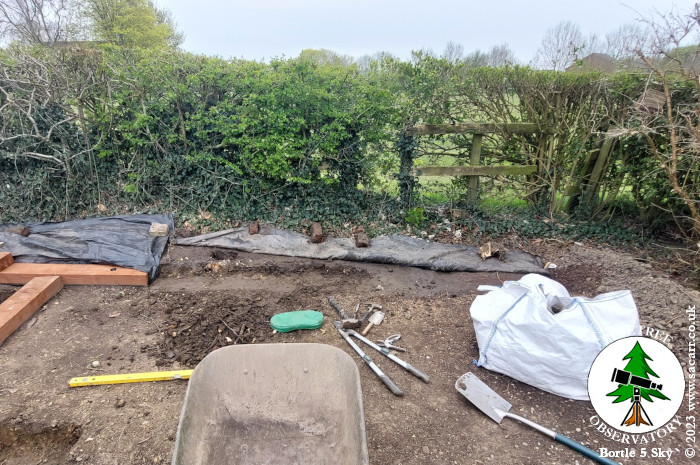
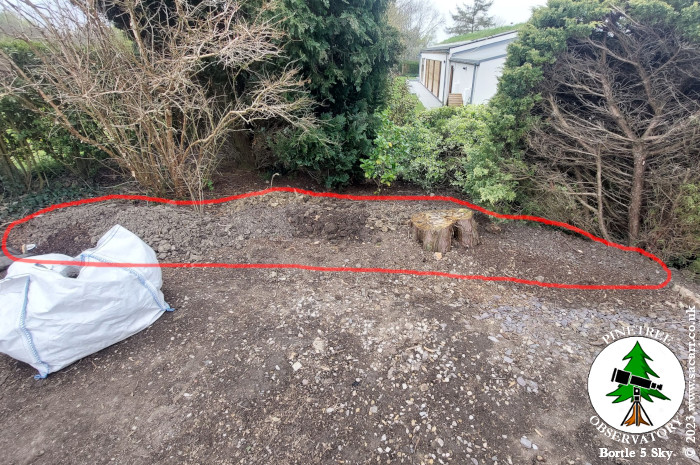
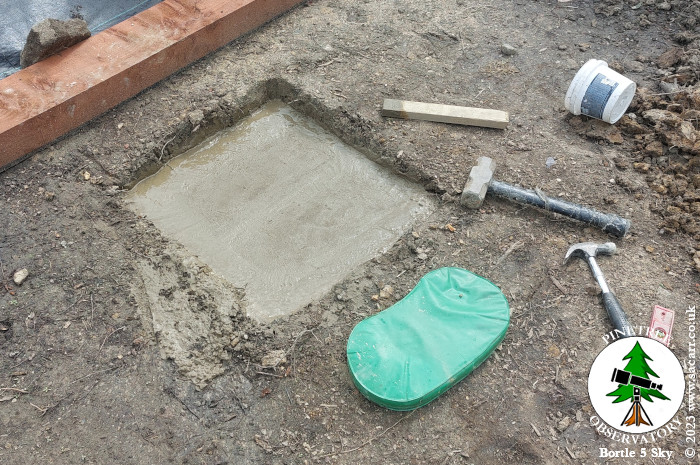
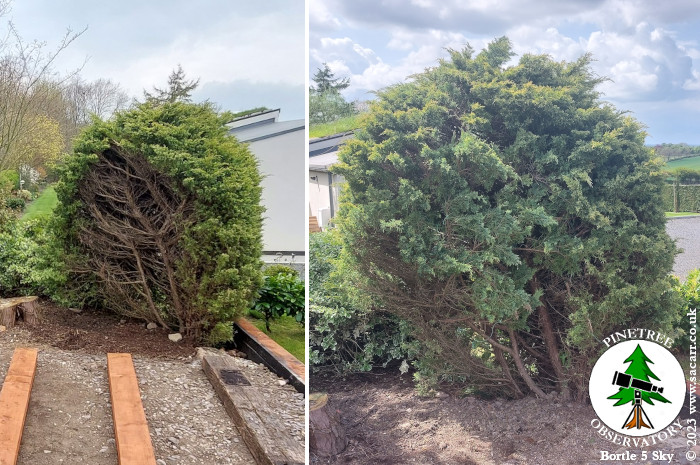
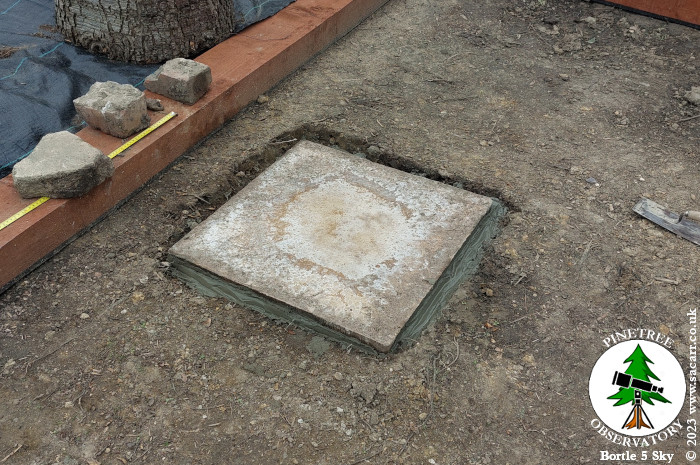
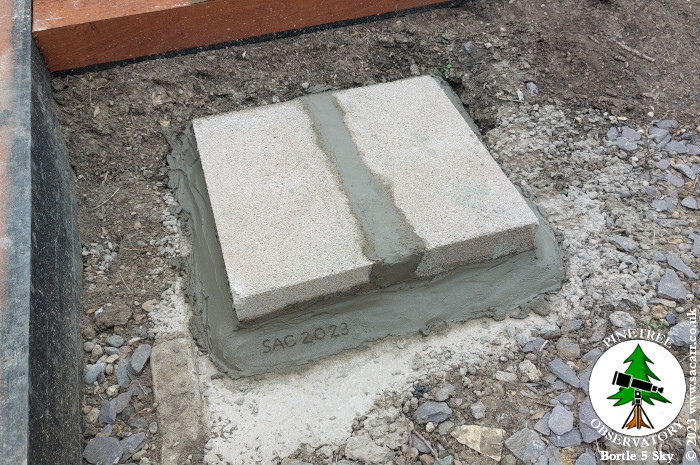
Over the last few days, I finished digging out the soil for the edging sleepers. I've also done some tree surgery on the conifer bush at the bottom of the garden. When we moved here, there was another, quite bald looking conifer in front of this one. As a result, the remaining conifer didn't get any sun light on its front face and so was also devoid of greenery. Conifers don't grow back well, so I started knitting branches from the sides of the bush to fill in the bare area in the front. Branches were pulled around and tied in place with nylon garden twine. It looks a load better now and once those branches fill out a bit more, with a little future trimming, it should become quite respectable again. May 18th On the 18th, I did some more work on the gate footings. I've had to make some compromises with the gate, for the reasons of practicality. I needed to remember that this is a garden feature, not a working railway. The gate will be too low to open and clear the tracks. If I wanted to be able to open it, the gate foundations would need to be raised by around 12 inches, or the whole trackbed dug out and lowered by 12 inches. Raising the gate was going to make it look rather odd and digging out the trackbed through roots, concrete and bricks left over from the air raid shelter, was far more work than I was prepared to do. As a result, the gate height is set for a practical and aesthetic appearance in relation to the rest of the garden. The main footing, nearest the
hedge, was raised by the addition of a 2 inch thick paving slab being
cemented on top of the concrete blocks. This lifted it by around two and
a half to three inches. The other footing was quite a bit lower, due to
the slope of the garden. I added two more concrete blocks on top,
bringing it to a very similar height to the other footing. Once the
mortar is set, I need to back fill around them with earth to level the
area, ready for the weed membrane that will cover the whole area. |
|||
|
|
|
|
| Once the back fill is done, I can drill the mounting points for the gate in the top of the footings. The whole area can then have the weed membrane laid out and its edges can be tucked under the edging sleepers, which in turn can then be pinned down. Once the membrane is fitted, the gate can be bolted in place on top. I haven't yet made the metal mounting bracket for the latch gatepost. I plan to get the gate fitted first and I can then see if the second post needs any additional height. If it does, I can make the bracket taller to suit. It shouldn't be too long until I can start laying the track. | 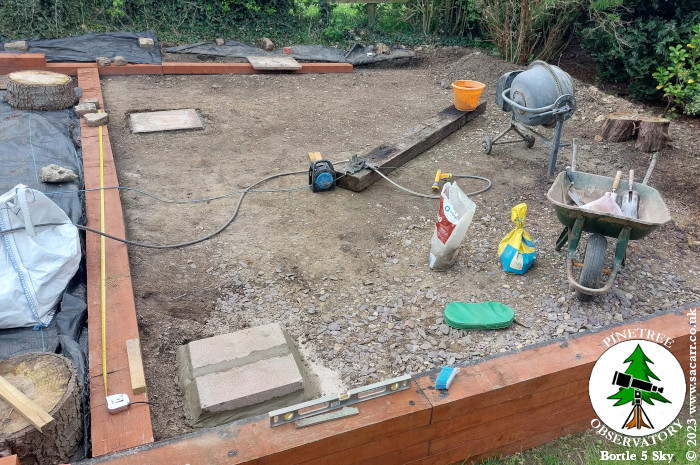
|
||
|
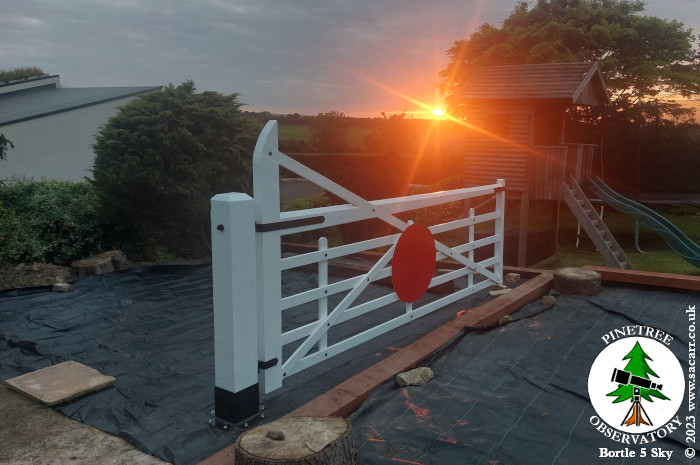
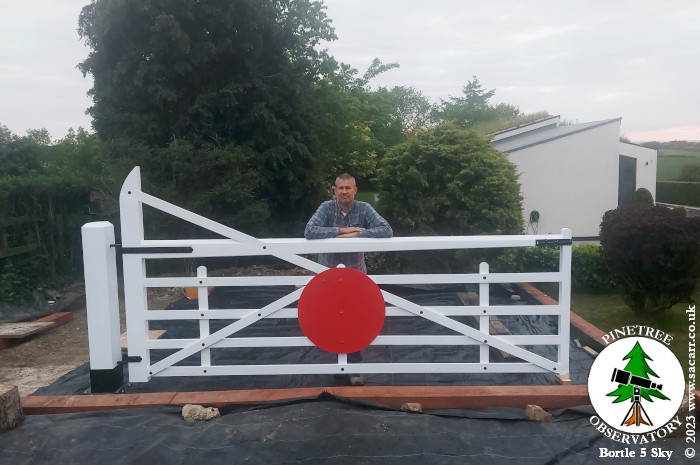
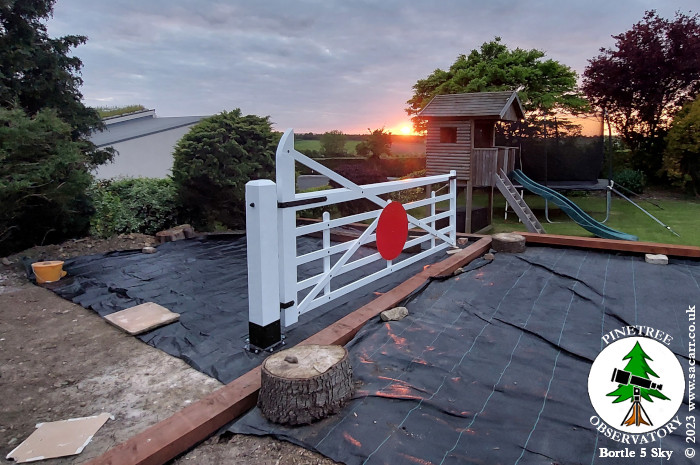
The concrete footings were
packed around with mud and left to set a few days while I had other jobs
to do. On the evening of May 25th, when wifey was home from work and
free to help, we carried the gate from the rear corridor, around 150
feet down the garden to the railway location. The footing for the hinge
end of the gate was drilled for the rawl bolts and they were installed.
The lawn/railway dividing sleepers were then lifted and a 5 metre square
weed membrane spread out over the trackbed area. The sleepers were
replaced and can now be drilled and pinned down properly. The membrane
was cut around the rawl bolts and the gate lifted and lowered into
place. It took a bit of jiggling to get all the bolts through the metal
post mount, without pushing them back down the holes, but eventually all
eight nuts were in place and tightened down. The other end of the gate
is just supported on a block of wood for now. I need to order some steel
plate to make the mounting bracket for the other gate post, which will
then support the end of the gate with its locking bolt. |
|||
|
|
|
|