|
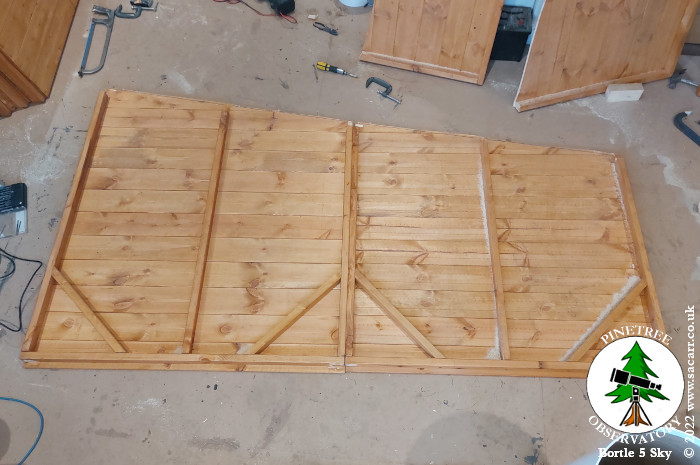
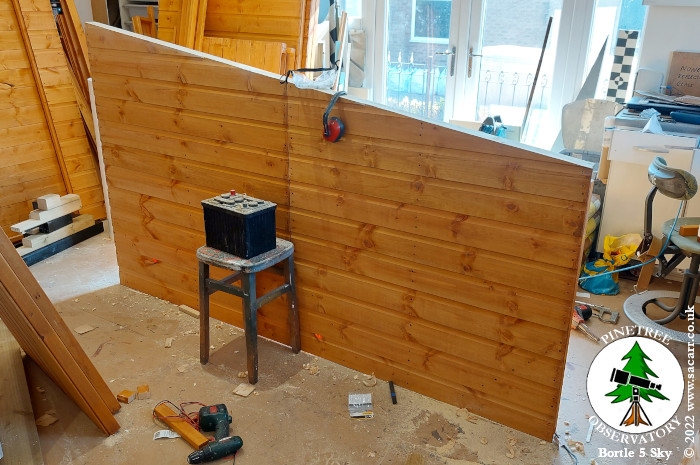
On May 6th, the first two panels
were screwed together and the top cut off for the roll off roof. A new 2
inch square timber was added along the top for the roof runner to attach
to and also to stiffen the end wall across the joint. This is to replace
the strength lost that the roof would have provided had the structure
been built as intended. |
|||
 |
 |
 |
 |
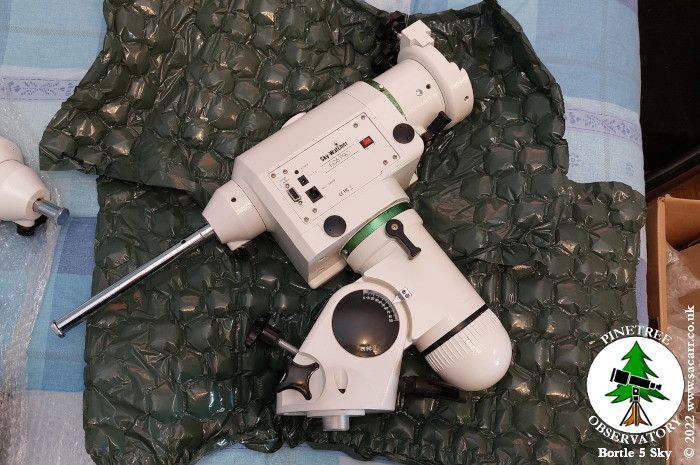
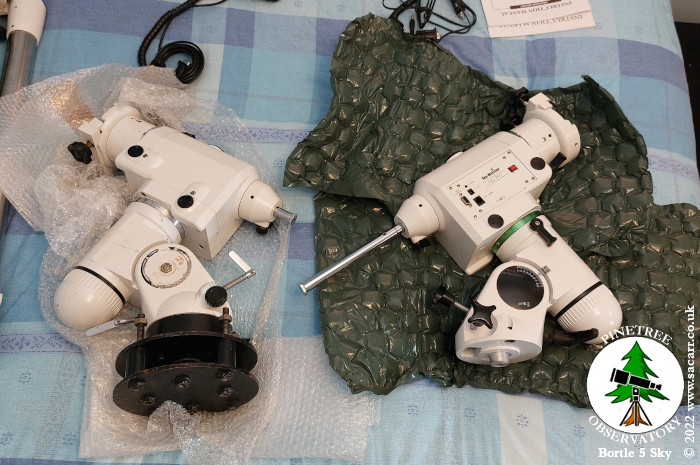
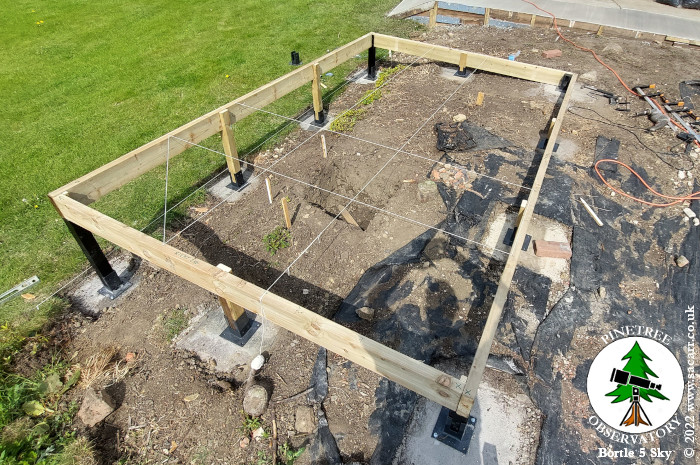
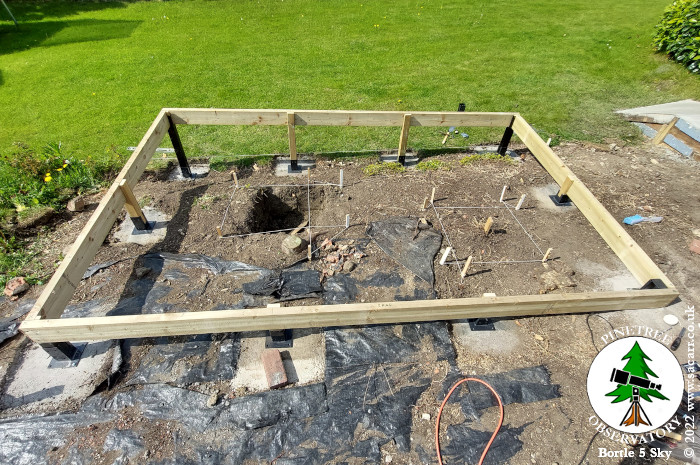
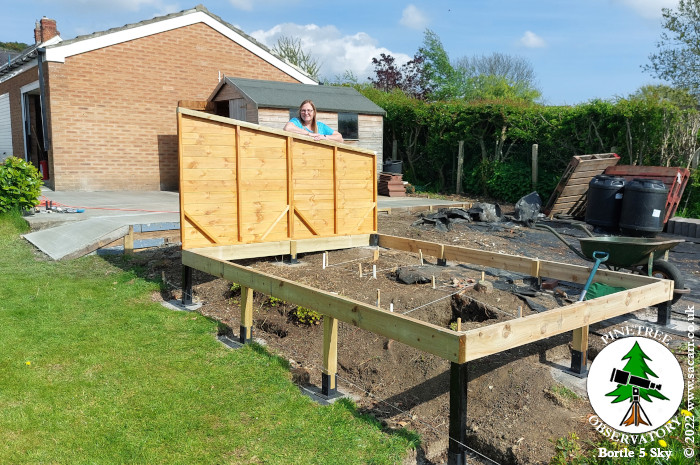
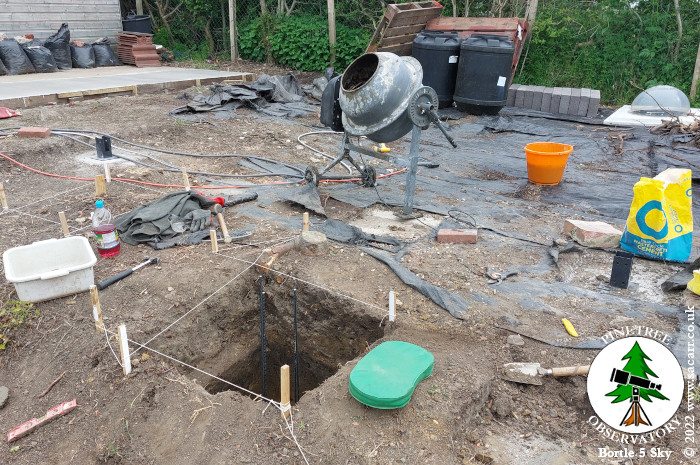
| Thanks to a chance spotting of an advert in the "Latest Posts" section of the Stargazers Lounge forum homepage, I met up with the seller on Saturday morning and bought the second NEQ6 mount needed for my observatory. My original NEQ6 Pro was bought in 2012, while the one I've just got is the newer, green trimmed model. This one is about two years old and in excellent condition. I can't wait to get them both installed. On Sunday 8th, I got back to working outside again. The outer floor joists were refitted and the diagonals carefully measured to get the base as square as possible. Once the position was set, I drilled the bolt holes into the footings for the rear corner leg brackets. The brackets were then bolted down finger tight and the floor joists screwed together. This was just a temporary measure. Once all the piers are done, I want to lay a weed membrane down over the footings and then bolt the brackets down onto them. With the floor in position,
the other six legs were marked up and cut to length. Their mounting
plates aren't yet bolted down. With the frame supported and secure, I
marked out the edges of the pier foundations on the timber frame and
knocked some small panel pins in. String was then stretched across the
pins, end to end and front to rear to give me the pier position. Small
stakes were then hammered into the ground where the string crossed to
mark the area to dig. |
|||
 |
 |
 |
 |
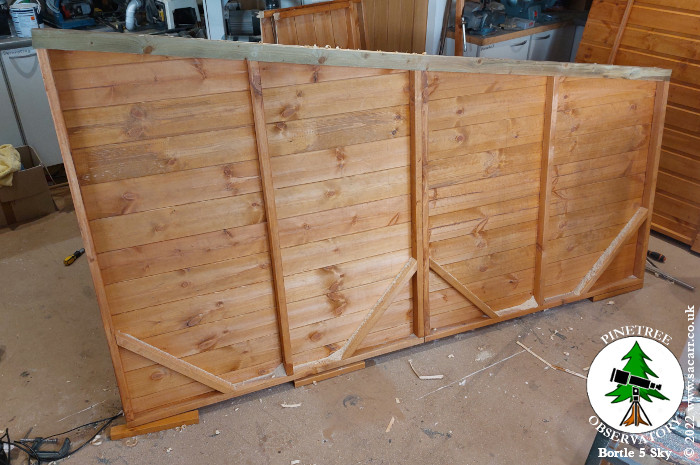
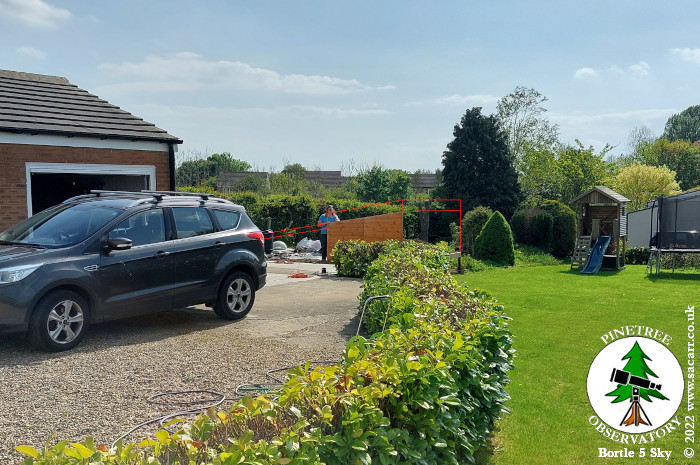
| Lynne had been wondering how much of the garden would be blocked by the observatory when viewed from nearer the house. She held one of the end walls in place while I took a picture from about half way to the house. Once the garden shed is pulled forwards onto the new concrete, half of the observatory will be hidden anyway. This was one of the reasons for the low height of the observatory. Another was that it meant the piers didn't need to be so tall and the whole thing is just more hidden in the garden by the hedges. The long distance view is looking approximately South South West. Back down at the build site,
Lynne supports the end wall. Her eye line is around the height of the
top of the roll off roof. Due to the floor height above the lawn, I'm
planning on some fold out steps in the doorway. When not in use, the
steps will fold away inside the observatory and leave the lawn
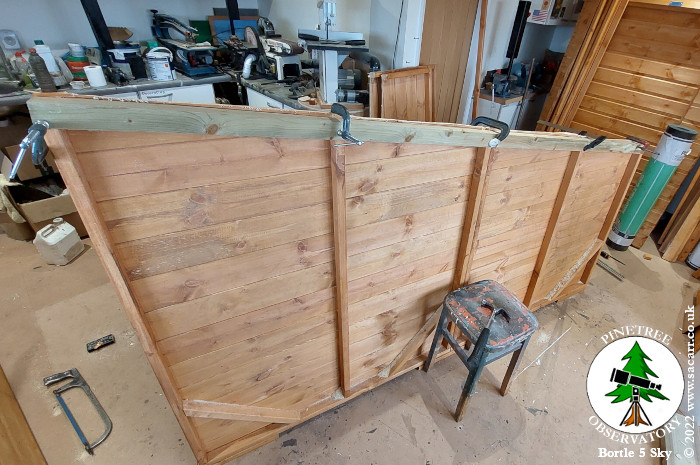
unobstructed for mowing. Slightly out of work order for today, the other end panel was trimmed and the roof runner screwed in place
as the first job of the morning. The tongue and groove side was planed down to the runner and sanded flush. Since it was a nice day, that's when I decided to go out to the garden and move the job along out
there.
|
|||
 |
 |
 |
 |
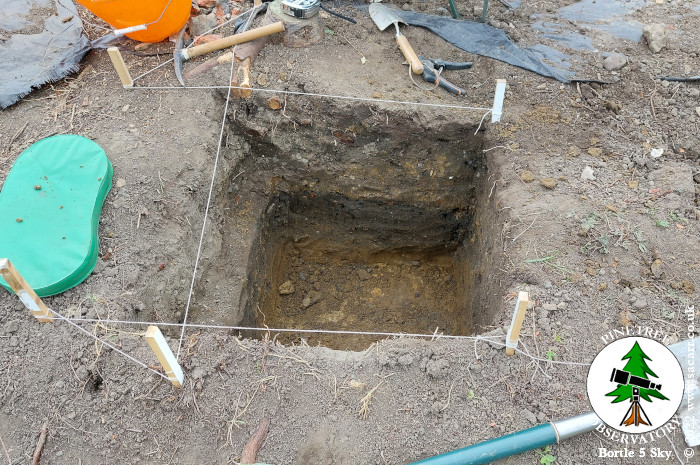
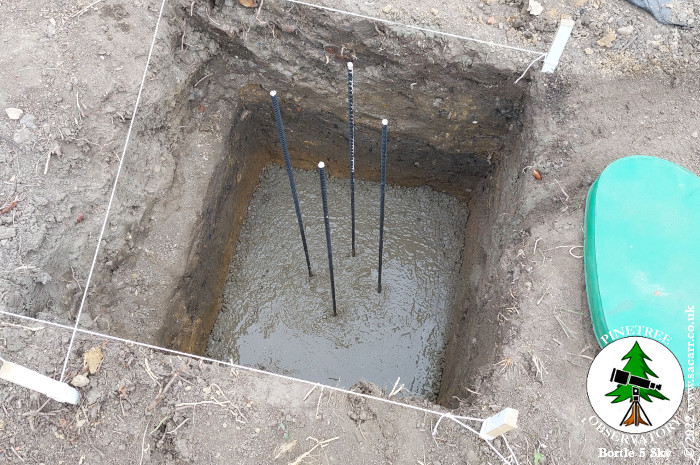
| May 9th, was mostly spent digging and digging more. The first pier hole was extended in width to match the strings plotted out the day before and then I started digging down and down. Since the slope of the earth drops away where the pier is, I wanted to go down a decent distance so the foundation was supported on all sides. The hole was about 2 feet square and a tight space to dig in once I got too low to reach from the outside. The new mixer made short work of mixing the concrete for the foundation at the bottom of the hole. Three layers of high density
concrete blocks will be built up in a square with a hole down the
centre. Blocks are much cheaper than concrete to mix. The centre of this
square will be filled with more concrete and the space around the
outside of the blocks and the hole will also be filled. Four re-bars are
fitted up the centre of the square and a further four will extend up to
the top of the pier tube.
|
|||
 |
 |
 |
 |
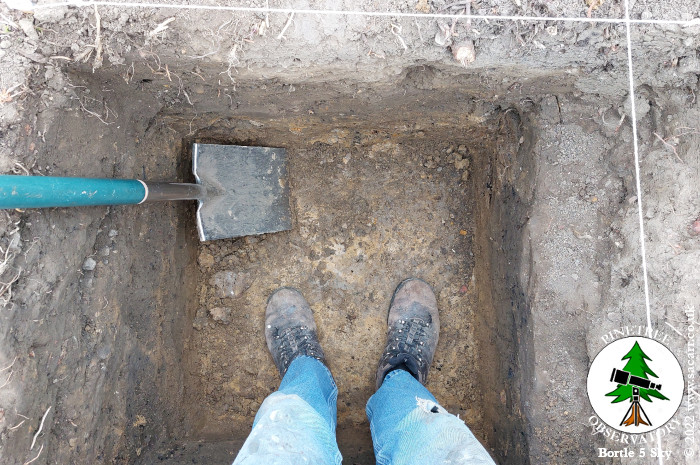
| May 10th - I could do with having the frame assembled outside when I pour the foundation for the pier. The top of the foundation height is related to the floor height, which in turn sets the pier height. So I decided I needed the joists and legs waterproofing. So this morning, I spent 3 hours painting the original corner legs and the new intermediate legs, then turned my attention to the main joists. All the intermediate joists will need painting too, plus the underside of the shed floor, but I can't do any of that until the piers are in. After a quick lunch, I set to work digging the second pier foundation hole. All I can say is that I'm pleased I
didn't dig this one first; otherwise, my observatory may have only had one pier!! |
|||
 |
It was very hard going, with lots of smaller one to two inch stones or bits of brick in the upper layers. This meant my spade couldn't dig through it and I had to resort to a small gardening trowel, which due to its more pointed end, could cut between and push passed all these small stones. As I dug further, I started to find larger bricks and what I thought was a complete brick at first, turned out to be a five to six inch slab of very hard concrete, wedged under and over more bricks. I had to mine under and around it before belting it with a small sledge hammer, breaking it up into four main chunks which still put up a fight to remove! The further I went down, the more large stones and bricks I found. My dodgy elbow was killing me. |
 |
|
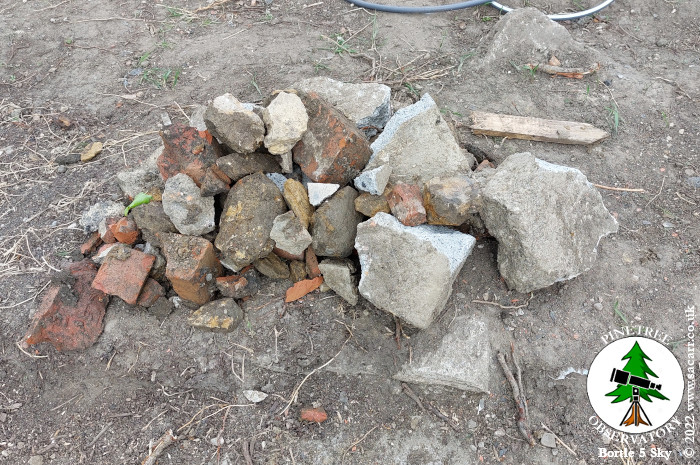
| By the time the school pick up run was due, the hole was almost at full depth, but it fought me all the way. Five full wheel barrows of heavy clay soil came out of the hole, along with this pile of bricks, concrete and stone. You can see a brick on top of the pile to give scale to the lumps! I could barely lift the trowel by the end of the day. To the right is the second hole, almost complete. My placing of the hole, dictated by the nearby tree stump, was fortunate. |
|||
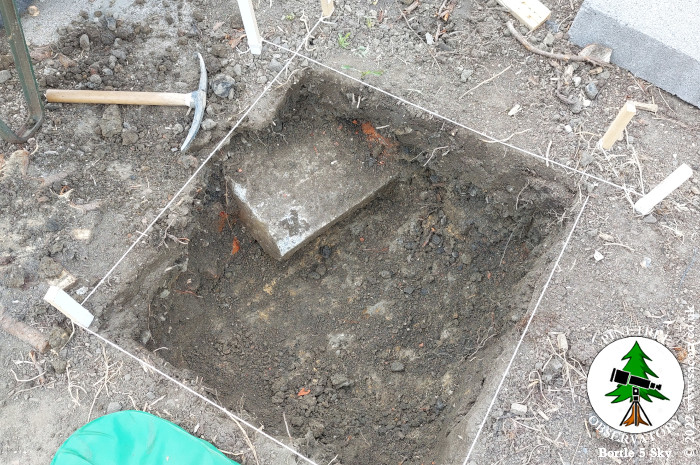
 |
As I dug down, one edge of my hole fell exactly in line with one of the brick walls from the old air raid shelter ( inset ). These bricks are very hard and the wall is double brick thickness. I had to smash one wall out when the conifer hedge was cut down along side the garage concrete hardstand. This was so the tree felling team didn't damage their stump removal machine on the bricks. It was a nightmare to smash the bricks out and I broke one hammer and damaged another getting them out! So I'm really fortunate the edge of my hole was flush with this brickwork. | 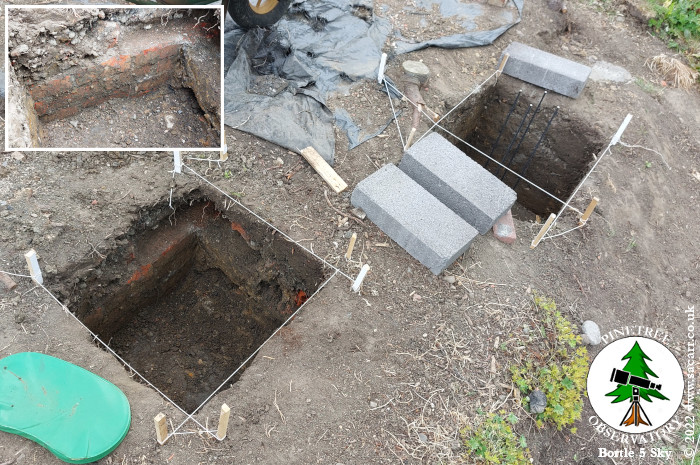 |
|