|
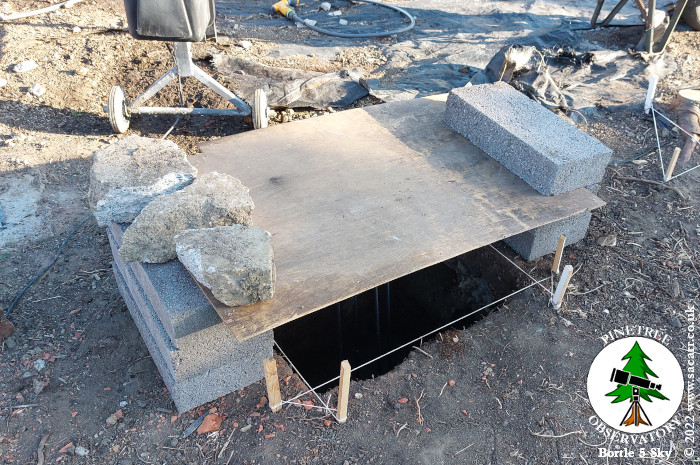
On May 11th, I got the other side of the legs and joists painted, then carried on digging. I got to the bottom of the second hole at seven wheelbarrow loads, plus the huge pile of rocks. I just got some hardcore into the bottom of the hole when the rain came.
The spoil heap from all the digging and clearing is 23 feet long, 2 to 3 feet high and about 5 feet wide! This will go into leveling the land beyond the observatory where we plan a second lawn and a 1/1 scale railway garden feature!
After 6pm that evening, the
ground had dried up enough to crawl around without getting muddy, so I
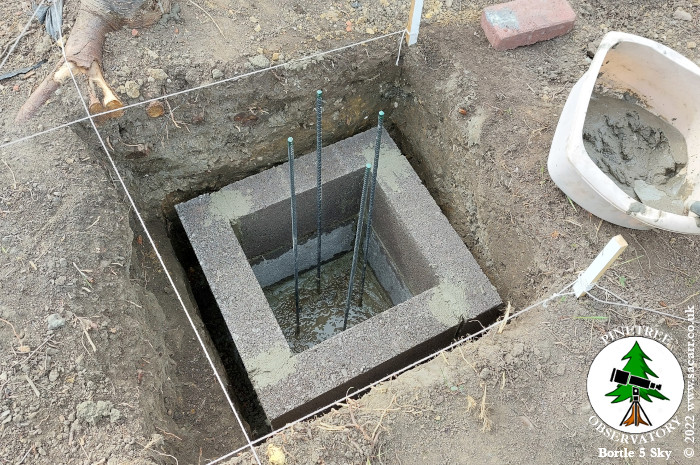
went back out and put the concrete in the bottom of the second hole.
When I was done, I did a minute or so of mobile phone astrophotography,
with the pier bases in the foreground and the Moon in the background to
the South East. The following day, with both lots of concrete dry, I
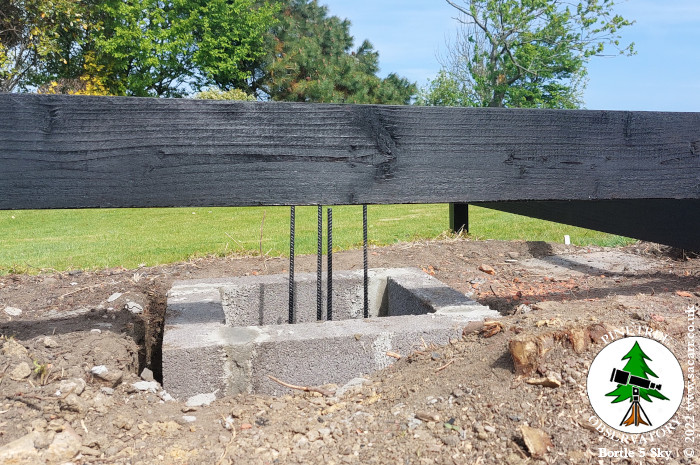
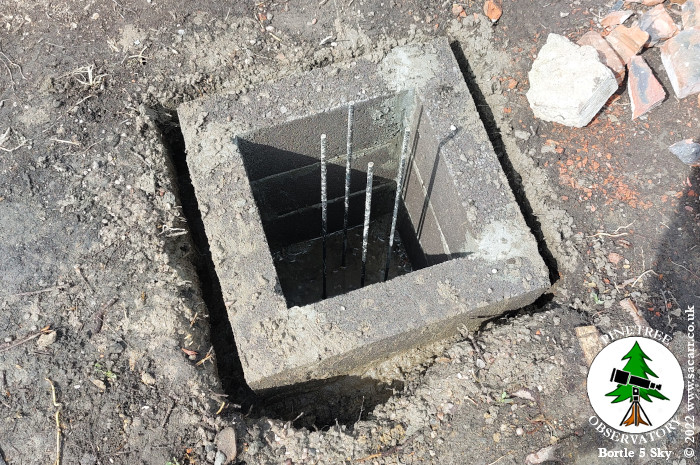
began laying blockwork. It was hard work laying the blocks so deep in the hole and I had to climb into the hole for the first layer, being careful not to stab myself on the rebars. Layer two was easier, but still quite a reach to lower the blocks in place without following them into the hole!
|
|||
 |
 |
 |
 |
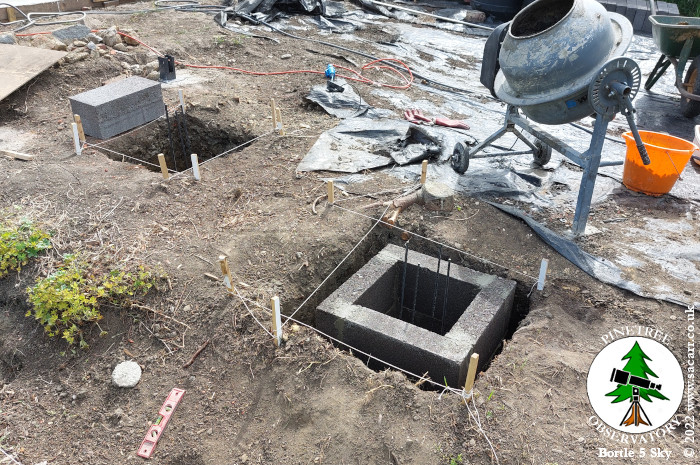
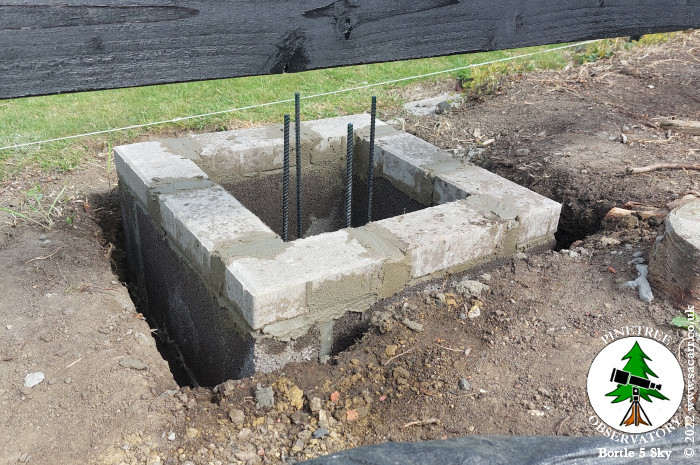
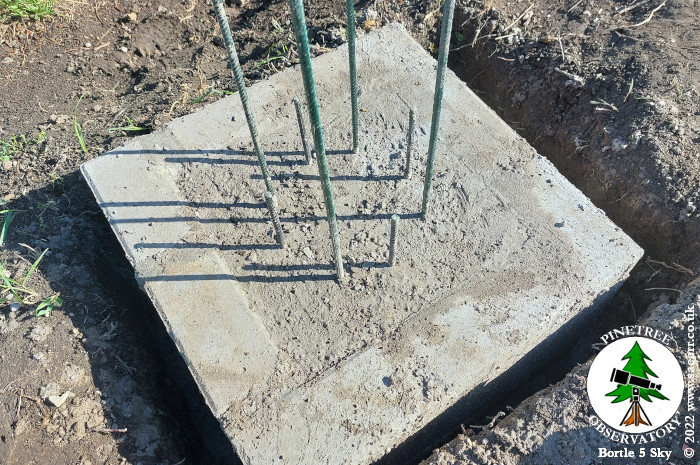
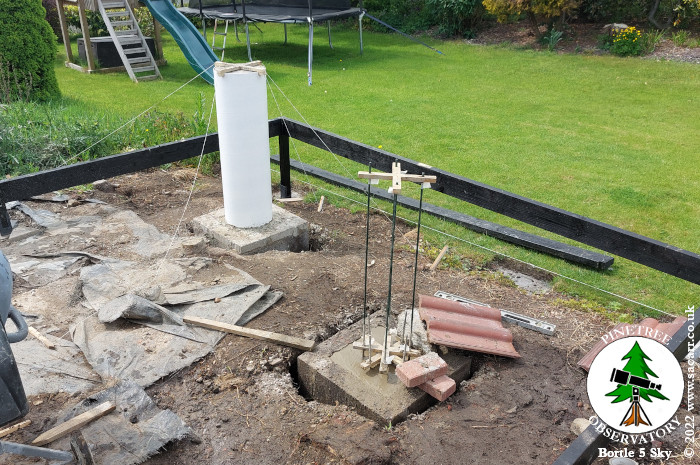
| It took about 90 minutes to get the first twelve blocks in place. The first 180Kg of the foundation. Even though I laid the second pier foundation the evening before, it was firm by late morning today. I hadn't expected it to have cured, but it gave me the opportunity to get the blockwork in for the second pier. Another 90 minutes passed and the second one was done. The blockwork needed to fully dry before I can pour the concrete inside and out, but I also needed to wait for some more rebar coming in the post. Local stores were all out of stock, so I had to go online. The new rebars will be set into the top of the foundation block, then extend up into the pier. The existing bars will extend six to eight inches into the bottom of the pier. The foundation concrete will need to set enough to support the upper rebars and also be firm enough to support the weight of the concrete when the pier is poured. The second view of the two foundations is looking approximately South. The way the piers are staggered gives them both a good view South and gives me my small warm room space in the left foreground. The right pier will be for solar system targets while the left will be for deep sky. On May 13th, the eight extra rebars I ordered, turned up in the post. I wasn't expecting them until Monday. Unlike the bars from B&Q which were varnished, these weren't and were covered in light surface rust. I didn't want to stick them in my concrete going rusty, so cleaned them all up with a rotary wire brush in the pillar drill and then painted them in hammerite. |
|||
 |
 |
 |
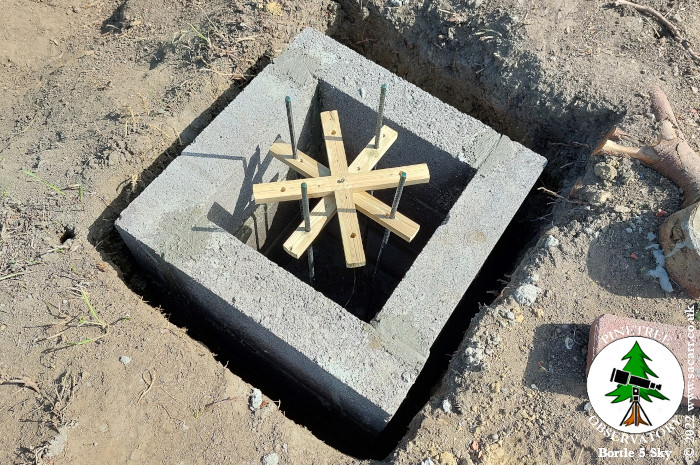 |
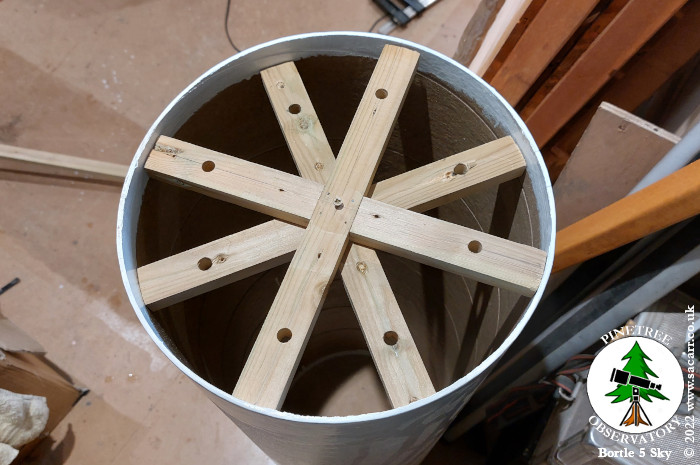
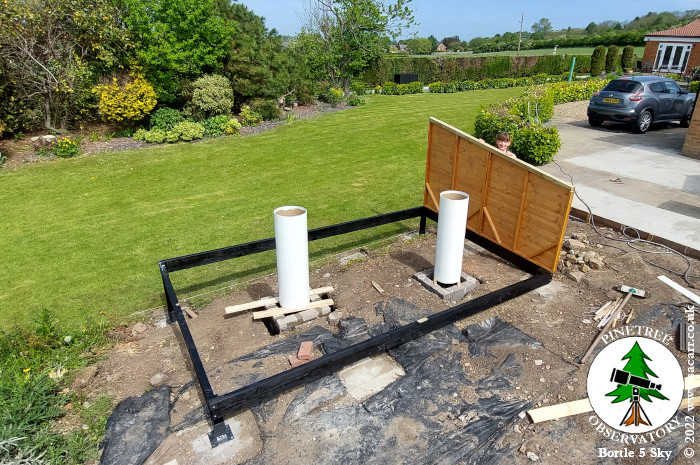
| The cross also fits the top of the pier tube, so when I come to pour that, I can also keep the bars straight. I only need one cross in the top of the tube as there's only four bars that extend up to the top. On May 14th, the floor joists were carried out once again to check on the height between floor level and the top of the pier foundations. I needed about 12 inches. The deepsky pier was pretty much spot on with about 10 inches to the top of the joist, plus another 2 inches of the shed floor. The solar system pier was a
bit low by around a couple of inches. The easiest way to solve this was
to add a layer of block paving bricks. So off to B&Q for eight
bricks and a bag of sand and then back home to get them laid. This would
allow the foundation concrete to be filled flush with the top, so the
pier tube would start at the correct height.
|
|||
 |
 |
 |
 |
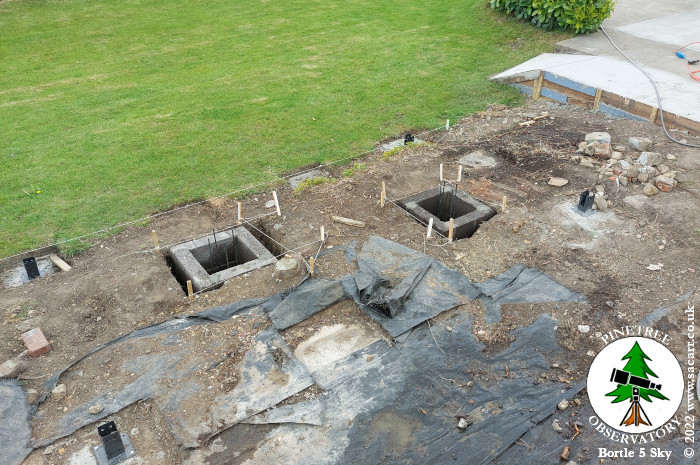
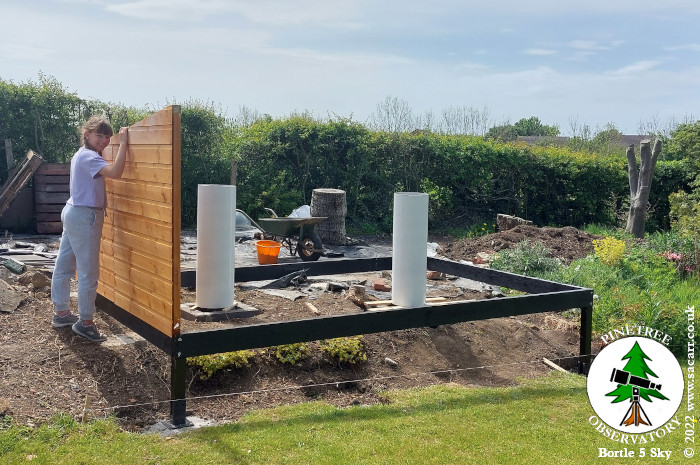
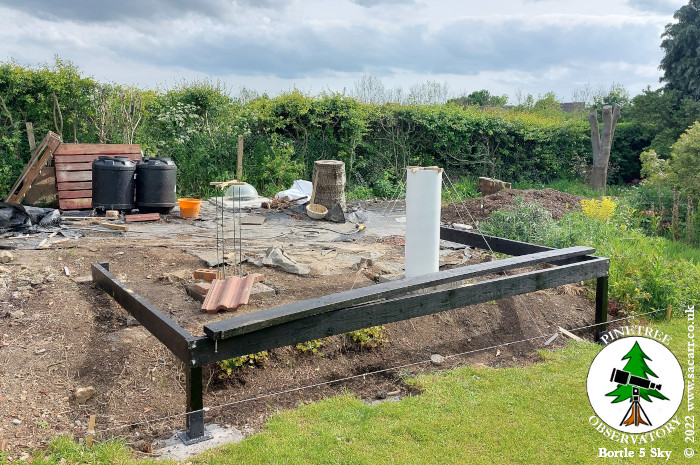
| My daughter gave me a hand out with one of the observatory end panels to check the pier heights against the rolling roof height. The piers were standing about an inch high, due to sitting on planks over the foundation holes. Allowing for the height of the pier adapter and mount, it should bring the telescopes into the roof cavity space. This means that if I turn either of them to the North West, they should be looking up the roof runner line as their lowest viewing position. There's little point in having the observatory wall any lower on this side, as there's a small woodland on the other side of the garden. Due to rain on the 16th I didn't do any work outside. May 17th - I added 80Kg of concrete around the outside of the
blockwork on the first pier and then filled the inside level with the
top of the bricks. The upper four rebars were added and left to set. |
|||
 |
 |
 |
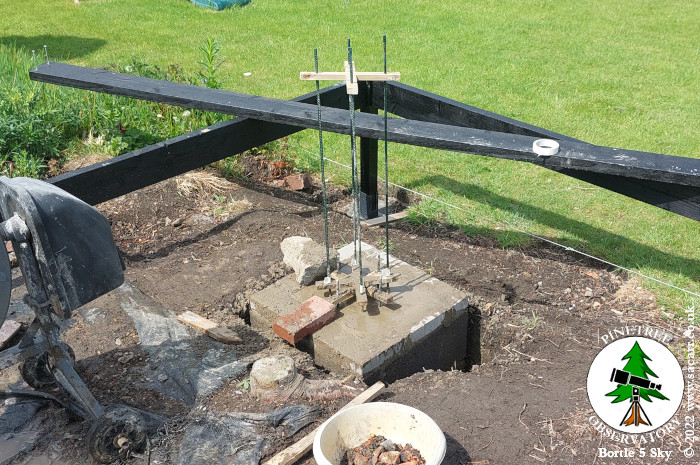 |
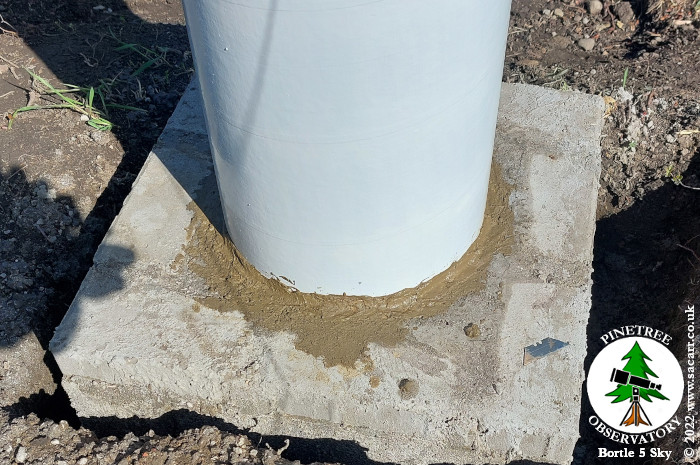
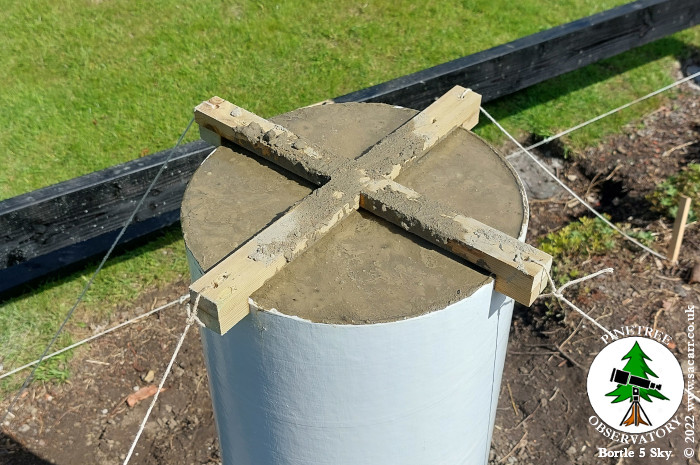
| Another 80Kg of concrete was added to the outside of the blockwork on the second pier. On May 18th, the wooden
formers which held the rebar were removed and the pier tube added. The
bottom edge was sealed with clay and the concrete mixing began. A wooden
cross clamped the top of the tube and was secured with guy ropes and
stakes in the ground. |
|||
 |
 |
 |
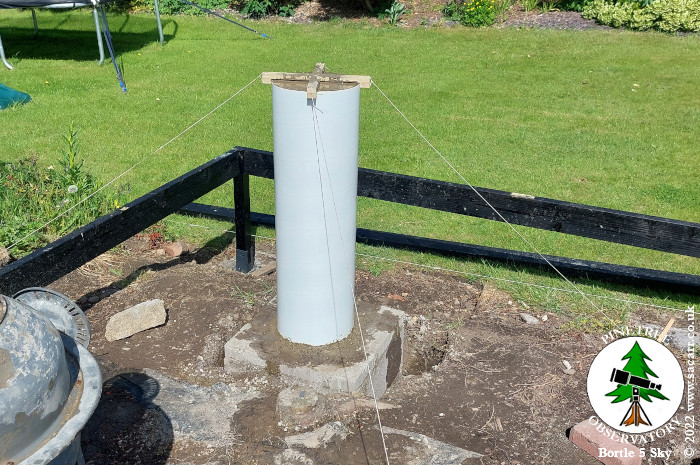 |
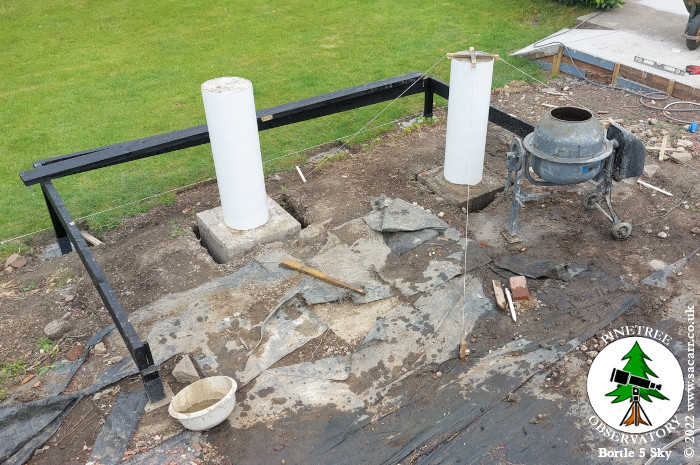
| After lunch, the foundation of the second pier was filled with concrete and the upper rebars supported to allow it to cure overnight. The second pier was poured on the 19th, as seen in the last picture on this page, stabilised by guy ropes. |
|||
 |
 |
 |
 |