| September
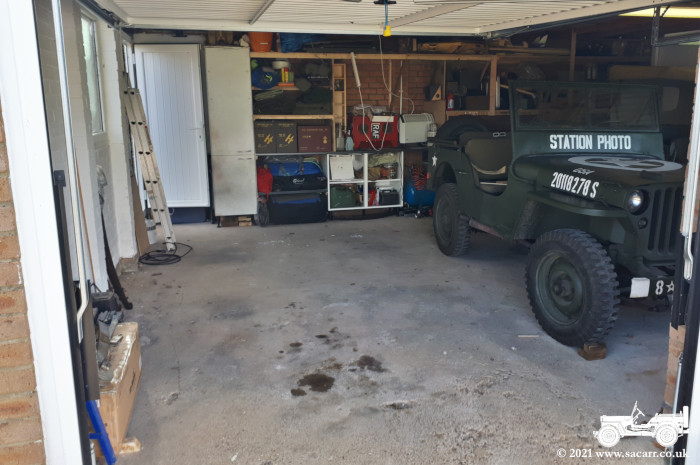
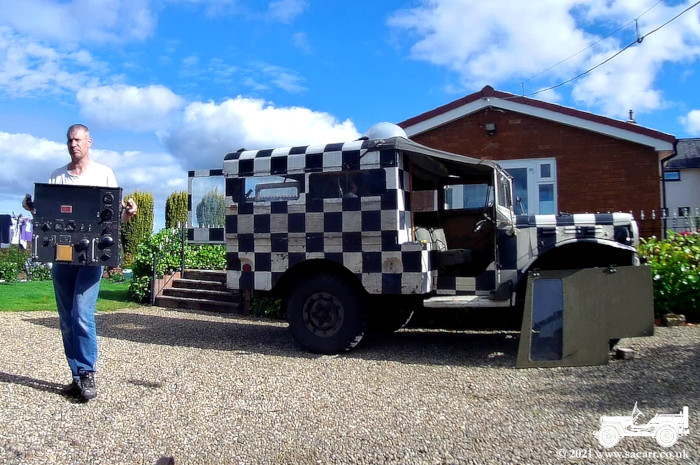
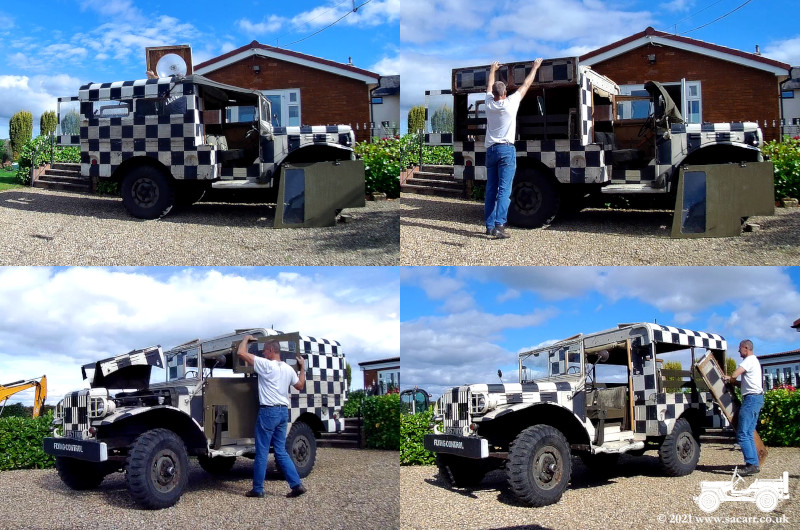
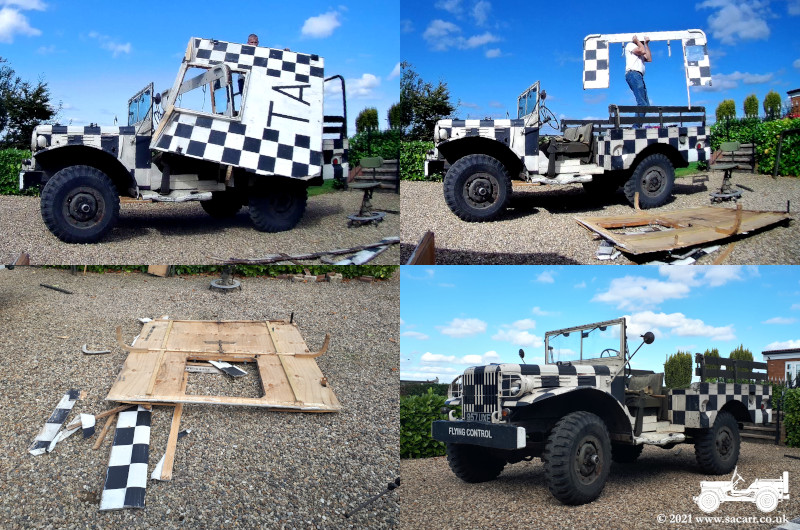
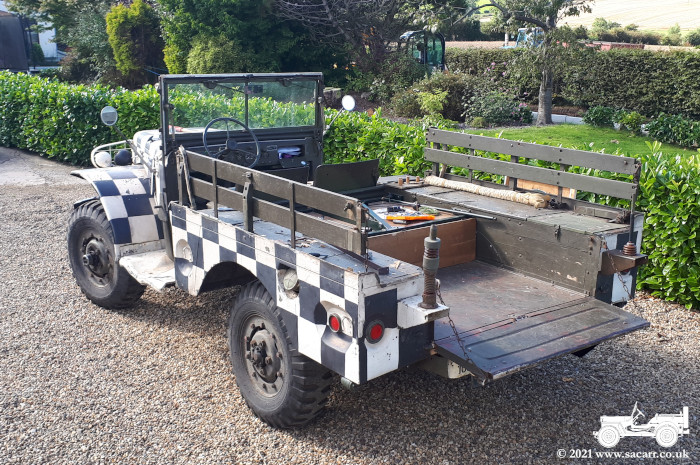
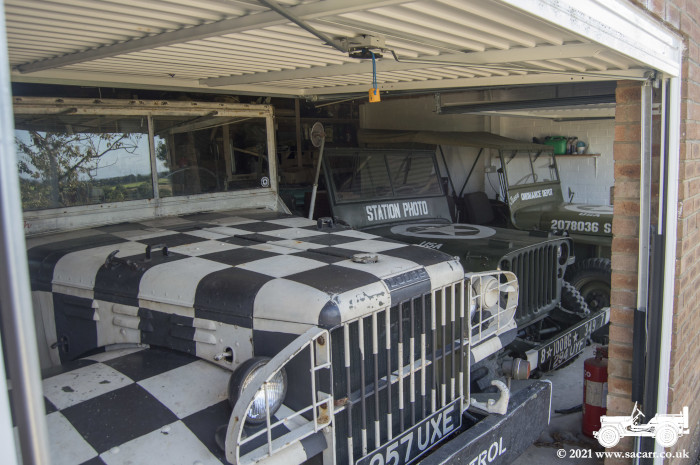
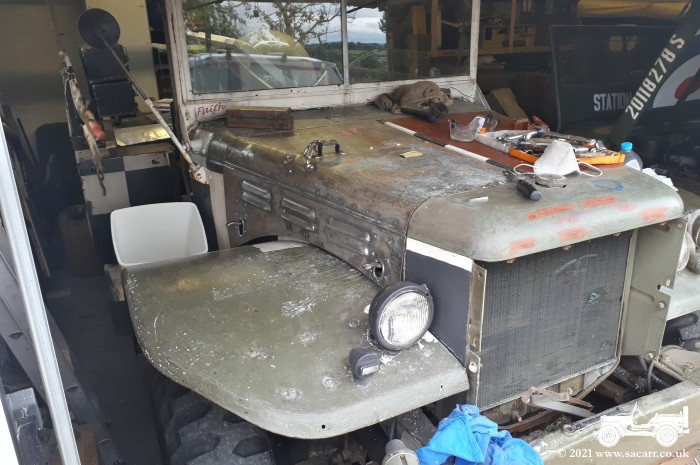
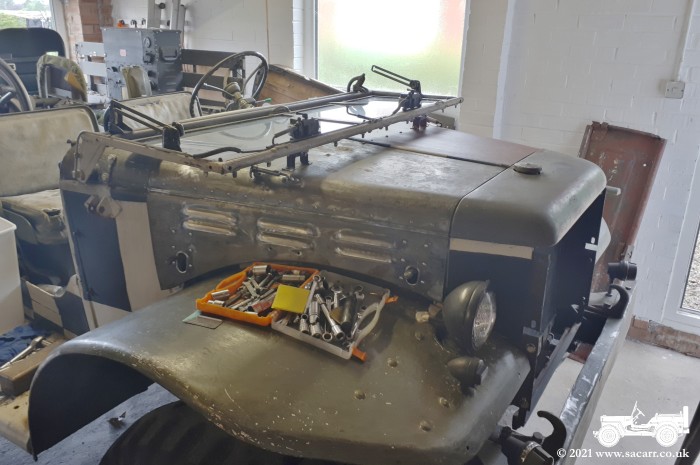
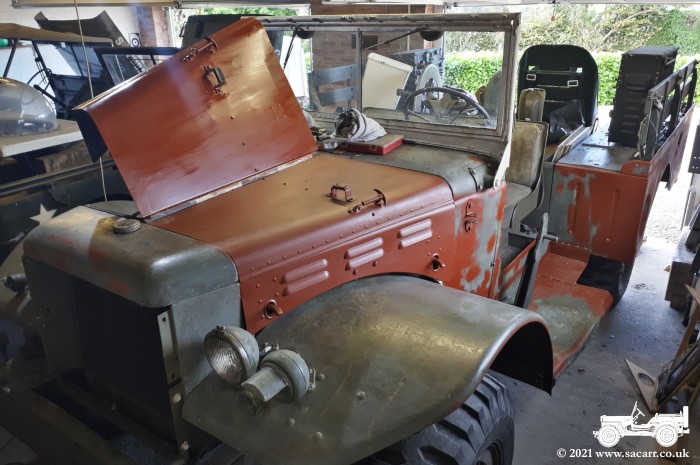
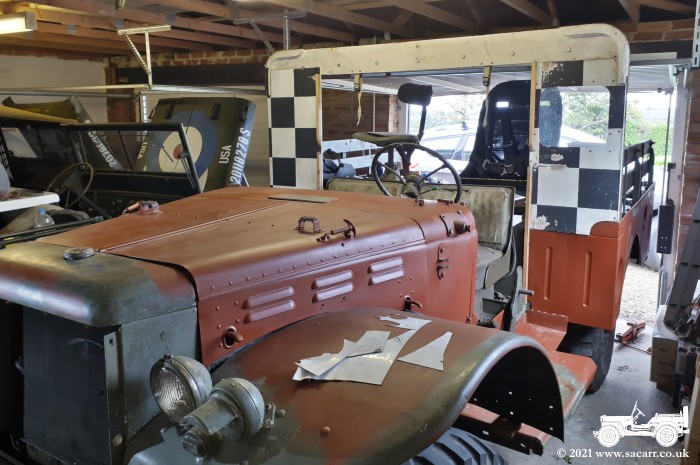
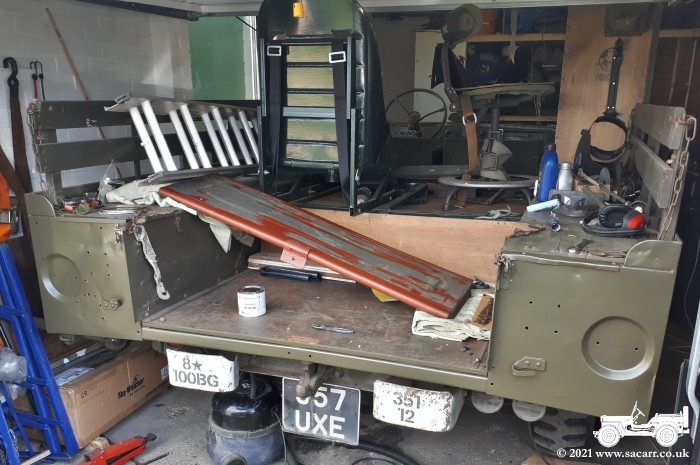
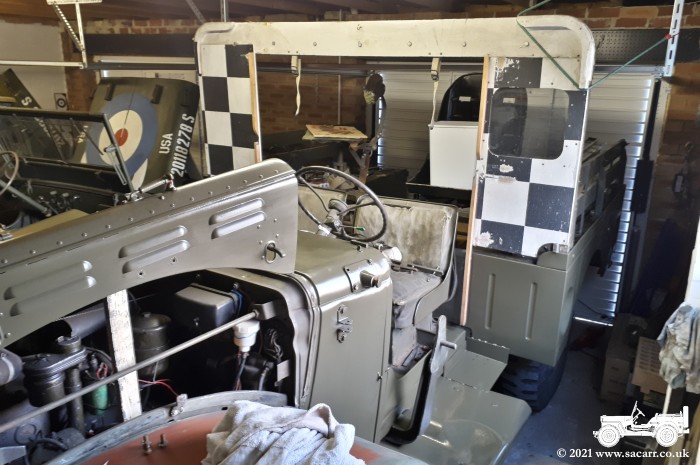
16th - Dodge Body Tear Down This page is a brief-ish overview of the return of the Dodge back to a standard WC51. The full description and pictures of the work is covered on two pages in the September and October 2021, Ongoing Work section of the website They can be seen here, PAGE 1 and here, PAGE 2. The work began as a result of there being no word from our builders as to when they would show up to modify the garage door openings. In September 2021, with Autumn and Winter just around the corner, I wanted the Dodge indoors sooner rather than later. With the Flying Control modifications, it wouldn't fit through the door. Returning the Dodge to a cargo configuration would allow the canvas roof bows to be removed, allowing it to squeeze in through the standard garage door. The R/C B-17 that was in the middle of the garage floor, was packed back into the trailer, leaving a space for the Ford GPW. With a space cleared, stripping the Dodge began, starting with the internals. Once the radios were stripped out, removal of the wooden bodywork began. A timelapse video of the stripdown is shown below, followed by the attempts to get the Dodge in through the narrow garage door. With the door mechanism extending inside the door opening, there was only 1/2 inch clearance on each side of the bodywork. |
|||
|
|
|
||
|
|
||
| The
garage doors do still need altering, but if the Dodge was altered to fit
the garage, there was no longer the pressure of when the builders would
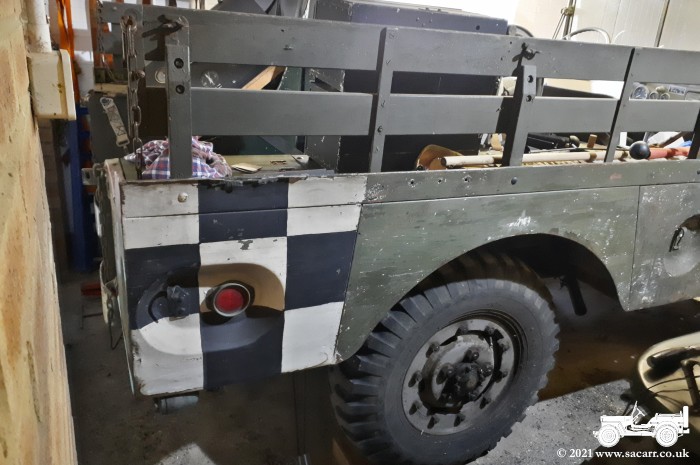
turn up. On September 17th, I began stripping the checkered paint from
the Dodge. I did a test with a chisel, chipping away at the paint and
lifting it in flakes. This would be quicker than trying to sand through
the black and white layers. The green below could then be lightly sanded
to key the surface for a new olive drab paint layer.
On the 19th and 20th, I continued down the left side. On some areas, the paint was difficult to remove, but a wallpaper steamer softened it enough to chisel away. The steamer worked really well on the hood, so I continued with the technique down the rear body. |
|
||
|
|
On the 21st, paint stripping continued across
the back of the truck. At the right rear corner, there was a large area of rust
and thin metal that needed dealing with. The tailgate was also removed to allow
it and around its hinges to be cleaned up properly.
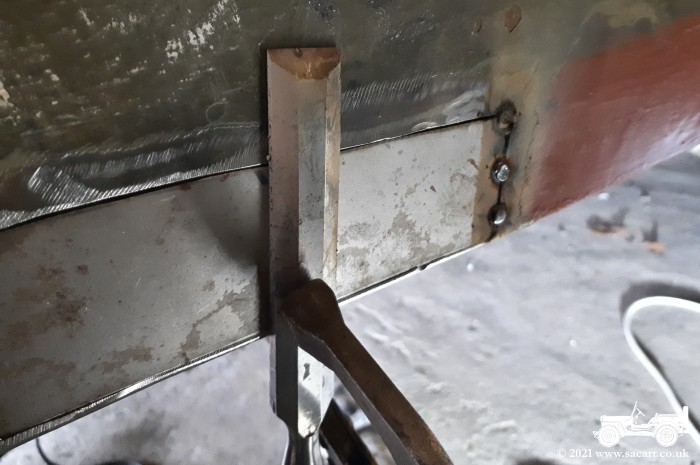
Most of the 22nd was spent cutting out rust, cutting and welding new metal. There were three areas that needed work, two of which I could reach with the Dodge this way around in the garage. |
|
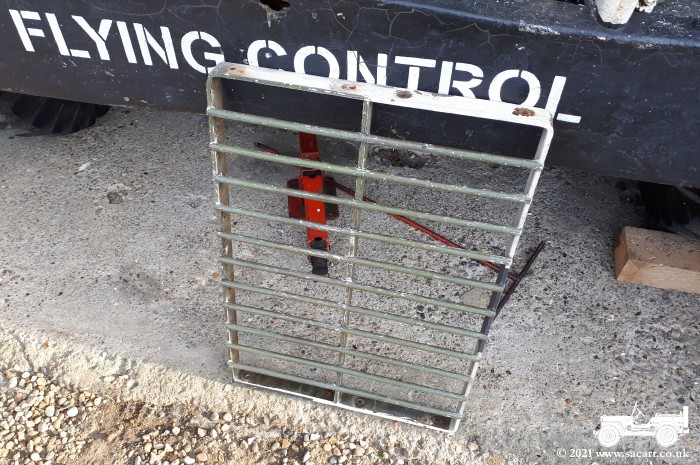
| On the side, near the driver's step, was worse than the initial pinholes suggested. The other on the rear was obvious. Some etch primer was used to protect the metal until I could get some red oxide primer. One of the tailgate hinges also needed some cracks welding. At the end of the day, the grille was removed for cleaning the inside. |
|
|
|
|
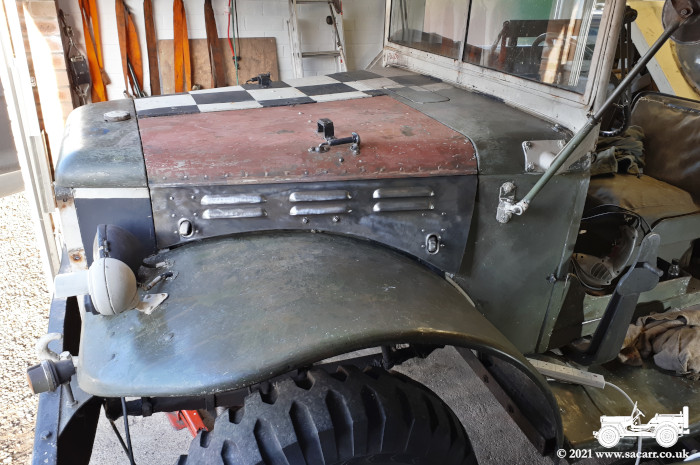
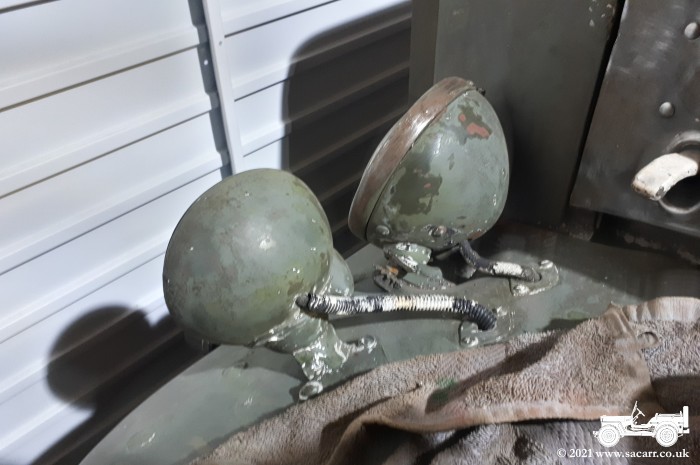
On
the 23rd, I began to strip the paint from the lights and brackets. It
took most of the morning which included stripping the lights apart. Most
of the rest of the day was spent sanding the paintwork on the left side.
The welding repairs and some other bare metal areas were given a coat of
primer to protect them.
For most of the 24th, I was doing surface preparation. There were a number of gouges from the chisel that needed filling. I wasn't worried about a perfect finish, but the chisel marks needed dealing with. There were also a number of small rust spots to grind out, prime and fill. It took some time to sand and grind out the rust in the depression around the fuel filler cap and very few of my tools would fit between the depression and filler neck. |
|
|

|
|
On
the 25th, I started stripping along the right side, with the hood and
fender under the chisel. As with the left, the two right side sections
of the hood had no primer. I sanded one small section of white to reveal
the olive drab below, but stipping it away showed no primer other than
my rust touch-ups.
By the end of the day, most of the right side fender was back to olive drab and a front view shows the Dodge looking more green than black and white. |
|
| First thing on the 26th, I carefully drove the Dodge out of the garage and snapped some photos in the sun before turning it around and parking up again in the garage. This gave me better access to the right side which still needed stripping. It was hard to believe a little over a week had passed. |
|||
|
|
|
|
| It
was still a tight squeeze to work in there, but by moving the GPW
backwards a little, it gave a bit more room at the rear right corner of
the Dodge where I had some welding to do. At the bottom of the fender, the doubler
had badly rusted and would need cutting off and replacing. The stripping
continued along the side of the cab and under the screen seal. Time was
getting on, so I switched to wiring brushing the bare metal hood and
then got a coat of primer on to finish the day.
I started the 27th by stripping the step, the rest of the cab side and the front face of the rear body. I quickly moved on down the side until there were only nine checkers left on the whole truck. |
|
|
|
|
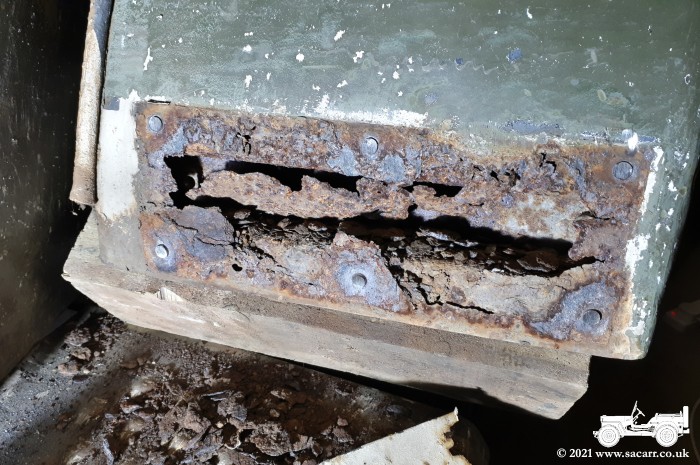
Other
than the windscreen, the Dodge was all olive drab or primer. As I
stripped away the paint, I found an old repair on the rear corner which
needed proper attention. There was some additional rot at the
front corner of the rear body, just behind the step. This only showed up
as surface rust discolouration on the checkers, until the rotary wire
brush came out.
Having prepared some replacement metal the day before, I started the 28th by welding in new sections, starting on the rear right corner. |
|
|
|
|
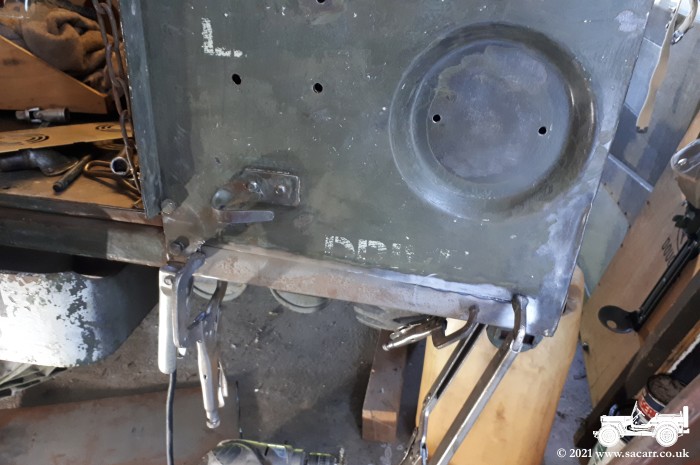
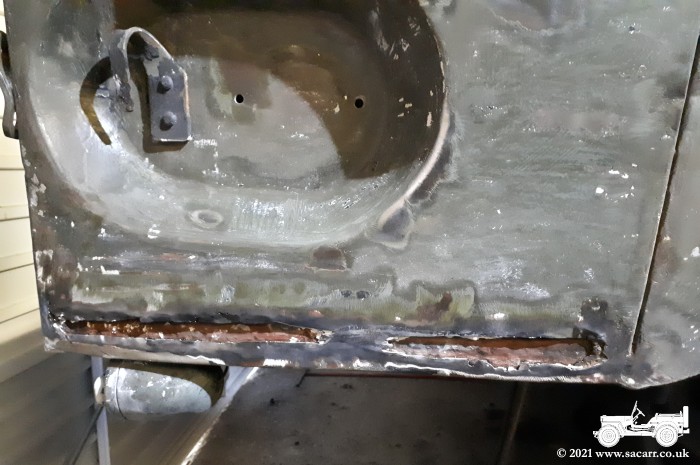
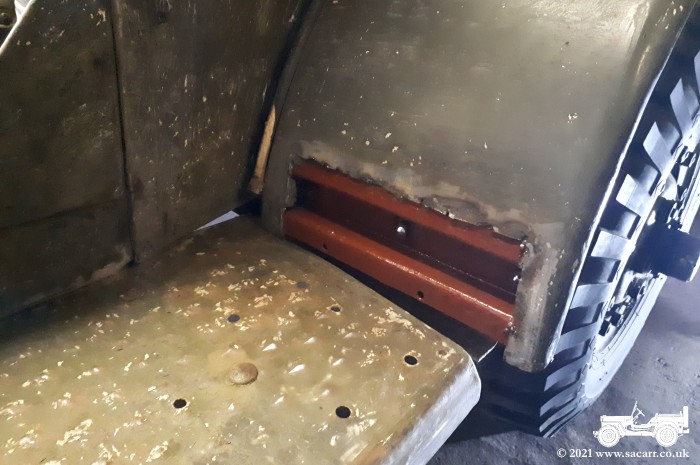
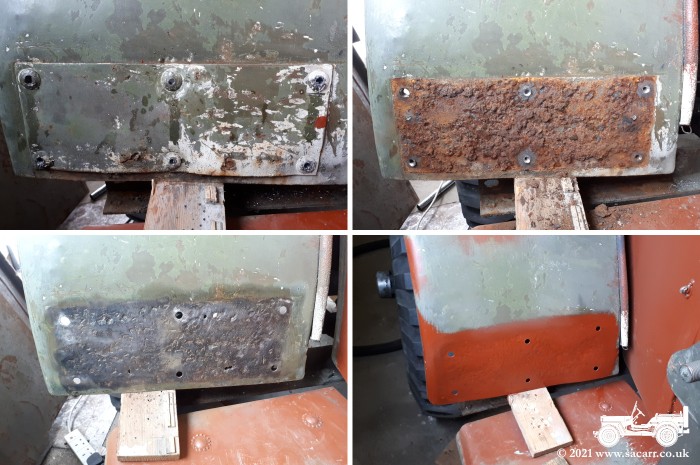
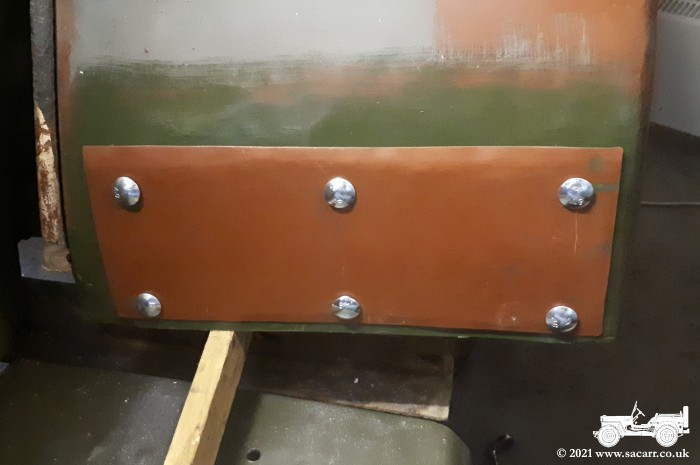
With
both pieces welded and primed, I thought I was finished welding until I
remembered the front fenders. The design of the structure creates a
perfect moisture trap, which has rotted out the fender skin at the rear
between the supporting hat channel and doubling plate. The rust then
slowly forced the two layers apart over time, allowing more water in.
The fender had to come off to start the work. The doubling plate was riveted with six large, coach-bolt looking rivets. I needed to grind the heads off to get the rotten doubling plate off. |
|
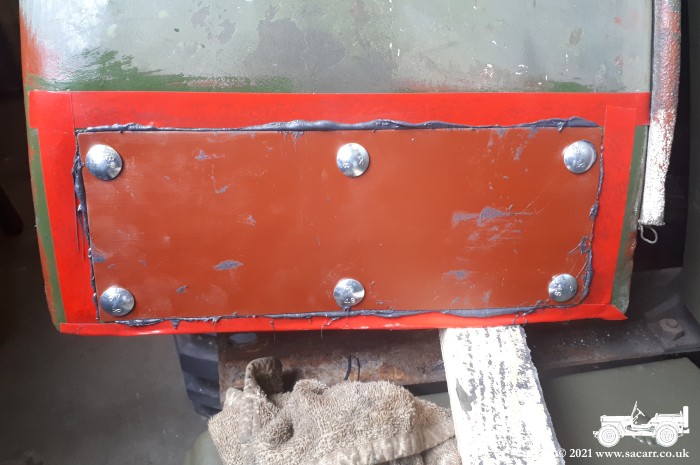
| The
hat channel was cleaned up as best as I could while loose. The fender
was bolted back in place to keep all the holes lined up and the hat
channel was then welded to the fender to keep everything in the correct
place. The fender was then removed again and the hat channel red oxide
primed.
I began the 29th by cutting and welding a new piece of metal into the front right fender. I'd just finished welding it in place when I ran out of welding wire. Once the welding wire ran out, I switched to sanding the fender paint and stripping and priming some parts of the lights. |
|
|
|

|
On
the 30th, I started stripping paint from the screen. It turned out that
the inner frame was another area without any primer and the paint flaked
away very easily. A little chipping on the outer frame showed it was
primed and the paint was more stubborn to remove. Due to the difficult
shapes, the wiper motors and the inner frame needing some rust
treatment, I decided removing it and moving it to the workshop was the
most sensible move.
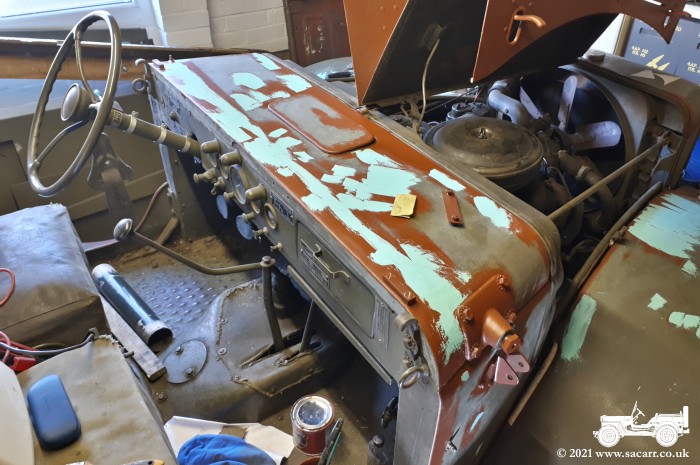
With the screen off and out of the way, it left the cowl over the instrument panel easy to reach and so the remains of the paint, which had been under the screen, was stripped off. Some areas were wire brushed, the whole area sanded and a number of areas primed, along with some small fixings from the screen. |
|
|
| The
right side of the body was next, sanding paint and grinding rust spots
and quite a lot of slight surface rust. So much of the body was stripped
to metal, that after sanding the remains of the paint, the whole side of
the body was red oxide primed.
October 1st - The passenger step was sanded and primed, followed by the front bumper. Much of the rest of the day was spent with the fine surface filler, applying and sanding it. On the instrument cowl, where the rubber screen seal sits, it gathers water and created a pitted line. There were also a few Norwegian Army welds that hadn't been dressed very well, allowing water to gather. |
|
|
|
| October
2nd - I started by centre drilling the large rivets on the driver's side
fender doubler, followed by larger drills until I broke through the
rivets. This wasn't as badly rusted as the other side. While the fender
was pitted, there were only a few holes that could be welded up, rather
than cutting large chunks of metal out and replacing it.
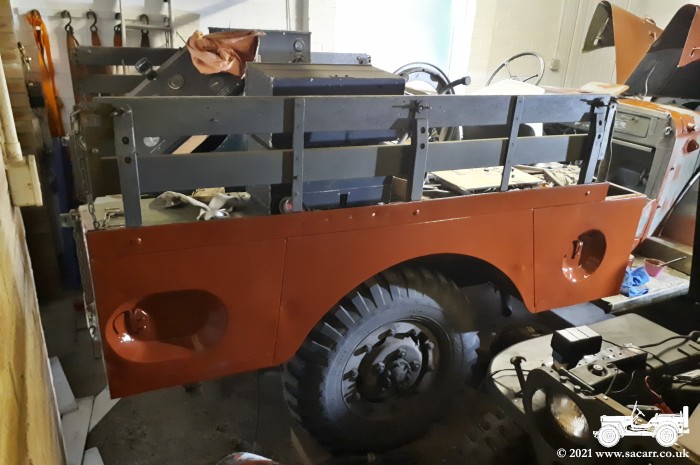
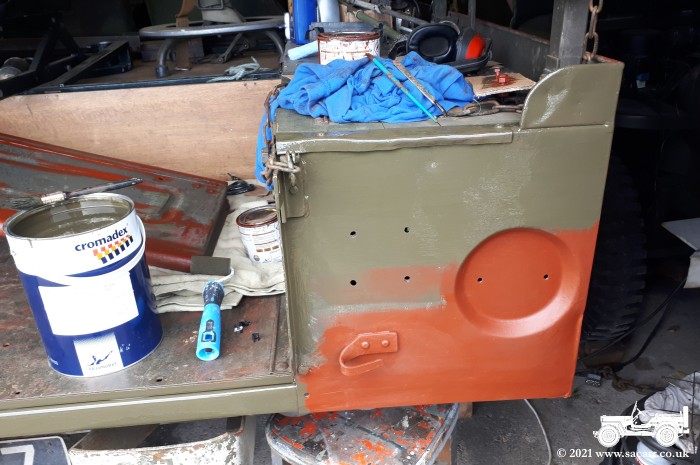
What was there was sound enough to re-attach the fender to its hat channel. A new doubling plate was cut and both it and the hat channel primed. On the other side, the fender and doubler were given a coat of semi-gloss green. These faces wouldn't be seen, so I didn't want to waste the proper olive drab on unseen areas. |
|
||
|
|
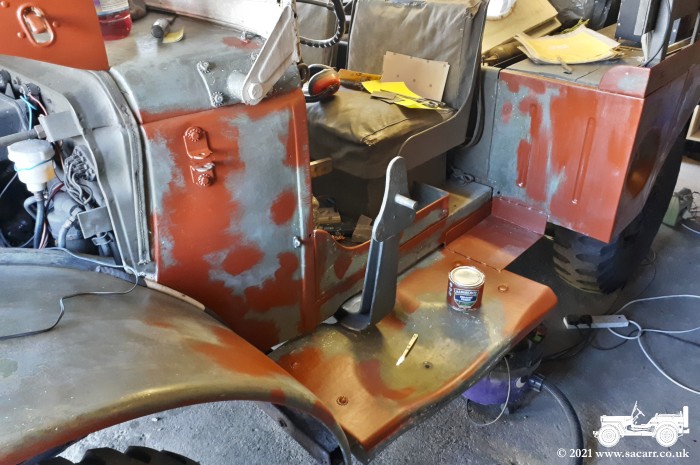
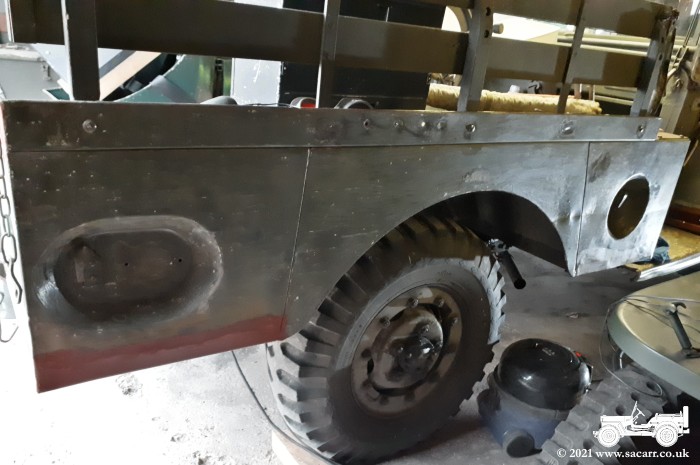
At last on October 3rd, I started adding a bit of colour. I wanted to get some paint on the Dodge, but there were a few jobs to do before that. The hood hinge needed sanding, the tailgate needed a sand down on the inside and some priming and I needed to have a tidy up of stuff around and in the Dodge to give me better access around for painting. One of the bits in the way was the front roof bow. The best place for it was on the Dodge. I'll be keeping this wooden framework so the cab doors can still be used. I also made a paint stirrer from a welding rod. After a good mix of the tin, out came the brush and roller. | |
| There's
lots of awkward seams and indentations on the Dodge, so I figured it
would be easier and less chance of missing anything, to brush the paint
on, then go over it with the roller to remove the brush strokes. The
paint went on well, but it quite thin so was going to need a few coats
for good coverage.
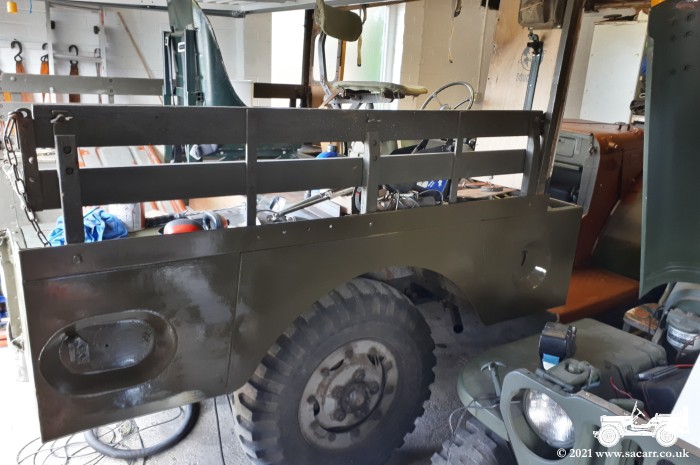
I started on the rear panel, then moved anti-clockwise around the truck, along the right side towards the front. Everything was given one coat except the fenders, as I'm waiting for the new bolts to arrive. I finished on the tailgate. |
|
|
|
|
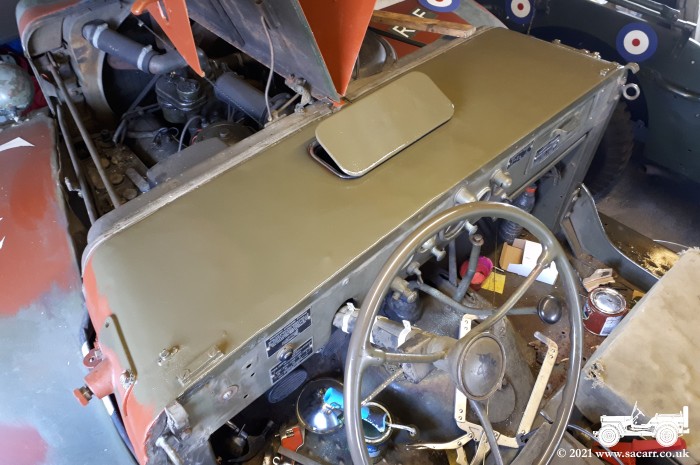
The
paint started out matt on the rear then by the time of the cab had gone
a bit glossy. I don't know whether that was anything to do with the
temperature or my application, rollering a bit earlier or later after
the brush application. It doesn't really matter as the truck needs more
coats of paint. Down the left side I spotted several chisel marks which
hadn't showed in the matt primer, but did show up in the wet olive drab.
I'd give them the fine surface filler treatment and a sand before the
next coat of paint.
The paint is Very Dark Drab, a colour used from late 1944 onward. I prefer it to the more brown olive seen on earlier vehicles. The colour is a pretty good match for the original olive drab on the seat frames. |
|
|
|
On
the 4th, the left side chisel marks were filled first thing to give them
time to dry and be sanded later in the morning. A heater in the garage
helped to raise the temperature to speed up the drying time. The filled
areas looked better with the thin coat of filler, so I was happy to go
ahead with the olive drab again.
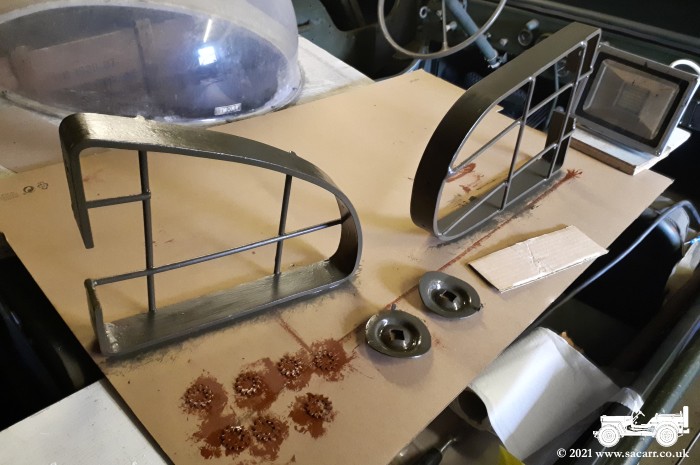
Once the olive was done and left to dry, I took the radiator grille and lamp guards into the workshop to prepare for paint. The grille needed the second side painted with primer while the light guards needed the white stripping off and priming. |
|
|
| On
the 5th, my day's work was focused on the fenders and the doubling
plates. The bolts arrived the day before and most of the pieces of metal
had been primed or painted. The coach bolts had a square collar just
under the head and I needed to file the holes in the doubler, fender and
hat channel to match so the bolt would fit fully flush.
I had several square files, but only a short one was small enough to fit in the hole. It took quite some effort to file out all twelve holes through the three layers of metal, but eventually all the bolts fitted. Under the plate was sealed with mastic to keep water out. |
|
|
|
|

|
On
the 6th, the fenders were painted along with some accessories and the
rest of the truck getting another coat of olive drab. While that dried,
I started on the windscreen.
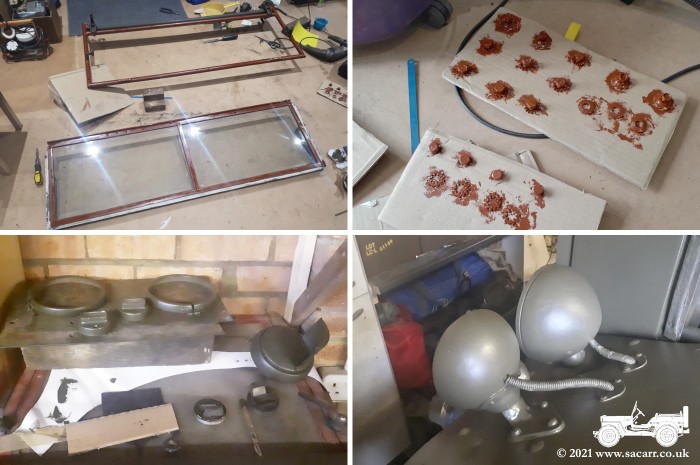
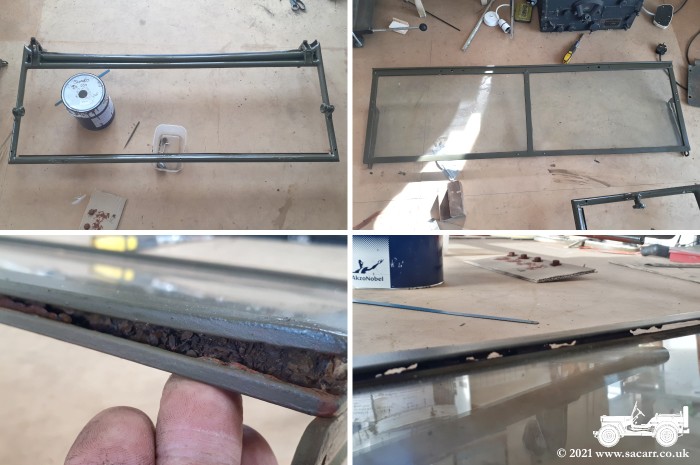
I began by stripping off all the accessories such as the vacuum wipers, mirror and canvas fasteners. The inner and outer screens were then separated. The outer screen frame looked in good condition while the inner had rusted where water had been trapped by the rubber screen seal. |
|
|
October
7th - It appeared that progress on the Dodge had slowed down,
but that was just due to painting multiple coats of paint and little
visible difference. By this time, most of the
main bodywork had received four coats of paint, with a few
parts such as the fenders, tailgate and steps at two to three coats.
Both inner and outer frames were primed. All the grille, lamp guards and
fender bolts were cleaned up and primed which took a while.
The following day, the frames started receiving the olive drab. Both mirror arms were stripped and primed today, more olive drab on the Dodge, all the bolts so far removed had their threads re-cut and the steel plate over the front right locker was primed on the outside. |
|
|
| I
also investigated the chassis number. The original build card from Dodge
shows it to be 81722458, built in August 1944. However, a closer look at
the stamped serial shows a second number, in a slightly smaller font,
which appears to have been stamped over the original number. This
number is 81681824, which according to one file I have, was from May
1944.
It all started by trying to track down the original US Army hood registration number, based on the chassis number and build date. I narrowed the number down to a range of 173 vehicles using the August 1944 build card serial. With no numbers visible on the hood, I was going to have chose one from the range between 81694364 to 81694537. |
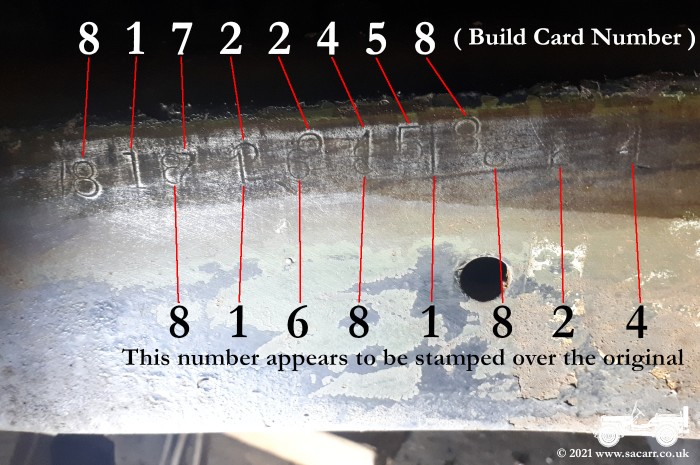
|
||
| On
the 9th and 10th, there was more painting and I did some repairs to
splitting wood on the front bow frame. While
the paint was drying on everything, I then started on the graphics for
the stencilling.
A few test prints were made to check the sizes against the space on the Dodge and all seemed good. The paper prints were tack glued to some thin card and out came the scalpel for a few hours cutting. Not all the stencils were made that day. Sore fingers meant that there was still the Left Hand Drive and No Signals for the back.
|

|

|
|
|
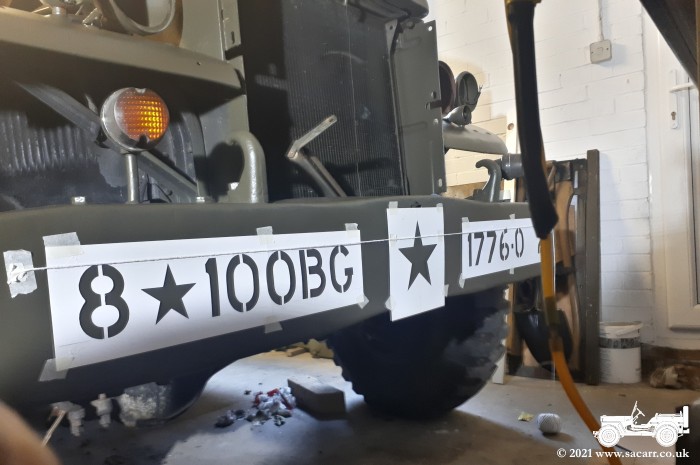
I
started on the front bumper. The Dodge's new identity is still with the
100th Bombardment Group to match the rest of the fleet. Partly inspired
by the Ordnance Depot Jeep markings, I checked up on the 100th BG
website and found the ordnance unit there was the 1776th Ordnance
Company.
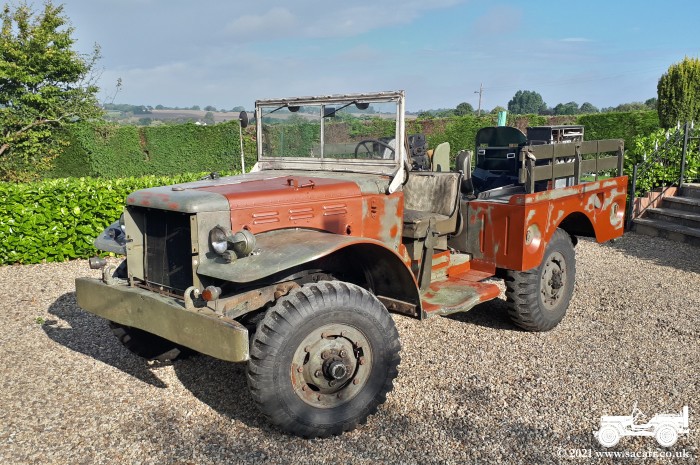
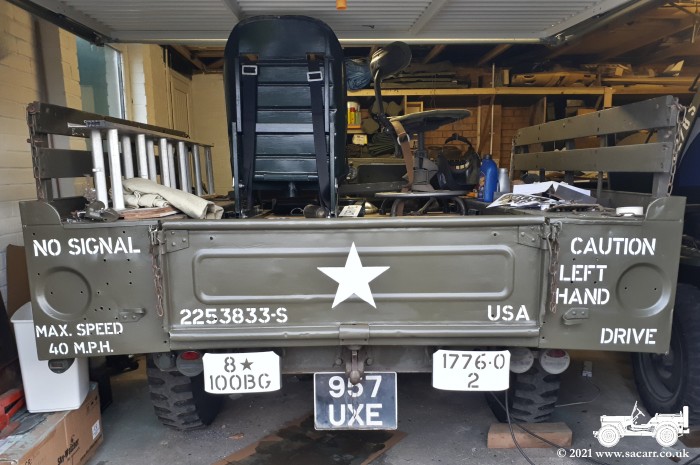
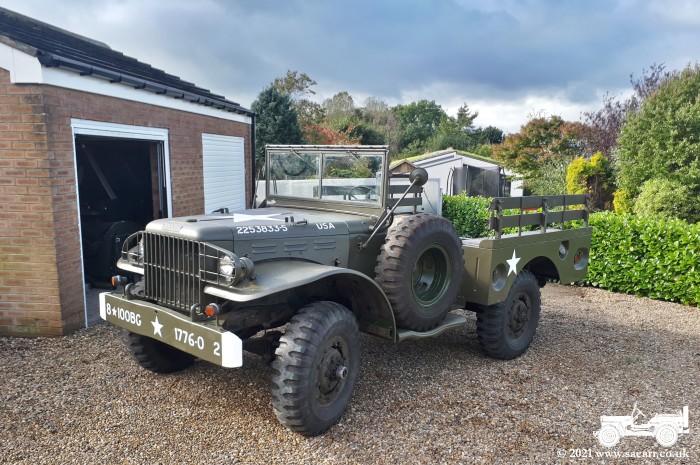
This gave me the new bumper markings of "8 * 100BG 1776-O 2" - 8th Air Force, 100th Bombardment Group, 1776th Ordnance Company, Vehicle 2 ( vehicle two simply because the Dodge was the second military vehicle I bought ). At least, that's what I thought until after it was painted. |
|
|
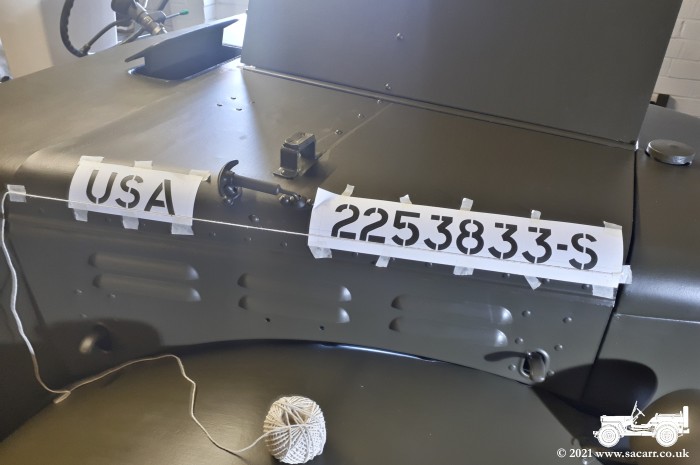
| The
Army registration on the hood was next. Research showed I had a range of
173 possible vehicle numbers, based on the chassis number. It lay
somewhere between 2253695 and 2253868, but there was no way to be sure.
When I was sanding the bumper down, I found a number ending in 833. I don't believe it was the original number, but it fitted into the range I had, so my stencil was cut to give 2253833. The last stencilling for the day was on the tailgate. The irony was that most of it would be hidden behind the Pioneer tool rack when it was refitted, but small parts of the stencils would be visible. |
|
|
|
|
|
On
the 11th, the rear panel stencils were test fitted and with all being
well, were taped in place. Three thin coats applied with a piece of
sponge foam was enough to give a reasonable coverage.
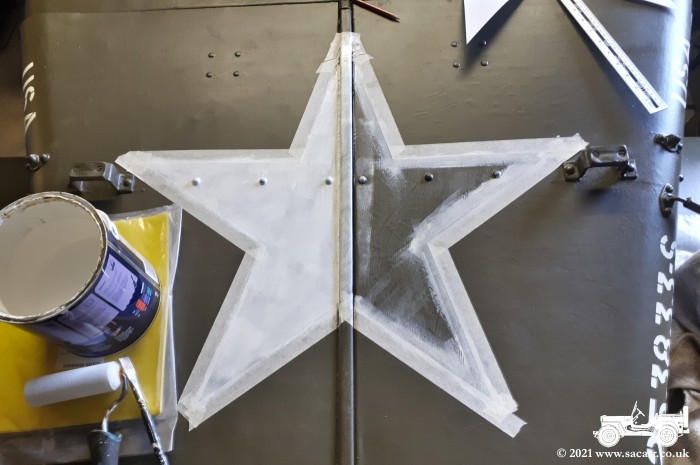
I didn't have any card big enough for a star stencil and the central hinge and proximity of the screen rests resulted in masking being the easiest option. It was brush painted like the truck itself and while wet, I went over with a small glossing roller to take out the brush marks. |
|
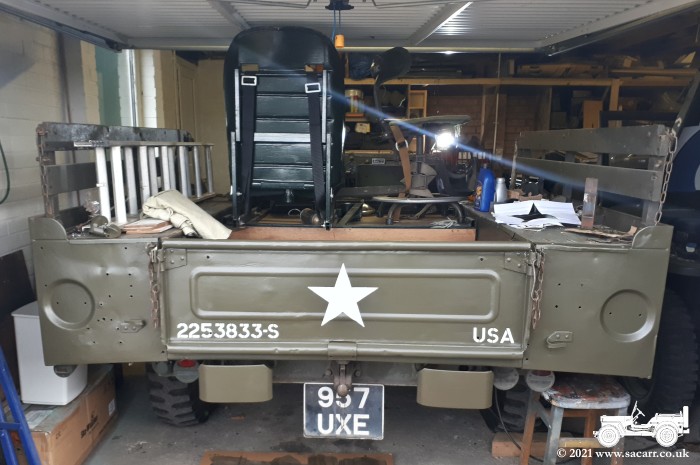
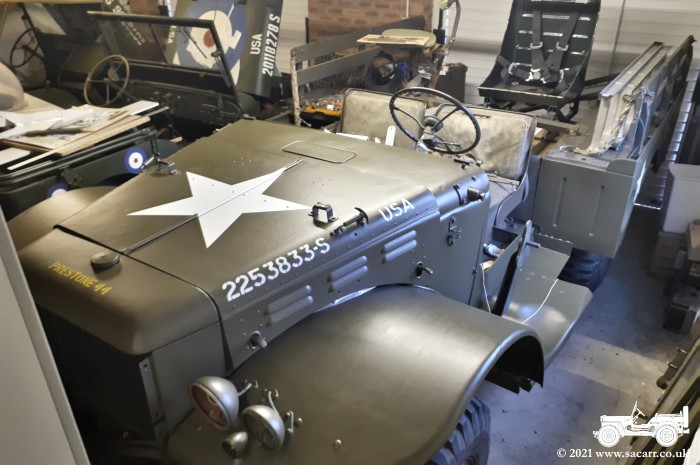
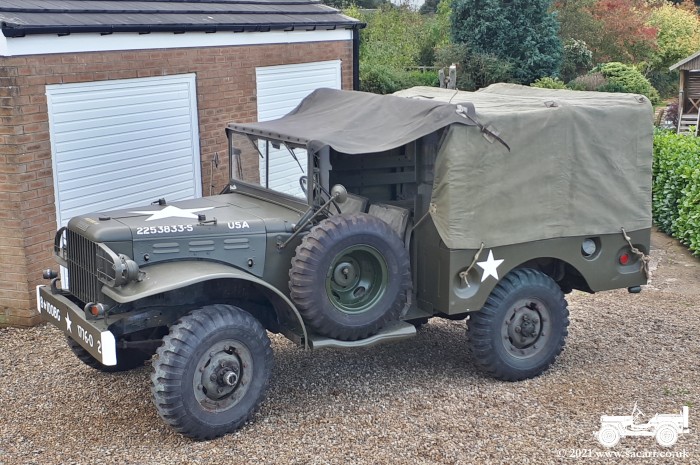
| With
the hood star drying, I went back to the rear of the truck and attached
the unit marking stencils to the bumperettes. They were then painted
olive drab with the sponge method.
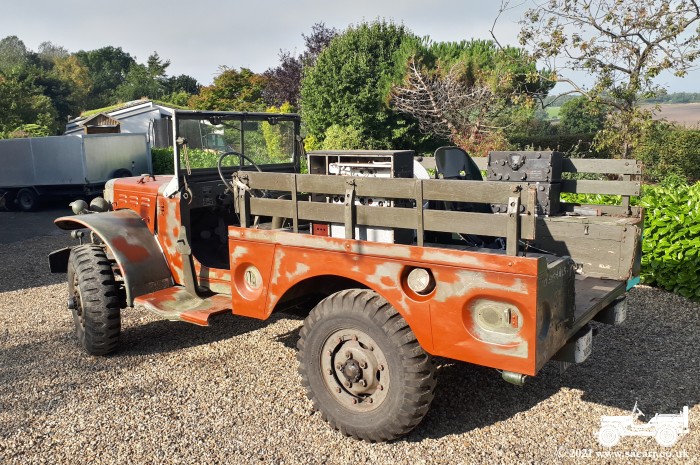
The tailgate was hooked back on for another rear end shot looking pretty much complete, but for the pioneer tool rack. Around the front of the truck again and the white had cured enough to remove the masking tape. That's all the markings complete, but for the name on the screen. |
|
|
|
|
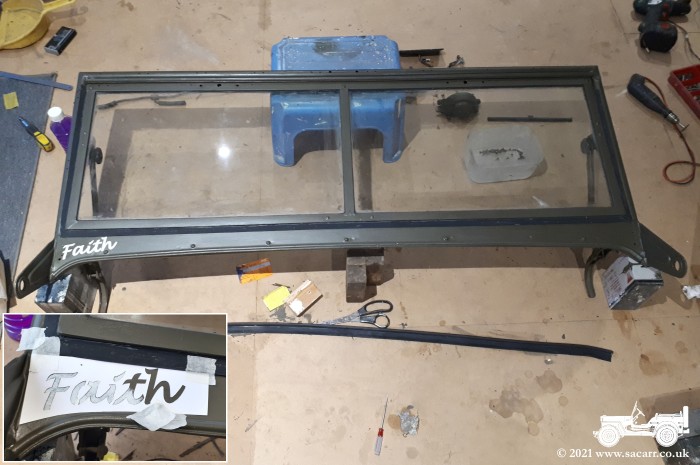
On
the 12th, I spent the day working on the rubber screen seal, cleaning it
of old paint and refitting it with mastic to keep water out. After that, I started painting the front
roof bow olive drab.
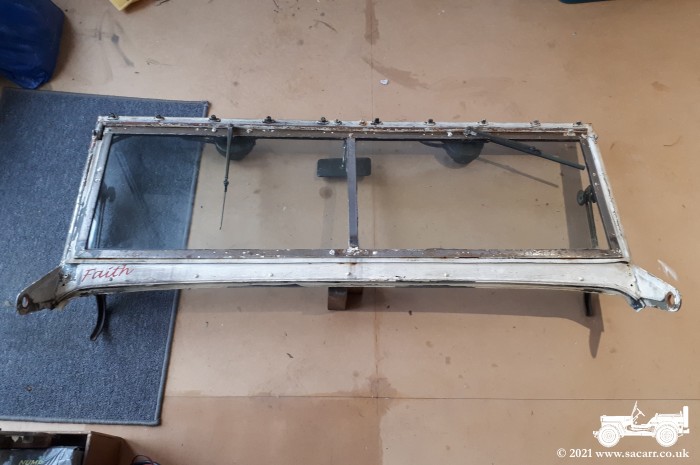
The screen was a challenge to put back together due to the hinge being worn, allowing the inner frame to fall out. I got there in the end, after which the name stencil was applied and the name painted. The next couple of days were spent refitting the screen, reflectors, mirrors and other small odds and ends. |
|
|
|
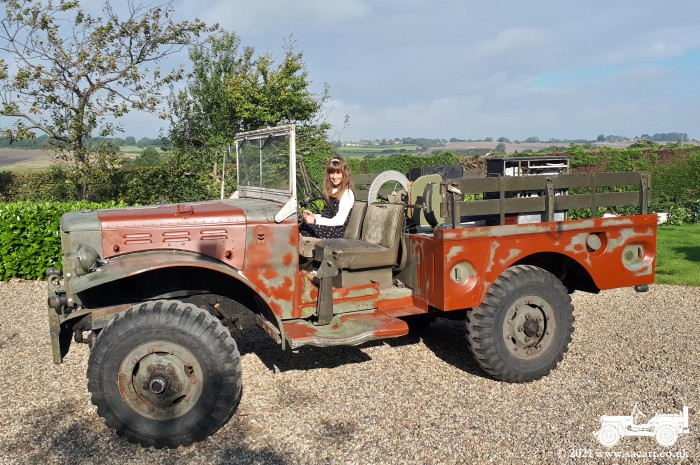
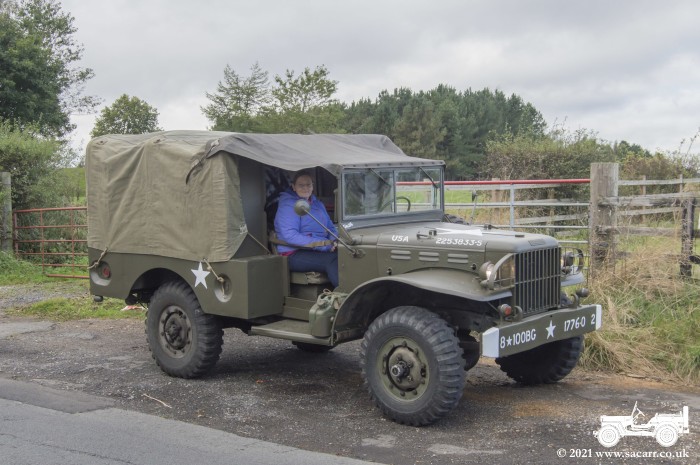
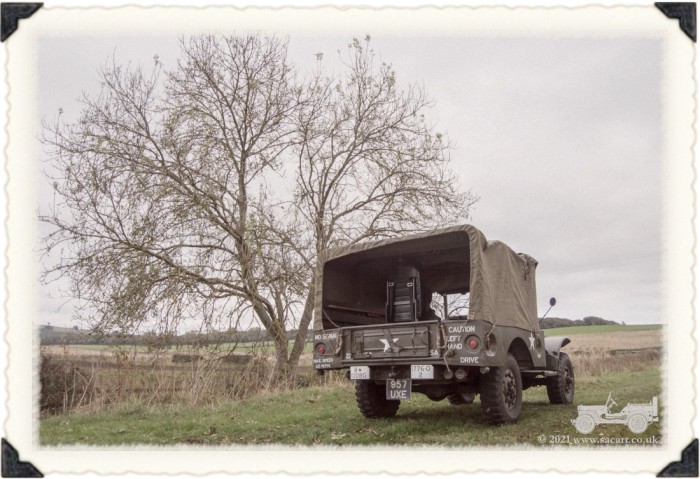
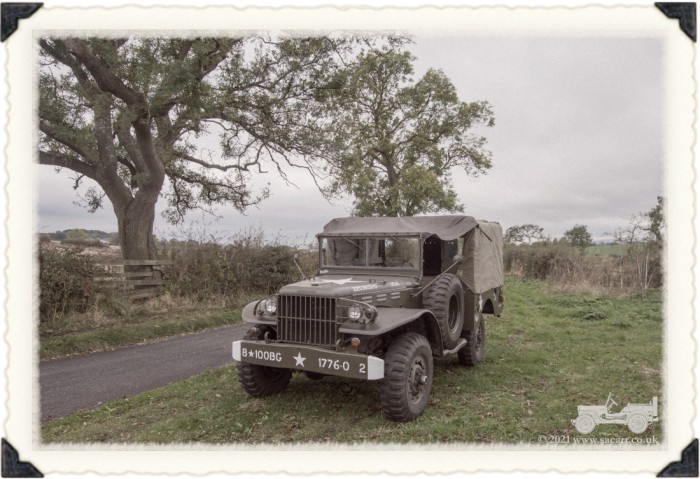
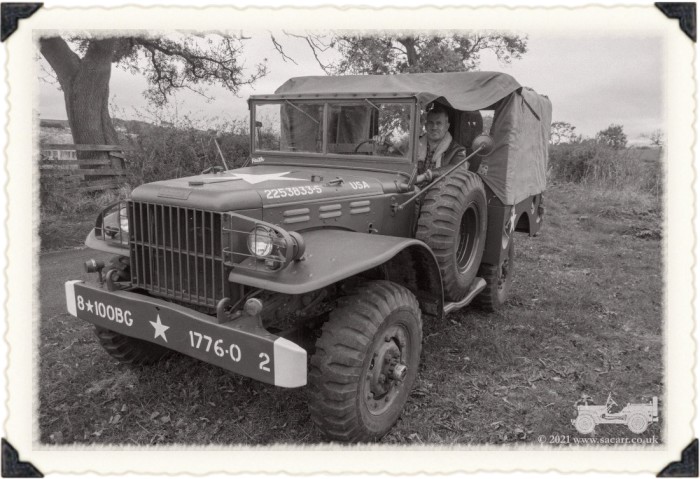
October 17th Test Drive
With nice weather forecast until
early afternoon, I fitted the Jerrycan bracket to the Dodge, cleared up
all the tools and rubbish in and around the Dodge and brought it out for
a drive. The bows and canvas had to be fitted once out of the garage. It was only a few miles locally to get some photos but it was
great to be out in it in the new scheme. |
|||
|

|
|
|
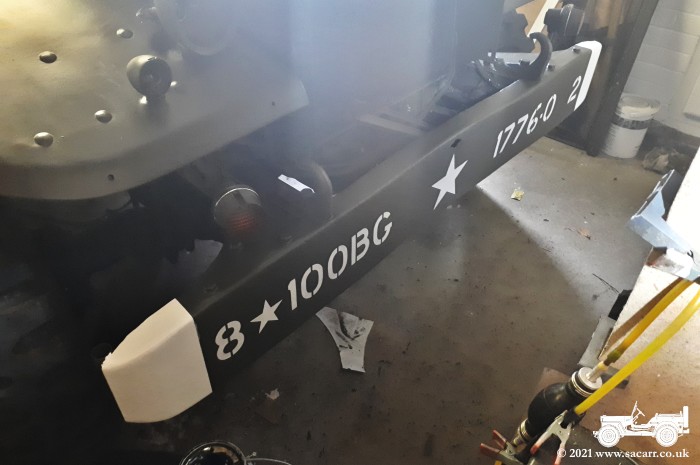
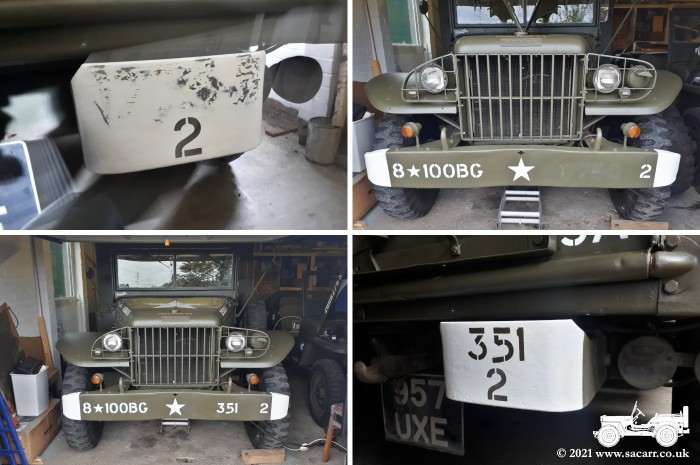
| After I posted some pictures on social media, someone from the 100th Bomb Group pointed out that the markings were wrong for the 1776th Ordnance Company. They were an independant unit attached to the 100th, but not part of it, so the bumper should read 8 * 1776-O 2. I wanted the 100th BG on the bumper so that it would match my other vehicles. That resulted in a markings repaint. 1776-O was painted out in favour of 351st Bomb Squadron markings to match my first Jeep, so they ended up 8 * 100BG 351 2. |
|||
|
|
|
|