|
Sept 16th - Sept 17th - Sept 19th/20th - Sept 21st/22nd - Sept 23rd/24th - Sept 25th/26th - Sept 27th/28th - Sept 29th/30th |
|||
| September
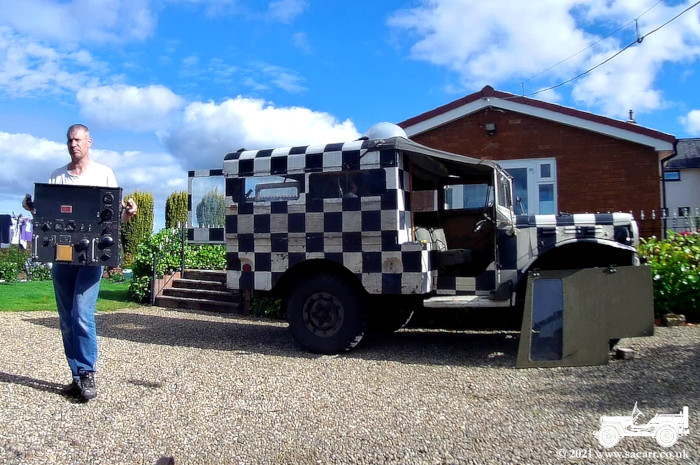
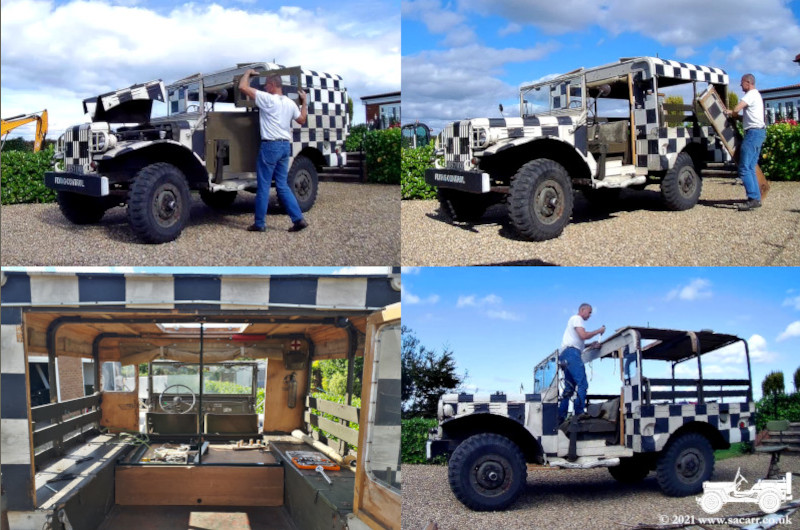
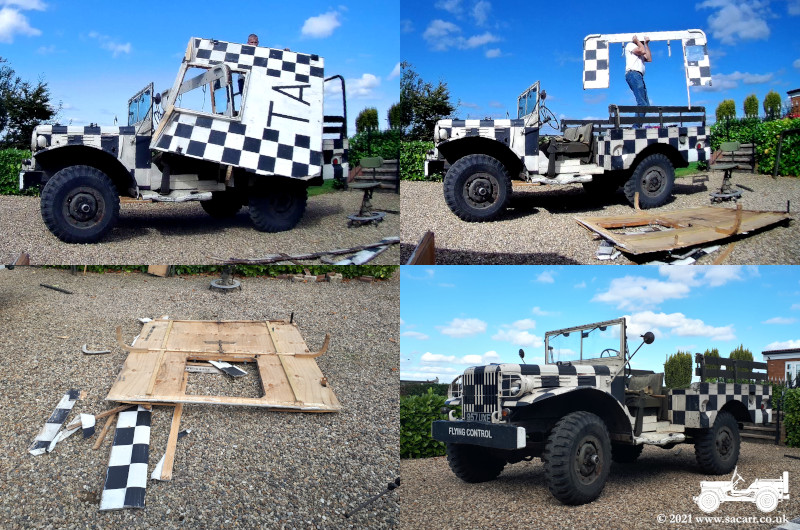
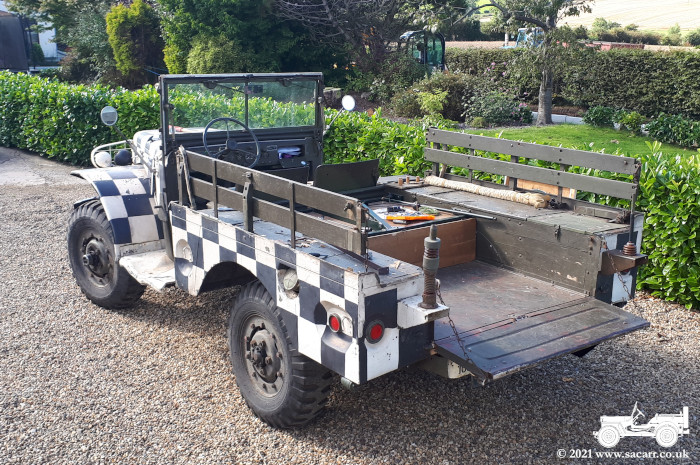
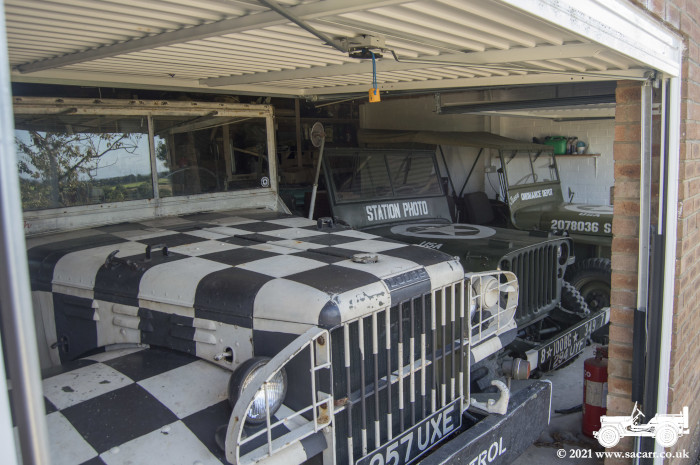
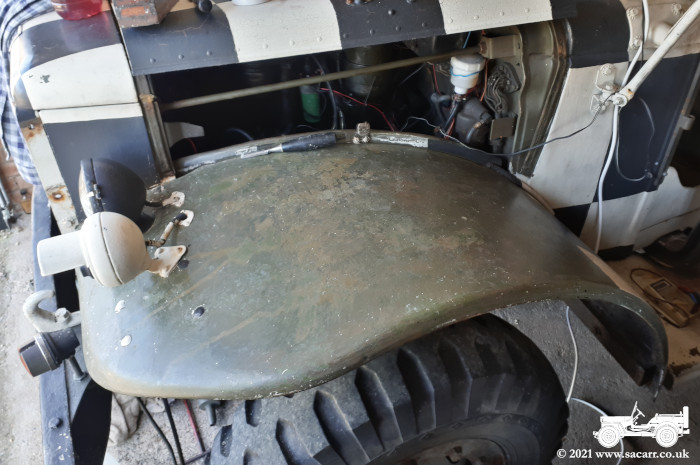
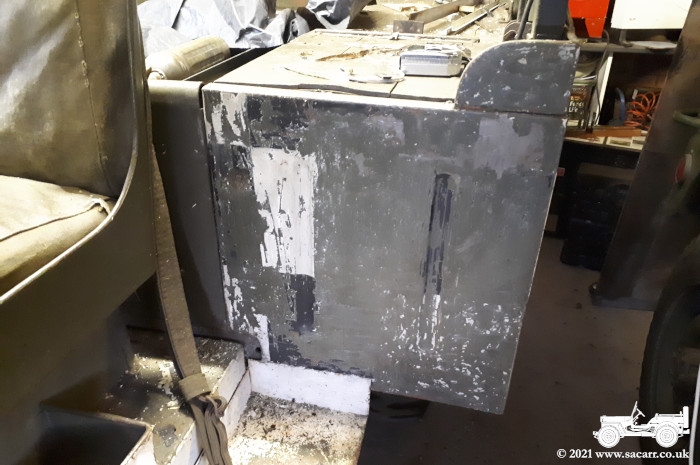
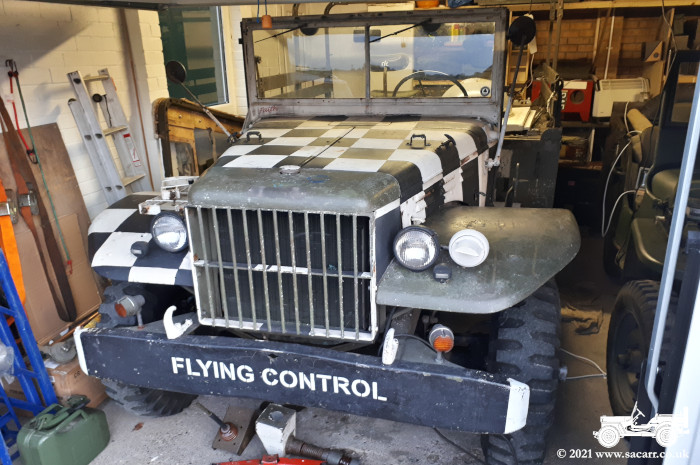
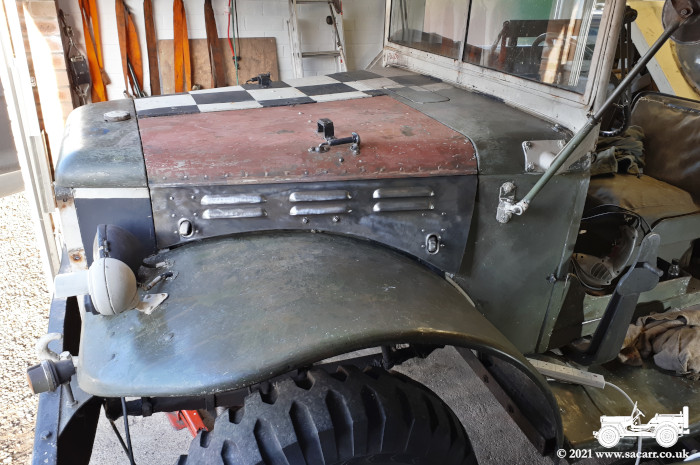
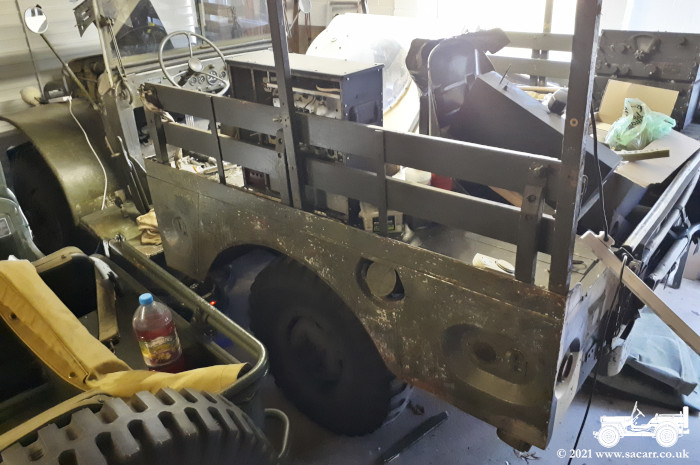
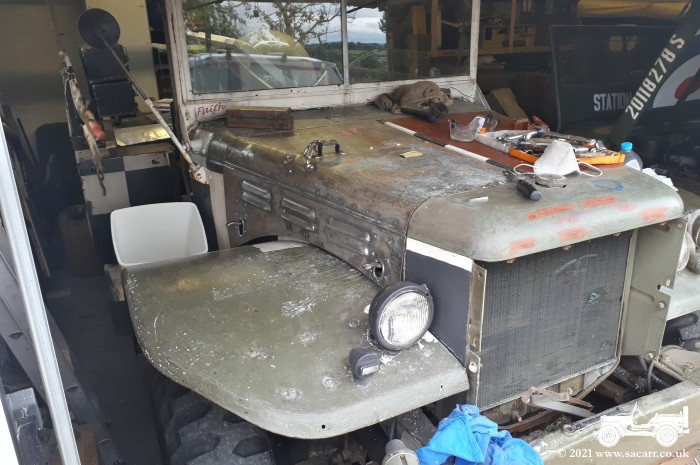
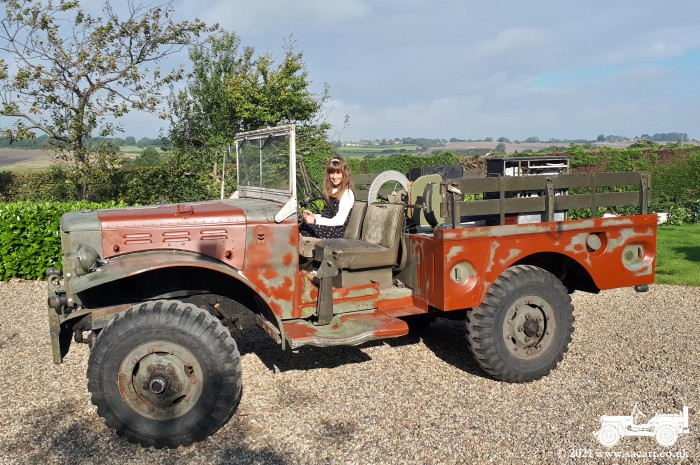
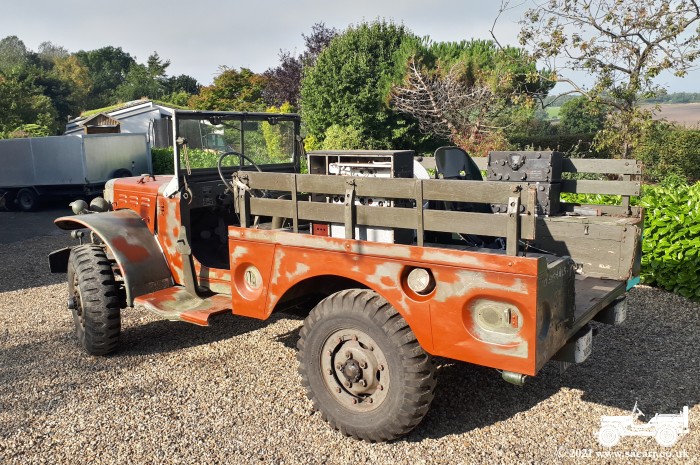
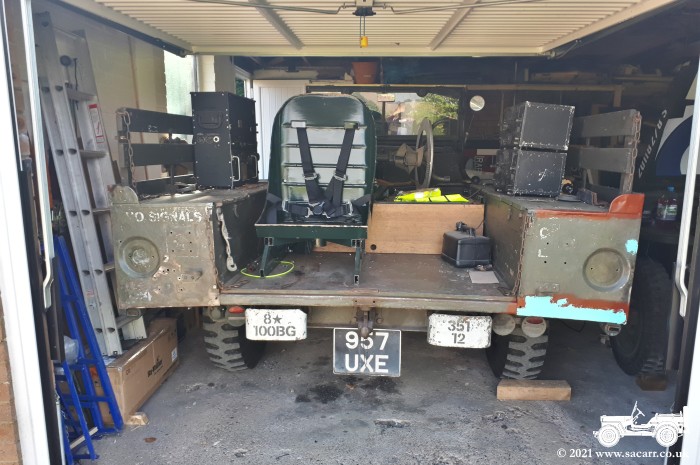
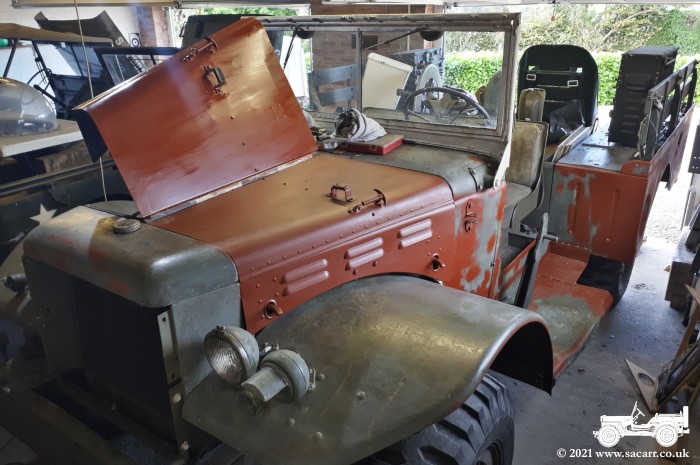
16th - Dodge Body Tear Down It's funny how plans can rapidly change. We've still no word on when our builders will show up to modify the garage door openings. With Autumn and Winter just around the corner, I wanted the Dodge indoors sooner rather than later. Of course, as it stood, it wouldn't fit. After Beamish, I'd also decided that after 13 years of being a Flying Control vehicle, it was time for a change. If I lived in 8th Air Force country, there would be plenty of airfield events to attend, so I'd be unlikely to make a change. However, I also got fed up of ignorant parents telling their kids, "Oh look, that one's an ambulance". Quite why "an ambulance" would need a windsock, meteorological instruments, a flare pistol and aircraft radios escapes me! This change opened up a possibility. If the Dodge was no longer going to be a Flying Control truck, it no longer needed the wooden body on the back. If that was the case, with the canvas roof bows removed, the Dodge should fit in the garage without modifying the
doors; at least for now. The first job was to move the b-17 model from
the middle of the garage into the trailer, now that we've finished using
it for moving from the old house. This left a space in the middle of the
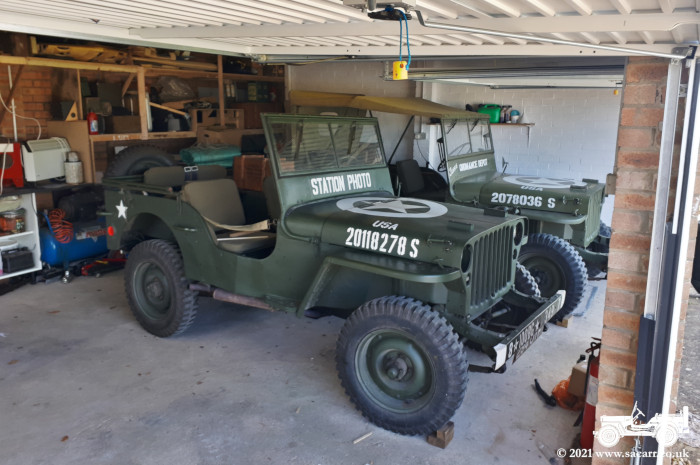
garage floor for the Ford GPW. It was a tight squeeze jiggling it into
the centre, but that shouldn't be a problem once the doors are enlarged.
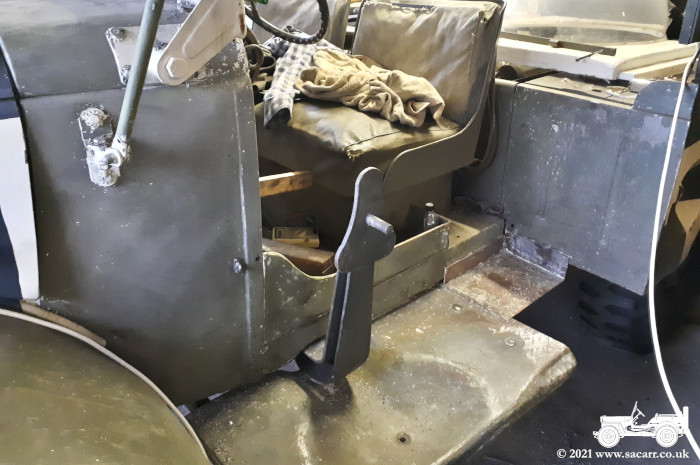
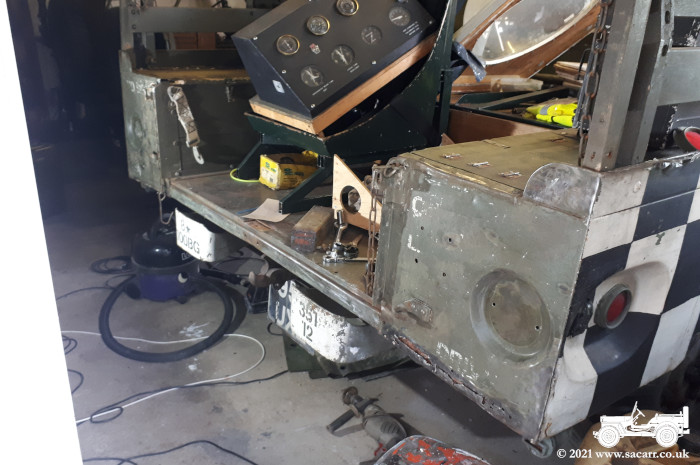
The Dodge radios and internal equipment were stripped out next. |
|||

|
|
||
|
|
||
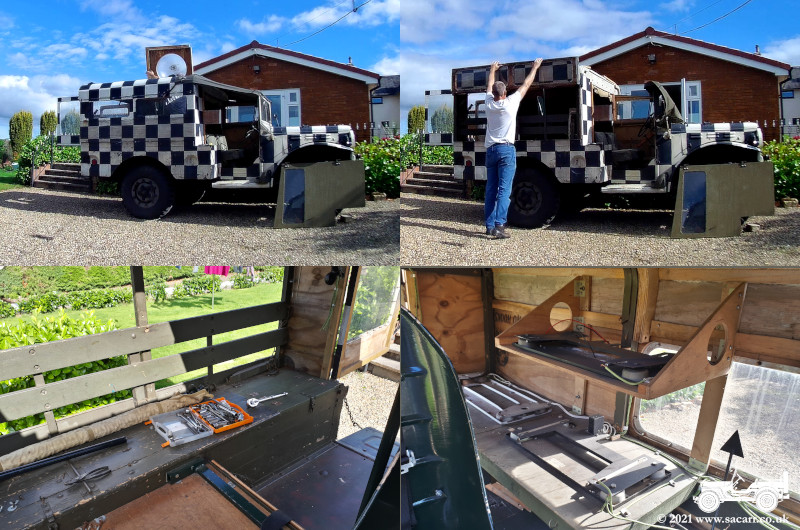
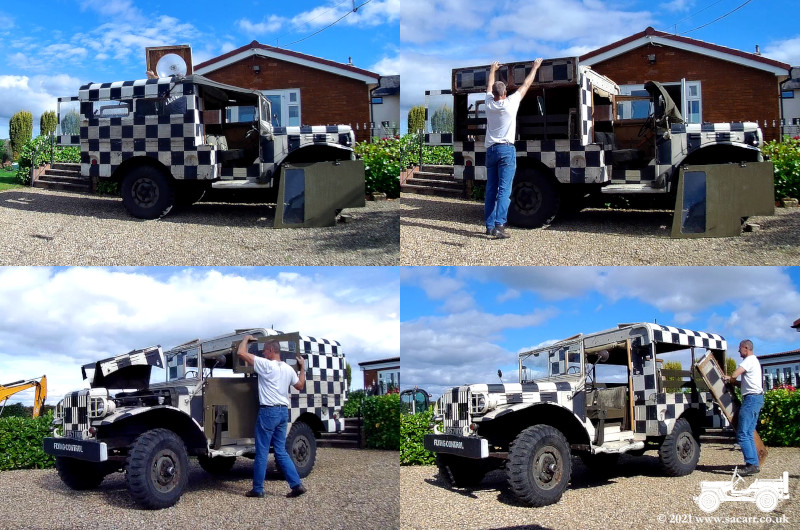
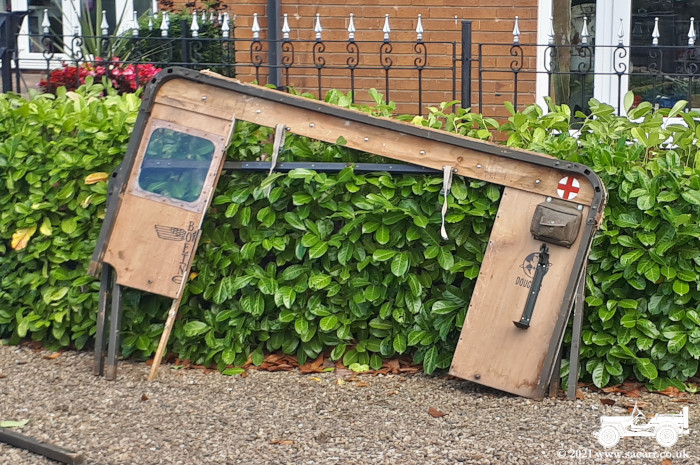
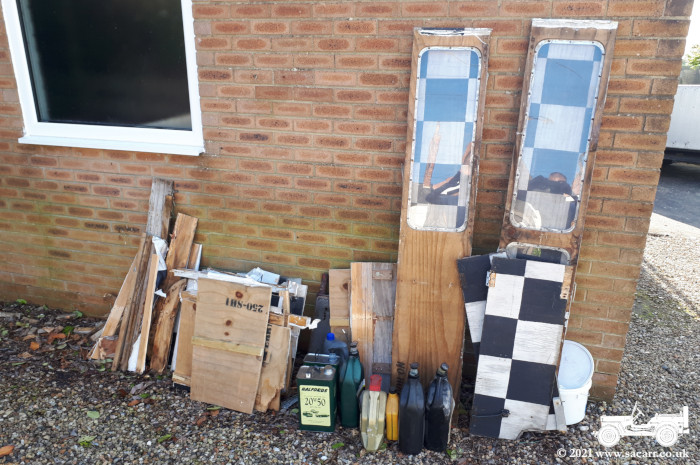
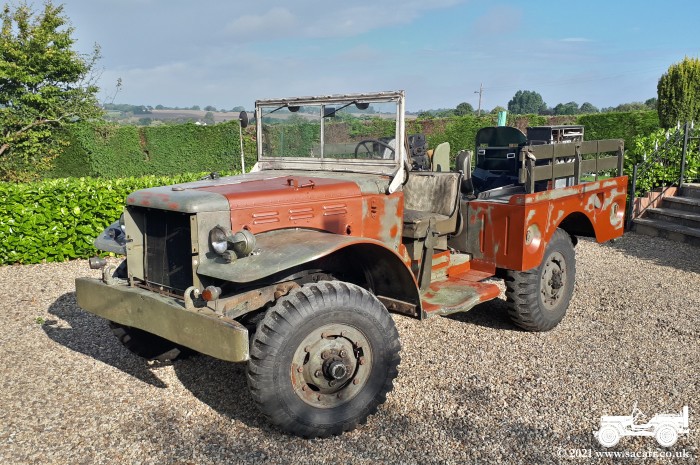
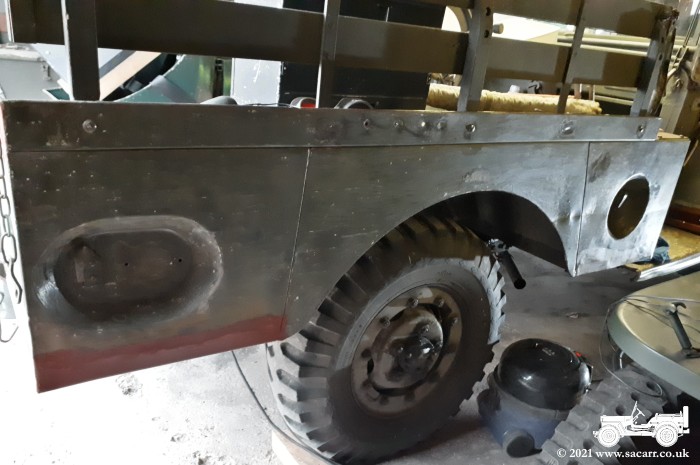
| The doors do still need altering, but if the Dodge was altered to fit the garage ( rather than the other way around ), there was no longer the pressure of when the builders will turn up. All three vehicles will have to live outside briefly when the work does start. So with the Dodge's future looking more like a standard cargo truck ( but not completely normal, this is me after all ), I set to work taking the first steps towards the conversion and getting it indoors. The doors and canvas cab roof were removed and then I started removing the wooden panels. |
|||
|
|
||
|
|
||
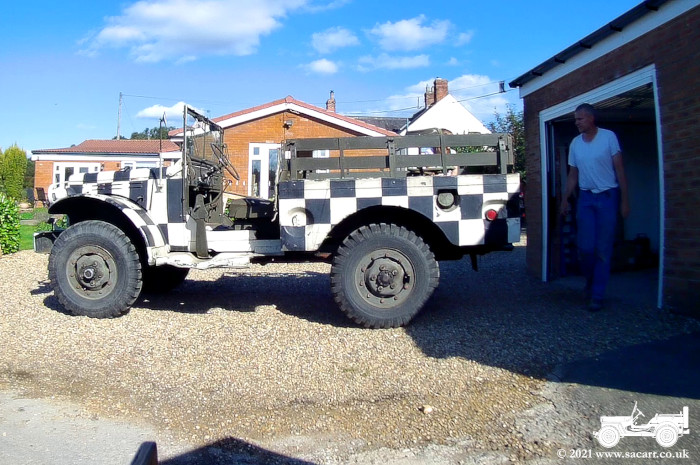
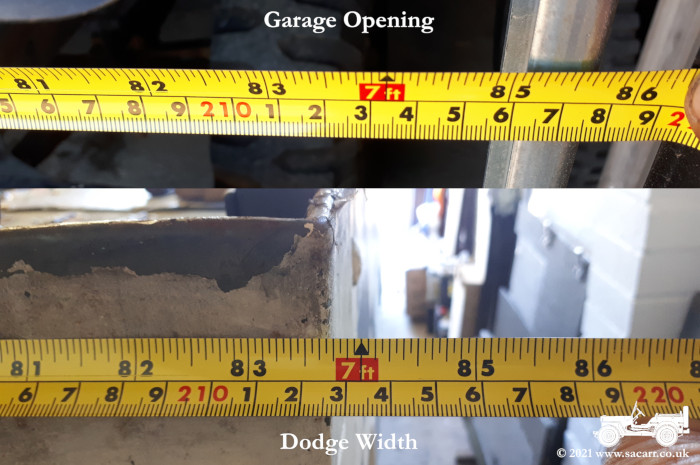
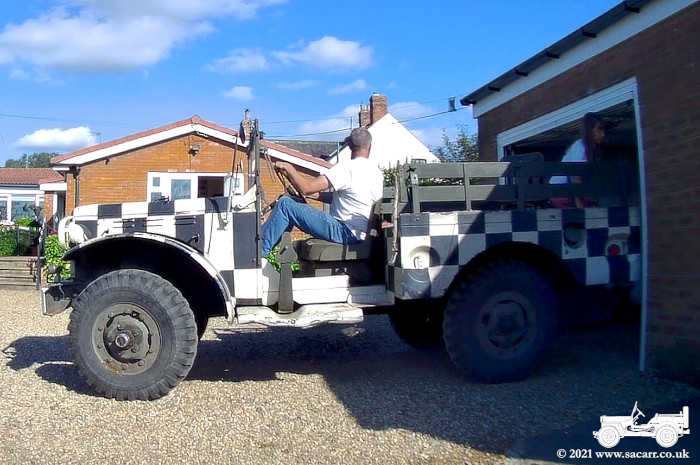
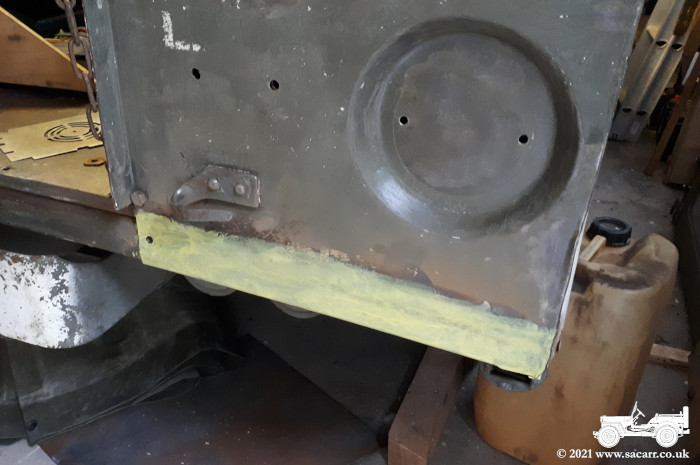
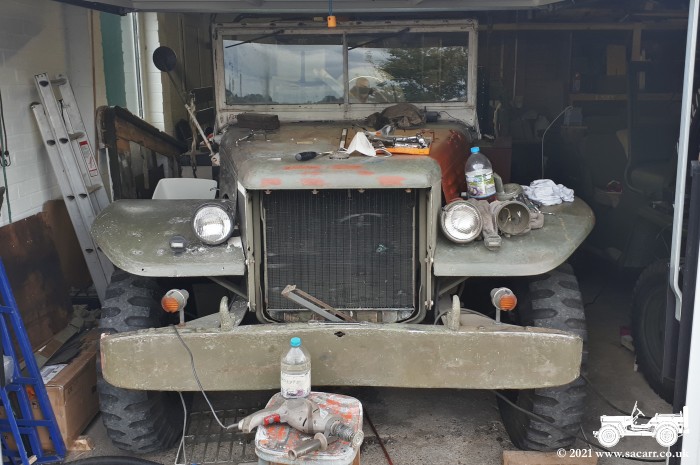
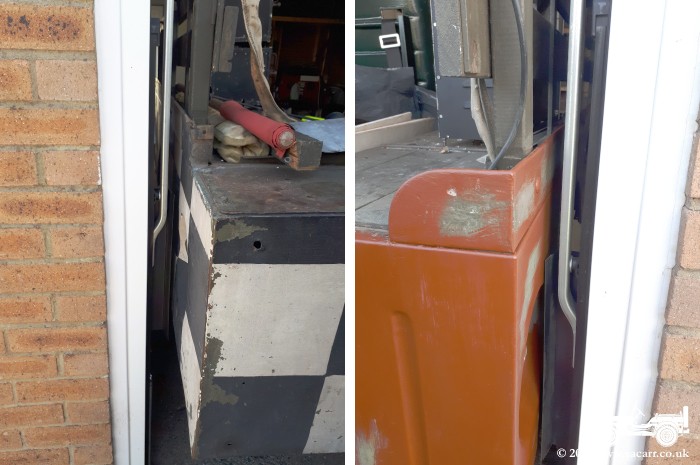
| Now with the existing garage doors, it is a tight fit and I REALLY mean TIGHT! Allowing for odd fittings on the body, Dodge is a tiny fraction under 84 inches wide. The opening between the garage door mechanism is 85 inches!!! That's why it took a few goes to get the Dodge through the hole. The section of bodywork attached to the front bow would be kept and reused. This would also allow the doors to still be fitted and have something to latch on when closed. It will also help to keep the wind out of the back. It was strange to see the Dodge as a pickup truck after so long with the Flying Control body fitted. |
|||
|
|
|
|
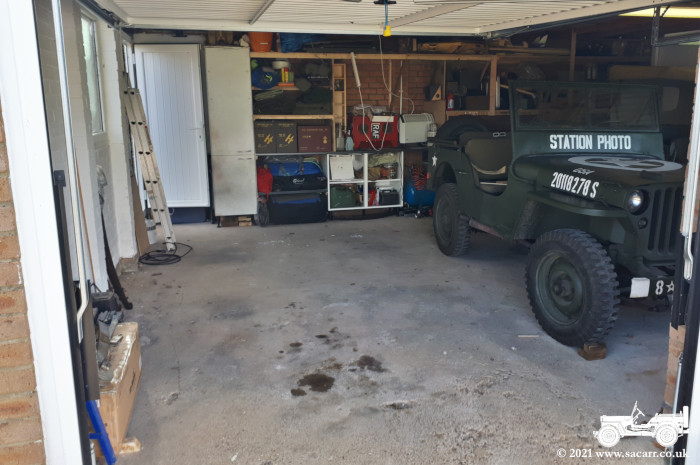
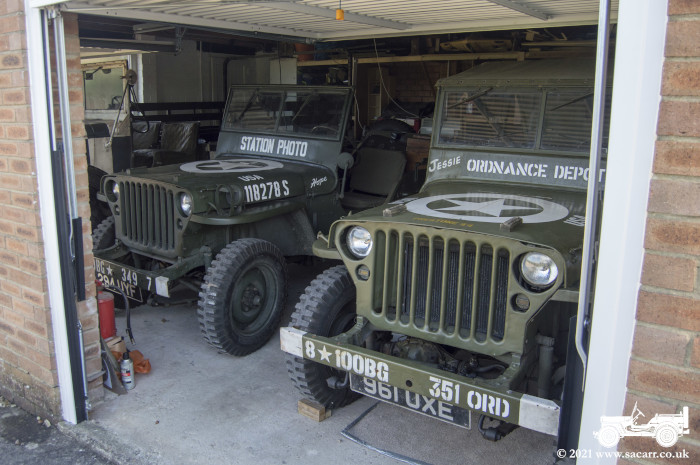
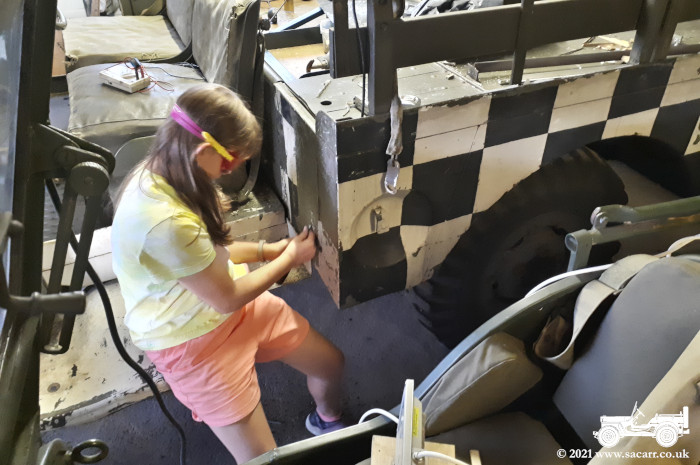
| With my daughter's help in the back of the truck guiding me, I carefully lined lined up on the opening, though it took several attempts. So six months after arriving at the new house, the Dodge finally joined the two Jeeps indoors in the garage. Now the transformation to its new form can begin. |
|||
|
|
|
|
| ----- | |||
| September 17th - Paint Stripping Begins | |||
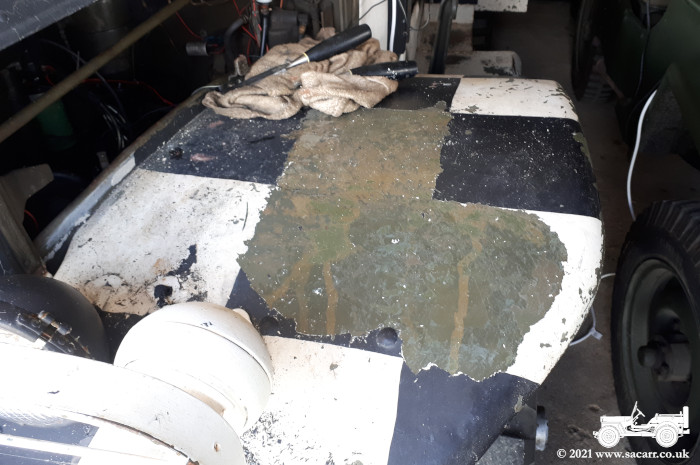
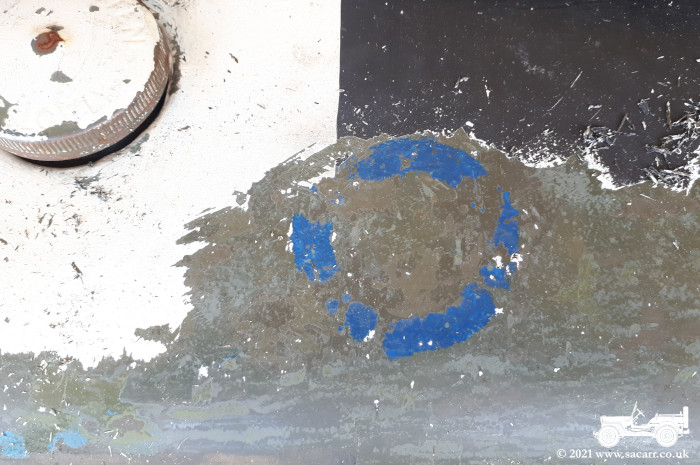
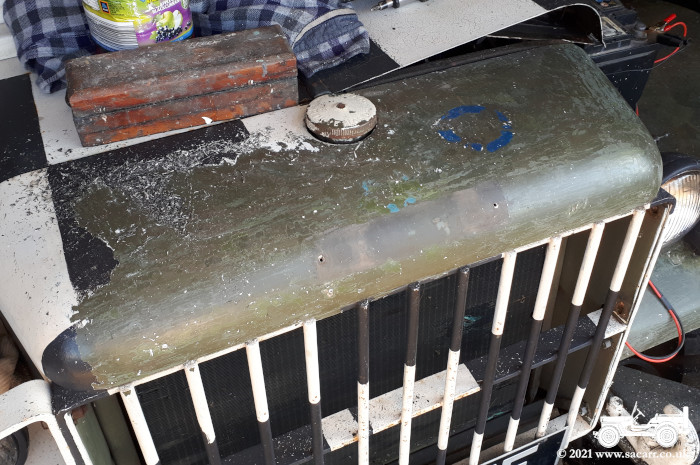
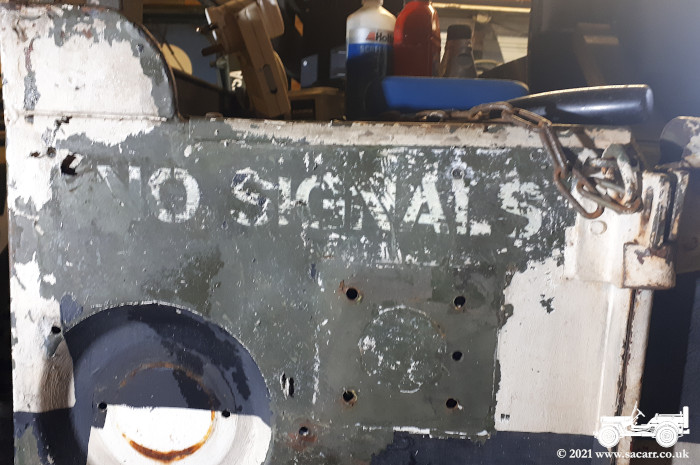
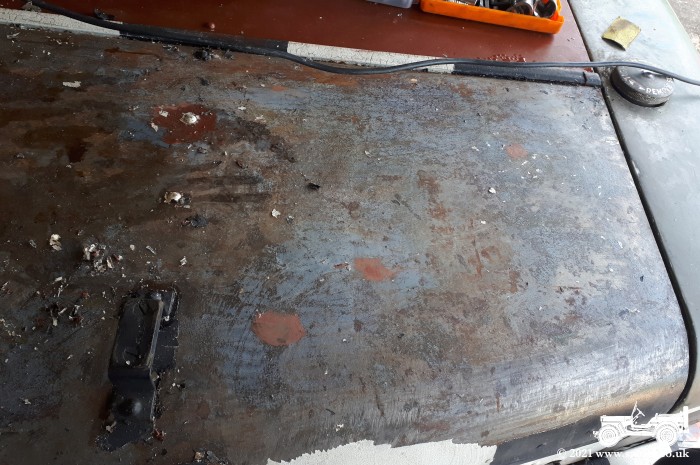
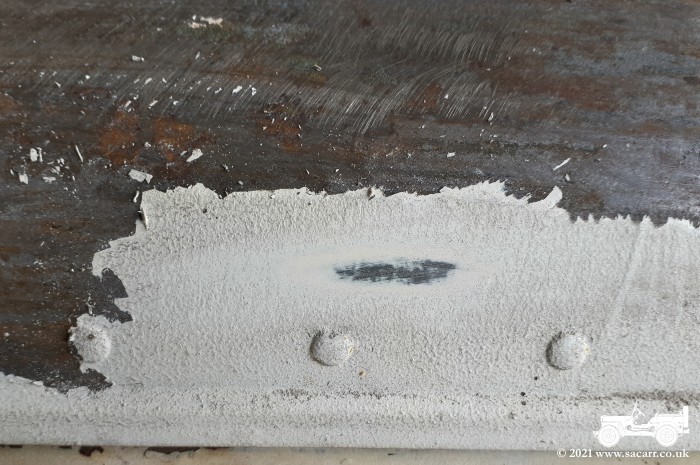
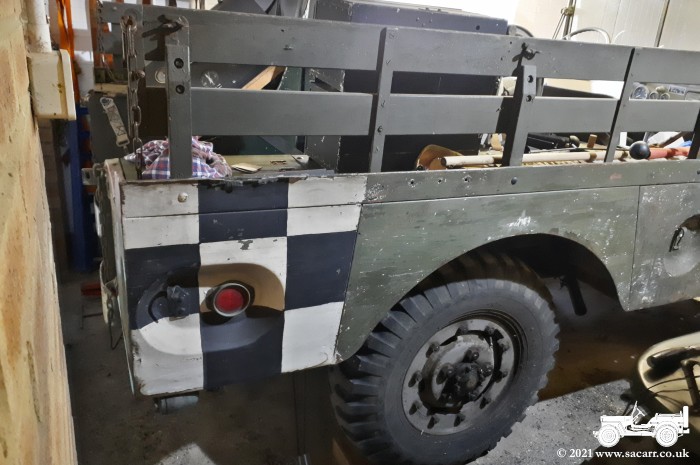
| On the 17th, I began stripping the checkered paint from the Dodge. A few days ago, I did a test with a chisel, chipping away at the paint and lifting it in flakes. This would be quicker than trying to sand through the black and white layers. The green below could then be lightly sanded to key the surface for a new olive drab paint layer. While scraping near the radiator cap, I found the blue circular marking seen below. I suspect this may have been something from Norwegian army service, but can't be sure. |
|||
|
|
|
|
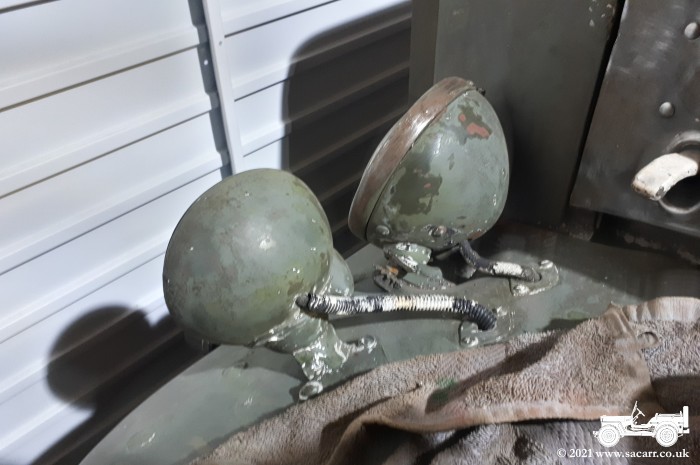
| By the end of the day, one fender, the section over the radiator, most of the radiator grille and part of the rear body were stripped of their paint. The light protectors were removed both to aid stripping the paint from them, but also to better access the paint on the fender and lights. |
|||
|
|
|
|
| ----- | |||
| September 19th & 20th - Paint Stripping | |||
|
On the 19th, I focused on the step and cowl over the instrument panel. The paint on the step proved to be particularly difficult to remove. After that was done, I worked forwards along the small upright section of body beside the seat. From there, upwards passed the mirror bracket and over the top of the instrument cowling. | 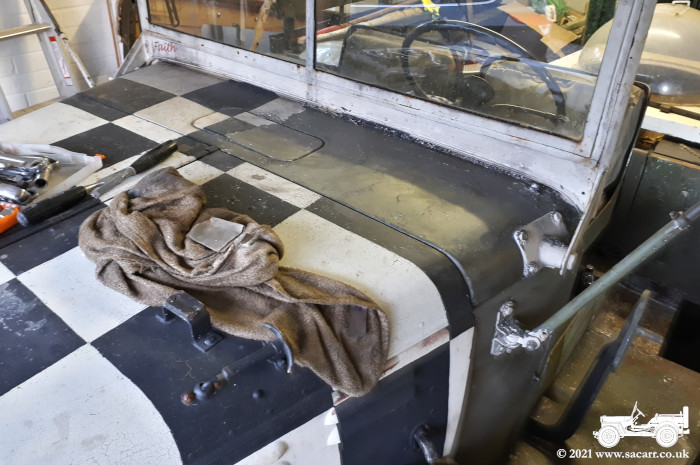
|
|
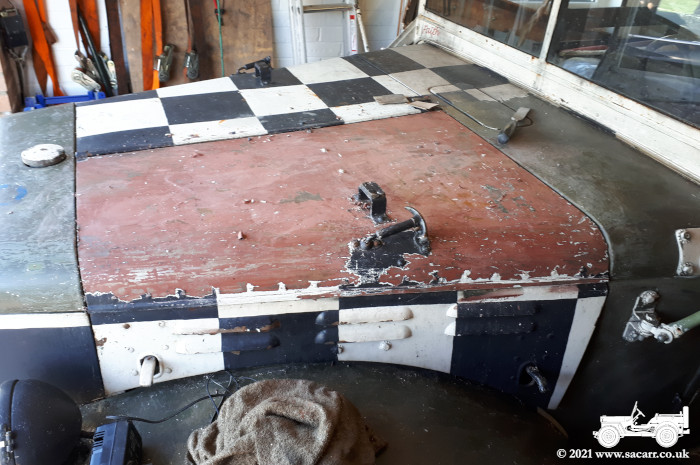
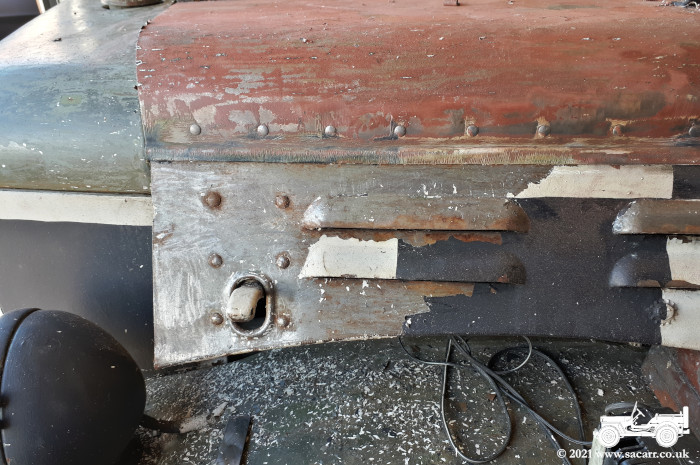
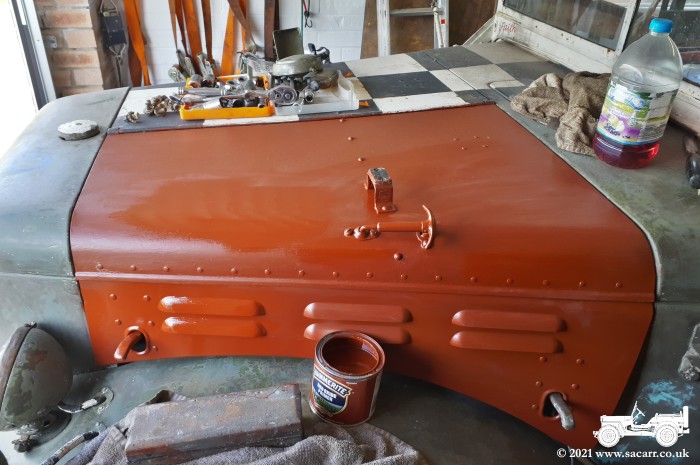
| The following day, I began work on the main section of the hood. I'd repainted this some years ago due to rust patches. The black and white didn't want to chisel away from the olive and in places, even the primer lifted. The paint was very hard and wasn't in the mood to be chiseled! However, having been decorating recently, I decided to give the wallpaper steamer a go. It had worked well to remove emulsion paint from a wall, so perhaps it could do the same for the checkers, which were also emulsion. Back when I did the rust repairs, I'd only given the area a thin coat of olive paint as it was going to have checkers over the top anyway. The steamer brought off the black, white and olive fairly easily, in most areas leaving the primer behind. The side of the hood was going to be
harder to steam due to the louvres, but as it turned out, the paint came
away very easily, having no primer at all and very little olive drab.
I'd never touched the side of the hood, so I'm guessing it has had a
lack of primer since its Norwegian Army days or during the ownership of
the Norwegian collector who was the first owner. The paint was scraped
away and the whole panel given a light polish with a rotary wire brush
to remove some surface rust. |
|||
|
|
|
|
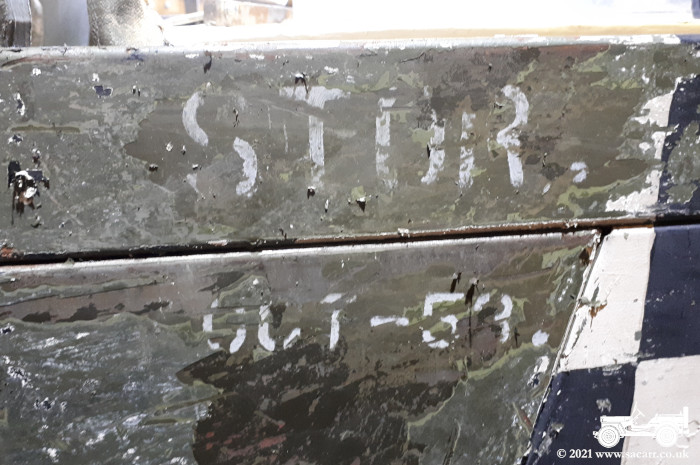
| The steamer had worked really well on the hood, so I gave it a try on the rear body, starting at the front. It wasn't long before I found some lettering, which once uncovered, read " STOR. " and below it, " OCT-53. ". These words weren't on the lowest layer of paint, so I'm guessing they date from Norwegian Army service. I continued rearwards until reaching the back, then chipped out the paint from the fuel filler and canvas tie depressions. That's the progress so far - almost one side completely stripped. |
|||
|
|
|
|
| ----- | |||
| September 21st & 22nd - Paint Stripping and Welding | |||
|
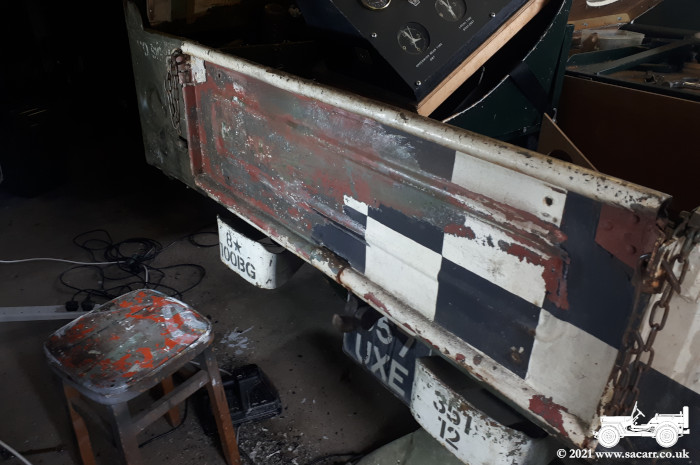
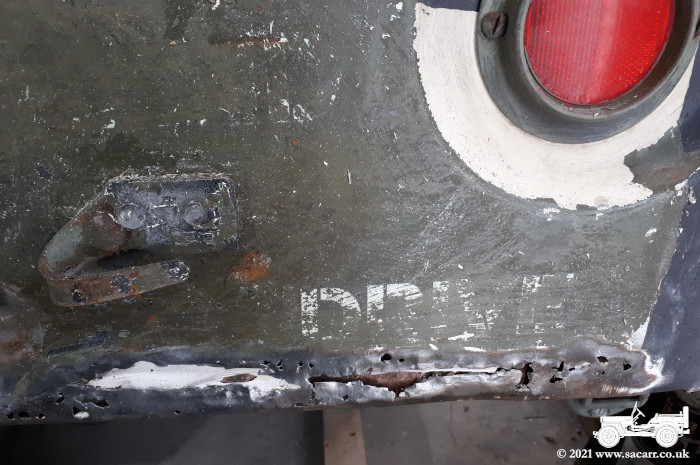
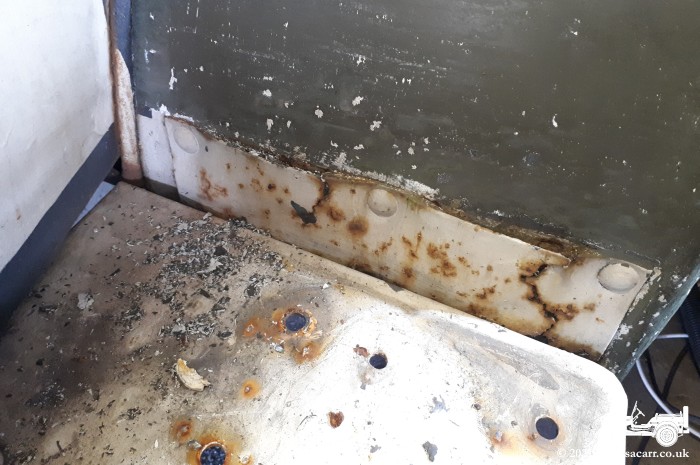
On the 21st, paint stripping continued across the back of the truck. More markings were revealed, but again, I don't believe they are original. At the right rear corner, there was a large area of rust and thin metal that needed dealing with. The tailgate was also removed to allow it and around its hinges to be cleaned up properly. | 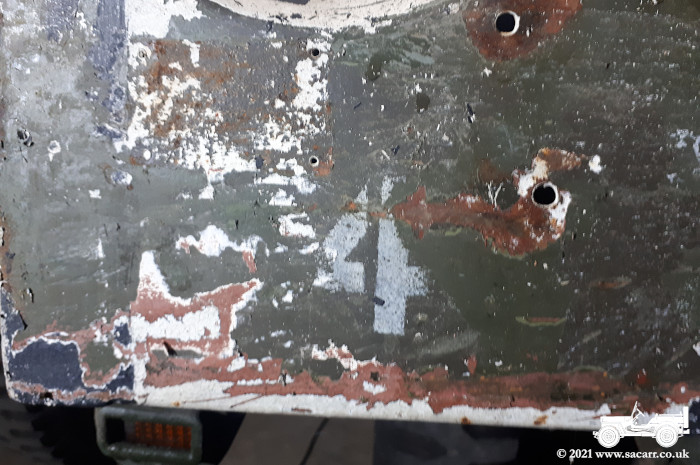
|
|
 |
 |
 |
 |
|
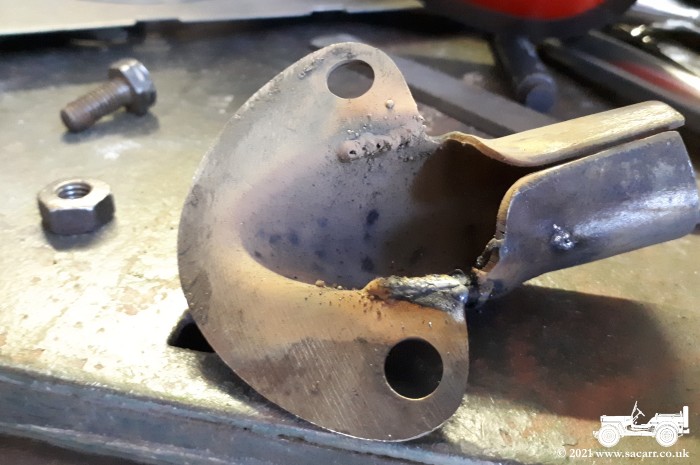
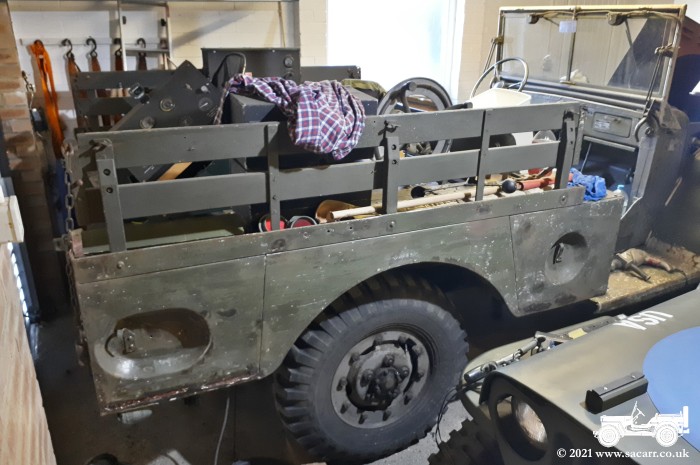
Most of the 22nd was spent cutting out rust, cutting and welding new metal. There were three areas that needed work, two of which I could reach with the Dodge this way around in the garage. On the side, near the driver's step, was worse than the initial pinholes suggested. The other on the rear was obvious. Some etch primer was used to protect the metal until I can get some red oxide primer. One of the tailgate hinges also needed some cracks welding. At the end of the day, the grille was removed for cleaning the inside. | 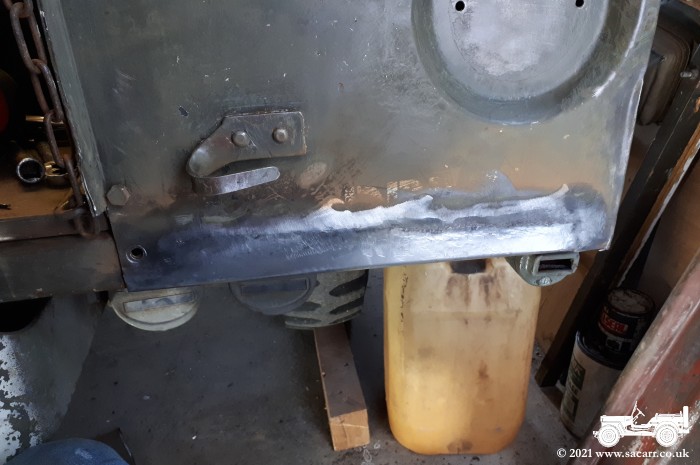
|
|
|
|
|
|
| ----- | |||
| September 23rd & 24th - Sanding and Priming | |||
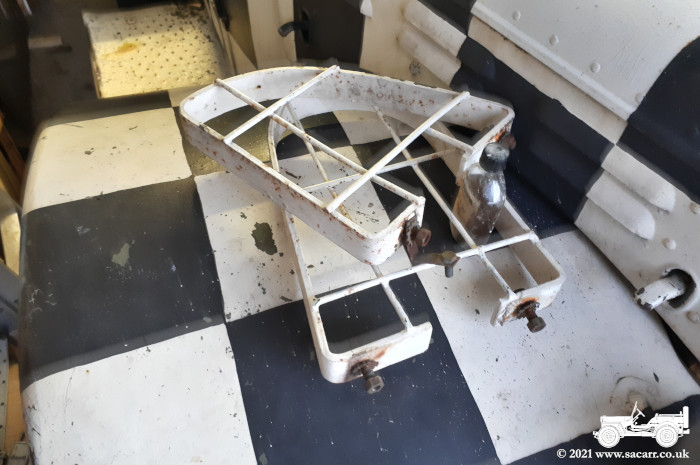
| On the 23rd, I began to strip the paint from the lights and brackets. It took most of the morning which included stripping the lights apart. Most of the rest of the day was spent sanding the paintwork on the left side. The welding repairs and some other bare metal areas were given a coat of primer to protect them. |
|||
|
|
|
|
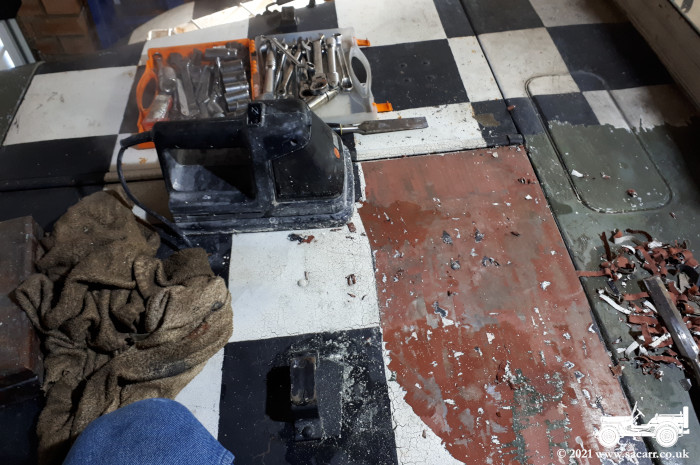
| For most of the 24th, I was doing surface preparation. There were a number of gouges from the chisel that needed filling. I'm not worried about a perfect finish, but the chisel marks needed dealing with. There were also a number of small rust spots to grind out, prime and fill. It took some time to sand and grind out the rust in the depression around the fuel filler cap and very few of my tools would fit between the depression and filler neck. To end the day, I stripped the paint from the front bumper. There were multiple layers that were very hard and needed quite a bit of steaming to soften the paint enough to scrape away. |
|||
|
|
|
|
| ----- | |||
| September 25th/26th - Paint Stripping | |||
|
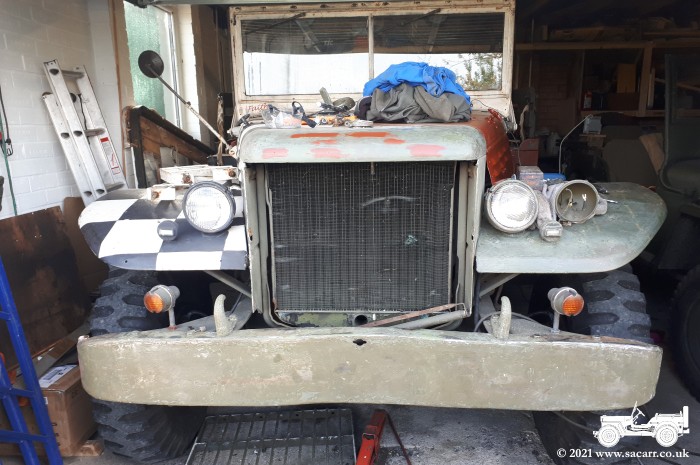
On the 25th, I started stripping along the right side, with the hood and fender under the chisel. As with the left, the two right side sections of the hood had no primer. I sanded one small section of white to reveal the olive drab below, but stipping it away showed no primer other than my rust touch-ups. By the end of the day, most of the right side fender was back to olive drab and a front view shows the Dodge looking more green than black and white. | 
|
|
|

|
|
|
| First thing on the 26th, I carefully drove the Dodge out of the garage and snapped some photos in the sun before turning it around and parking up again in the garage. This gave me better access to the right side which still needed stripping. It's hard to believe it's a little over a week since I started. |
|||
|
|
|
|
|
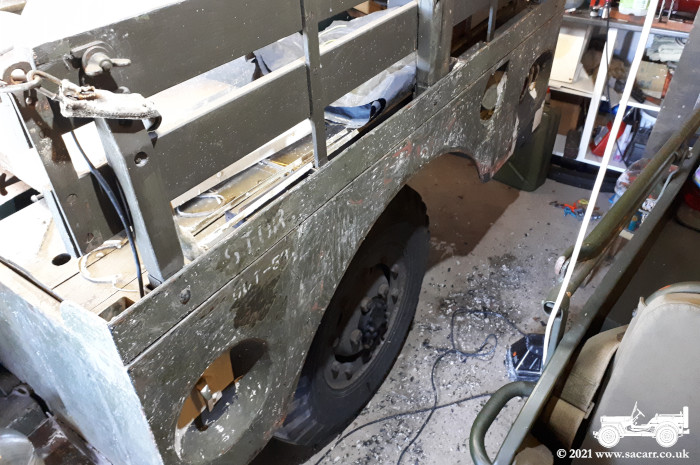
It's still a tight squeeze to work in there, but by moving the GPW backwards a little, it gave a bit more room at the rear right corner where I have some welding to do. I carried on stripping the fender first, uncovering some shipping data stencils. They appear to be on a more recent layer of paint, so probably applied by the Norwegian collector and not original. | 
|
|
| At the bottom of the fender, the doubler had badly rusted and would need cutting off and replacing, but not today. The stripping continued along the side of the cab and under the screen seal. Time was getting on, so I switched to wiring brushing the bare metal hood and then got a coat of primer on to finish the day. |
|||
|
|

|
|
| ----- | |||
| September 27th/28th - Stripping, Welding and Priming | |||
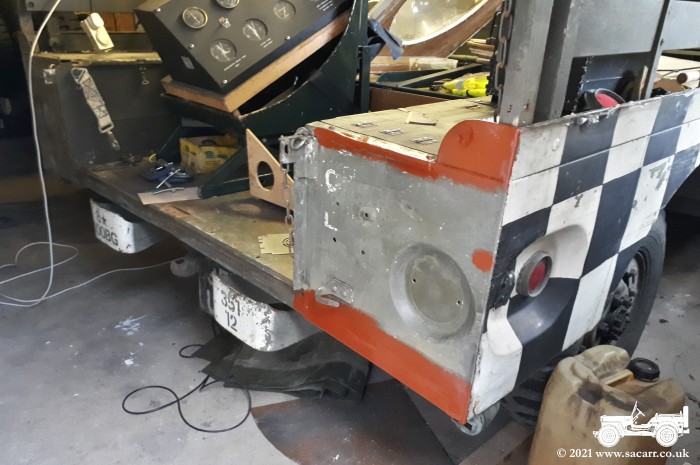
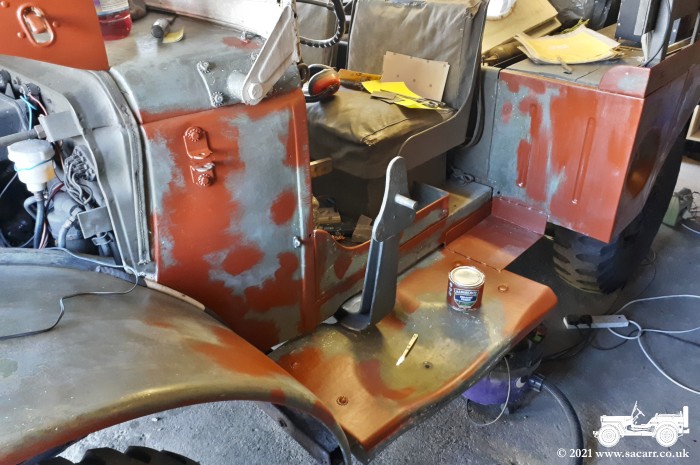
| I started the 27th by stripping the step, the rest of the cab side and the front face of the rear body. I quickly moved on down the side until there were only nine checkers left on the whole truck. Other than the windscreen, the Dodge was all olive drab or primer. As I stripped away the paint, I found an old repair on the rear corner which needed proper attention. |
|||
|
|
|
|
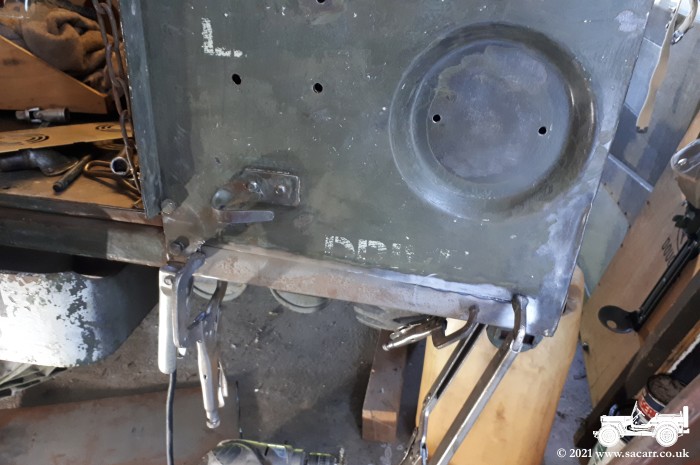
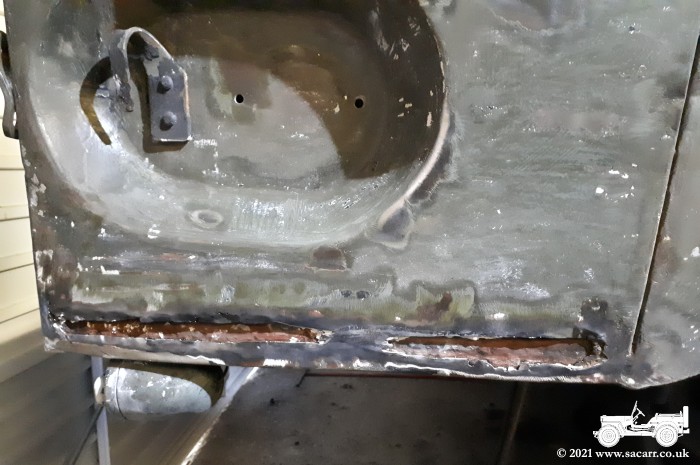
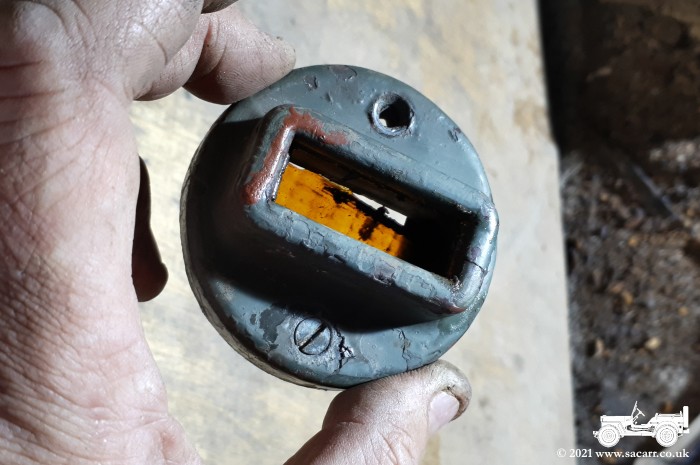
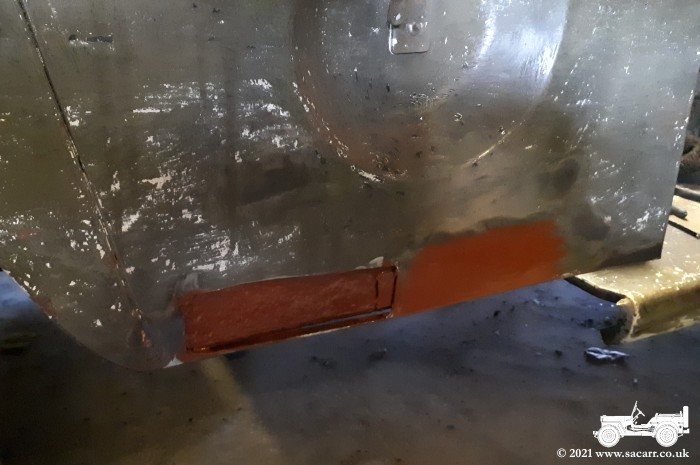
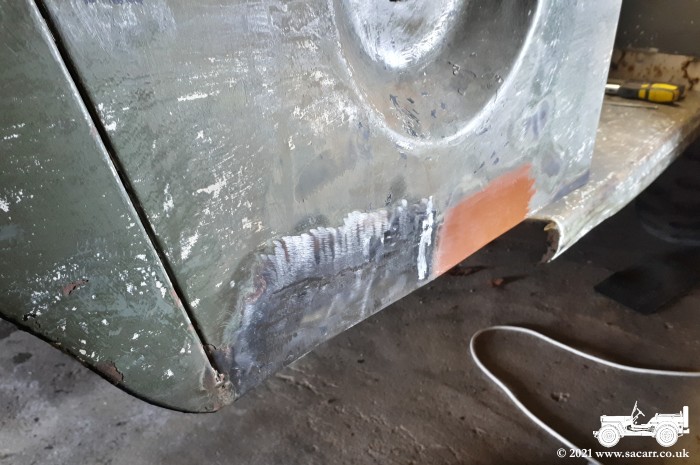
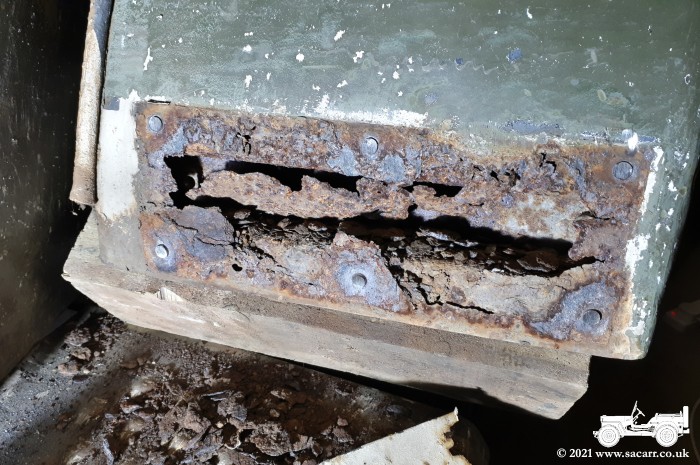
| There was some additional rot at the front corner of the rear body, just behind the step. This only showed up as surface rust discolouration on the checkers, until the rotary wire brush came out. One spot was just a few small holes which I welded up straight away. Just behind was a more rotten area that needed cutting out. The metal framework behind the rusted areas was cleaned with the grinder and wire brush, then given a coat of red oxide. At the back right corner, the indicator lamp was removed as this was in the way of the repairs. As I took it off, a load of water poured out. Closer imspection showed the lens had come loose, allowing rain water to enter the housing. Fortunately the LED cluster looked fine, with no signs of internal corrosion in the housing. |
|||
|
|
|
|
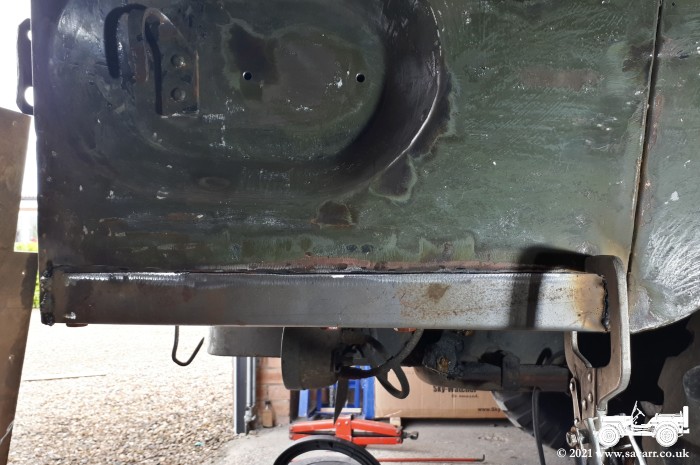
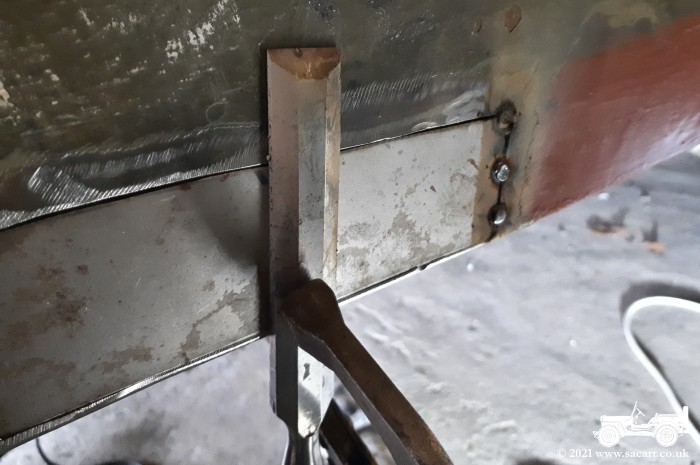
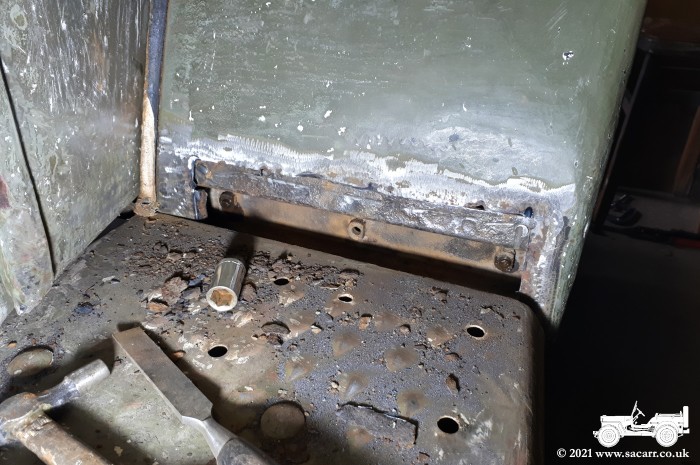
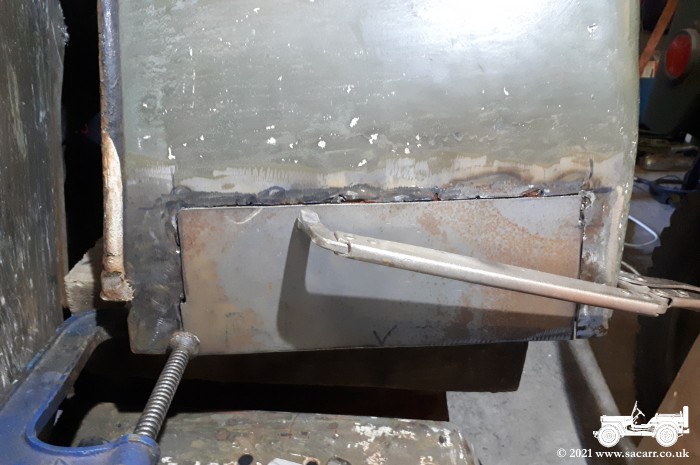
| Having prepared some replacement metal the day before, I started the 28th by welding in new sections, starting on the rear right corner. I don't like welding, mostly because I don't do it often and when I get back to it, my early welds aren't great. As I carry on through a job, the welds getter better as I re-familiarise myself. Today's welds were going pretty well and I got a fairly neat job with nice flush skins that didn't need much tidying up. It had been raining and was damp outside, so I primed that section straight away before moving on to the section behind the step. It was all slow progress, tack welding and clamping to keep the new sheeting flush. |
|||
|
|
|
|
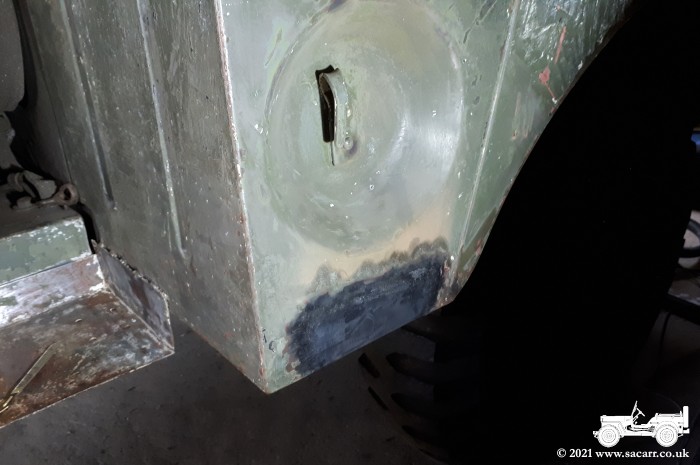
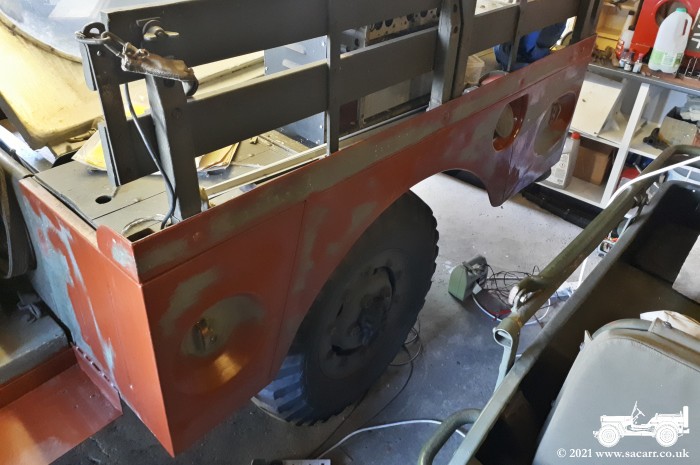
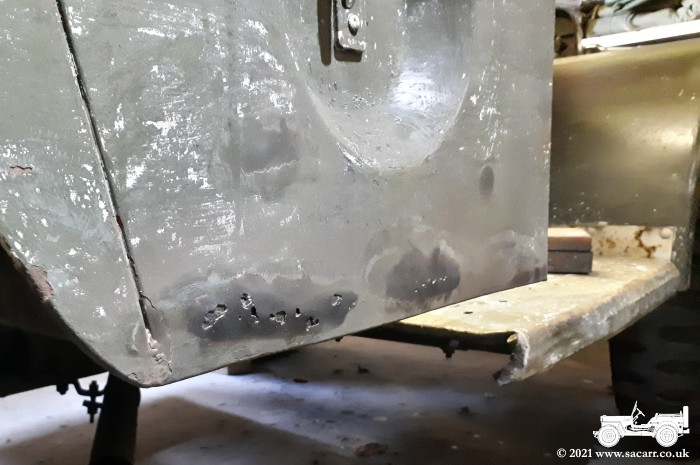
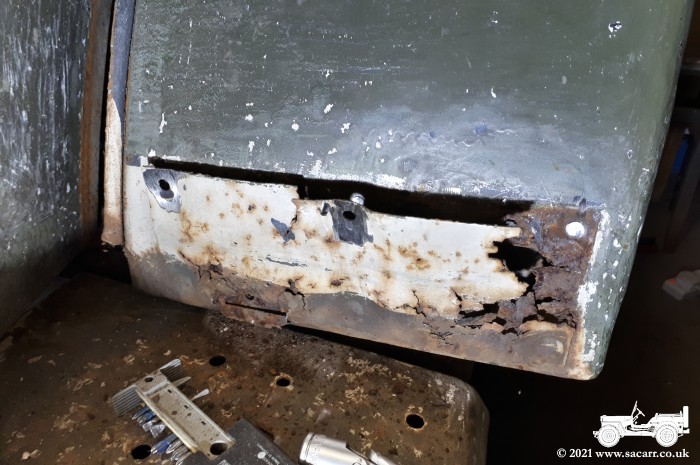
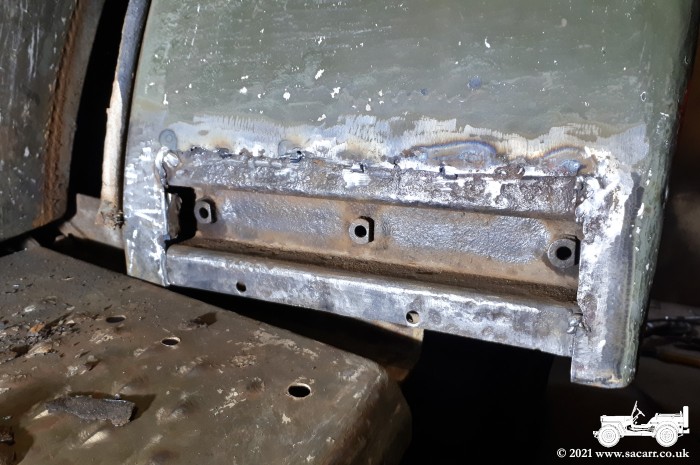
| With both pieces welded and primed, I thought I was finished welding until I remembered the front fenders. The design of the structure creates a perfect moisture trap, which has rotted out the fender skin at the rear between the supporting hat channel and doubling plate. The rust then slowly forced the two layers apart over time, allowing more water in. The fender had to come off to start the work. The doubling plate was riveted with six large, coach-bolt looking rivets. I needed to grind the heads off to get the rotten doubling plate off. I then cut out the rot and cleaned up the mess. The hat channel came loose and fell off as I was cutting out the rotten fender skin around the remains of the rivets. |
|||
|
|
|
|
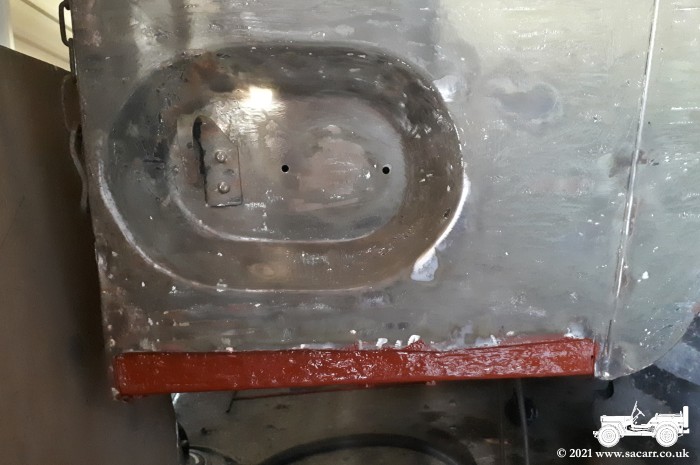
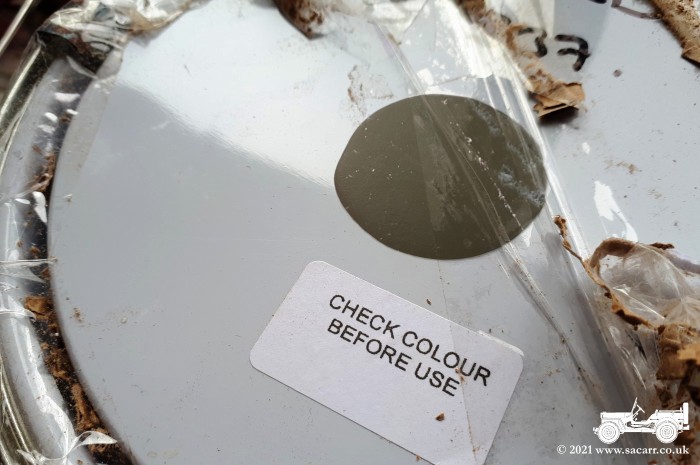
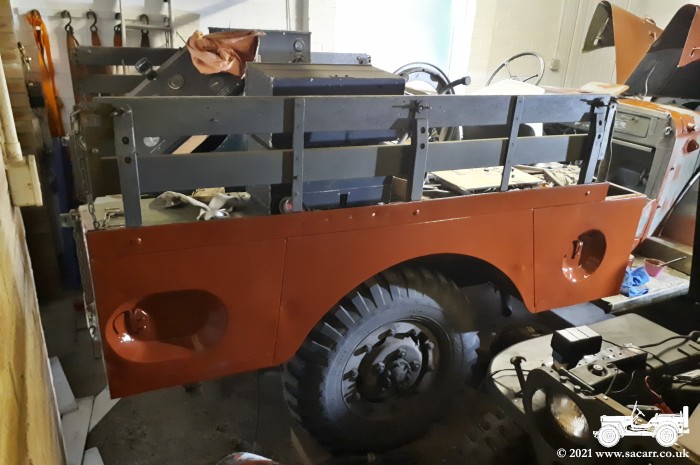
| The hat channel was cleaned up as best as I could while loose. The fender was bolted back in place to keep all the holes lined up and the hat channel was then welded to the fender to keep everything in the correct place. The fender was then removed again and the hat channel red oxide primed. Tomorrow's job is to cut and fit the new fender skin. I have a feeling I need to do the same on the other side, though it doesn't look as bad at first glance. Part way through the day, the dark olive drab paint arrived. For just twelve days work, I'm really happy with the way it's going. |
|||
|
|
|
|
| ----- | |||
| September 29th/30th - Welding, Sanding and Priming | |||
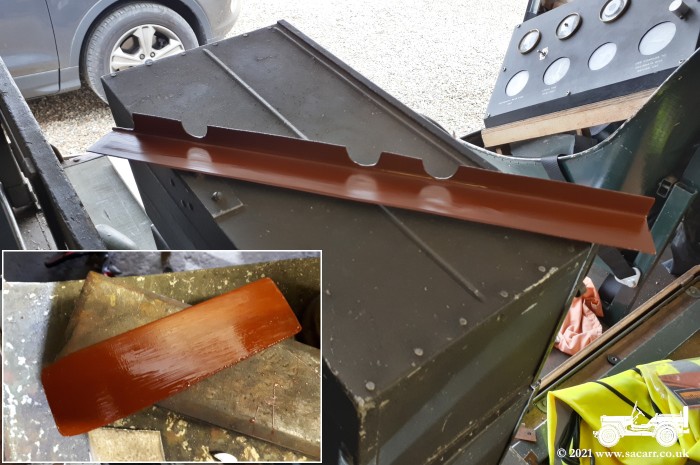
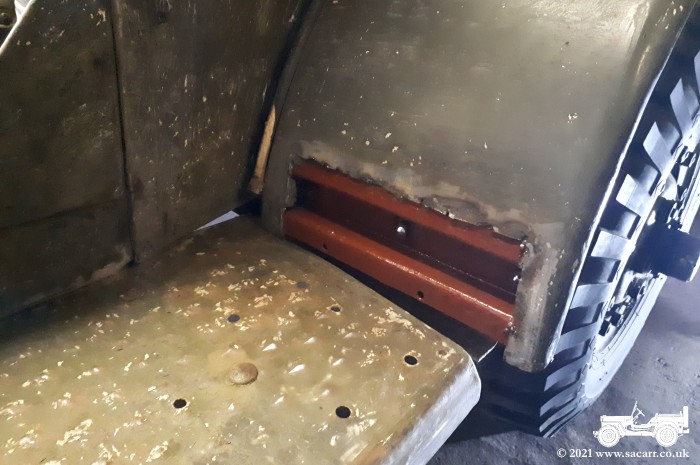
| I began the 29th by cutting and welding a new piece of metal into the front right fender. I'd just finished welding it in place when I ran out of welding wire ( more on order ). Inset in the second picture is a new doubling plate, cut and primed, ready to fit. The original doubler was riveted, but I'd be replacing the rivets with coach bolts, as the heads looked very similar. I plan to use mastic between the doubler and fender to prevent water getting between them and starting the rust again. Once the welding wire ran out, I switched to sanding the old paint, completing the fender, cab side and front end of the rear body. Rust spots were ground out and bare metal was primed. The lights on the right fender were also stripped, sanded and some areas primed. |
|||
|

|
|
|
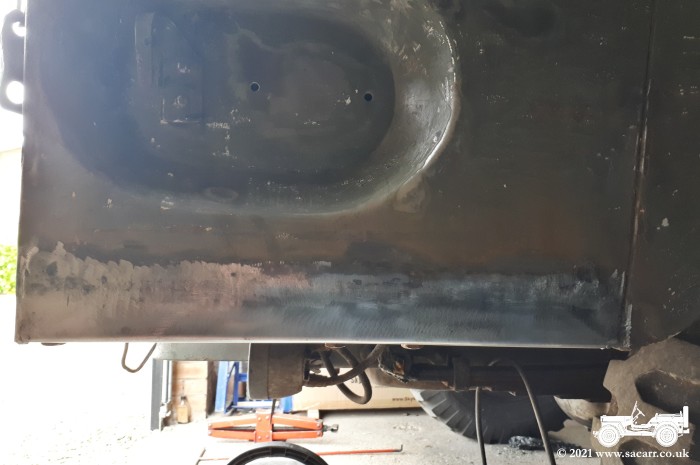
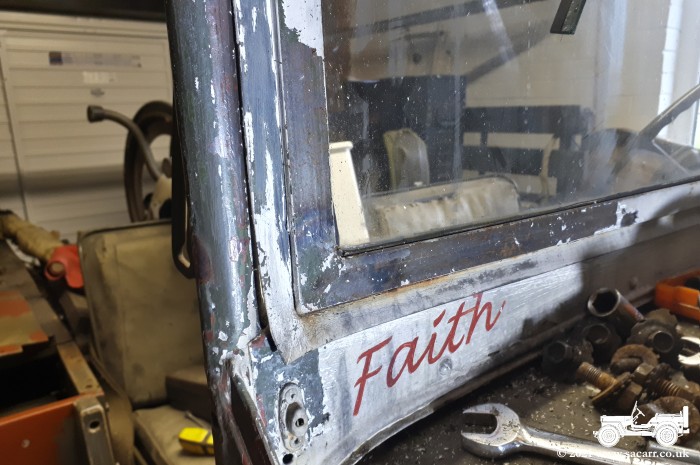
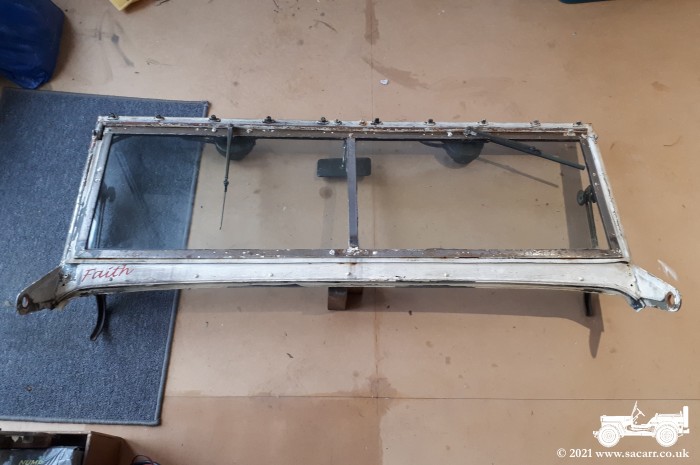
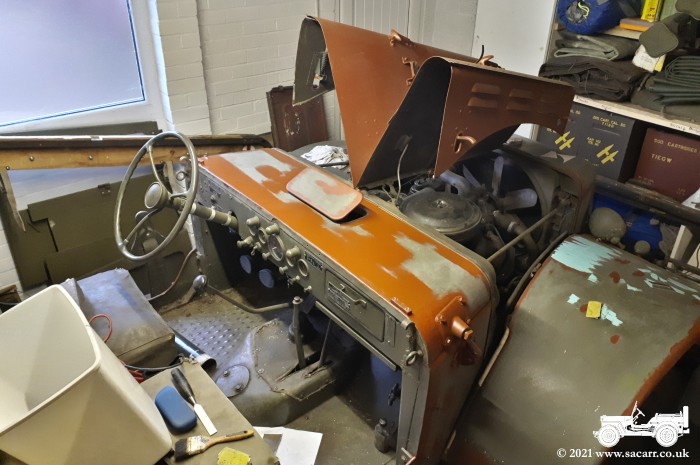
| On the 30th, I started stripping paint from the screen. It turned out that the inner frame was another area without any primer and the paint flaked away very easily. A little chipping on the outer frame showed it was primed and the paint was more stubborn to remove. Due to the difficult shapes, the wiper motors and the inner frame needing some rust treatment, I decided removing it and moving it to the workshop was the most sensible move. I'd have more space to work on it there. With the screen off and out of the way, it left the cowl over the instrument panel easy to reach and so the remains of the paint, which had been under the screen, was stripped off. Some areas were wire brushed, the whole area sanded and a number of areas primed, along with some small fixings from the screen. The right side of the body was next, sanding paint and grinding rust spots and quite a lot of slight surface rust. So much of the body was stripped to metal, that after sanding the remains of the paint, the whole side of the body was red oxide primed. With the colder and more damp weather coming, I may finish the welding on the fenders and then get on with the painting of the olive drab. I can get the garage fairly warm with a heater and the paint can bake. The olive drab can then be left to harden fully while I work on the windscreen. By the time that is painted and can be refitted, the truck paint should be hard enough to climb over for the screen fitting. |
|||
|
|
|
|