| Bell
YP-59 Airacomet Completed April 2010 |
||
|
1/48 Scale Hobby Craft Kit.
The kit has been modified to the clipped wing version of YP-59
#42-108777, the aircraft which is now being restored to airworthy
condition by Planes of Fame at Chino, CA.
Overall, the kit fitted together pretty well, although an online review I found stated that almost every part needed trial fitting before gluing - this wasn't promising! The review also mentioned the landing gear lengths were incorrect, the nose needing lengthening while the mains needed shortening. |
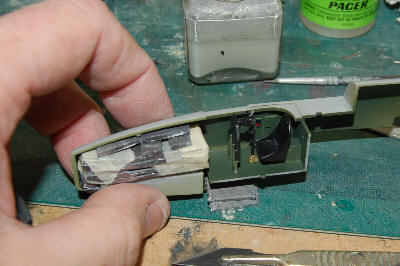 |
| Painting the interior was done using Warbirdcolors Paint, a water based paint used in the R/C model world. After the cockpit was assembled and fitted, plus the nose wheel bay, there wasn't much space left for lead nose weight. I wasn't sure how much lead would be needed in the nose, so crammed in as much as the space would allow. The fuselage halves joined fairly accurately, and only needed minor sanding of the seam. The join with the front fuselage was pretty good, but did need some filling to hide the seam. I had cut the rudder off so it could be added at a slight angle. | 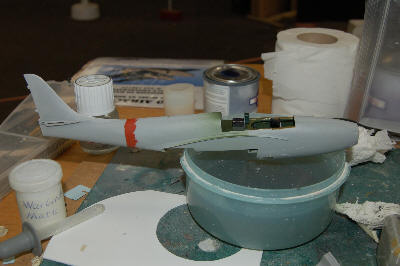
|
The wings went together well, but the online review I read stated unless the roots were trimmed a little, it would affect the dihedral. The ailerons, flaps and elevators were also sanded to remove the fabric effect as the YP-59 had metal surfaces. I modified the wing tips from the kit, to the cropped versions fitted to the YP-59. The fin was also cropped later in the airframes life, but the photos I worked from showed the rounded fin. Once the canopy frames were attached, they were filled to blend in to the fuselage. Several holes in the nose glazing were filled, leaving just two as per the version I was modelling. |
|
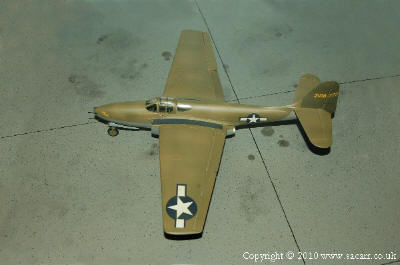
The pitot was added under the port wing. The canopy frame was sprayed in two goes to make masking easier. After the base colour had dried a while, several different tints and tones of the base colour were sprayed randomly over the model along some panel lines and general splotches to simulate the general patchiness of the full size. The olive drab was given a rub down with a automotive paint flatting pad which served two purposes. Firstly it smoothed the finish, and secondly, by rubbing down through the different shades of olive drab, it created the uneven blotchy finish I was looking for. | 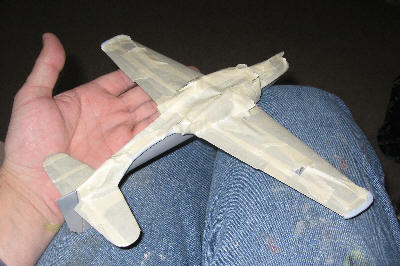
|
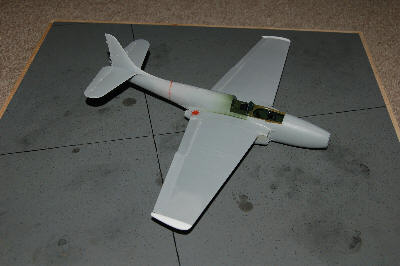
| Walkways were also masked and sprayed rather than the kit decals. The underside grey was also sprayed a couple of different shades, and also rubbed with a flatting pad in the direction of the airflow. I was just about to start decalling, when I remembered the fin was a much darker shade than the rest of the aircraft, so the decals went on hold while the tail was masked and sprayed. The Star and Bar were the first decals to be applied. After the rounded wing tips were removed from the original, they lost part of the bar, so the decals were trimmed to match. | 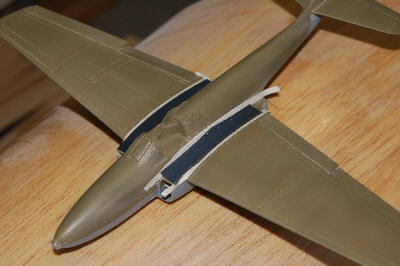
|
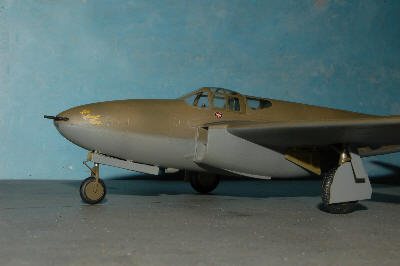
The centre red dot from the RAF roundel supplied in the kit, was used for the fuel filler cap, as these show up red in a colour photo I have. The tail serial was cut in two, to bridge the fin/rudder hinge line. After the decals had dried for a while, the aircraft was dirtied again with further shades of olive drab. It shows up more in real life than in a photo. The landing gear was assembled and fitted next. The main gear was reasonably ok, although the small doors that cover the legs were fiddly and needed the supports on the leg trimming down in length by about 60%. |
|
The nose gear fitted fine, but its gear doors seemed a bit too curved, preventing all three mounting lugs from touching the side of the wheel well. Two were glued with cyano, and once secure, the third was held in place and also cyanoed. Glued areas were then given a dust of matt coat to remove any shine from the
cyano. . |
 |
| Back | ||
