|
May 2nd/3rd - May 22nd - May 26th - May 28th |
|
|
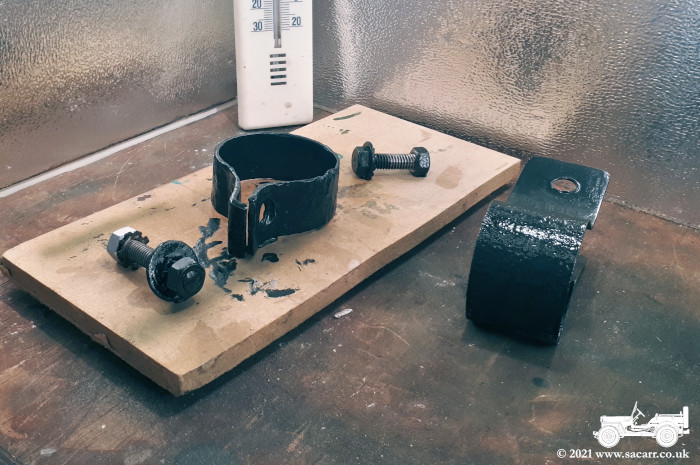
All the silencer brackets had been painted in
Hammerite as an undercoat and then an enamel top coat. I haven't unpacked my
olive drab yet, so I'll touch them up at a later date. The open end of the
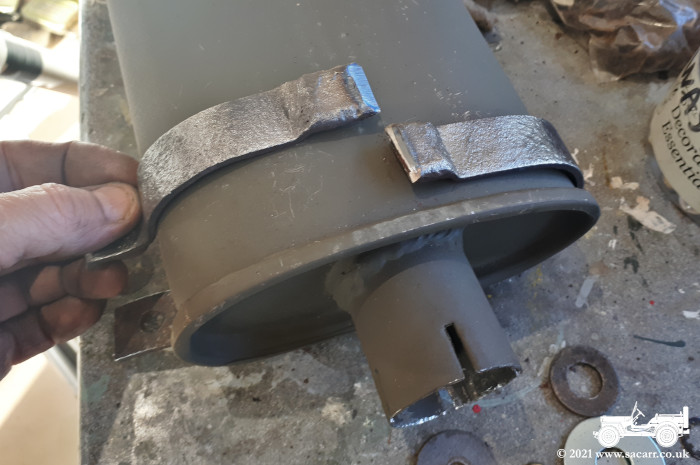
silencer needed the slots lengthening a bit and the petals hammering further
open to fit onto the manifold pipe, but still wouldn't fit on far enough to
align the silencer with the support bracket. To fix the problem, I cut about
half an inch off the manifold pipe which brought the silencer forwards to a
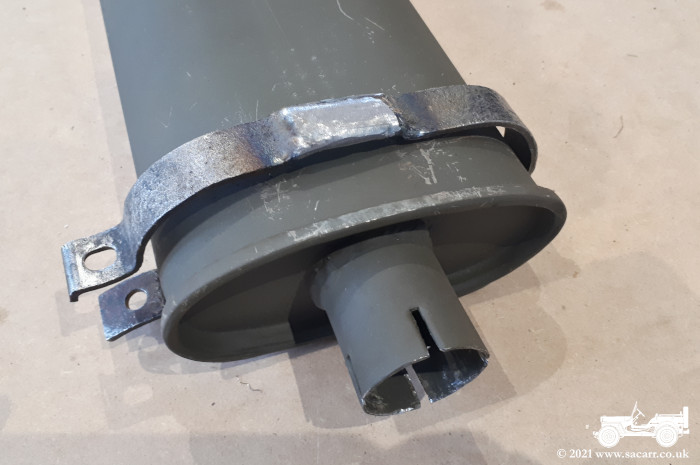
better position. Other than that, the fitting went without any problems and the
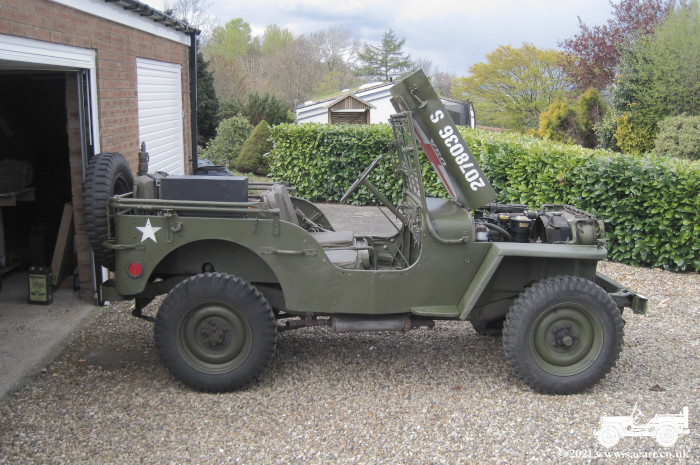
Jeep is back on the road for Ushaw Historic House on June 6th, the first proper
event since September 2019. |
|
|
|

|
|
| ----- | |
|
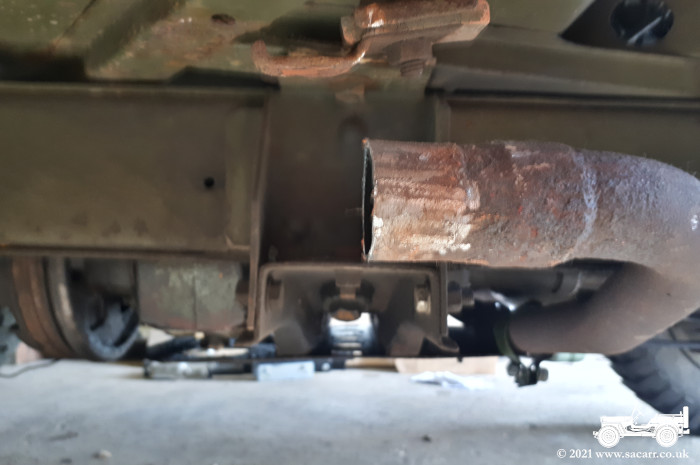
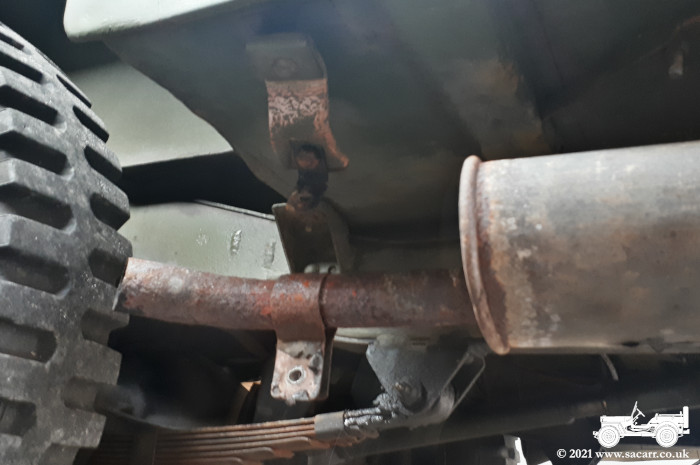
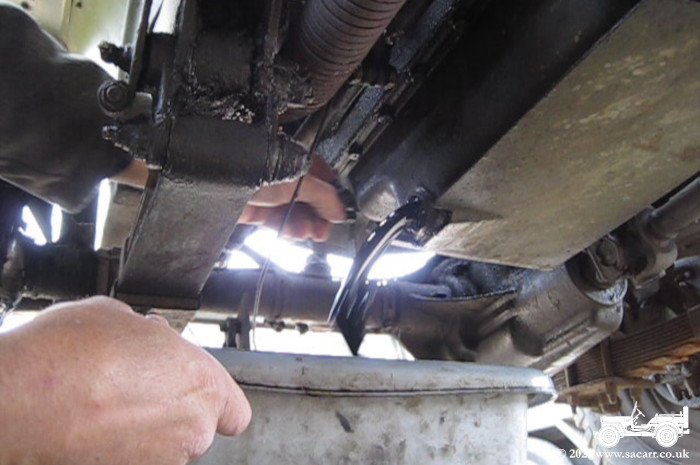
After finding some holes in the Jeep's silencer and having a general look around it, I figured it wasn't going to give up without a fight. It was fitted in October 2007 and other than replacing the rear support bracket around three years ago, it hadn't been
touched.
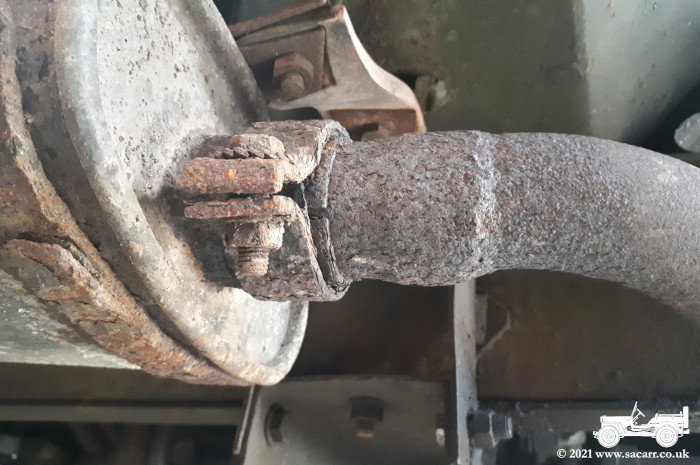
The various clamps, bolts and brackets were very rusted and didn't look like they would just unbolt. The rear support bracket and bolt did behave, probably as it was only replaced a few years ago. |
|
|
|
|
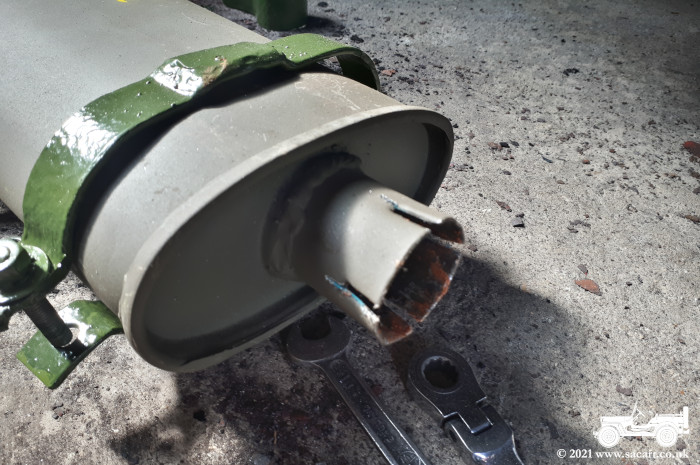
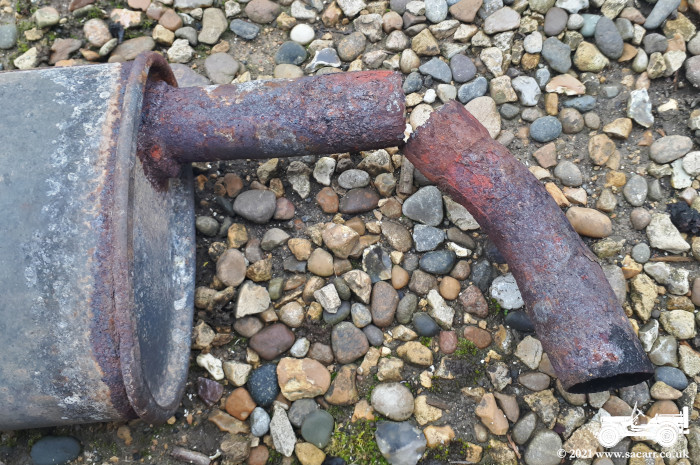
The front support bolt sheared straight away. The clamp at the front of the silencer wouldn't budge at all. After lots of fighting, the clamp loosened slightly and was able to slide forwards on the manifold pipe. However the silencer wouldn't move. In the end, I cut through the outer tube exiting the silencer and chisled it open to free it from the manifold pipe. |
|

|
|
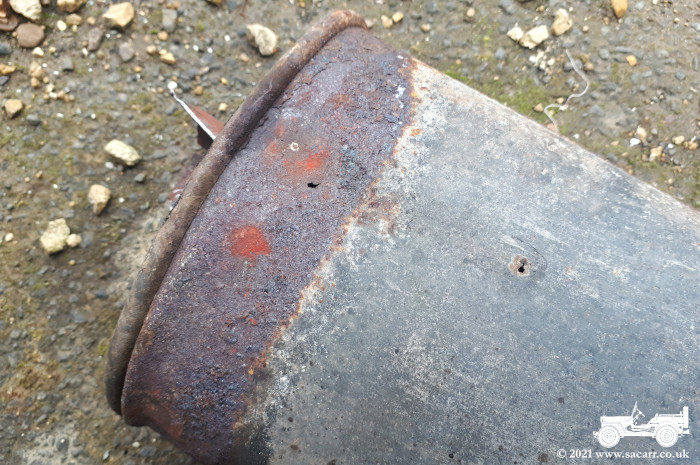
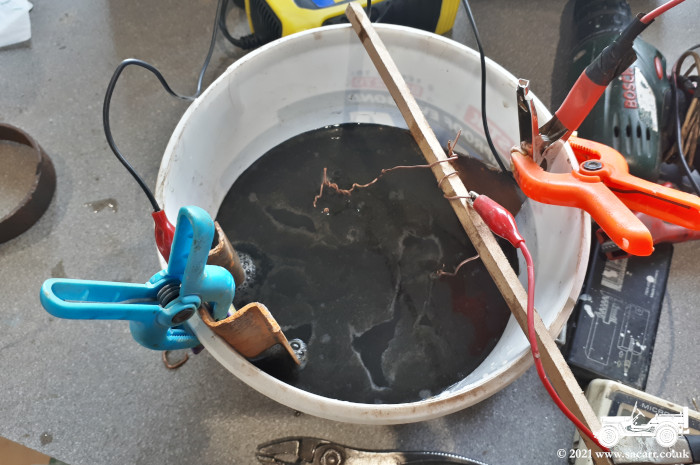
| As it came free, the tail pipe fell away; rusted through at the point where the rear bracket supported it. Further inspection showed more small holes developing elsewhere on the silencer, so it really was beyond saving. After almost 14 years, I can't complain too much. The rear support and manifold clamp were treated by electrolysis to remove rust and were then wire brushed and painted. |
|
|
|
|
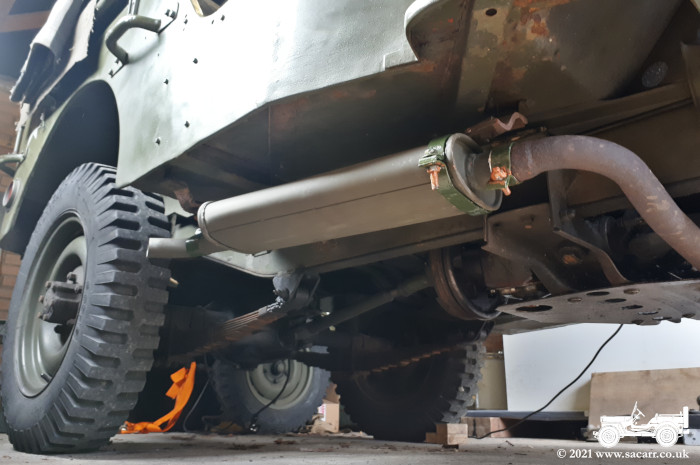
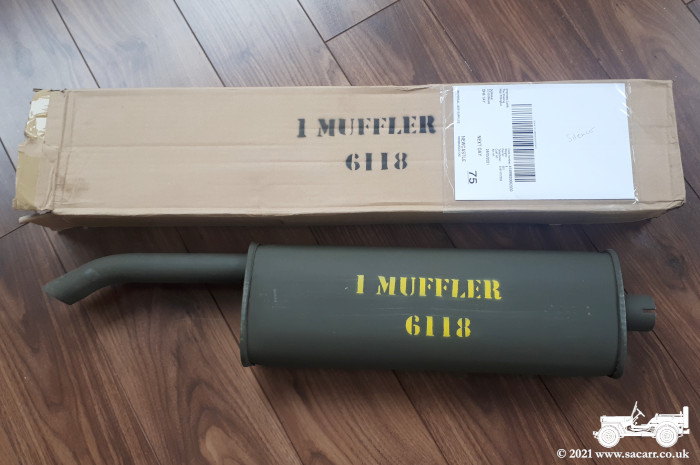
The support that went around the silencer needed modifying. The silencer I'm replacing came from Jeeparts. It had a larger circumference than the original Hotchkiss silencer it replaced. As a result, I had to weld in some pieces to increase the size of the bracket. Now the new replacement silencer came from Universal Jeep Supplies and was the same size as the original Hotchkiss silencer. So the bracket was cut again, pieces cut out and it was welded back together at what was probably its original size. Once the paint has fully cured, it can all be put back together again. |
|
|
|
| ----- | |
|
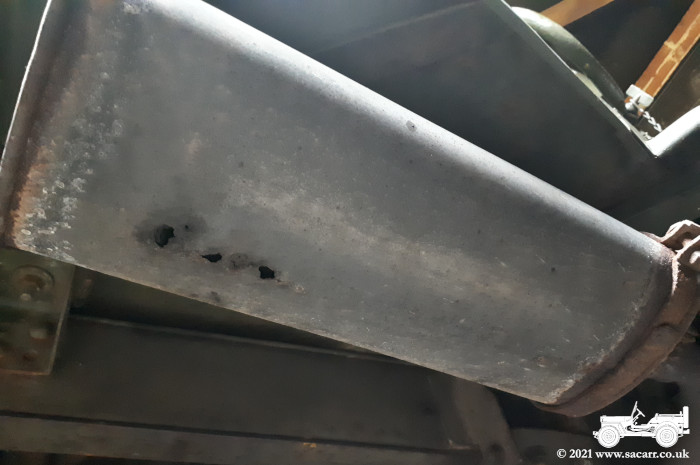
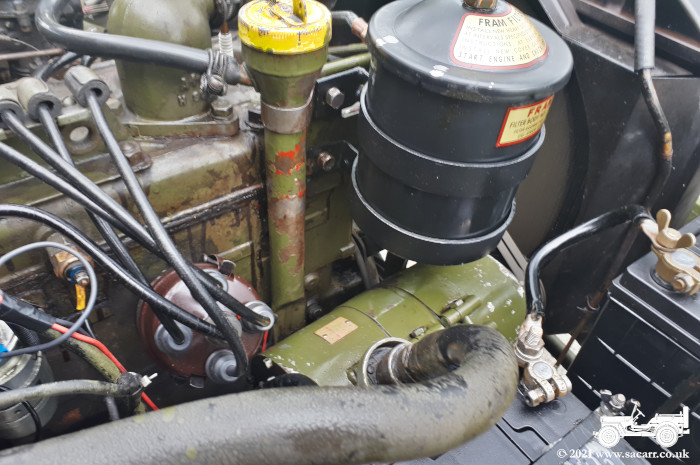
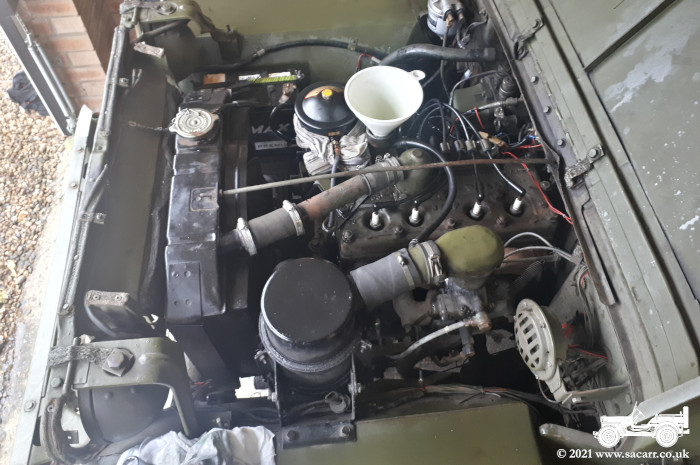
May 22nd - Servicing, Test Drive and Silencer On May 22nd, I did a little more servicing on Jessie. The cold and very wet weather that has dominated May eased a little so it wasn't too cold in the garage. I checked and topped up the transmission, transfer case and differential oils in both Jeeps. Since it was one of the few days where it wasn't raining, I took Jessie for a test drive for peace of mind over the leaking filter issue I'd had at the start of the month. After a six mile local trip, there was no signs of any leaks.While checking the Jeep underside, I also found three rust holes in the silencer. A little while ago, I'd spotted some tiny dots that may have been pin holes, but decided to wait for a warmer day to investigate properly. The silencer must have been pretty thin, as just a few weeks later, the suspected pin holes had developed into proper holes. A replacement silencer has been ordered and will be fitted shortly. |
|
|
|
|
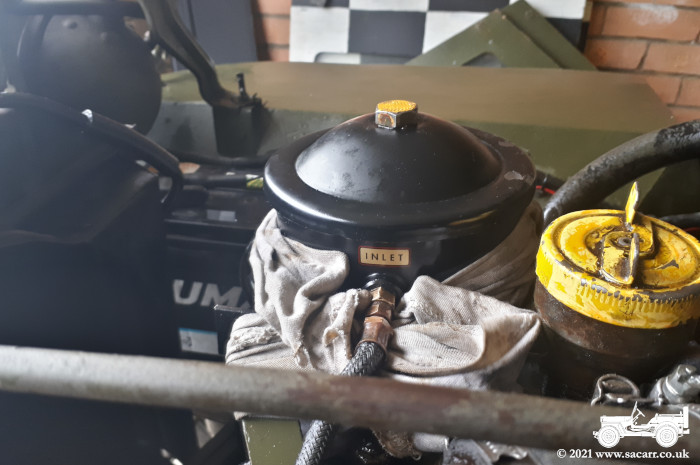
----- May 2nd/3rd - Oil and Filter change On May 2nd, I had some spare time to do a little servicing on Jessie. I'd start with the oil and filter change. I already had fresh oil and a new filter in stock, so expected it to be a fairly quick job, hopefully followed by some greasing. I was mindful of the rain forecast for the afternoon. The engine was run for a while to warm up the oil to aid its draining. |
|
|
|
|
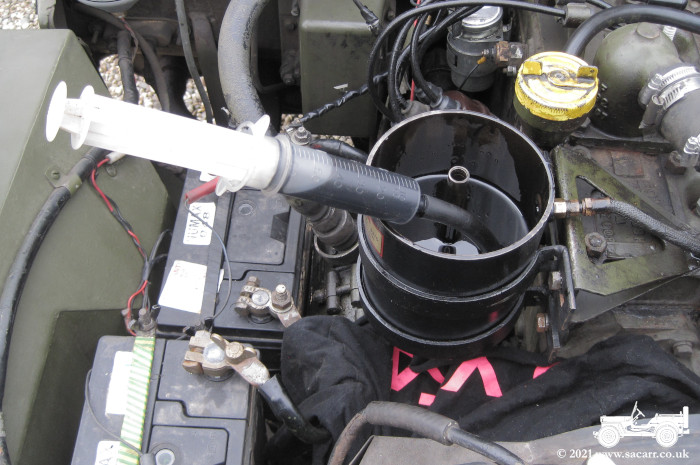
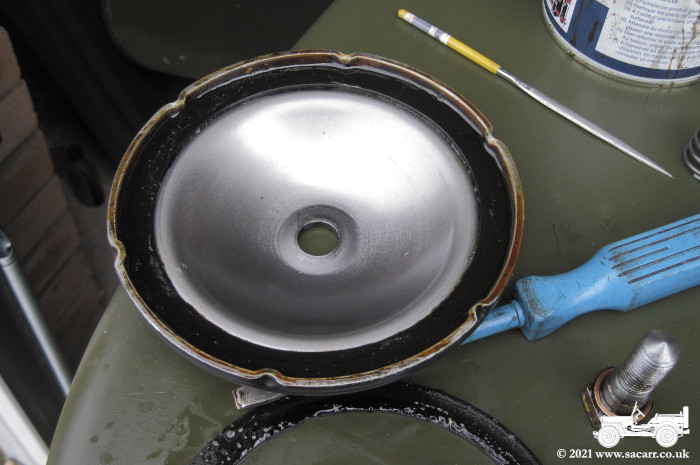
I set up a small video camera underneath, catching the point I pulled the plug and the oil started flowing. The old filter element was pulled out and I used a syringe to draw out the dirty oil from the housing. |
|
|
|
|
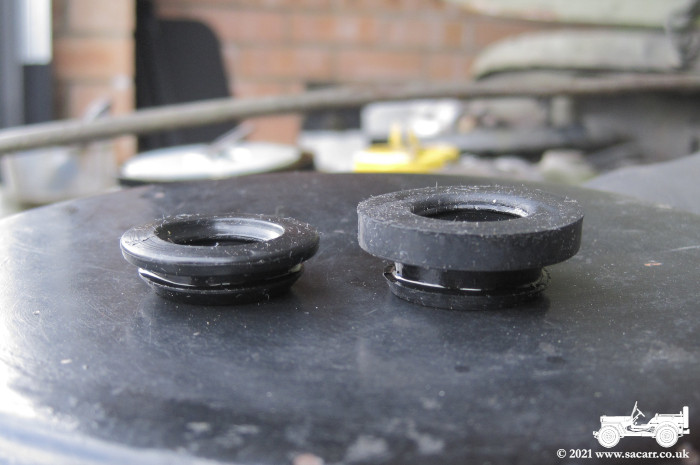
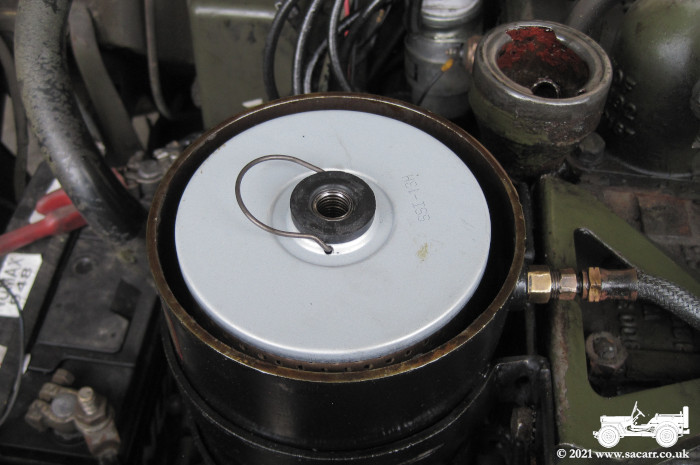
The new filter was fitted, the filter housing lid fastened down, fresh oil added and an engine test made. All looked good at idle, but as I advanced the RPM, oil started pouring out of the housing lid. By the time I got to the ignition switch to stop the engine, possibly two quarts of oil were all over the engine bay and drive. The lid obviously wasn't seated correctly. After a close look at the filter, the rubber grommet in the top and bottom were significantly thicker than the old filter that had just been removed. I wondered if the extra height was preventing the lid from fitting correctly. So I carefully pulled the grommets out of the old filter and fitted them to the new one. |
|
|
|
|
With the thinner grommets fitted, the filter was refitted, lid refitted oil topped up and I tried again. Once more at idle, all was fine, but with a few more revs, oil started squirting out from under the lid. As I've always done, I used Wellseal gasket seal to put the large rubber 'O' ring into the lid and a little around the filter housing rim. It was left to dry, put together and another engine test done on the 3rd. OK turning over on the starter and fine at idle, but it leaked again as the revs increased. The day before, I'd checked the top of the
housing for burrs and scratches and the lid seemed ok where the rubber 'O'
ring fitted. The 'O' ring itself looked thinner than the one from the old
filter. The lid had been bolted down securely, yet still leaked. On the
3rd, I took the filter right out again and poked some wire through the
small hole in the side of the central stem of the housing, just to make
sure it wasn't blocked and causing back pressure. |
|

|
|
|
With the 'O' ring Wellsealed back into the lid and left several hours to harden up, the lid was fastened back onto the filter housing. Since this 'O' ring appeared around 1mm thinner than the old one, it was more flexible. I wondered whether because of this, it was squeezing away from the rim of the filter housing as the lid was tightened on. That was one reason I left the Wellseal such a long time to cure, hoping it would prevent movement of the 'O' ring.
When I fastened down the lid this time, I did the bolt finger tight and
then only a slight turn of the spanner, again, hoping not to squeeze the
'O' ring out. The oil was topped up back to the full mark and a cloth
wrapped around the filter to catch any more leaks. The whole engine bay
needs a jetwash regardless! I'd started working outside in the morning,
but by lunch, had retreated to the garage as the Pacific Ocean descended on
Durham. |
|
|
|
|
The engine was turned over on the starter for several revolutions and all seemed well. I then fired up the engine and left it running at idle and still no sign of leaks. I then left it for the day. I'm going to leave it a day or so before I run at higher RPM to give the Wellseal further time to cure. I don't know how many times I've changed filters on the two Jeeps and the Dodge and I've done it exactly the same way every time. I've never had so many problems as on this one, so I'm hoping it was all down to the odd sized rubber seals that came with this filter. I'll be paying more attention to their sizes the next time I'm tinkering with filters. Greasing and checking the other fluid levels
will have to wait for another day. Two days on an oil change has burned me
out! |
|
|
|