| June
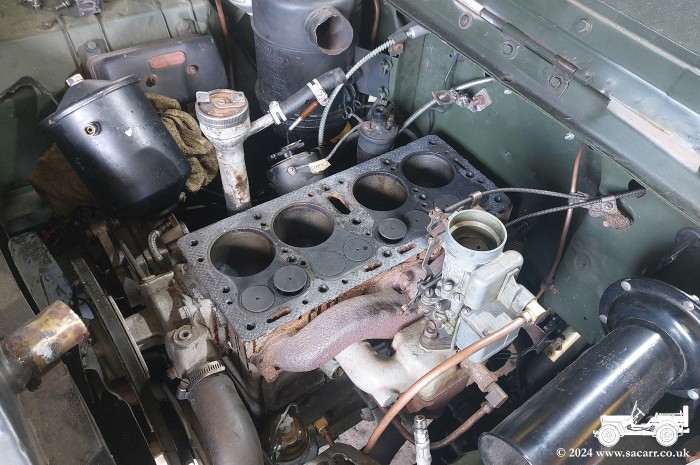
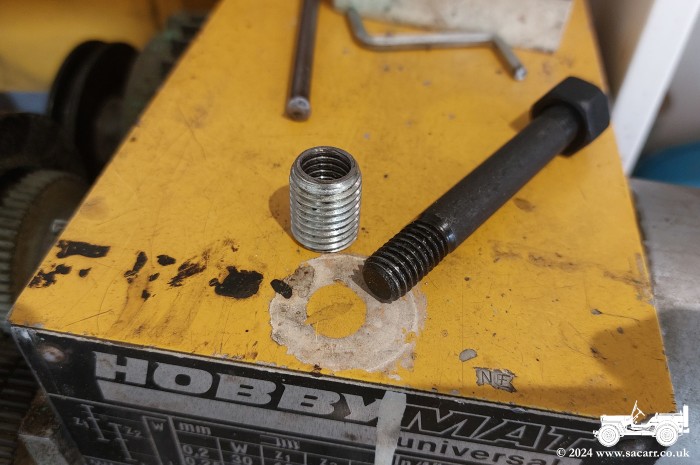
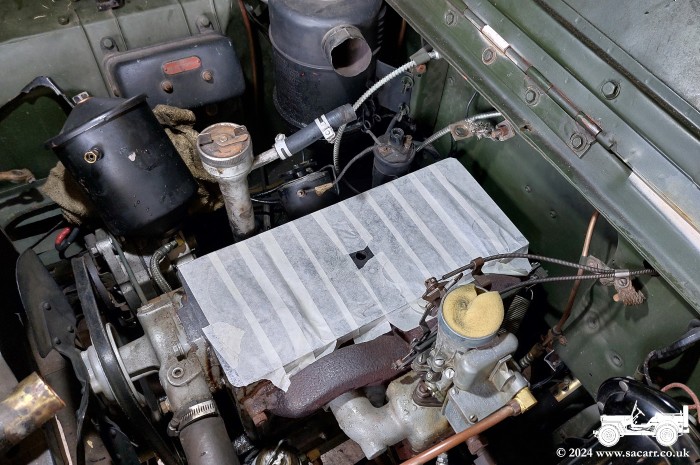
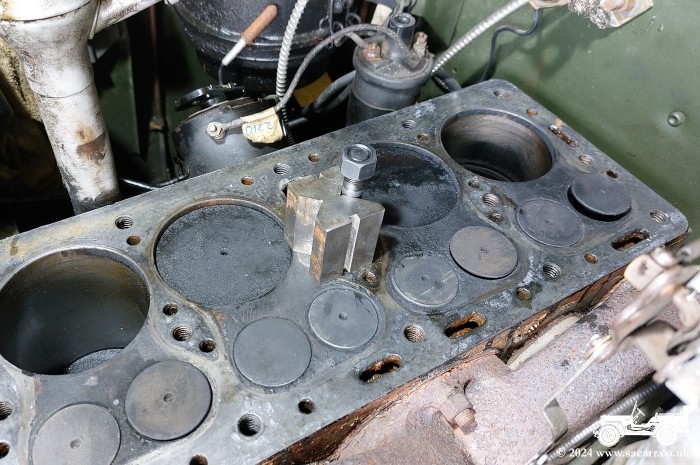
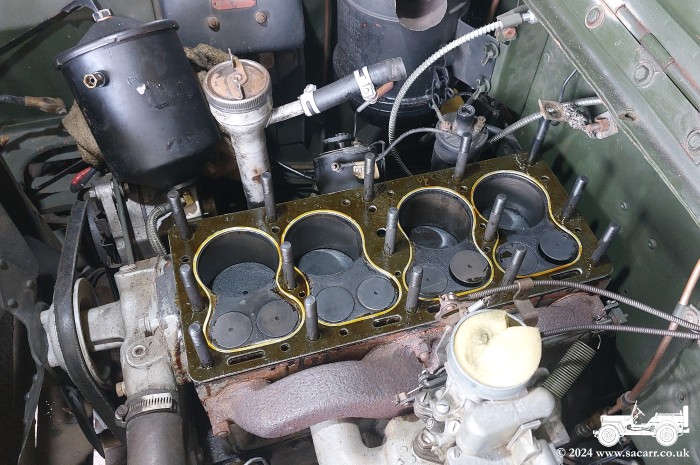
11th & 13th - Cylinder Head Removal and Insert Manufacture With garden jobs progressing well, I felt that I could give some time to the GPW. On the 11th of June, I drained the coolant a few inches, then began to remove the upper engine accessories. With those removed, I was able to remove the cylinder head. That allowed me to check the size of the stripped bolt hole. It was about 13.5mm in diameter, too big for any of the commercially available threaded inserts. June 13th Knowing the hole diameter allowed me to plan
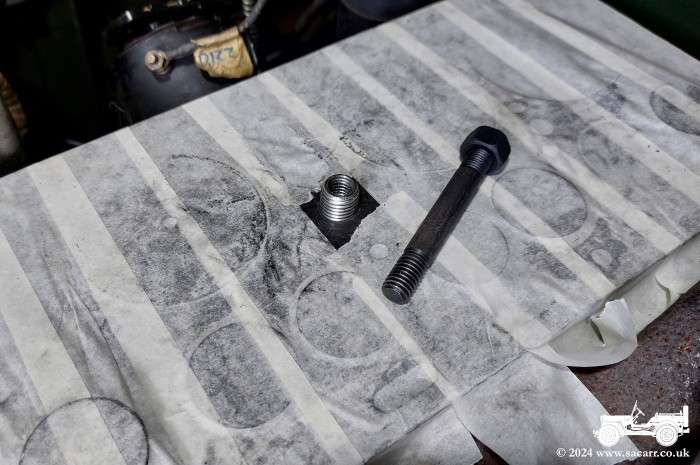
a repair. I had a 16mm bolt that I could make an insert from. To cut a
16mm thread, I needed to drill a 14mm hole, only a tiny fraction larger
than the 13.5mm diameter existing hole. Being a hardened bolt, it took
some effort to both drill a hole through it and to then cut a 7/16 UNC
thread. This thread matched the new cylinder head studs that I purchased
to replace the original bolts. |
|
|
|
|
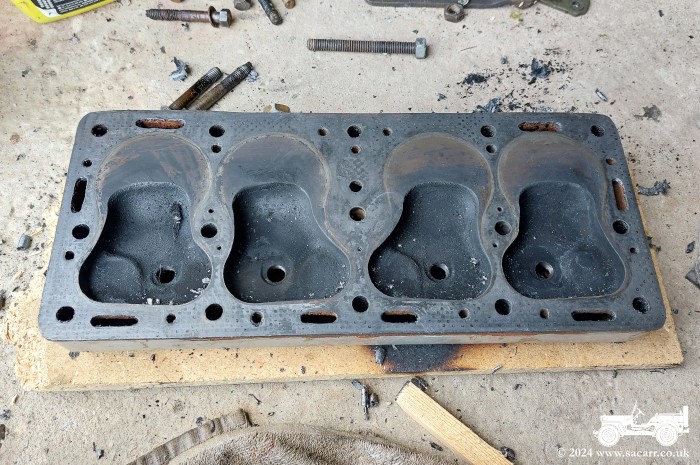
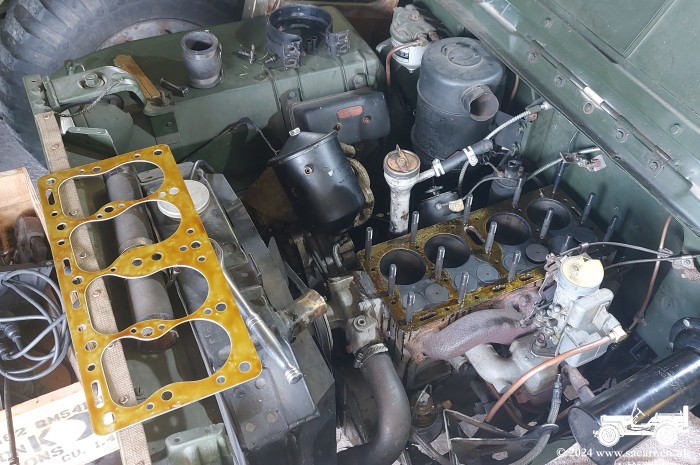
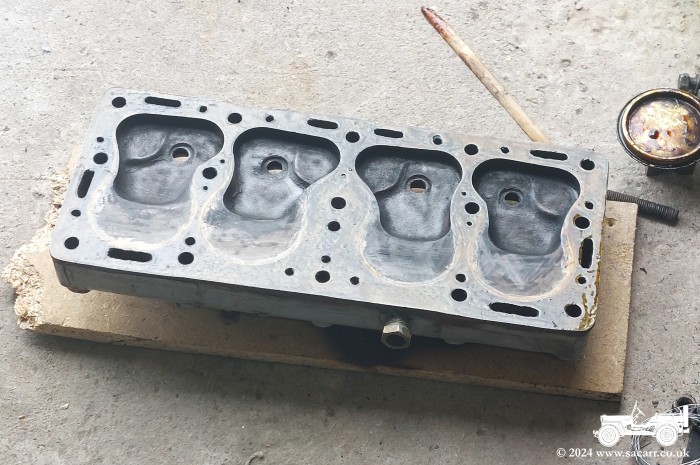
July 27th - Repair Work Begins The remains of the head gasket were removed
from the head and block to start the day. |
|
|
|
|
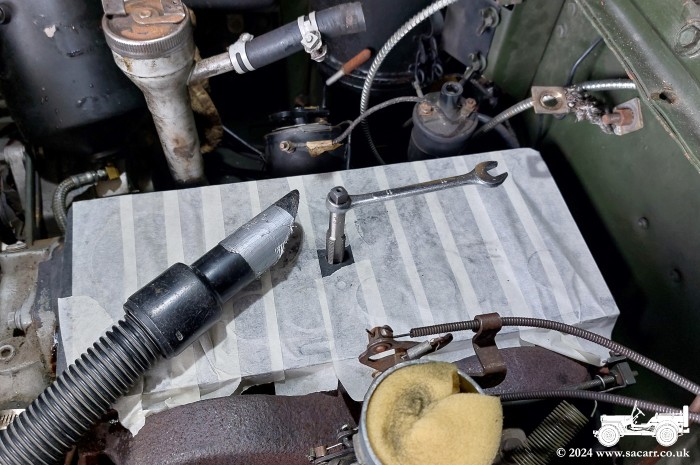
I then cleaned the top of the block with thinners, allowing me to cover it with masking tape to keep the cylinders and valves clear of debris. With a vacuum cleaner to remove metal particles, I drilled out the hole to 14mm diameter. It turned out that none of my tap wrenches were big enough for the new taps, so I had to make use of a spanner. This wasn't ideal, but I had to make do and concentrate on keeping it vertical. As the taper tap got tight, I switched to the second tap for a couple of turns, then switched back to the taper tap. I needed to do this several times as I cut further into the block. Eventually I broke through the bottom of the hole. I was very relieved it was done, as I was paranoid about snapping a tap in the hole. |
|
|
|
|
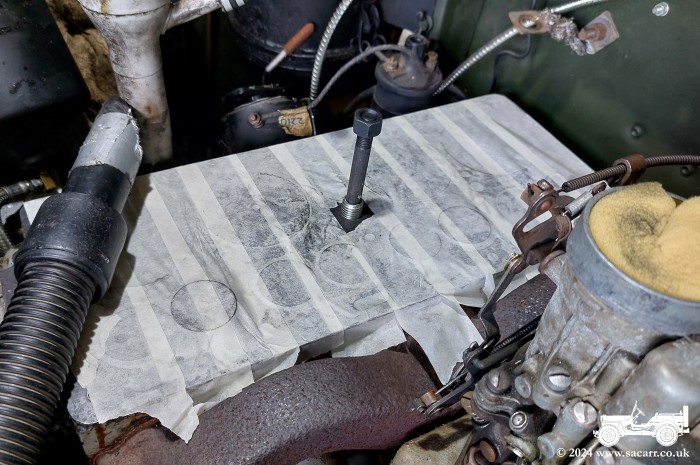
With the thread cut, I test fitted the insert. It screwed all the way in and was able to drop low enough to be flush with the top of the block. One of the new studs was used to screw it in. |
|
|
|
|
Once I was happy with the fit and had checked the stud was vertical, I added some thread lock to the insert and screwed it back into the block for the last time. I used an engineer's 'V' block to ensure the stud was vertical and to make sure it didn't move while the thread lock cured. That was where I left the job for the day. |
|
|

|
|
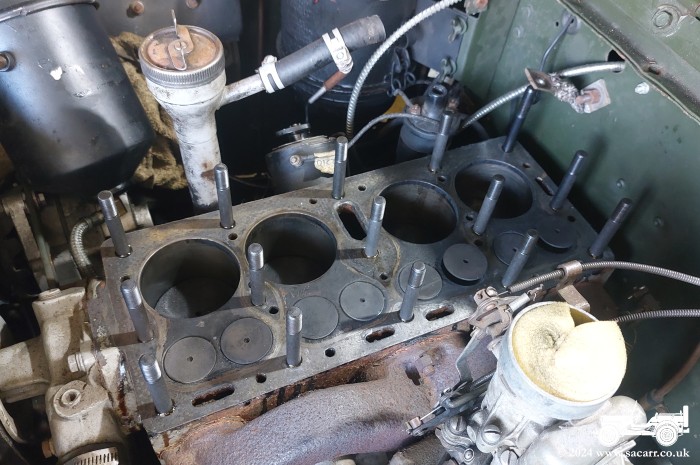
July 28th - Engine Re-assembly
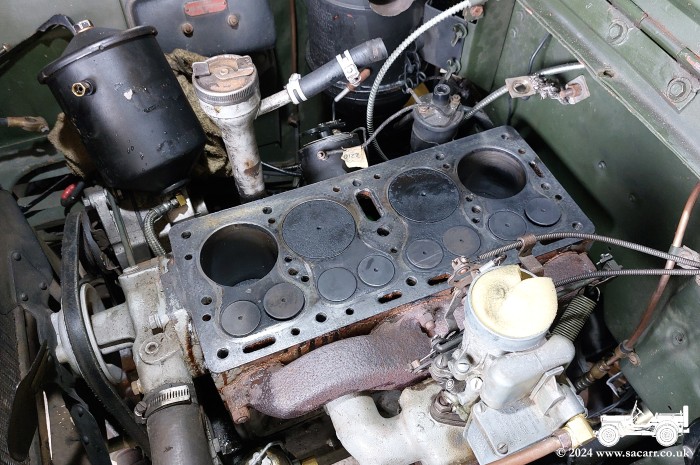
Three studs, including the centre stud, were fitted to the block and the cylinder head test fitted to check the vertical alignment of the centre stud. The head fitted ok, so was removed and all of the studs fitted. They were left a fraction of a turn loose, giving a little play in each stud, to help the cylinder head slide on.
The top of the block was coated in Wellseal, along with the bottom of the head gasket and were left to dry for 5 minutes while I had lunch. |
|
|
|
|
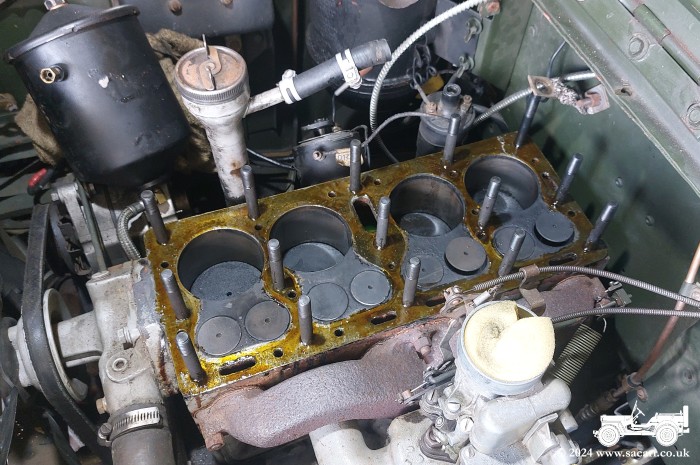
After the gasket was fitted, the top side was coated with Wellseal along with the cylinder head. They were again giving a little time to dry. |
|
|
|
|
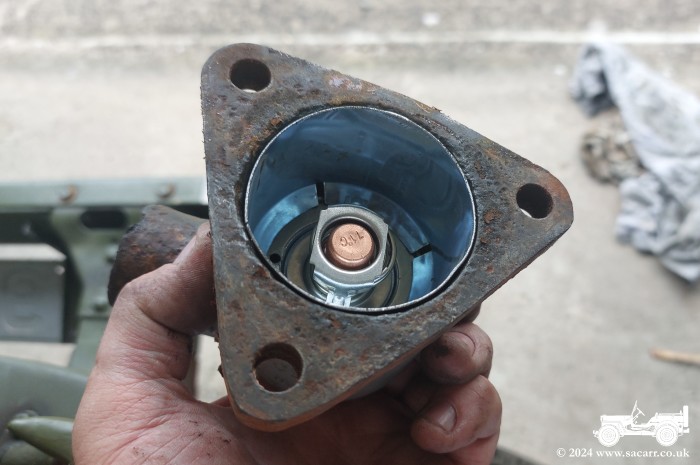
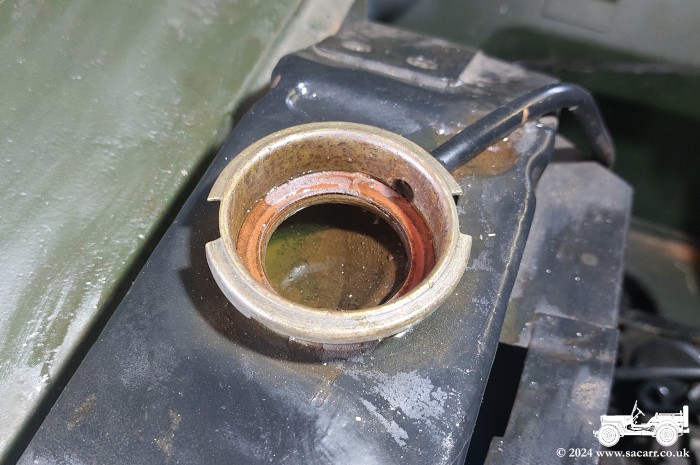
Earlier in the morning, I removed the old thermostat and retainer and cleaned up the inside of the housing. I'd bought a new thermostat and retainer and after testing it in a glass of hot water, I drilled a 1/8 inch bleed hole in it as recommended on many forums. This allows coolant flow if it gets stuck. |
|
|
|
|
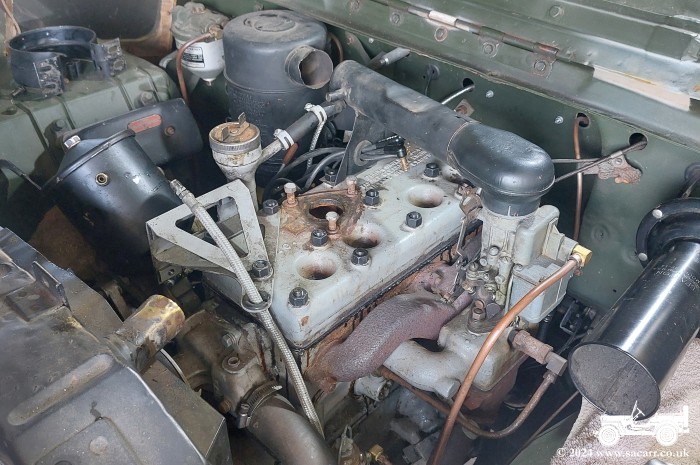
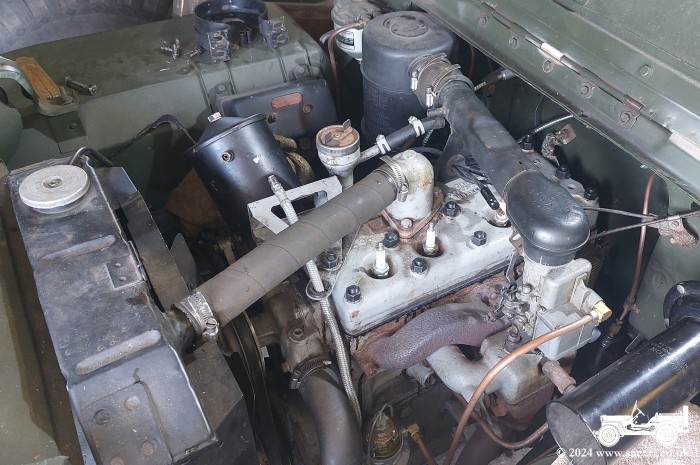
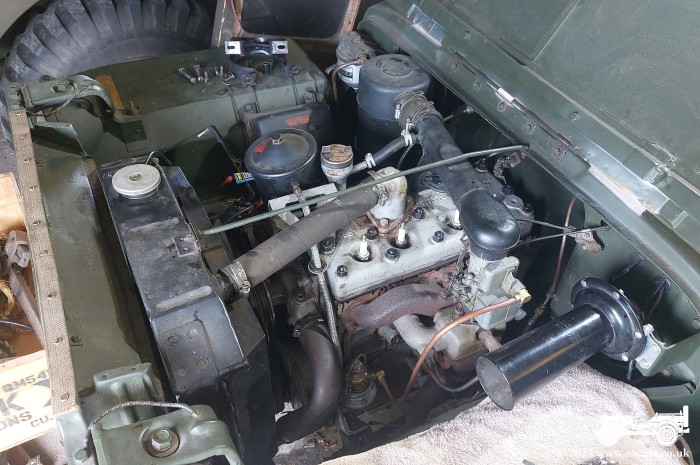
The head was dropped onto the studs, but was a little tight in places, so was tapped down with a wooden tent peg mallet. The oil filter bracket was placed back on the studs, along with the carb crossover tube and fifteen of the sixteen nuts fitted finger tight. They were nipped up with a socket and ratchet, then I started ramping up the torque wrench, building up to the recommended stud torque, which is less than the original bolts. The sixteenth nut is a second nut on the long rear stud, holding the earthing strap in place. I won't fit that until the engine has been run a few times and the head torqued down again.
The thermostat housing was fitted next, along with the radiator hose. The rubber air filter hose was clamped in place and then the small tube linking the crossover tube to the oil filler neck. While tightening the clamp with a screwdriver, that's where it all went wrong, with a finger/jubilee clip interface
anomaly. |
|
|
|
|
After 10 minutes dealing with the leaking red stuff, I went back to the garage to do a few more small jobs. The coolant was refilled and the radiator bracing rod fitted. I didn't want to fill the hole in my finger with dirt, oil and other rubbish, so decided to call it a day. So still to do are refit the oil filter bracket and filter. Fit the dizzy cap, plugs and leads, fit the battery and that's it all back together. I'm waiting for some new engine oil arriving in the post, then I can drop the oil ( which possibly has some water contamination ) and change the oil filter. I'll then be ready for the first run. So hopefully, within a week to ten days, I can go for the first test drive and finish torquing down the cylinder head. |
|
|
|
|
July 30th The postman brought the new engine oil around lunchtime on the 30th. After he's been, I went out to the garage to fit the oil filter can, change the oil filter and change the engine oil. The battery was then refitted and I was then ready for an engine start. A video of that can be seen below, along with a few pictures of the repair. After the first run, I had a slight weeping of coolant around the centre stud, as this was the one with the larger hole through the cylinder head. I dipped some cotton string in some Wellseal gasket sealant and wound it around the stud, poking it down between the stud and cylinder head hole. After several turns around the stud, I added a thick aluminium washer on top, then fitted the nut again. A second run later in the day showed the leak seemed to have been stopped. I plan another run on the drive tomorrow,
followed by a cool down and re-torque, then will probably go for a short
drive tomorrow evening. |
|

|
|