|
Ongoing Work September 2025 Sept
1st - Sept 2nd - Sept 3rd - Sept
7~9th - Sept 10th - Sept 11th -
Sept 12th - Sept 19th - Sept
21st - Sept 23rd - Sept 24th - Sept
25th - Sept 26th - Sept 27th - Sept
28th |
|
|
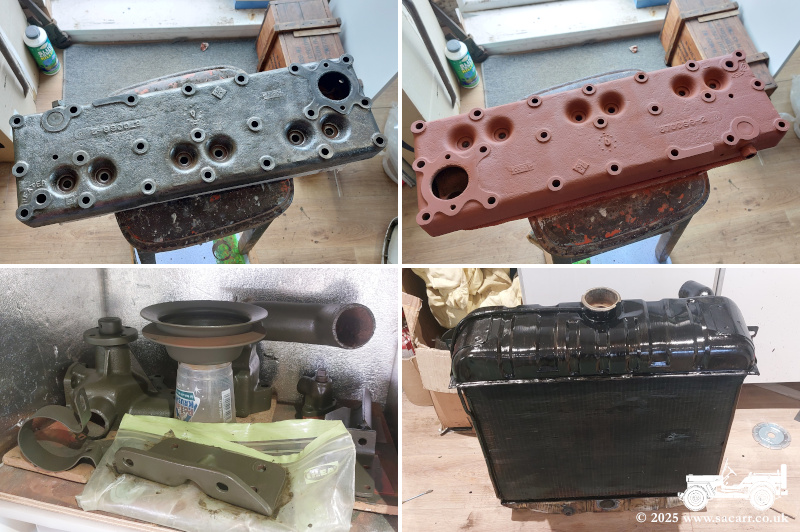
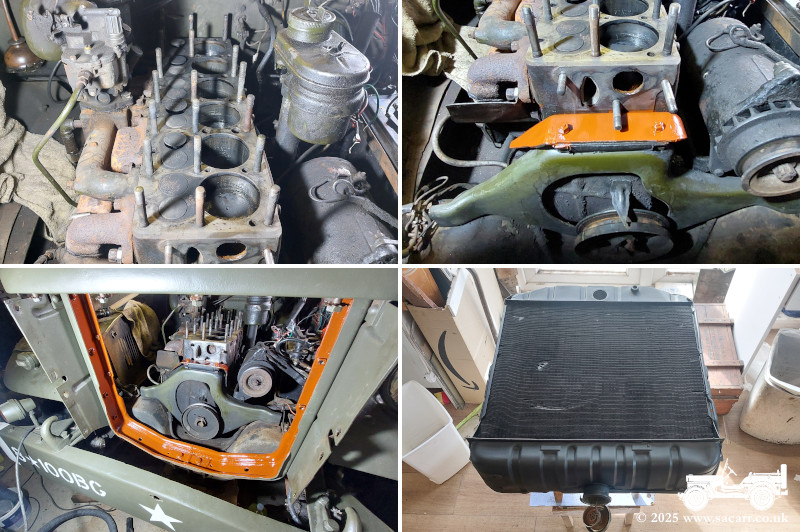
September 1st - Engine Accessories Clean Up After the Ryhope show on the 24th of August, we were away from home for a few days. While away, I got a phone call to say the cylinder head machining was done, so on September the 1st, I went to collect it. After I got back, I started to clean up the various parts of the engine that had been removed. The fan was first, as it had various patches of surface rust. Nothing major, but I decided to strip to to bare metal. The water pump pulley and various brackets were next, some of which were stripped while some were just wet sanded. The last parts for the day were the water
pump and thermostat housing, which were both stripped to metal. Next will be
the radiator and fan shroud.
|
 |
|
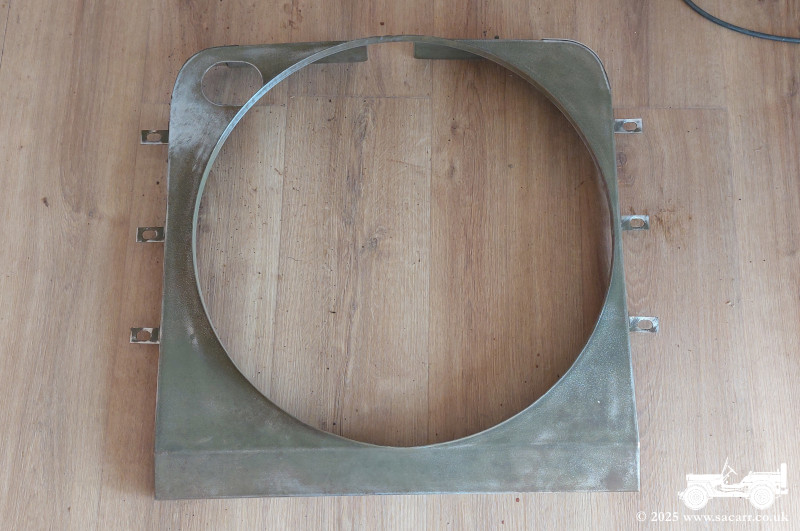
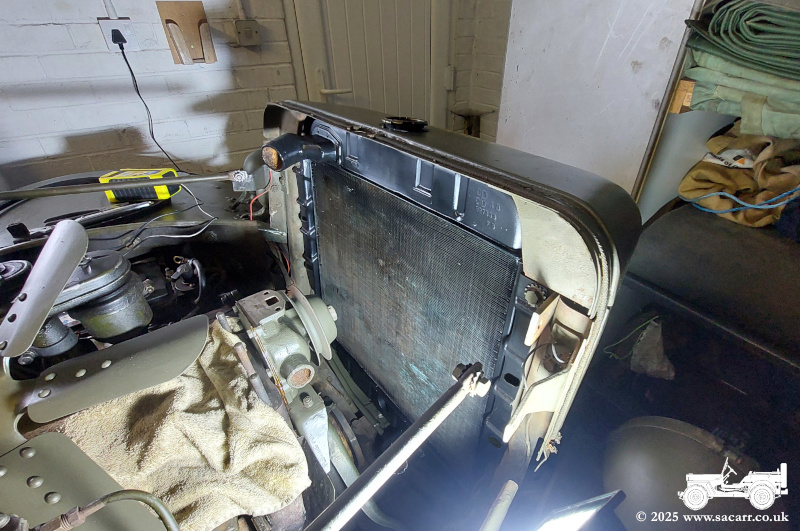
All of the 2nd was spent degreasing and
sanding the fan shroud and radiator. The shroud is done but there's still a few
small difficult areas on the radiator that needs some attention before
painting. I think that's all the accessories inside the workshop ready for
priming, but there may still be a few small parts in the garage.
|
|
|
 |
|
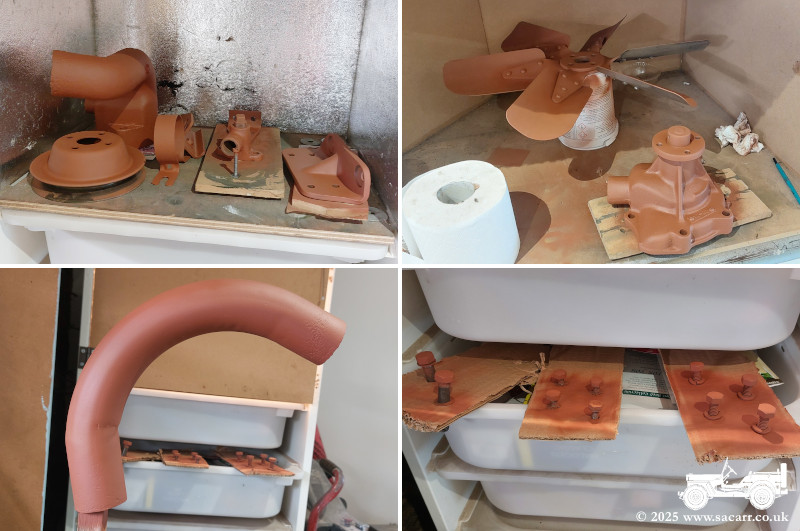
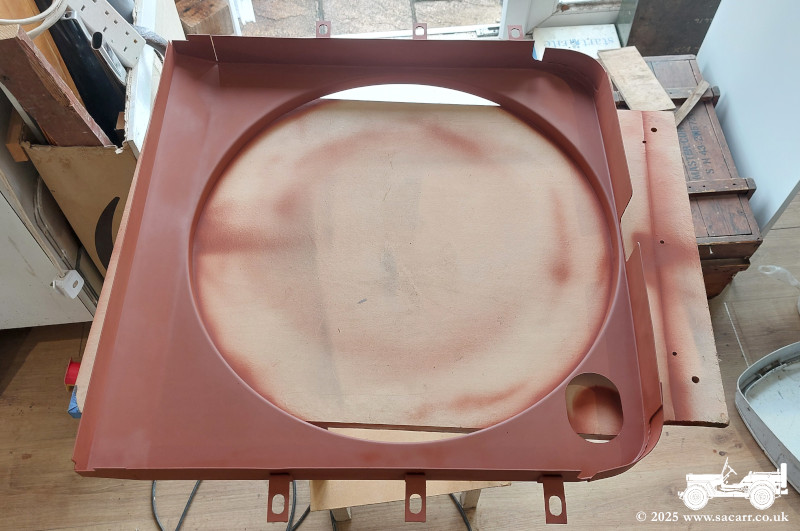
All of the small parts were given a coat of
red oxide primer today. I haven't done any more to the radiator and the
cylinder head could do with the upper surface cleaning and painting.
|
|
|
 |
|
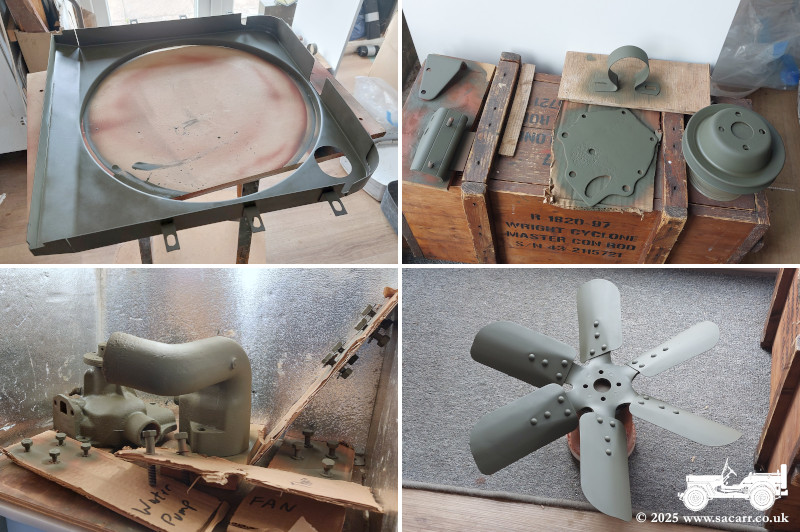
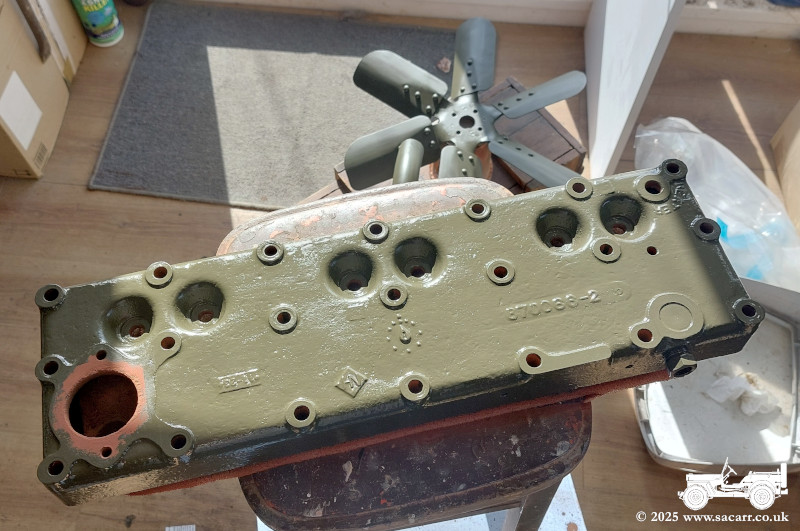
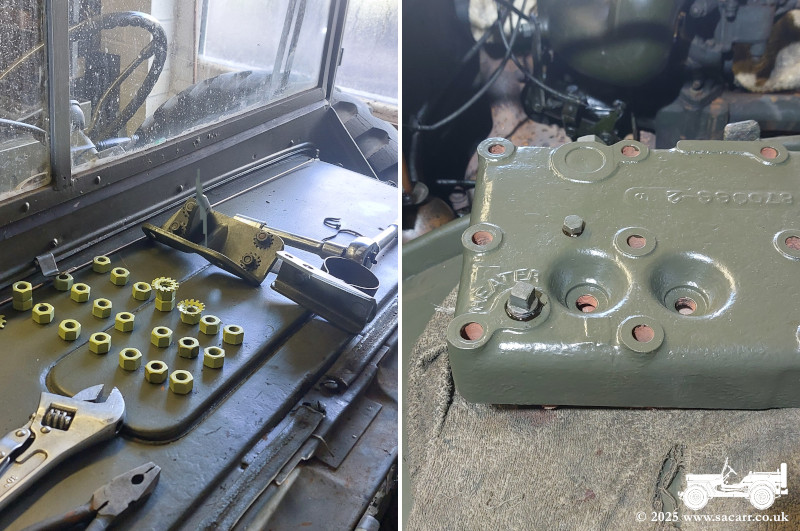
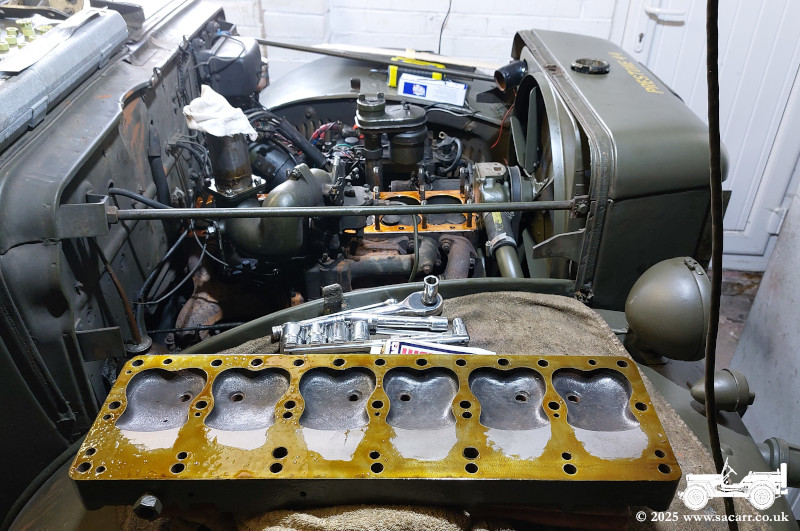
September 7th~9th - Accessory Painting Across the 7th to 9th of September, I got two coats of olive drab on both sides of all the parts, plus all the hardware. On the 8th, the cylinder head was stripped to bare metal, before priming and the first coat of olive drab applied. The next day, I got the second coat of olive drab applied. The radiator was also given a first coat of smooth black Hammerite on the top tank and late in the day, it was turned over to paint the bottom tank. This was just an undercoat before the final sprayed satin black. |
 |
|
 |
|
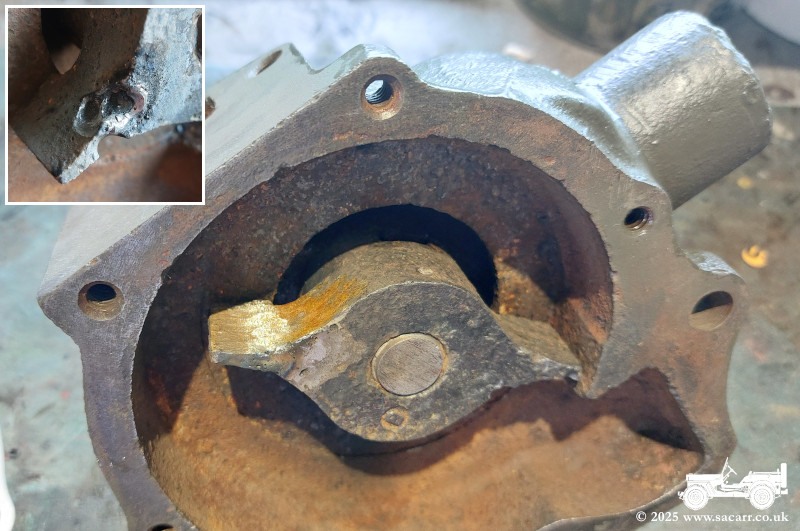
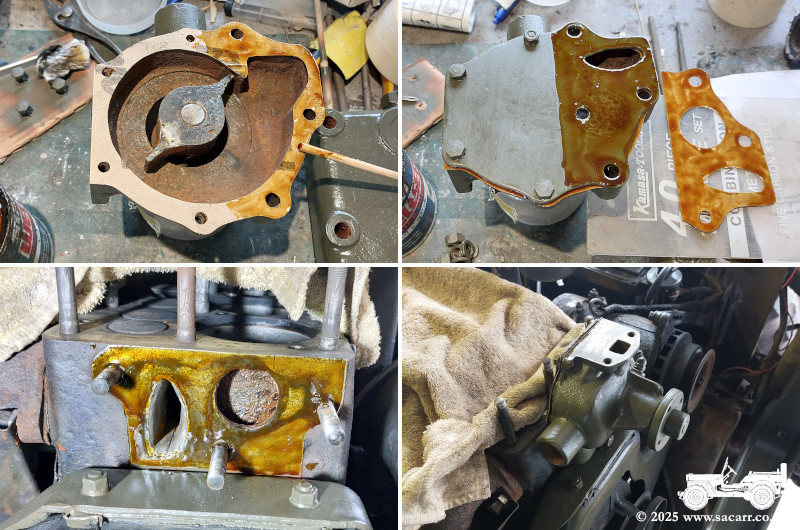
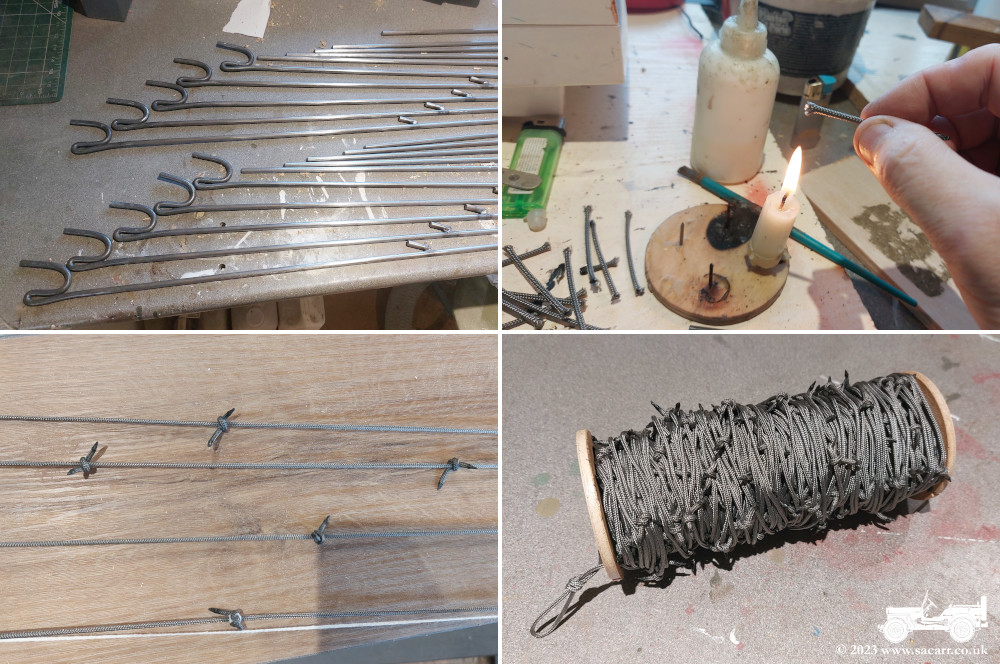
The water pump rotor had some severe
pitting on one blade, shown in the inset image after I'd already started to
weld it up. It took several applications of weld and grinding to fill the holes
and get it smooth again. After that, a search in the household recycling bag
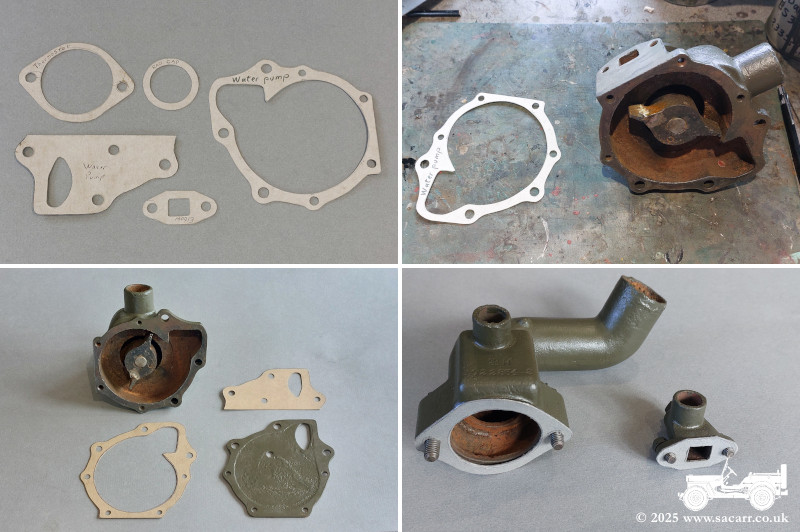
got me some pizza box cardboard, to make some templates for the various gaskets
I needed. I'd bought some large sheets of gasket paper and thicker, steel
reinforced gasket material, to make my own gaskets, having not found any listed
on line. I'm often needing gaskets during my vehicle maintenance, so it's never
going to come in wrong. There were five to make, two paper ones for the water
pump, two thicker ones for the thermostat housing and bypass elbow and a thick
one for in the top of the radiator cap.
|
|
|
 |
|
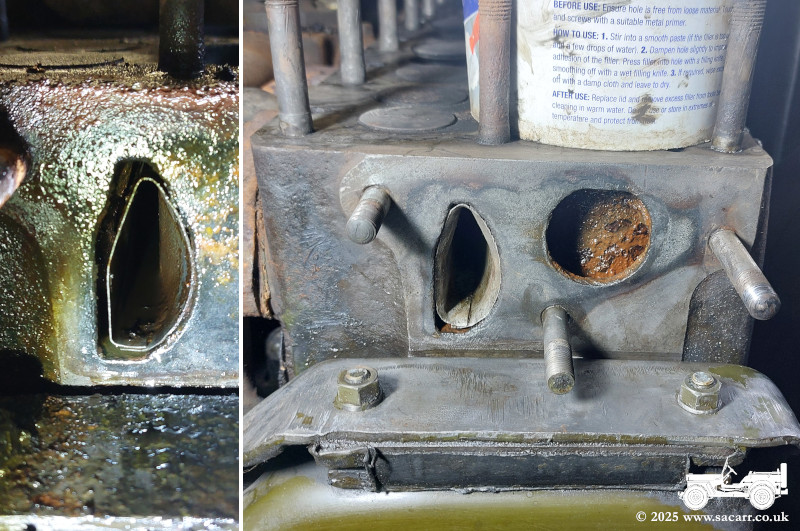
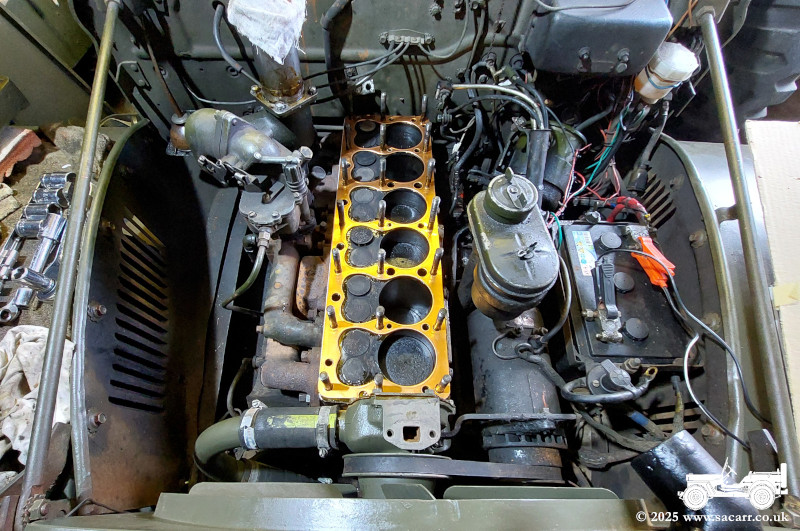
On the 11th, I was back out in the garage, starting with the water transfer tube. With a small hammer, I peened out the end of the tube, to make it a tight fit into the block and unable to fall inside the engine as shown in the inset image. I may yet coat the outside of the peened part of the tube with some JB Weld epoxy, to fully seal the hole in the block and guarantee it can't move. When that was done, I cleaned up the water pump mating face and removed all the oil and grease from the mount just below it. The water pump studs also had their threads cleaned up with a die. The top of the engine block was cleaned
next, along with a little corrosion on the smooth parts of the studs. Those
threads were also cleaned with a die, but weren't actually too bad, as I was
able to screw the die onto the threads with just my fingers. The engine mount
just below the water pump was stripped and primed and the frame around the
outside of the radiator was cleaned, sanded and primed. The last job of the day
was to spray a satin black on the radiator tanks and front face. |
|
|
 |
|
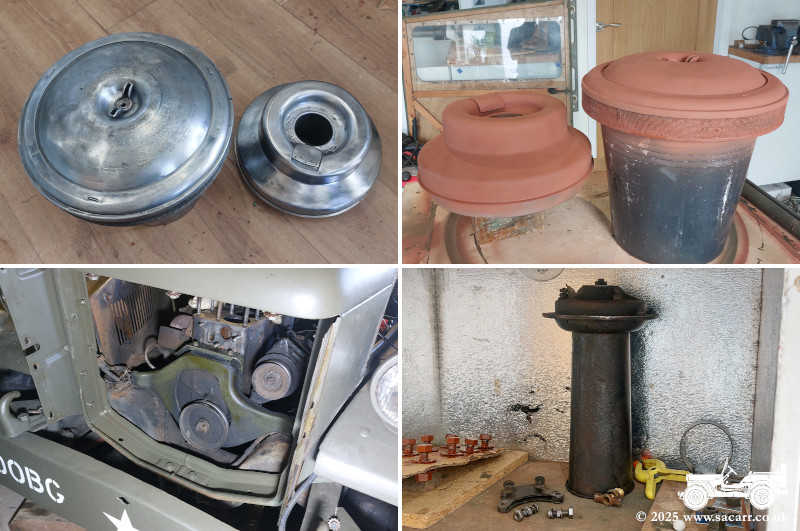
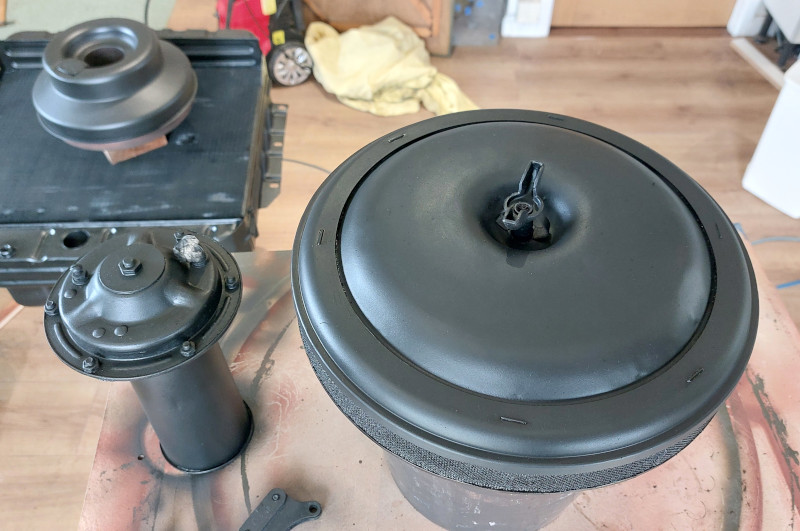
September 12th - Engine Bay & Accessories Painting The engine and radiator mount were given a coat of olive drab first thing this morning, as I needed to head out mid morning. When I got back, I decided the air filter and horn might as well be repainted while everything else was in bits. It took some time to degrease the horn and particularly the oil bath air filter. Once the oil, grease and road dirt were cleaned off, the horn was wet sanded, while the air filter was stripped to bare metal with a rotary wire brush. Once dry, both parts of the air filter were primed and I also cleaned up and primed the metalwork on the Norwegian radiator blind bracket. |
 |
|
September 14th/19th - Painting & Re-assembly On the 14th, the horn and air filter got their final black satin coats of paint. The transfer tube was also painted in black Hammerite ( inset on block image ). I started the 19th by installing the transfer tube with a seal of JB Weld epoxy. Next, I applied Wellseal to the back of the waterpump and its gasket. After that cured a while, the gasket and backplate were coated in Welseal, then the backplate fitted. The backplate and second gasket were coated in Wellseal and that gasket fitted and finally the gasket and engine block were coated and the pump fitted. A few other bits of radiator and fender hardware were also cleaned and primed. |
 |

|
 |
|
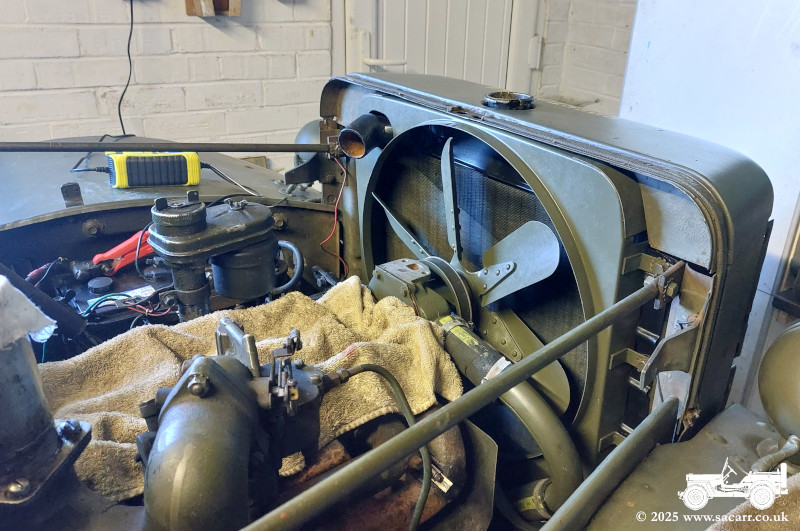
September 21st - Re-assembly On the 21st, I began carrying parts back out to the garage. The radiator was first, lifted into the cowl and bolted into the large 'U' channel that supports it. I needed to remove a little paint from the stub on the water pump where the pulley fits, as initially it was too tight for the pulley or the fan. With the radiator in, the two rubber hoses and the curved water pipe were attached, to the pump and bottom radiator outlet. It was easier to get in without the fan. The water pump pulley, belt and fan were next to be fitted and bolted up. With those on, the generator was bolted up to tension the belt. The longest job was then to get all the
bolts back in on the radiator cowl and fenders. These bolt through the fenders
and fender brackets, through the cowl and into the 'U' channel. All the right
side fender bolts had also been removed, so everything needed aligning and the
bolts fitting by a few threads until all the bolts had their threads started.
Once all the bolts were in and the two top radiator support bars connected,
they were all tightened up. |
|
|
 |
|
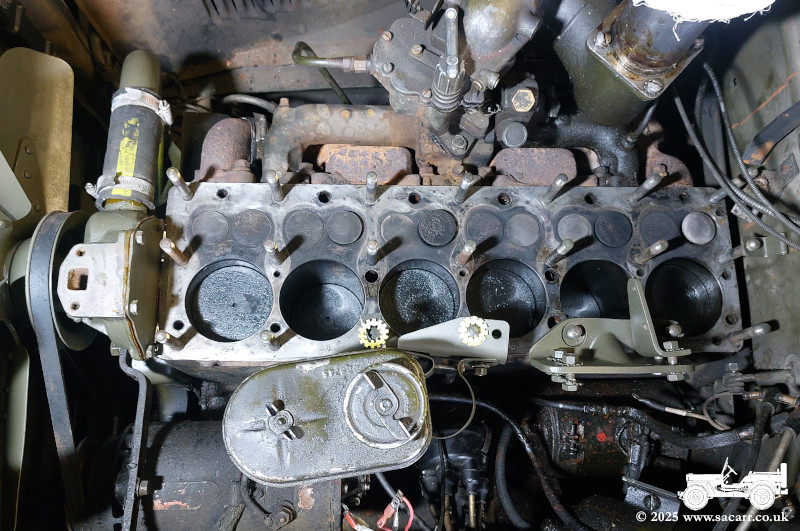
The next job was to round up all the various brackets, nuts and washers for the cylinder head. There are a number of brackets trapped under the cylinder head nuts. These include the oil fill tube, coil and HT lead bracket, oil filter and horn bracket and a small cable clip at the back of the block. It was getting late in the afternoon, so decided not to start fitting the head today. Instead, I just fitted the two blanking plugs in the head and left it at that for the day. |
|
|
 |
|
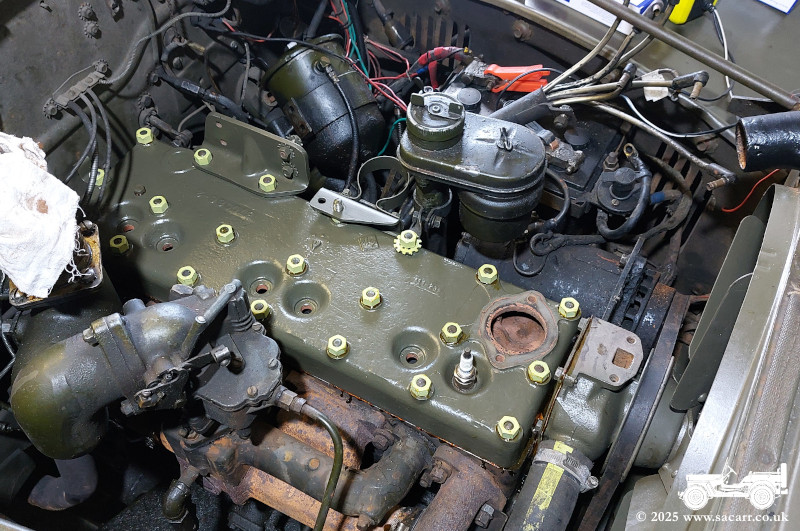
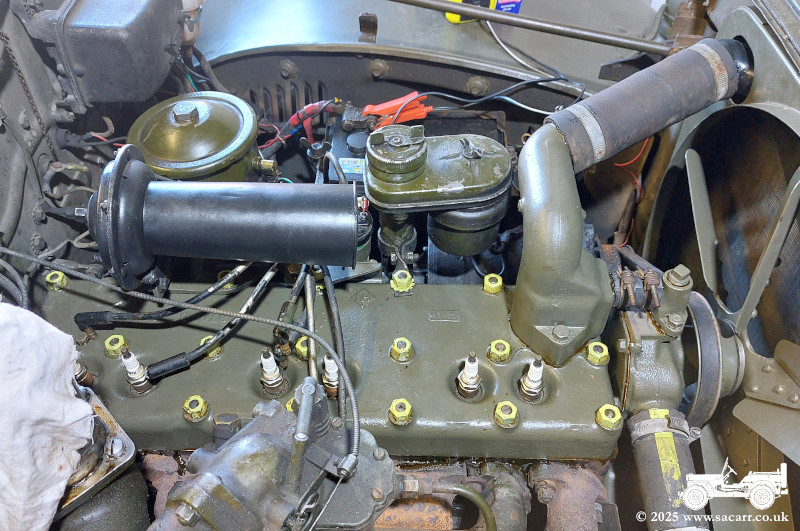
September 23rd - Cylinder Head Fitting Today, the cylinder head was refitted and bolted down, along with a number of brackets under the head bolts that support the oil filter, horn, coil and oil fill tube. With the head fitted, the thermostat housing was fitted. I've left the thermostat out for now, as it's one less point of potential overheating causes. I did test it back in June and it was opening and closing okay, but it's just easier to leave it off and rule that out as an issue. |
|
 |
 |
|
The oil filter, horn and coil were fitted and all the connections made. The thermostat bypass housing was fitted and the choke cable was the last thing for today. Just a few more small odds and ends to do before the first run. So right now, it can be considered as "Schrodinger's Engine", both working and broken at the same time and it's not until I press the starter button that I'll find out! Once I've done some engine tests and hopefully everything is fine, I can then fit the hood, grille and headlight guards and it will all be back together. |
|
 |
 |
|
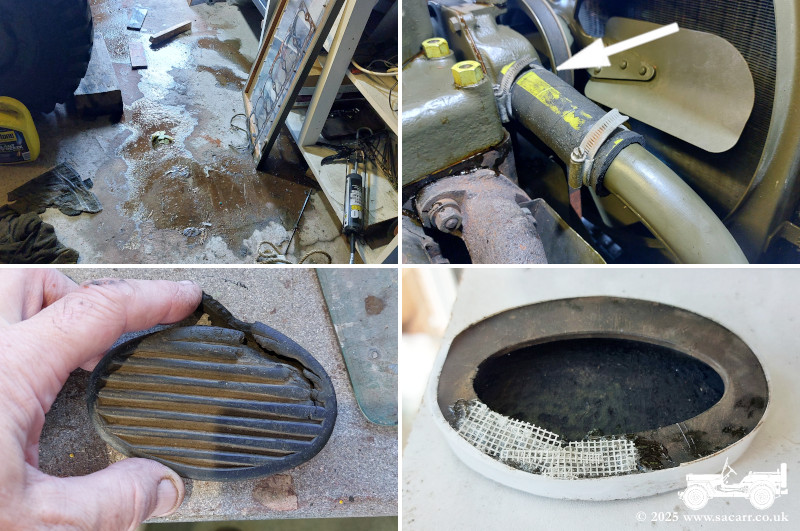
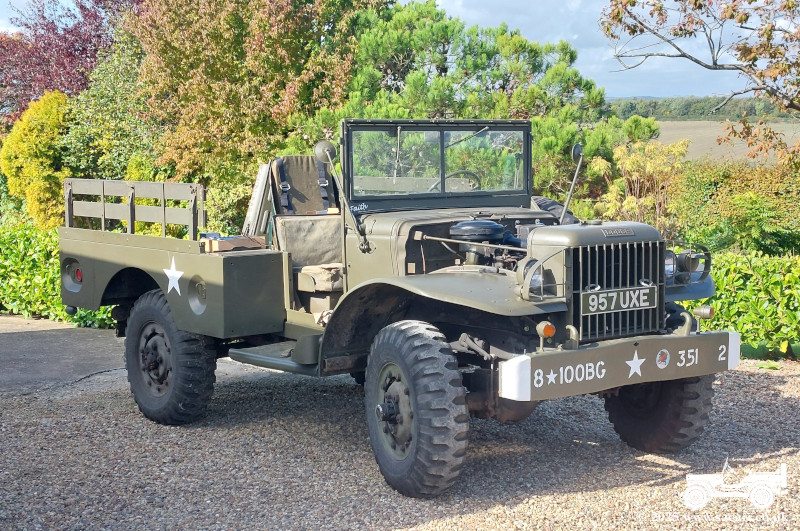
September 24th - First Start I opened 'the box' and Schrodinger's engine is alive! After putting it back in the garage again, I went for lunch. I had a minor heart attack after lunch, when I went back to the garage to find water all over the floor! After a moment to recover, I found the rubber hose to the water pump had come loose. It was under a little tension from the curved feed pipe and having used some Wellseal gasket seal on the pipe, the heat had softened it, allowing the tension to ease the pipe loose enough to weep a steady stream out of the pump. The wellseal was cleaned off, the pipe refitted and the engine run again briefly with no leaks an hour later. Not connected to the engine work, I also
tried a repair on the clutch pedal rubber pad. This fell off in June, due to a
large split. I found some flexible rubber glue in the workshop, and squeezed it
into the splits, wrapping some electrician's tape around the outside to hold it
all together. I also found some plastic mesh, which was chopped up and glued
over the split on the inside and back of the pad. I don't know whether the
rubber pad is wartime or a Norwegian addition. |
|
 |
 |
|
September 25th - Second Start and Grille Reassembly |
|
|
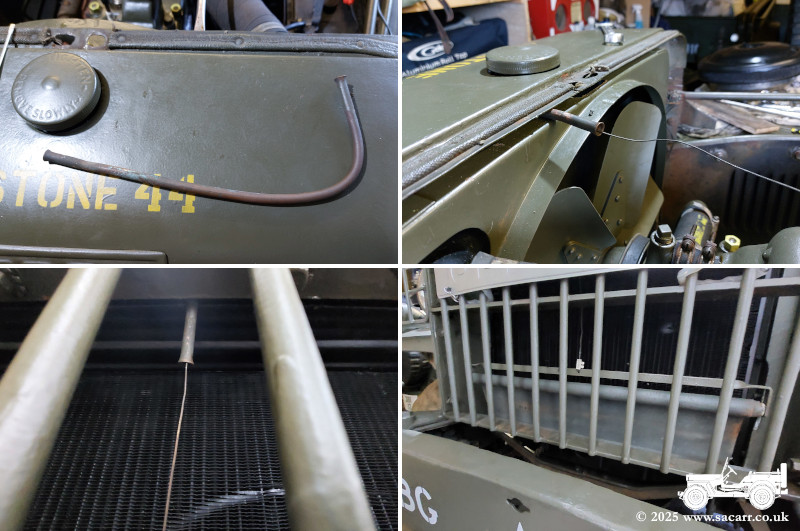
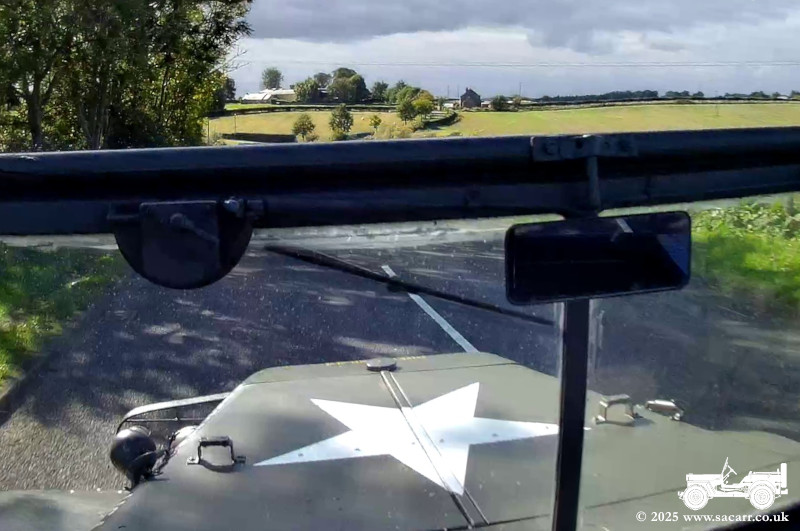
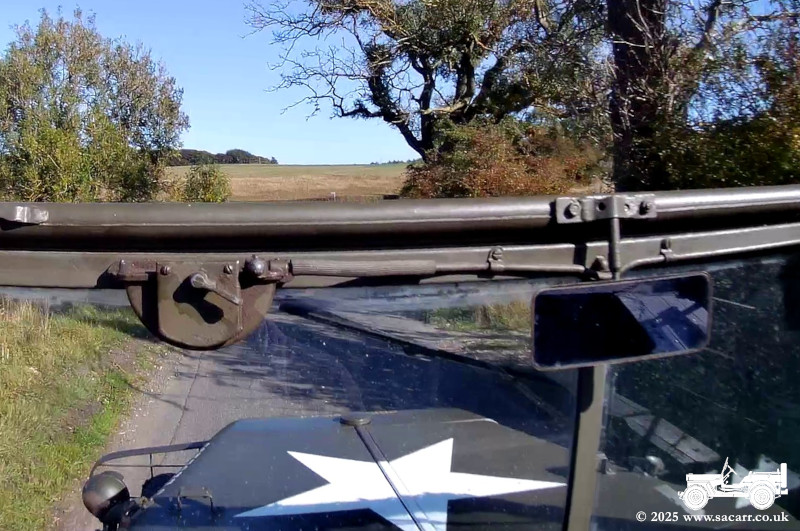
When I was dismantling the Dodge, this piece
of fuel pipe fell out onto the floor. I didn't know where it was from. Today, I
worked it out while re-assembling the Grille and light guards. Two of the
grille bolts also hold the Norwegian radiator blind bracket in place.
This blind is pulled up over the radiator via a small chain and steel wire inside the driver's compartment. This wire goes over the top of the radiator and curves down to the blind. The fuel pipe allows the wire to pull over the radiator without cutting into it. With the radiator already fitted, could I still fit the pipe? Fortunately I was able to prise the radiator cowl up enough to get the pipe in. After that, the cylinder head was torqued up again and the engine given another 15 minute run. The clutch pedal pad was also refitted. |
 |
|
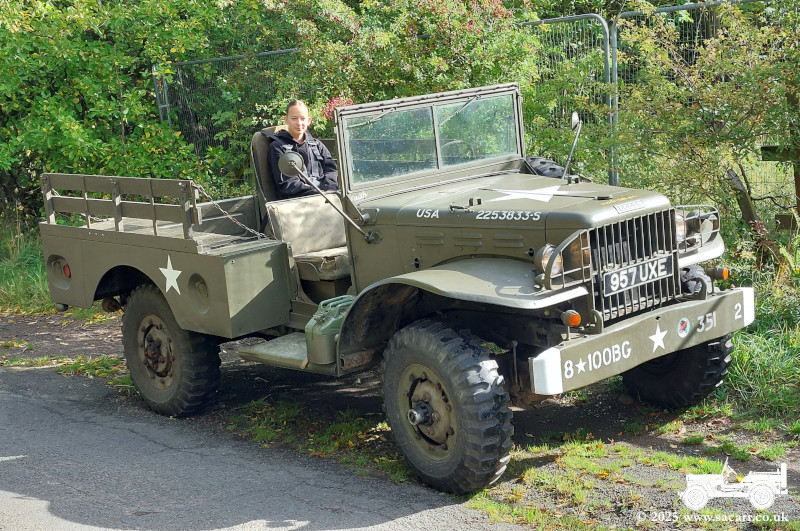
September 26th - Final Assembly & Test Drive |
|
|
Things didn't quite go to plan. I got the hood refitted to the dodge
with Lynne's help, as it is quite a heavy, awkward and flappy device when
removed from the vehicle. Once that was fitted, I got the Dodge warmed up
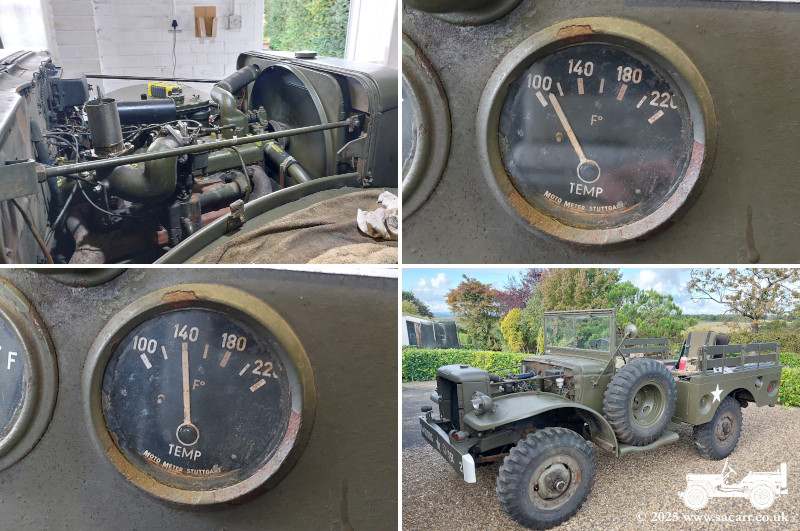
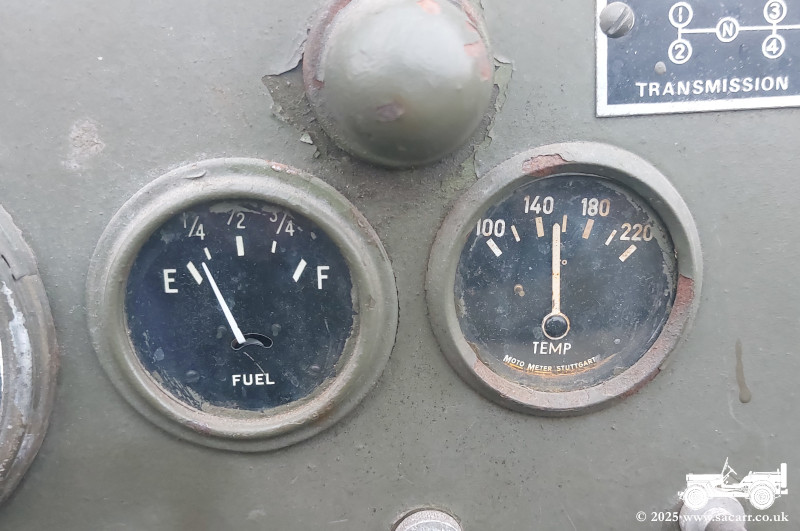
outside the garage and then and went for a test drive. Unfortunately, it was still getting too hot after only seven miles. The gauge was
around 182F, which is the top end of the normal range, but I'd only expect that on a Summer's day on a long run, not from seven miles in the Autumn.
During
testing on the drive, both the inlet and outlet pipes of the radiator were hot to touch, the outlet being noticeably cooler and I was able to hold it, unlike the hot
inlet. So the radiator was cooling the coolant and it was circulating, but not
cooling well enough under load. From the start, I had my doubts about the radiator being the
sole issue, as back in May, the Dodge was perfectly happy for 28 of the 30 mile trip to Blyth Battery. The temperature only started to rise in those last two miles.
|
|
|
 |
|
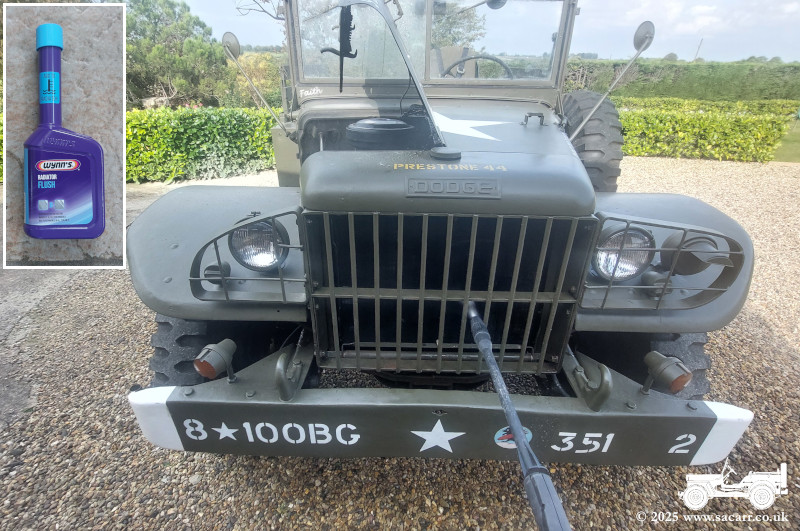
My reasoning is that if the radiator was blocked, it would have been running hot, or hotter than normal for the previous 28 miles and for the earlier trips in the year. The sudden rise late in the trip pointed to some kind of sudden failure. While the Dodge was in bits, I gave the radiator a blast through with the garden hose, from every different hole and while the water was a bit rusty coloured coming out, it appeared to be flowing out freely. So following the test drive, I suspected that the core of the radiator
might be furred up through all the cooling tubes, restricting their effectiveness at cooling, while not actually preventing a good flow.
My next step was to give the radiator a flush treatment, which was always the plan once I got the engine running
again anyway. I was out on Friday evening and passing a Halfords, so picked up
some Wynn's Radiator Flush. |
|
|
 |
|
September 27th - Flush, Second Start and Test Drive |
|
|
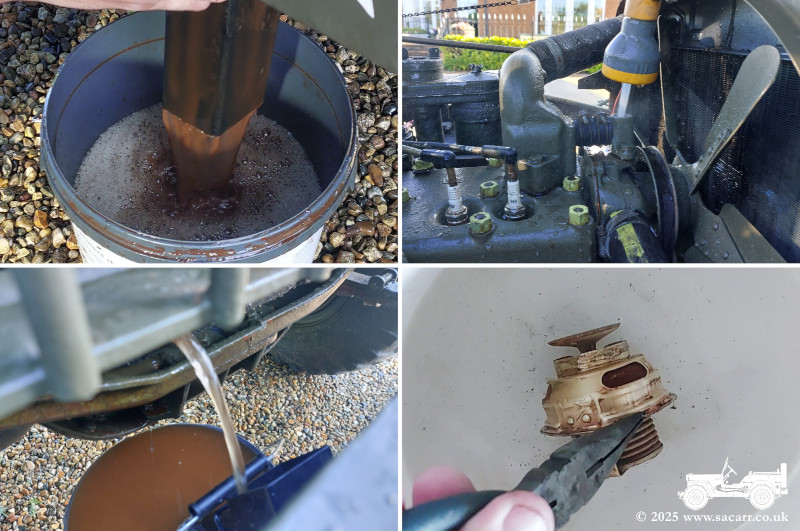
This morning I drained the original coolant and put two bottles
of flush in the radiator, which was then topped up with water. It was run on the drive up to 140F, then given another 15 minutes at a fast idle.
While the flush was going around, I decided some agitation would probably help. So I got a block of wood that would fit between the bars of the grille and pushed it against the radiator core. On the other end of the wood, I lightly held my orbital palm sander to vibrate the wood.
The vibrations from the sander were transferred through the wood into the radiator and the wood slowly moved around to different locations. I hoped these vibrations, along with the water flow, would help to dislodge any crud. When that was done, I also got the jet-wash out and sprayed the entire frontal area of the radiator, to make sure there was a clear passage for cooling air. There was a noticeable drop from 140F to 120F, due to the spraying water passing through. I hoped that this was a good sign that heat was being drawn out of the coolant/flush and that the tubes were getting cleaner. The Dodge was put away to cool down, as I had to go out late afternoon. |
|
|
 |
|
When I got back, I got the Dodge out again and decided that a few miles drive at high rpm, would increase the flow rate and help to clean all the passages. This trip was a little over five miles and the temperature didn't rise much over 162F. It was even noted to drop to around 150~155F at some points of the journey. Previously, it has only ever got hotter. When I got back onto the drive, before getting out to open the garage door, one last check showed the temperature at 150F, dropping to 142F when idling in the garage before switch off. Once cool tomorrow, the flush needs draining and the system rinsing. Depending on what it looks like after the rinse, I might repeat the flush with the last bottle, before draining again and adding the coolant. I think I may have finally fixed it. |
|
|
 |
|
September 28th - Flush, Rinse Repeat and another Test Drive |
|
|
This morning I got the dirty flush drained and the engine and radiator rinsed out. I then put the third bottle of flush in and ran the engine to temperature, then let that cool and flushed
that out too. The thermostat was tested again, then the housing removed and the thermostat re-fitted.
With everything bolted up, the coolant was filled, then my daughter and I went for a test drive.
This time it was a thirteen mile route including fast and slow roads, plus several hills. Once warm, the temperature hovered just under or just over 160°F, the same temperature that the thermostat opens at.
After getting home from the trip, the temperature was still stable, so I do believe I've finally got the Dodge sorted and back on the road. I'm still going to be watching everything closely over the next several trips out, but I think I can relax a bit finally. |
|
|
 |