Ongoing Work
August 2025
August 19th - Dodge Cylinder head
removal
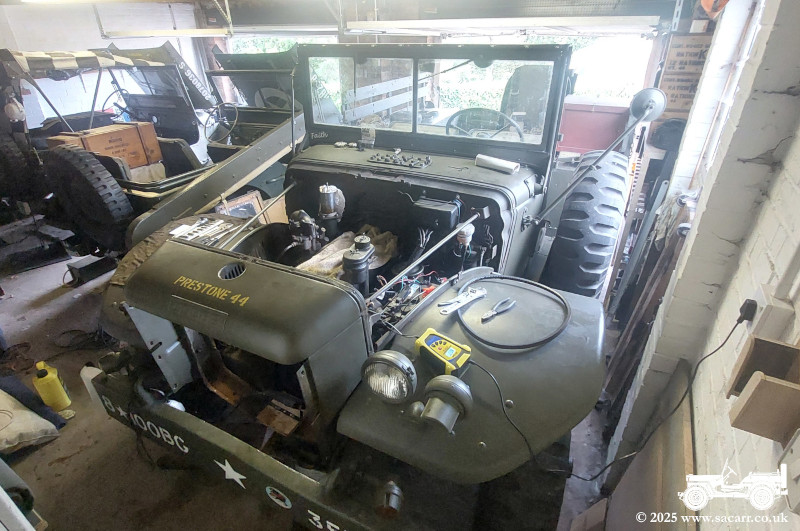
With the construction work in the garden done for this year, it was time to turn my attention back to the Dodge.
The truck has been kind of off the road since Blyth Battery in May, when it over heated on the way home. The 30 mile drive there was fine until the last couple of miles, when the temperature began to rise. I thought it was just from sitting in a couple of queues on the way. However, after nine miles going home, it was over heating so I pulled over.
I didn't think the radiator was sludged up, or it would have been running hot for a while during all the previous trips. I suspected the thermostat was stuck.
Despite pulling the thermostat and doing lots of testing on bits and pieces, the Dodge was still overheating on a six mile drive in June, having already got the engine up to temperature on the driveway. Running on the drive, even at high RPM, couldn't replicate the over-heating. Apart from getting hot when driving, the engine ran well as normal.
I wondered if it was the head gasket, but I wasn't using any noticeable water from the radiator and there was no signs of water contamination on the dipstick. There was a very slight trace of oil in the water when the radiator cap was lifted, so I decided the cylinder head had to come off for further inspection.
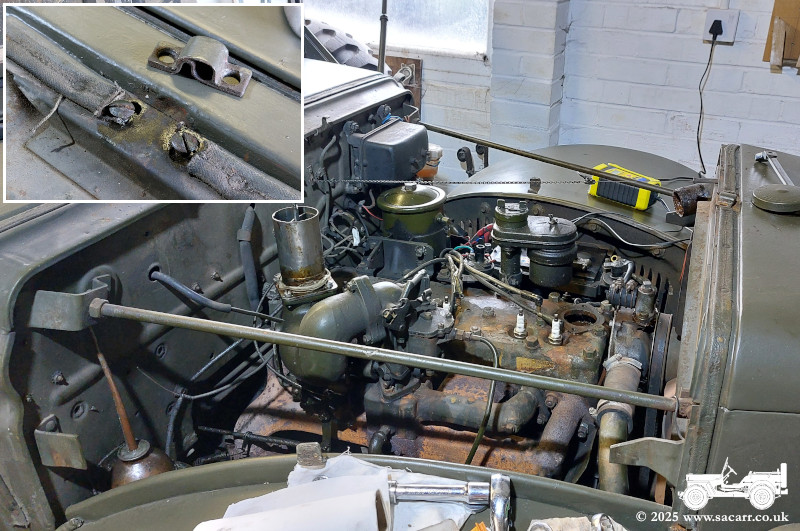
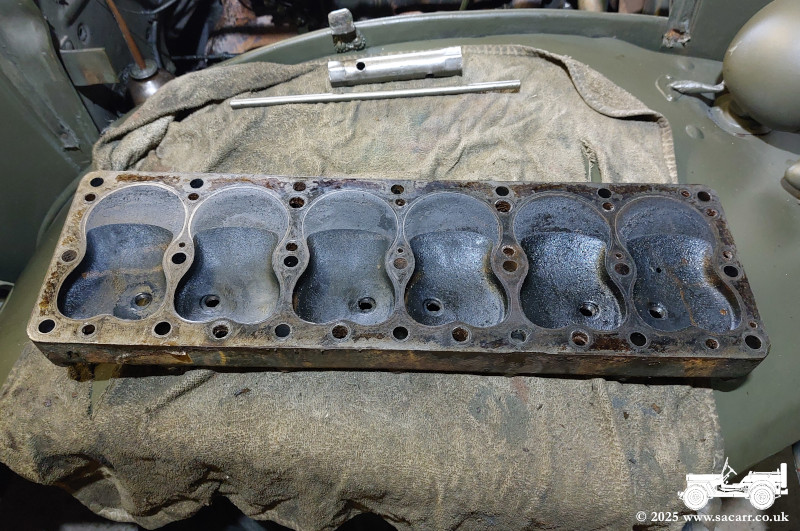
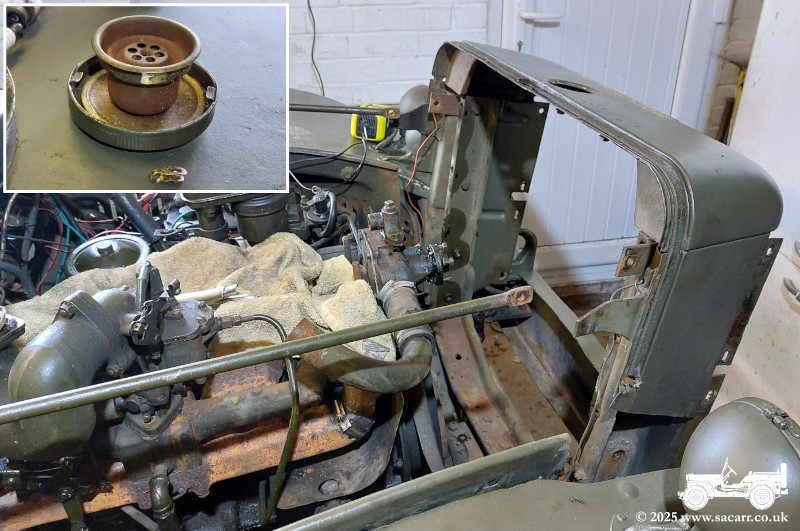
On the 19th, I finally got around to stripping the top end. I
began removing some of the engine accessories, but soon realised that removing
the hood would make everything much easier. One of the forward hinge screws was
seized solid, but the two rear screws were loose, allowing the two halves of
the hood to be lifted clear.
|
 |
 |
The large parts were stored in the back
of the Dodge, with most of the nuts and bolts, fastened back into the
parts that came off. All of the head nuts were loosened off and then the
engine was turned over on the starter to use the cylinder pressure to pop
the head free. The nuts were then fully removed, with only two getting
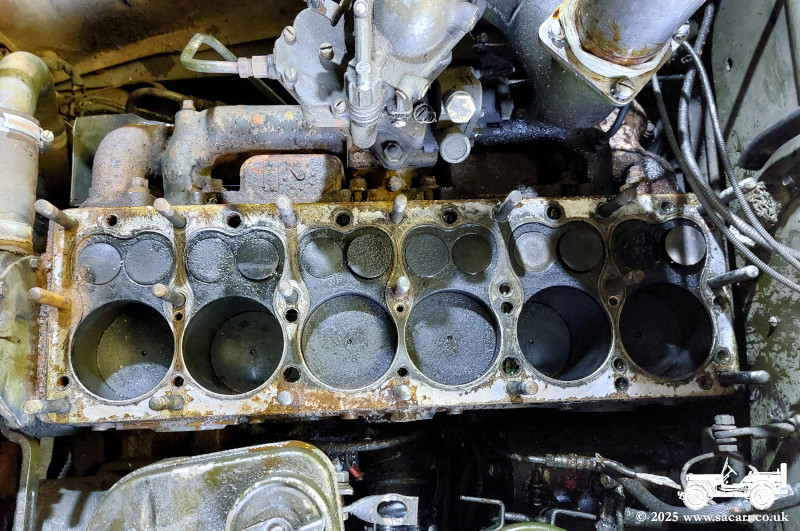
stuck on the studs and screwing the studs out. While the mating surfaces
were covered in crud, there didn't appear to be any cracks.
It's difficult to work on, being tall and a big stretch
over the fenders, so I lifted the cylinder head out by standing in the engine bay, over the engine, with my feet on the chassis
rails. That was enough for the first day.
|
 |
 |
August 20th - Cylinder head clean up
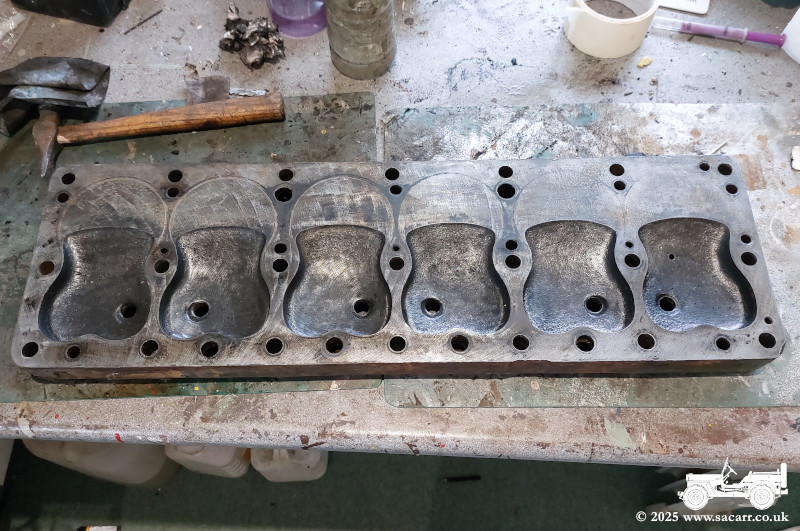
I spent most of today fighting with and cleaning up, the Dodge cylinder head. What took the most time were two blanking plugs in the top of the head. Both have probably been in there since 1944 and neither wanted to come out. The smaller one, which is for a probe to detect the piston top dead centre, eventually came out with a spanner that was repeatedly tapped back and forwards.
The larger square headed screw, which had a tapered thread, wouldn't move with a spanner or socket. It wouldn't move with mole grips, a clamp on adjustable spanner or a two feet long Stilson
wrench. My last resort was a tip I picked up 15 years ago, when I first got the Dodge and one of the brake drum screws wouldn't come out. I welded a 1/4 inch diameter bar to the top of the screw and clamped the mole grips to it. The heat from the welding is meant to help free the stuck screw. The first two welds broke after levering and hammering at the welded bar. After weld number three, I think the heat penetrated far enough to do its job and slowly, with lots of small taps with a hammer, the bar began to turn.
It was tight almost all the way out. The threads looked okay, but it must have had some kind of thread lock or crud gripping all the tiny gaps in the threads. After it was removed and the bar sawn off, I screwed it back in to protect the threads and built up some weld around the rounded off square head, so I could file a new square back onto
it.
|
 |
 |
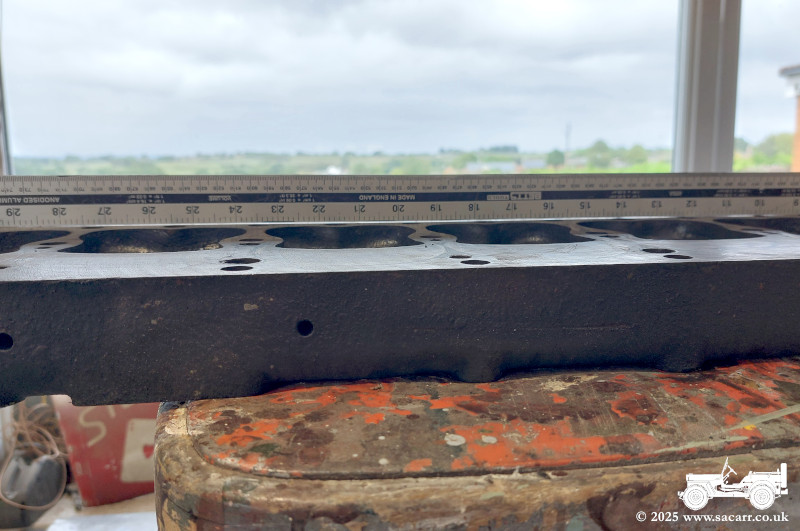
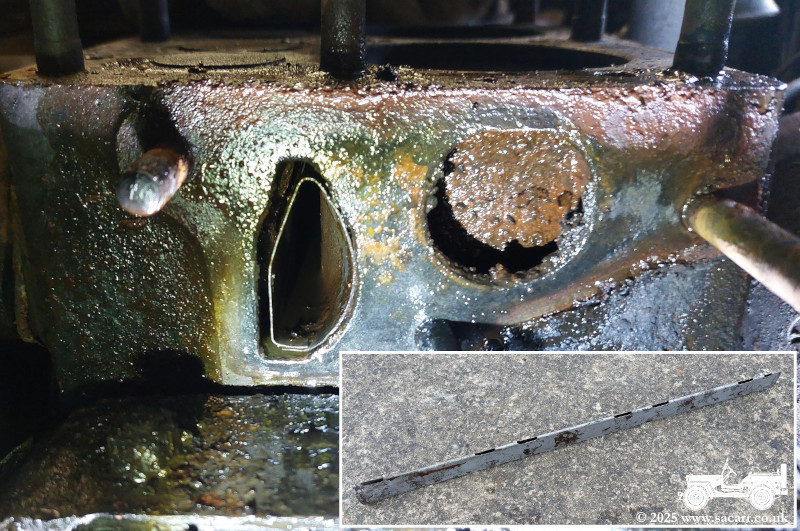
After cleaning up the inside of the head, it was checked with several steel rules, all of which showed a slight bow in the middle. There's no cracks in it, so I just need to get the mating surface milled, which will true the surface up.
|
 |
 |
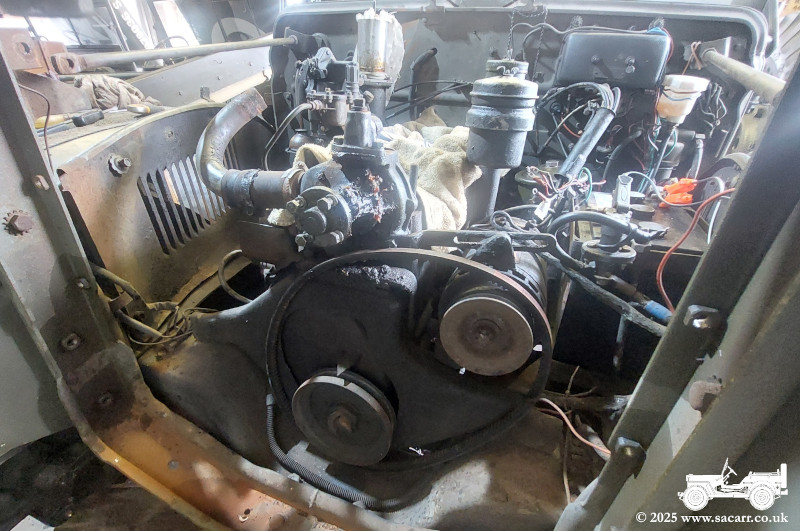
August 23rd - Radiator and Water Pump Removal
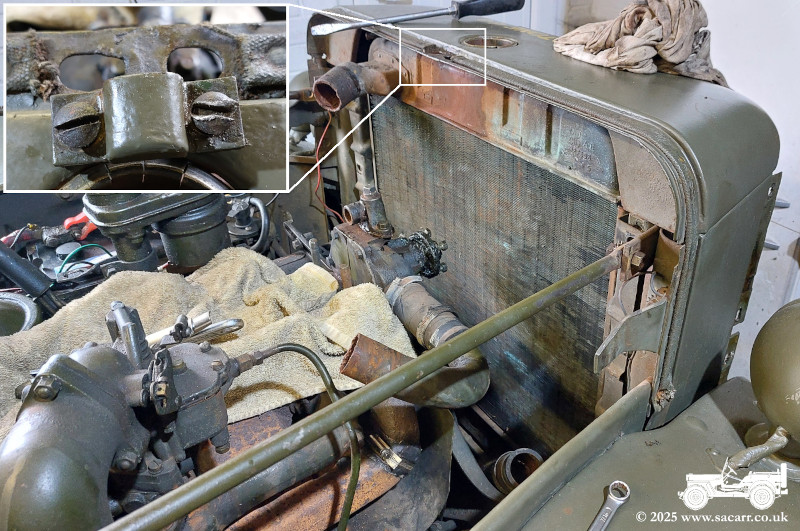
I've had another busy day dismantling the Dodge front end. The goal was to get the water pump off to check the water transfer tube in the block, but there was a lot of parts to remove to get there.
The radiator cowl need to move to get the radiator out, but I also needed to get the hood hinge fitting off. It stopped the radiator clearing the cowl. The mangled screw must have had damaged threads and only came half out. It turned out it was longer than the other screw, so I screwed it back in and used the grinder to cut the bottom threads off. That allowed the cowl and radiator to move, which allowed the fan to come off.
The grille and light guards had been removed and then there was still a number of bolts to get the cowl and radiator loose. With hoses disconnected, the radiator still wouldn't come out. The radiator cap was attached by a chain, but the cap was too large to fit through the hole in the cowl, so the rivet in the chain had to be filed off to free the cap. Finally the radiator was lifted free.
|
 |
 |
With a gaping hole in the front now, the fan belt was lifted off, generator bracket removed and water pump bolts removed. The manual said to tighten two nuts against each other to remove the water pump studs. Nothing would move. A 16oz hammer couldn't encourage it to come loose and I couldn't see anything else holding it in place. There wasn't.
After running out of ideas, but one, my last resort came out - A 2Kw hot air paint stripper and a gas torch. After a long time pumping heat into the water pump casting, the hammer slowly began to move the pump forwards along the studs. Eventually the whole pump was freed from the studs and lifted clear. That just left the backing plate which came away easily. It's slightly bent from the bashing it took from the hammer, but should hammer flat again.
|
 |
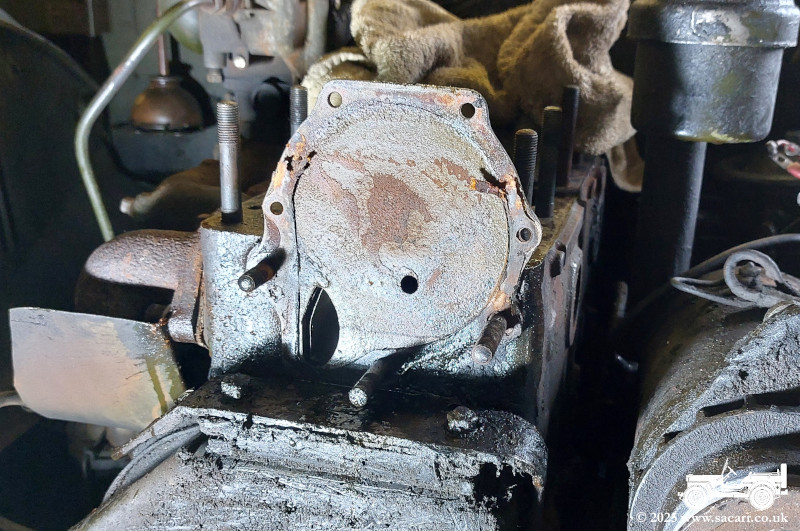 |
With the plate removed, I could finally see the water transfer tube in the block. I'd been warned by a couple of people that they often corrode and stop sending the coolant were it needed to go. It wasn't a tight fit in the block and I don't know if that's right and rather than the proper removal tool, I just grabbed the end with a pair of pliers. The tube itself looks to be in good condition, with just some minor surface corrosion and no blockages.
I've now got lots of sub components to clean up and while they are off and accessible, I'm going to give them a sand and repaint before things go back together. The radiator was given a soak in some detergent and flushed out before being taken to the workshop for a clean up and paint.
|
 |
 |
|
|
|
It was about six to seven hours of wrestling with tight screws and stubborn studs, many of which probably haven't been apart since the Dodge served in the Norwegian Army post war.
It's been hard work to strip it down, but I'm pleased there's nothing else obviously wrong. The cylinder head was dropped off at the machine shop on Thursday, so when that's done and everything is cleaned and painted, I can start to put it all back together.
|
 |