|
Dec 4th - Dec 8th - Dec 10th - Dec 11th - Dec 12th - Dec 14th - Dec 15th - Dec 16th - Dec 17th - Dec 18th - Dec 19th - Dec 20th - Dec 21st/22nd - Dec 23rd - Dec 24th - Dec 25th |
|||
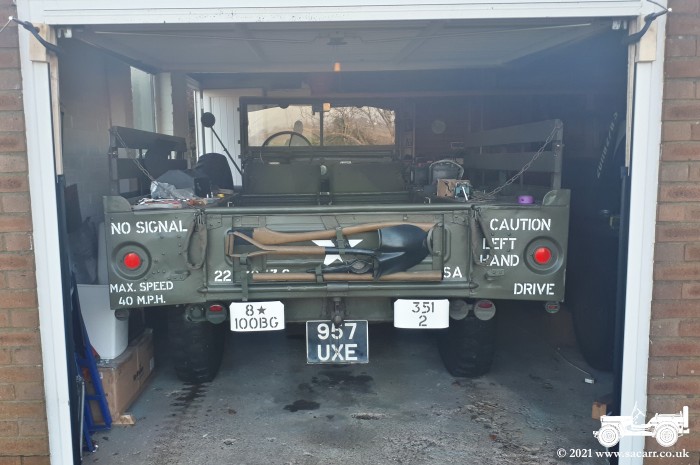
| December 4th - Dodge Mounted Crane | |||
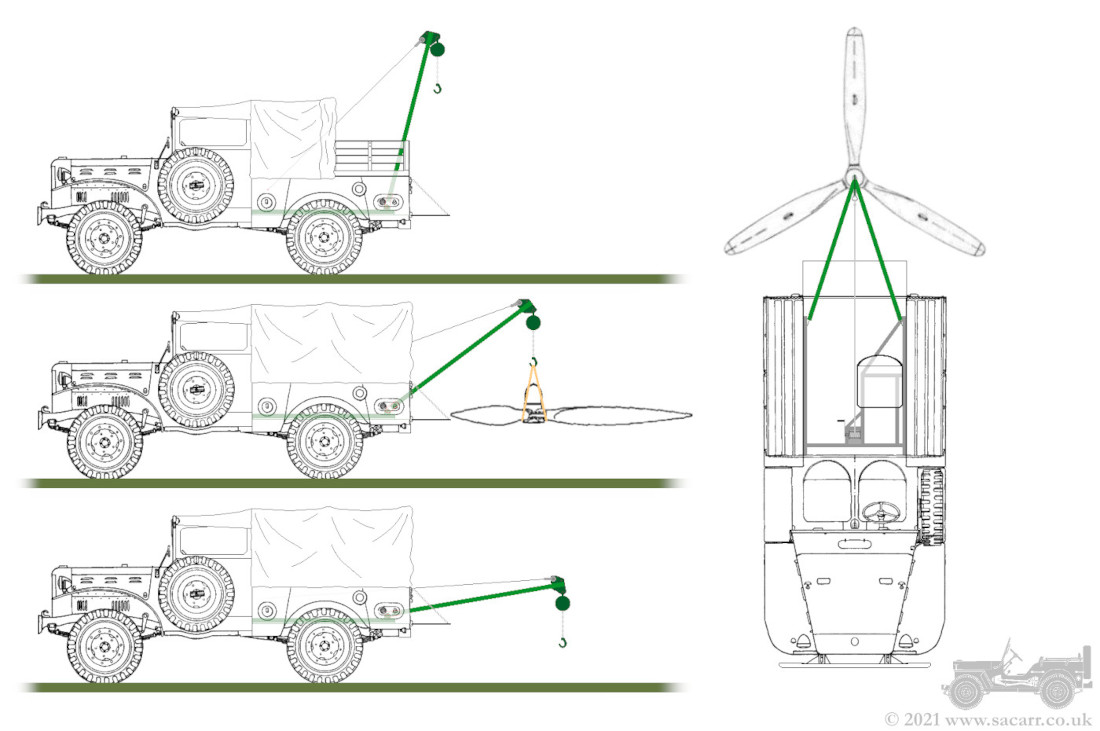
The diagonal braces of the original design were just there to help support the removable beam, but did I really need the beam at all? That and its supporting structure was going to add most of the weight and complexity. If I made the diagonals an A-Frame crane, it would dramatically cut down on the amount of weight, steelwork and welding needed. Instead of the beam carrying the weight, the A-Frame would carry it, braced by a hand operated wire winch. The winch could raise and lower the A-Frame, giving a longer reach or bringing a load to the point where it could be lifted onto the tailgate/bed of the truck. The chain hoist would still be used, mounted on the end of the A-Frame, to give precise and easy control of any lifting, such as removing a Jeep engine. My Daughter's child seat is currently mounted on a framework on top of the false floor that contained the spare wheel. The false floor would be removed and this framework would be lowered to the truck bed. The frame would then be extended rearwards to form mounting points for the lower pivot of the A-Frame, while a bracket would be added at the front to mount the hand winch on. The two bars of the A-Frame can be quickly removed and stowed for transport. I already have the chain hoist and the winch should arrive by courier tomorrow. I just need to finalise the steelwork required to make the A-Frame and extend the framing on the floor. For that I need to get some measurements of the existing seat frame structure and to work out how to mount the winch, once I have its size, so I know the required handle clearance from the floor.
|
|||
|
-----
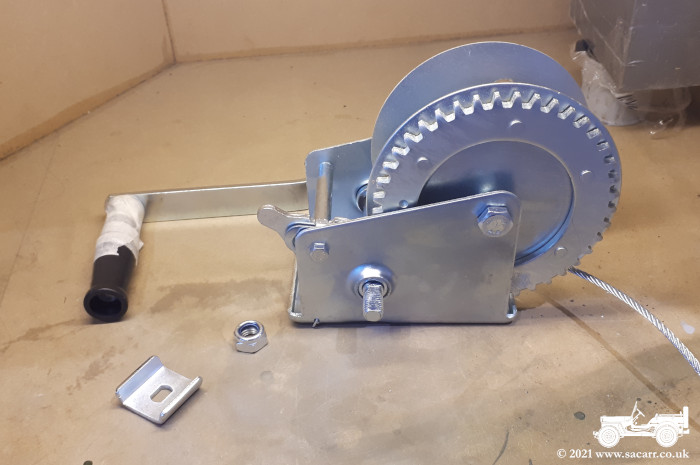
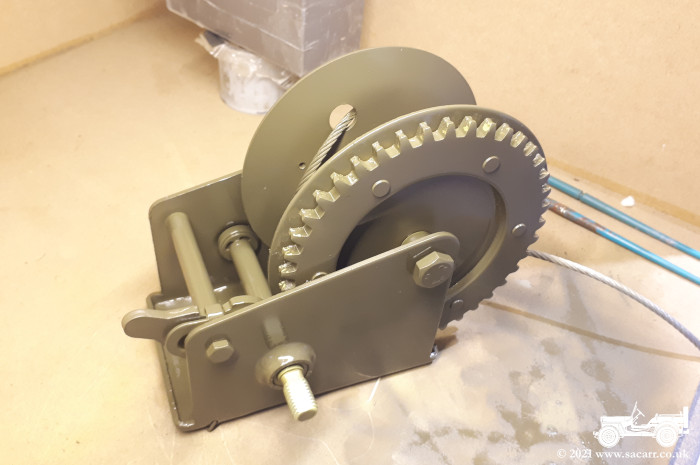
December 8th - Crane Winch and Materials Work in the house loft paused when I
ran out of materials, so I turned my attention to the truck crane. I
bought a winch on Ebay to support the A-Frame bars and this was primed
and sprayed olive drab this morning. It was left in my curing cabinet to
bake hard. This afternoon, I took some measurements in the back of the
Dodge and finalised the sizes of the steel work required. This has just
been ordered from a local branch of Metal Supermarkets. Hopefully it
will all be cut in time to collect before Christmas. The next step will
be to remove the seat frame and false floor from the back of the Dodge
and refit it at bed level. The other parts will then be built up from
there. |
|||
|
|
||
|
-----
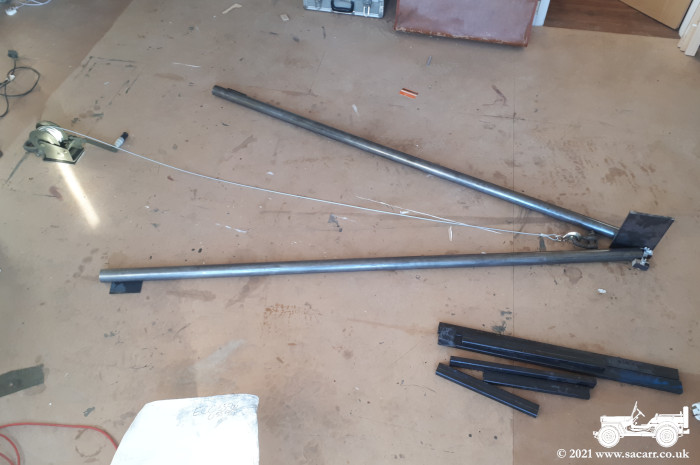
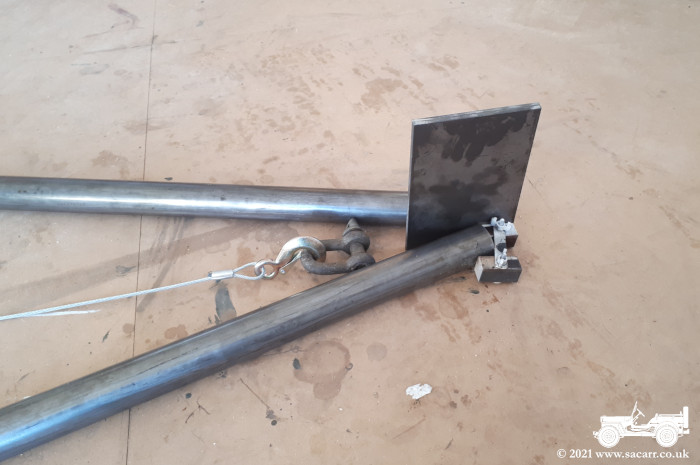
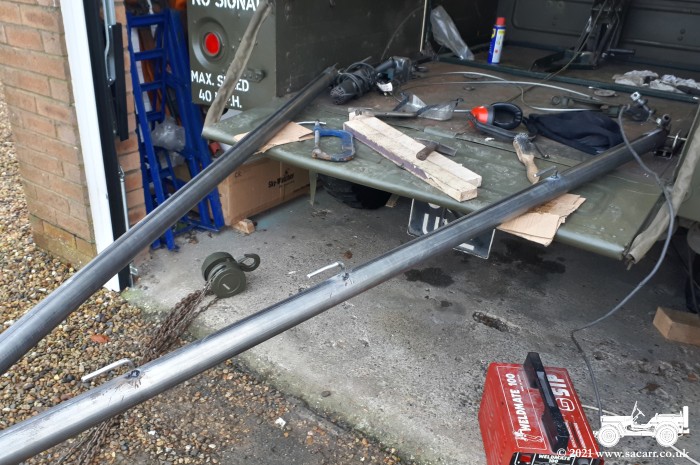
December 10th - Crane Materials Arrive I got an email confirmation on the
morning of the 10th, to say that all the metalwork was cut and ready to
collect. I had a number of odd jobs to do, so combined them all into one
trip. When I got there, all the box section was cut from the wrong
material, so I had to wait a while for it to be recut. Once home, I laid
out the main A-Frame parts and winch to get a sense of scale. |
|||
|
|
||
|
-----
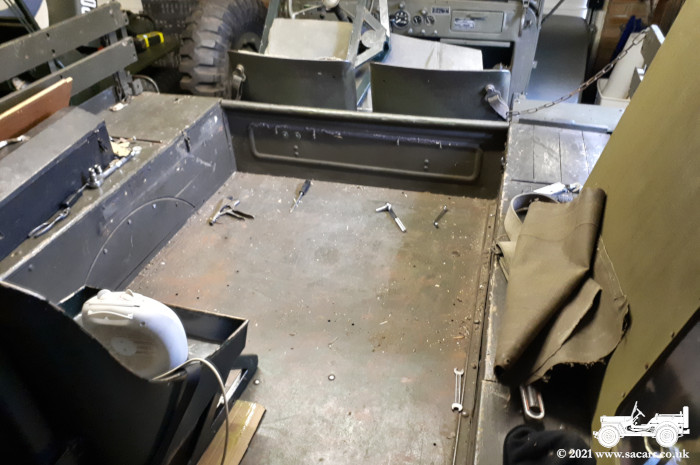
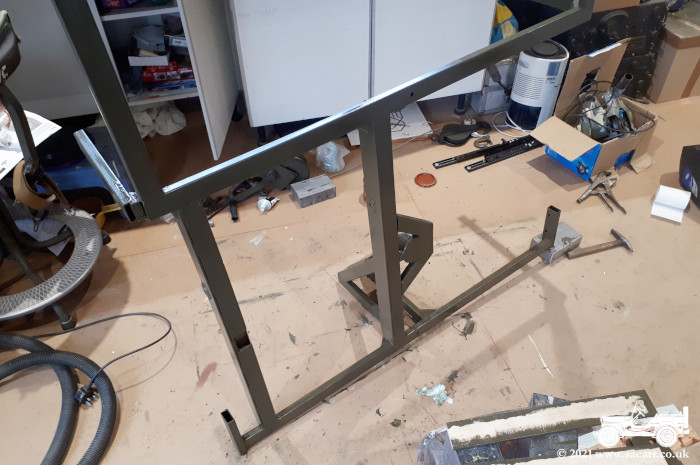
December 11th - Seat Frame Removal and Refitting A busy day in a chilly garage today. With all the Dodge crane materials here, there wasn't really an excuse not to get started. The first step was to remove the metal framework that supported the child seat and had also supported the observers chair when the seat was positioned under the dome. Some of this structure would be reused. It didn't take too long to get it out, despite 11 years of rust on the bolt threads. |
|||

|
|
||
|
With the frame out, the false floor was next. That was quite easy as it was just held in with machine screws. Being inside the truck rear body, they were protected from the weather and came out without any fuss, shortly followed by the 4 x 3ft sheet of ply. The steel angle support frame for the floor was a bit more stubborn, having long bolts from inside the body to the wheel arch. They were very rusted and due to the difficult to reach location of both ends of the bolt, Lynne helped and unscrewed the bolts from inside while I crawled under the wheel arches. That brought that frame out. |
|||
|
|
||
|
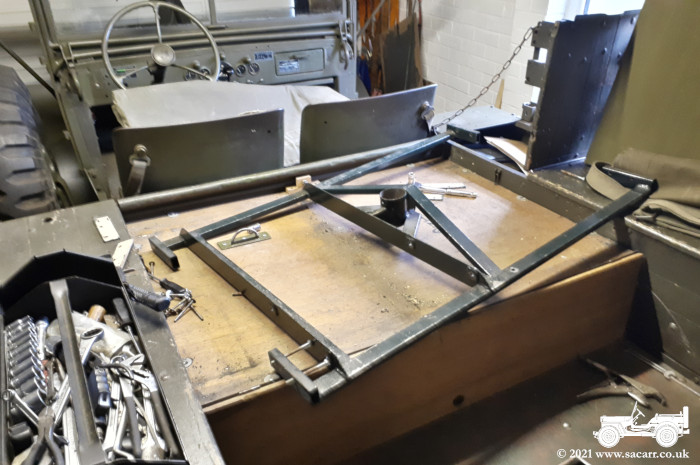
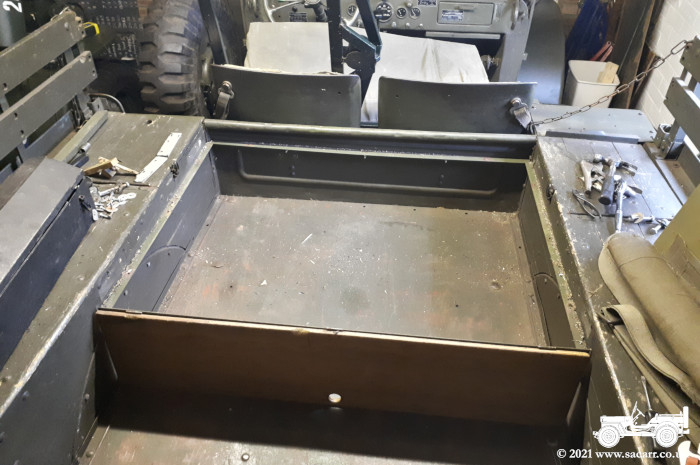
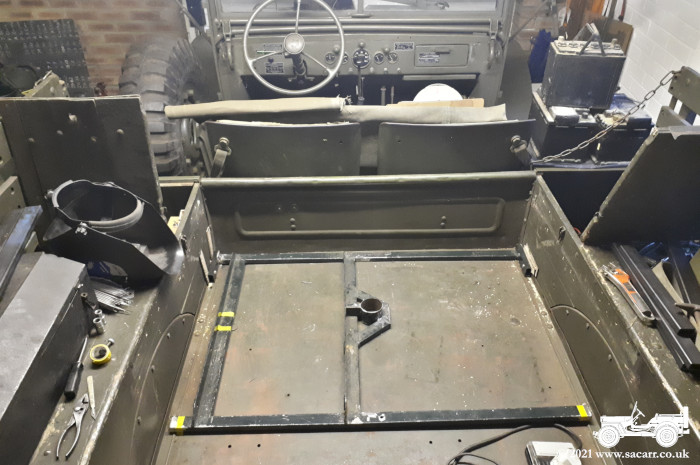
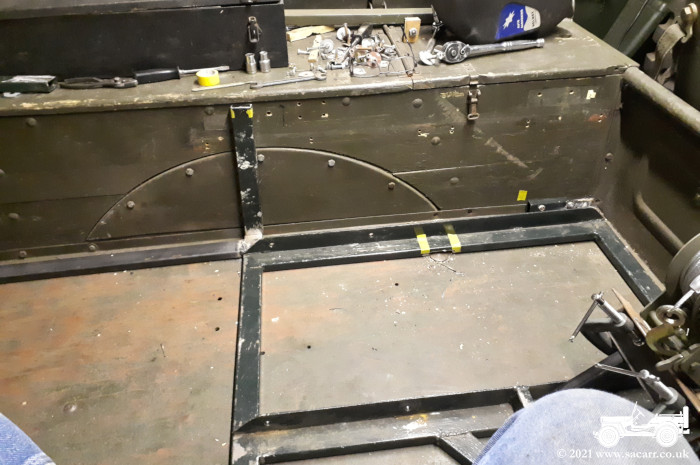
The original seat frame had a few bits cut off and some of the mounting brackets removed, to be refitted once I'd sorted the new mounting position. So the frame was placed on the truck bed, more or less in the same fore/aft position it had been in, but now about 12 inches lower. My Daughter was called out to check her leg length in the new position and once I was happy that she'd fit, I began to remount the frame. |
|||
|
|
||
|
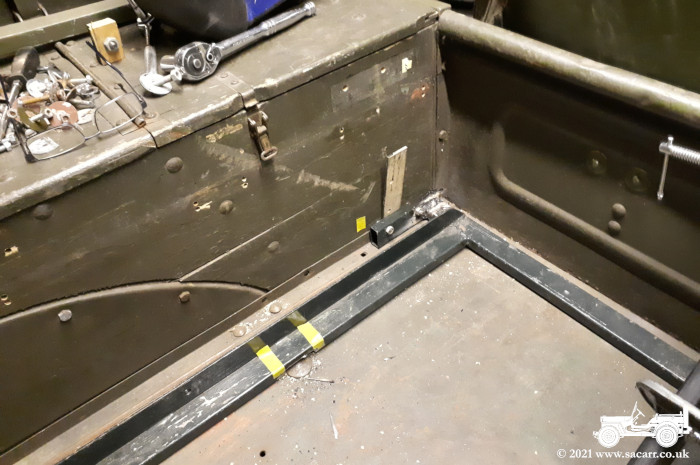
The frame itself is a little narrower than the truck bed, the gap made up with a wood shim. This allows a bit of clearance for getting the frame in and out after the shims are knocked out. I was thankful I made it this way to start with, as it did make the frame removel easier, especially as the wooden bench seat overhangs the side of the bed. I also discovered the Norwegian metal bed in the truck is mounted slightly on the wonk, being 1/4 inch lower on one side. I used some clamps to support the winch frame in place, to check the clearance for the handle. |
|||
|
|
||
|
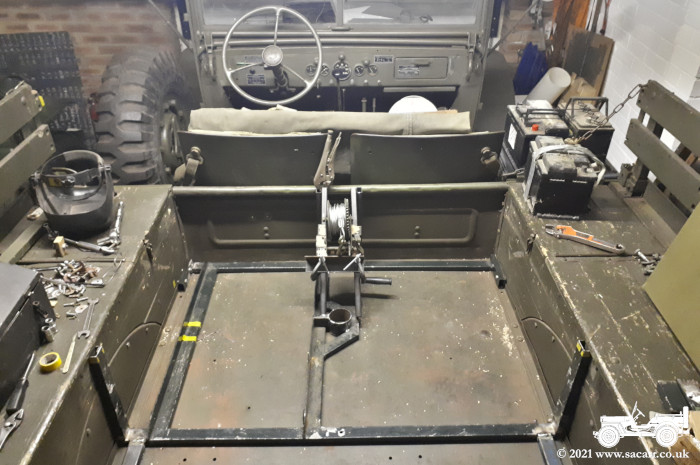
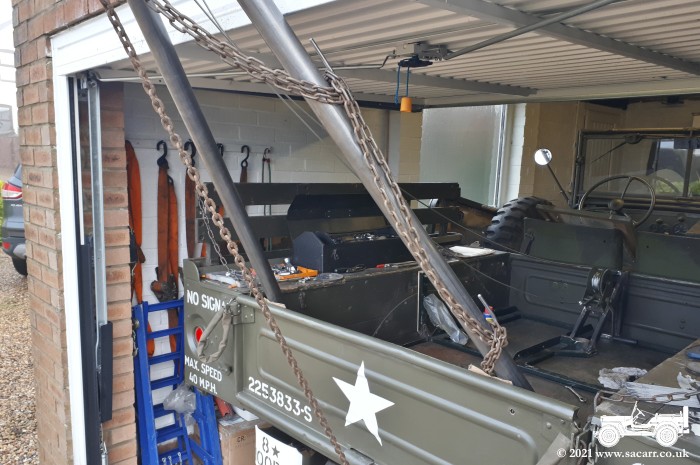
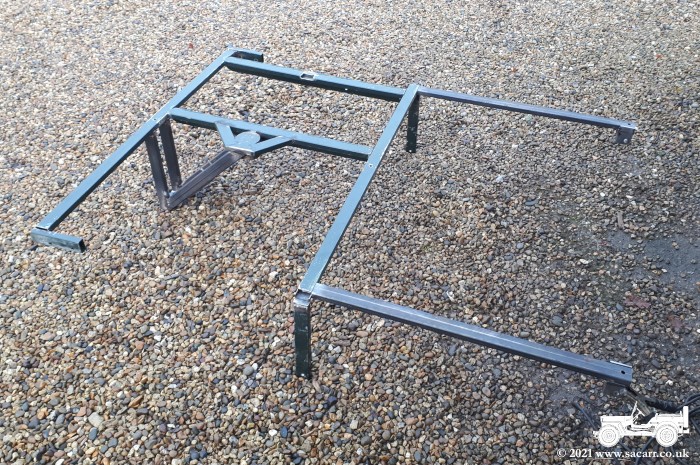
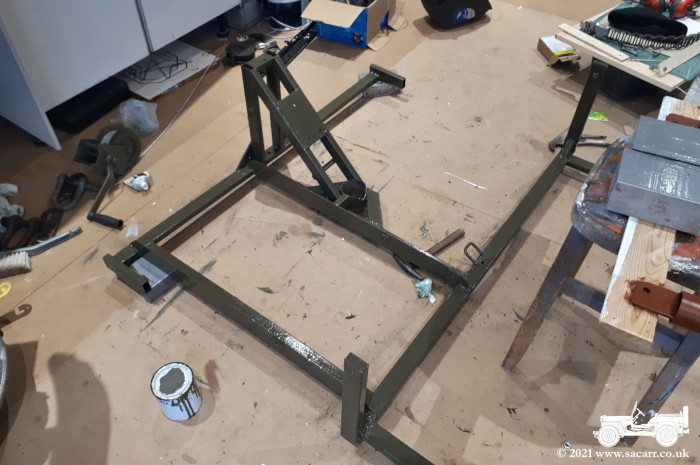
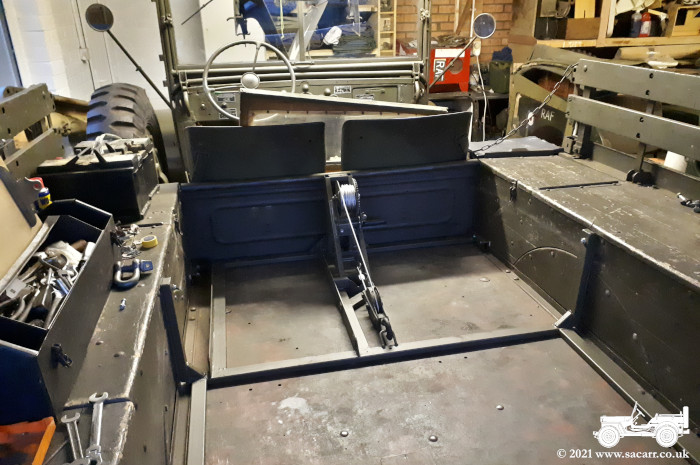
At the rear of the frame where the seat mounts, I'll add two new vertical mounts to brace the frame from tipping forwards under braking/crash loads. The rear of the frame was extended back another 30 inches for the A-Frame mounts, bolted through the bed at the rear. The last picture is a general view of the bed with the progress so far. Not a bad day's work. |
|||
|
|
||
|
-----
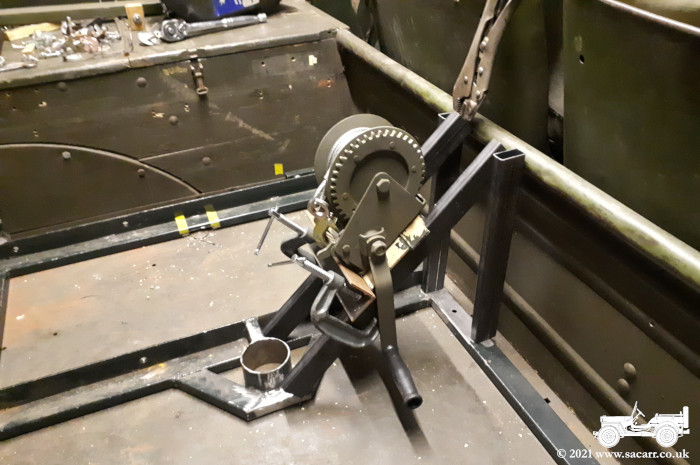
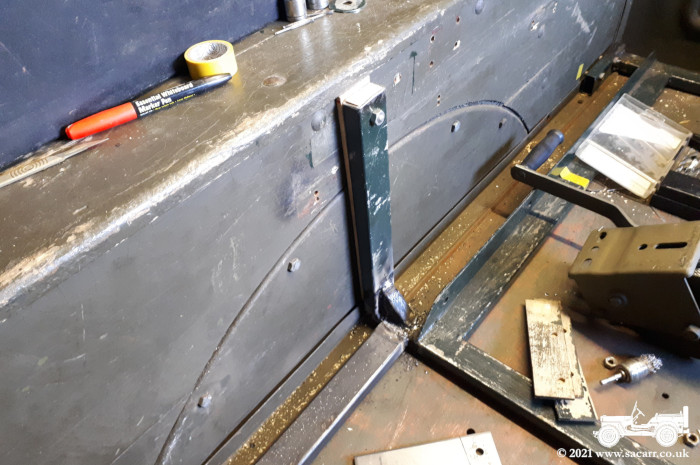
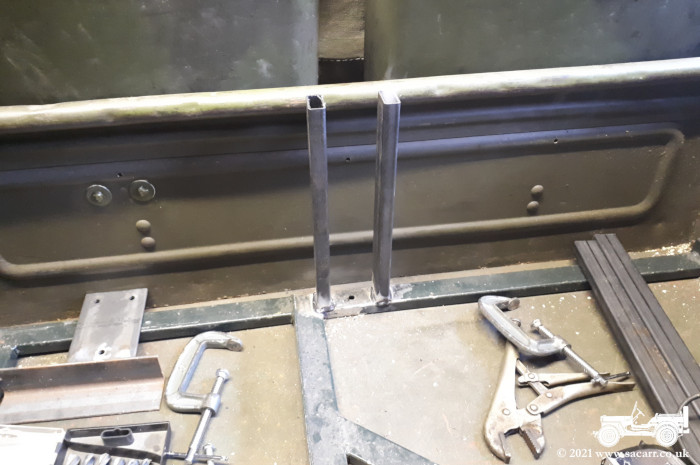
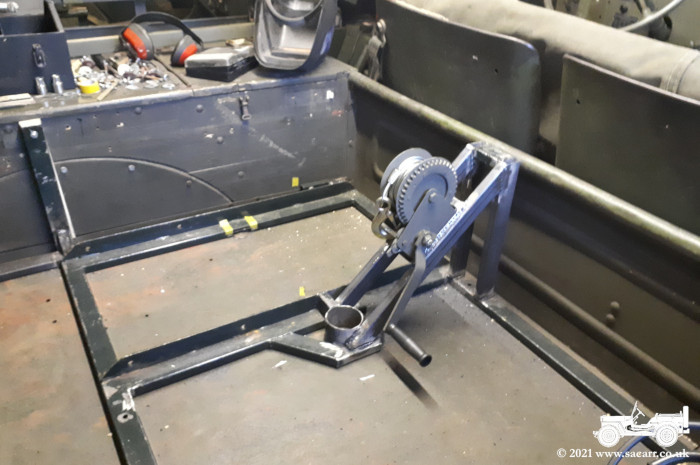
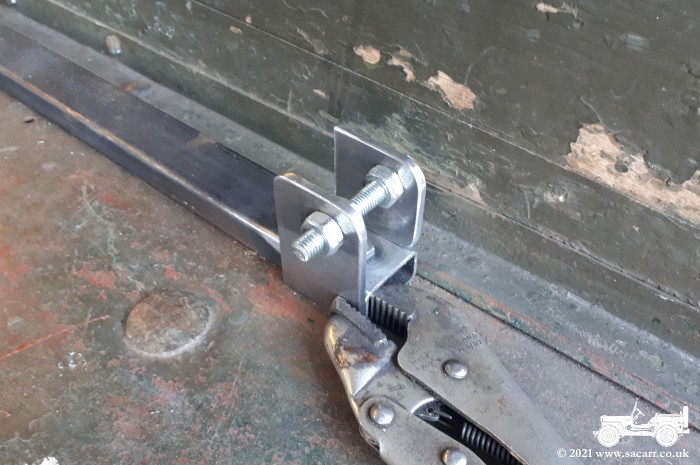
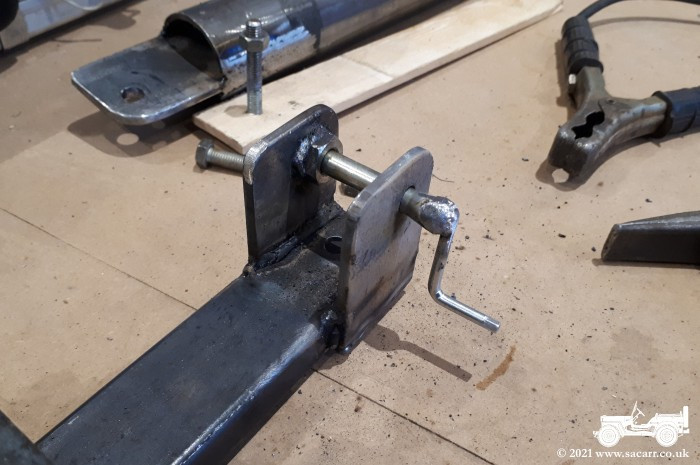
December 12th - Seat Frame Bracing and Winch Fitting Another busy day in the garage, but not so cold today. The vertical braces for the side of the seat frame were
marked up, drilled and bolted in place. The lower end was then welded to
the seat frame, followed by cutting a triangle reinforcing piece and
welding that in. After that, I moved on to the winch mount. Much of the day was spent cutting, grinding and trial fitting, followed by a few minutes of welding thrown into the mix.
The first part of the mount was the two vertical supports. |
|||
|
|
||
|
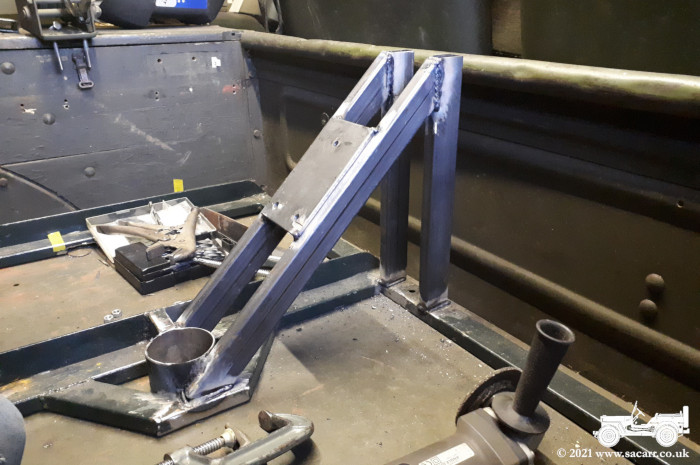
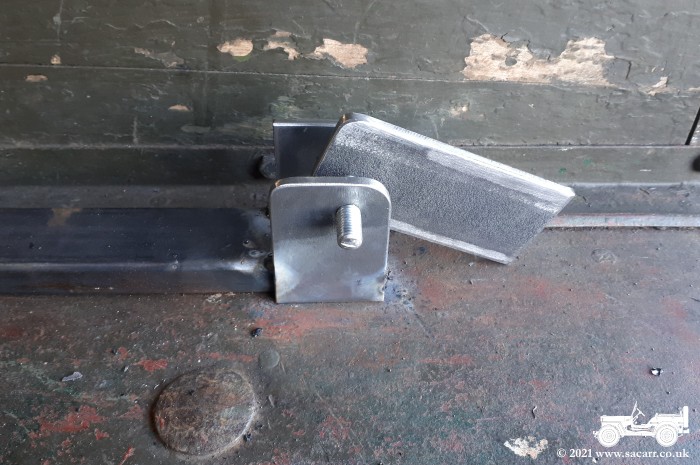
The diagonals were cut next, which needed lots of fettling to get them to fit the uprights and around the old seat mount at the bottom. The plate for the winch was used to clamp them together to get them parallel for the test fits. Once welded in place, I clamped a piece of metal across them to hold the winch base plate around half way up. The winch was attached and it was checked for clearance for the handle to rotate without hitting the floor or front face of the truck bed. I also needed to make sure there was hand/knuckle clearance!! Once I was happy the the position, it was tacked in place and the winch checked again! |
|||

|
|
||
|
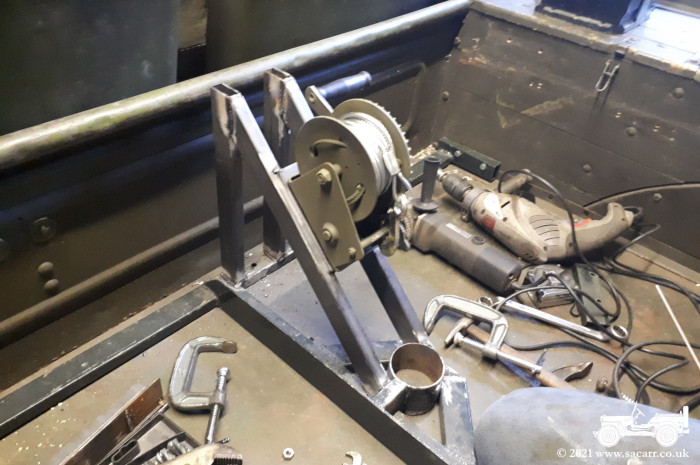
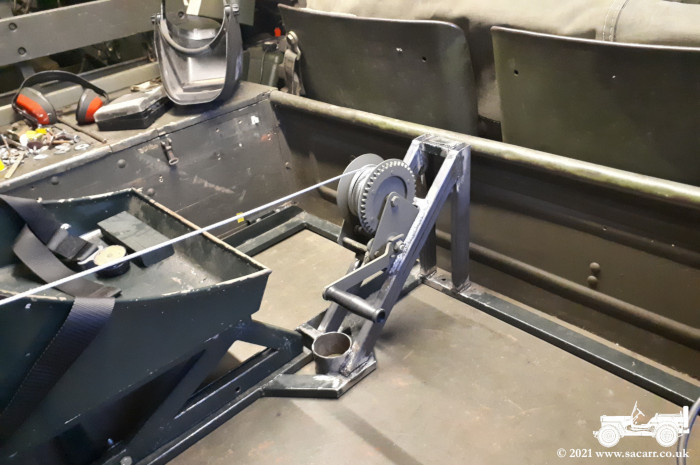
I was happy with the location so welded it up solid, then added a brace across the top of the two vertical mount pieces. |
|||
|
|
||
|
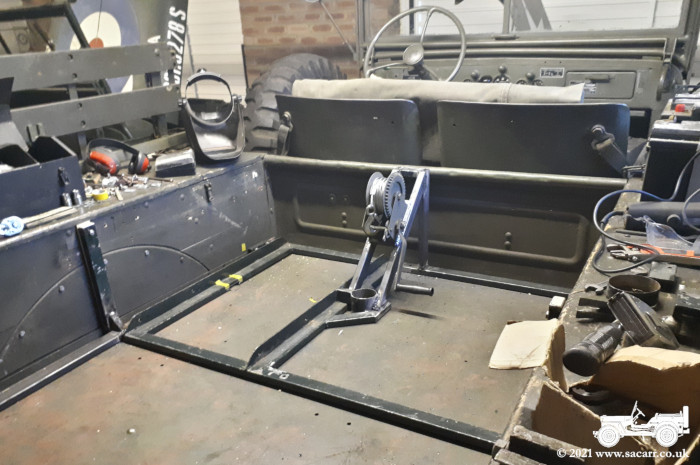
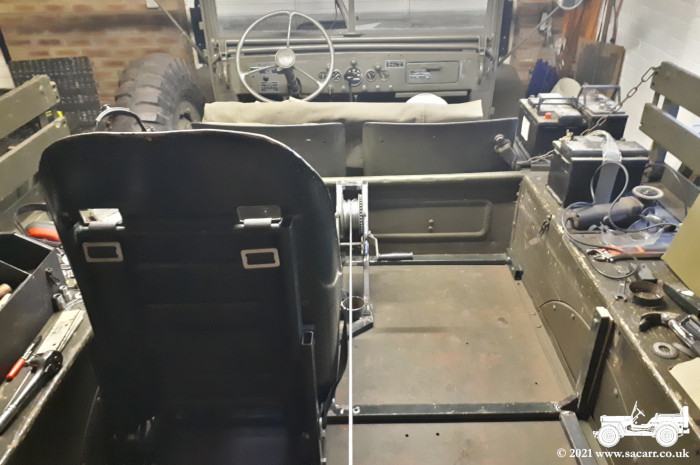
With the winch in place, I wanted to check its position in relation to the child seat. I'd removed it to make more space in the truck, but lifted it back out from under the truck for a temporary fit check. It's heavy and awkward to move, especially was there wasn't much space at the back of the Dodge, but it was necessary. There was enough space for my daughter to climb in passed the winch and it also allowed me to check the winch cable would clear the seat. |
|||
|
|
||
|
I need to turn the Dodge around in the garage so the tailgate is at the garage door end. I'll then be able to open the garage door and jig up the A-Frame bars sticking out of the door to work out the hinge angles and to trim the mating faces of the bars where the chain hoist mounting plates will attach. Cutting and drilling the A-Frame hinge plates and the chain hoist plates will be the next job before the A-Frame can be assembled. That's all there is, other than priming and painting all the metalwork. |
|||
|

|
||
|
-----
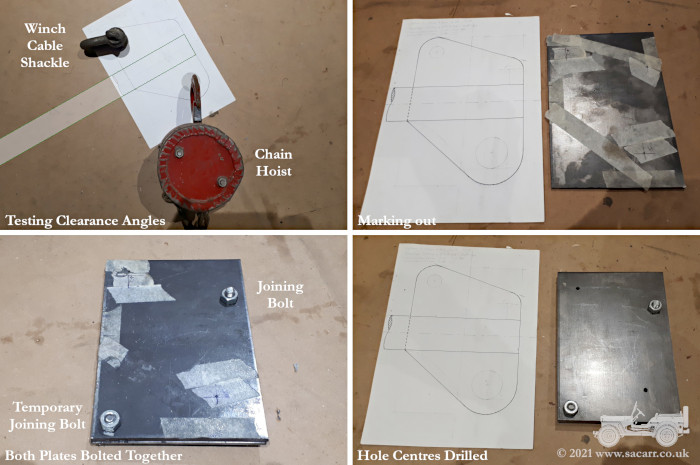
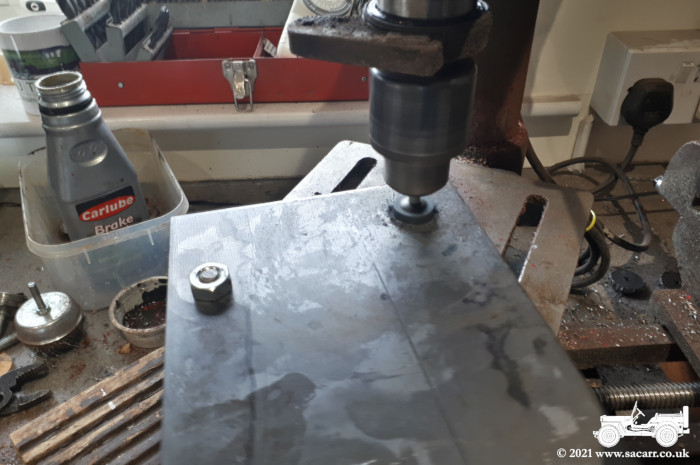
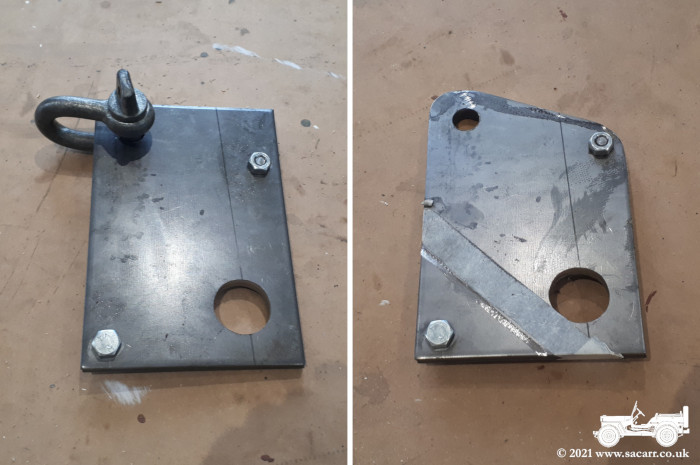
December 14th - A-Frame Head and Hoist On Tuesday afternoon, I started the A-Frame head, the flat plates that both the winch cable and chain hoist attach to on the end of the round bars. A 1/1 scale drawing was made first to check how the hoist would hang in relation to the hole, plate and bar at various angles. The angles and hole centres were marked up with tape next, then drilled for a joining bolt. This will be used for holding the two sections of the A-Frame together when complete. Another bolt hole was drilled in an area that will be cut off. This bolt is just to hold the two plates together while being cut and shaped. With the two bits bolted firmly together, centre holes were drilled for the winch cable attachment and chain hoist hook. Since I don't have a 20mm and 40mm
drill bit, or a pillar drill big enough to handle them, the large holes
would be opened up by chain drilling. Wooden templates were epoxied over
the centre holes as a guide for the chain drilling. They would also help
to hold cooling oil in the area while drilling. It took some time with a
4mm bit to chain drill both holes, after which the plates were separated
and the webs between the holes broken through to release the waste from
the centre of the holes. Both parts were washed of swarf and oil and
then put in my curing cabinet to fully dry. They need bolting back
together before the round and half round files come out to clean up the
holes. |
|||
|

|
||
|
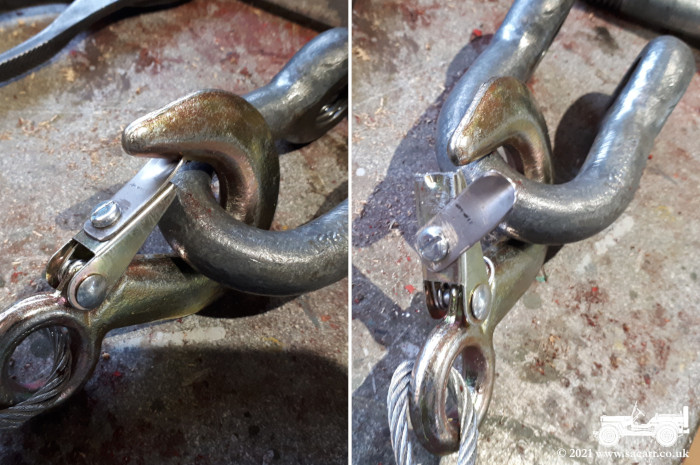
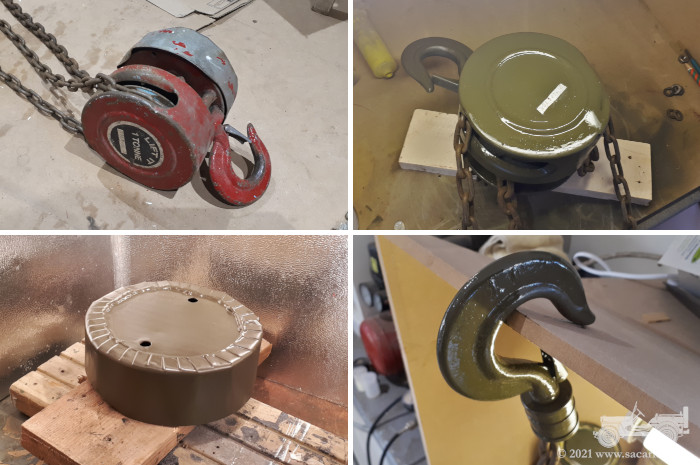
I wanted to join the winch hook to the A-Frame head via a 'U' shackle. However, the shackle was to thick to clear the safety jaw on the hook. I didn't want to reduce the diameter of the shackle, so modifying the hook as the only option. The end of the spring loaded jaw was cut off, allowing it to open back away from the hook. This of course meant it would no longer stay closed, but it would open outwards to let the shackle into the hook. A new tip was added to the safety jaw, pivoting on a small bolt. The end of this tip was formed into a 'V' shape so that it would seat into the inside shape of the hook with the original spring keeping pressure on it which held it in place. The chain hoist was partially dismantled
this afternoon and both the case and hook given a coat of olive drab. The main
hoist needs to dry before turning and the other side painting. |
|||
|
|
||
|
-----
It was a hard day of elbow grease on
the 15th. With the holes rough cut the day before, it was time to get
the files out to clean up the edges of the holes. The larger hole took
most of the morning using a combination of a half round file to take
most of the material off and a power file to finish. The smaller hole
was too small for my half round file, so I started off with a smaller
round file. Again, it was slow progress until I spotted a conical
grinding wheel in the bits box next to my lathe. This was fitted to my
pillar drill and was spot on for the hole size I wanted. It took around
an hour, working from each side of the combined 1/2 inch thick steel
plates. I found it worked better with a little oil to both lubricate the
stone to stop it jamming and to create a cutting paste from the debris
it was removing. |
|||
|
|
||
|
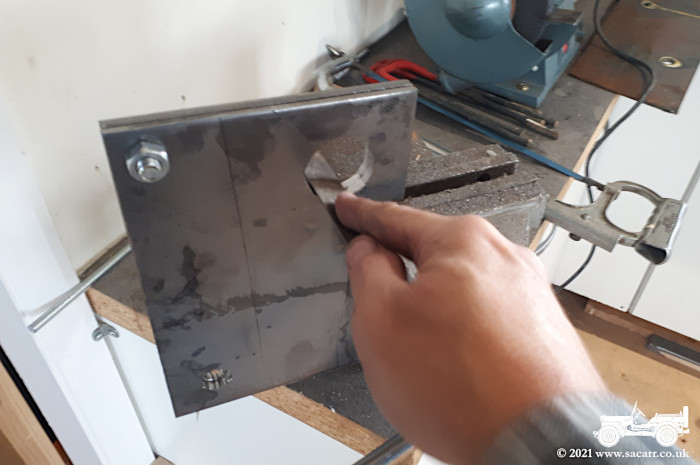
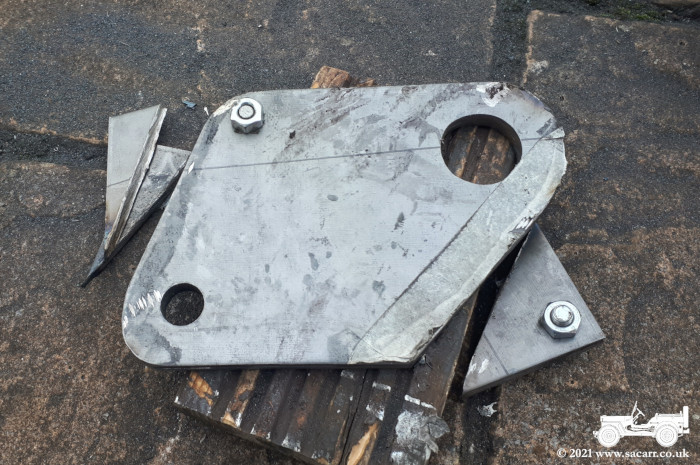
With both holes cut, it was time to start trimming the plates. I don't have any huge metal shears and with 1/2 inch of steel to cut through, the angle grinder was the only option I had. The top angle and rounding off by the shackle hole was cut first. The bottom corner was still being used to bolt the two plates together. The 1/2 inch thick steel put up a good fight, but eventually, the top was cut free. All the other corners were rounded off next and lastly the bottom angle. I cut from both ends, all the way through, leaving a small section in the middle holding everything together and aligned until the last minute when the corner was finally broken free. |
|||
|
|
||
|
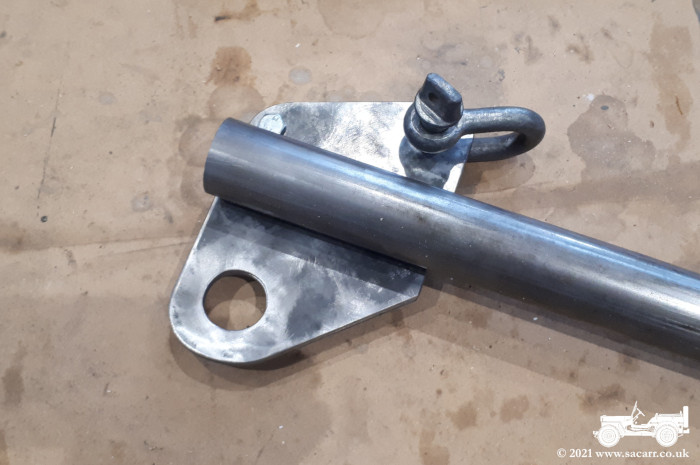
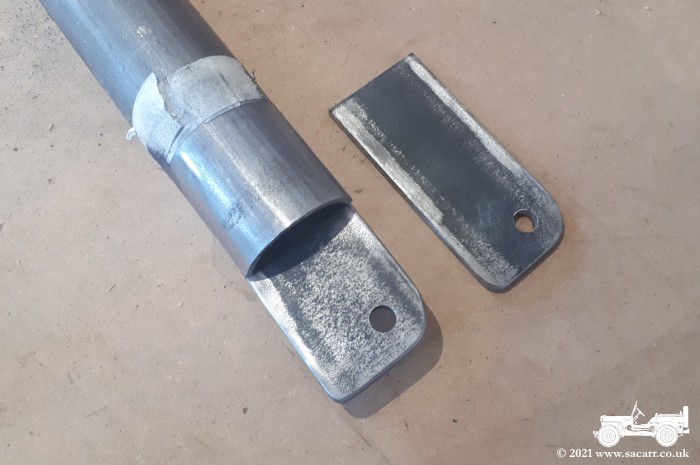
The plates were then separated and the edges all cleaned up with the belt sander and a small file to make sure there were no sharp edges or swarf remaining. The picture below shows the plates with the A-Frame bar positioned on top. The bar needs a tapered cut for the plate to mount on to, but I need to jig it all up in the back of the truck to get the angles correct. I had thought about turning the truck around today, but had nobody to help guide me out of the narrow door, so I'll probably do that tomorrow. The only other jobs done today was giving the hoist and winch another coat of olive drab. |
|||
|
|
||
|
-----
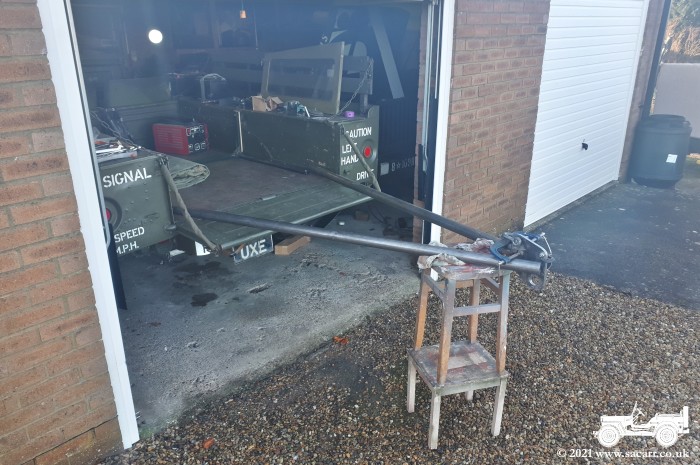
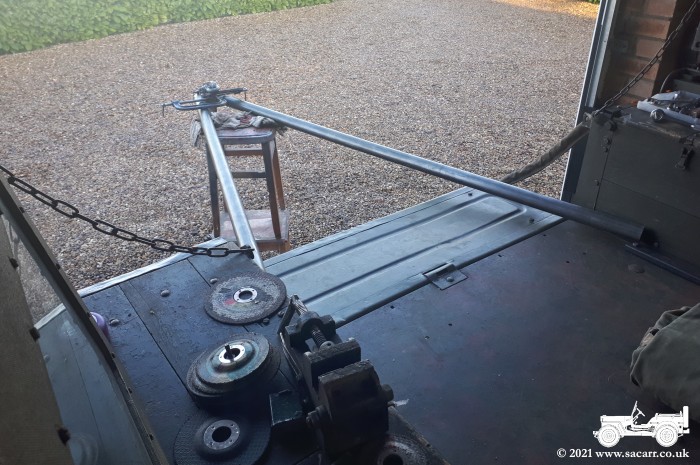
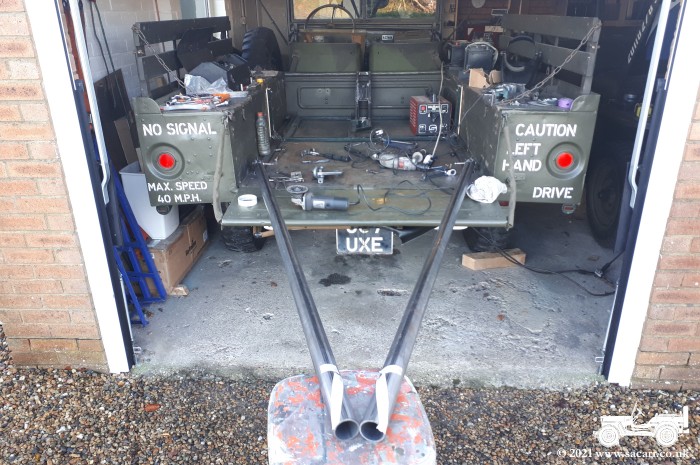
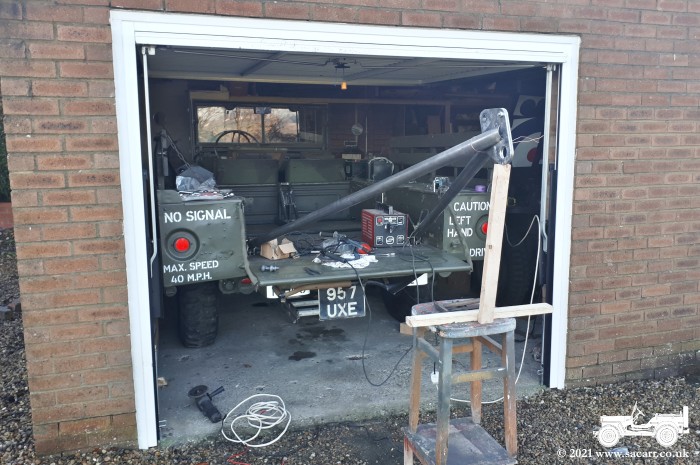
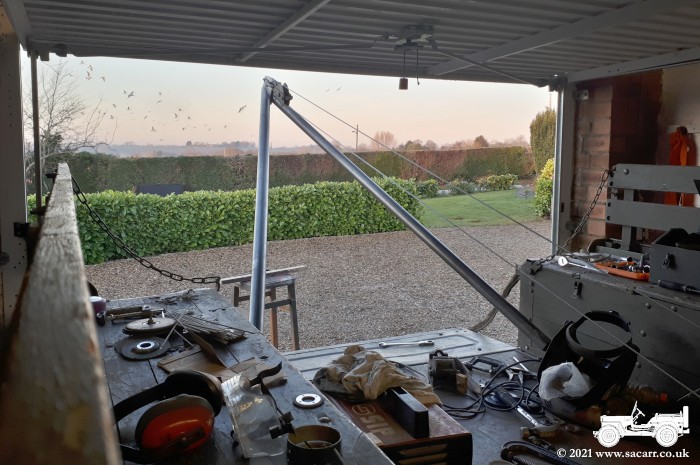
December 16th - Crane Build Preparation The Dodge was turned around on the
16th, allowing easy access to the back of the truck and more space with
the garage door open. While I was out there, I balanced the bars on a
stool, along with the crane head, to get a feel for the scale of the
crane. |
|||
|
|
||
|
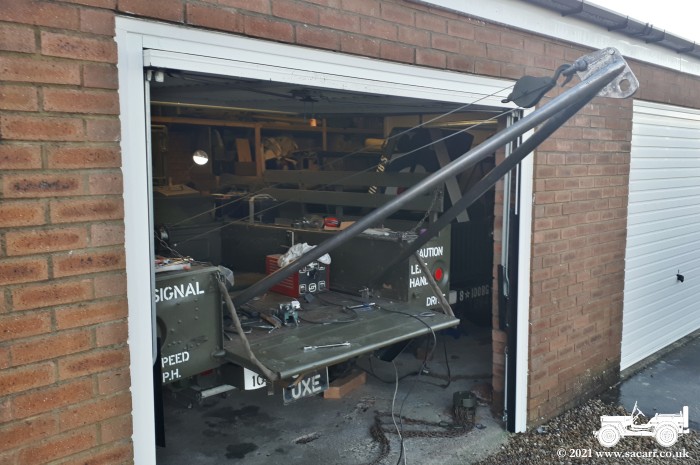
Lifting one of the bars up, I tried to get an idea of the angle and height if the crane was lifted high enough for the tailgate to close. At events like Beamish where we can drive around, I'd like to be able to do it without dismantling the crane. |
|||
|

|
||
|
-----
December 17th - Crane Construction I began the 17th in the workshop, drilling the hinge plates for the bars and floor frame. The bars were then taken onto the patio and one end slotted for the hinge plate with an angle grinder. Out to the garage next and the hinge mounts
were jigged up on the floor
frame using some studding to hold the position and spacing. They were
then given a few small tack welds to hold them in place in case I needed
to make any changes. |
|||
|
|
||
|
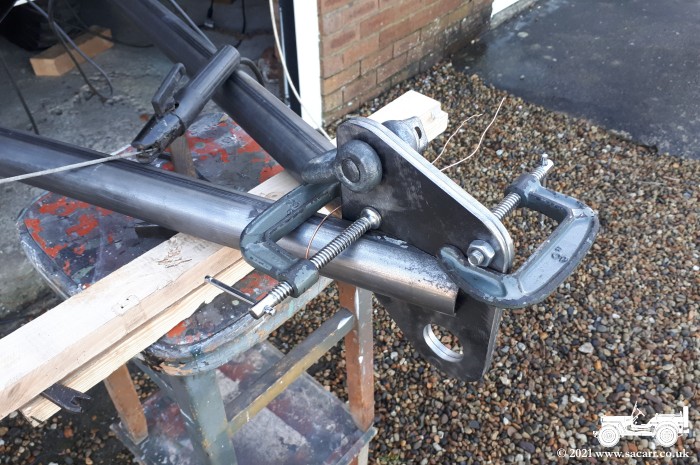
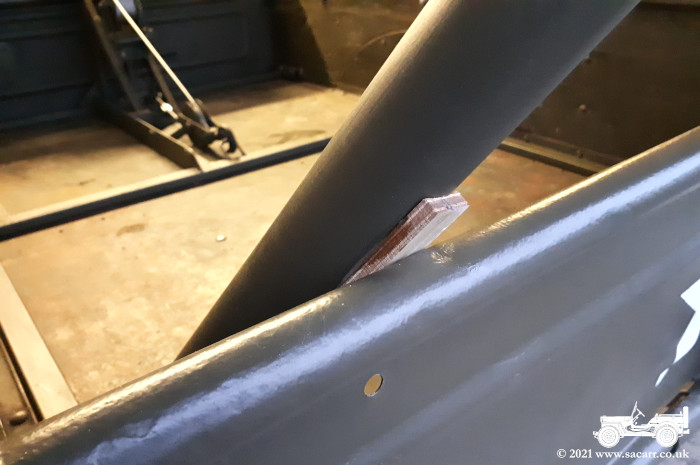
After a quick check that the hinge plates were clear of the bolt holding the floor frame to the floor, the hinge plates were welded into the A-Frame bars. This allowed them to be temporarily mounted to the hinge mounts with some studding. With the bars fitted in the truck bed, the top ends were pulled together to work out the taper angle that they would need to be cut to, in order to fit the frame head. The cut lines were marked with masking tape. |
|||
|
|
||
|
More noise and sparks from the angle grinder got them cut, followed by more noise as the faces were fine tuned to fit together with the crane head between them. With that done, the crane head was jigged up between the two bars, using some G-clamps to set the height and some copper wire wrapped around the bars to hold them against the face of the crane head. |
|||

|
|
||
|
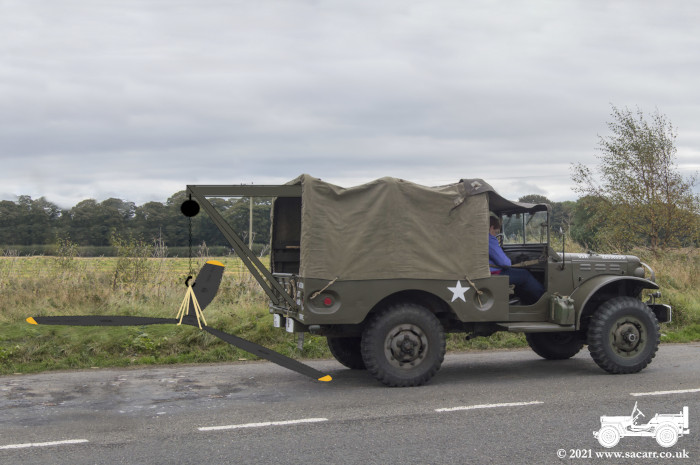
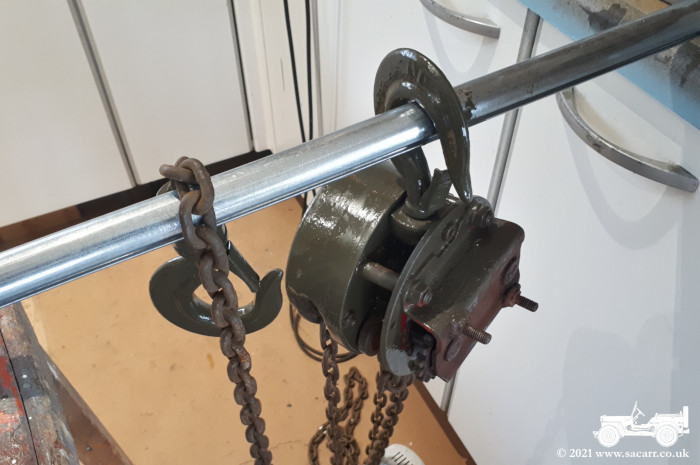
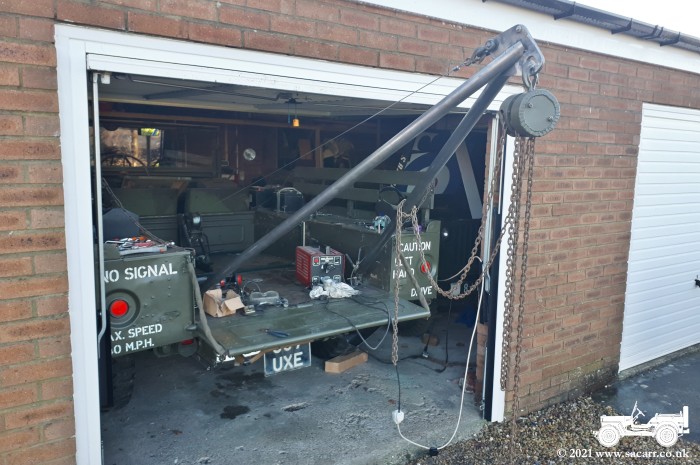
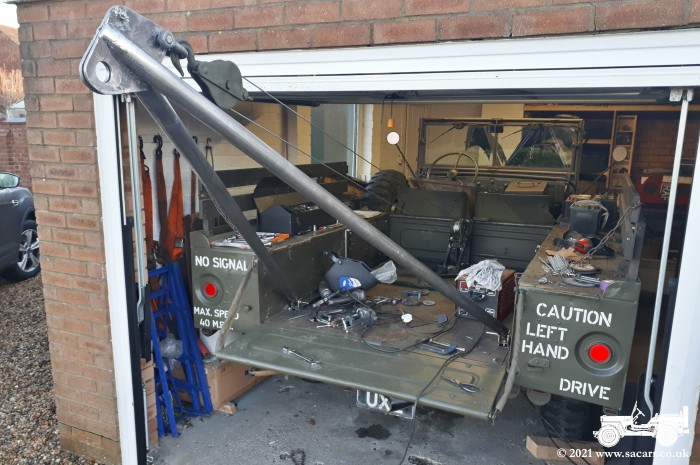
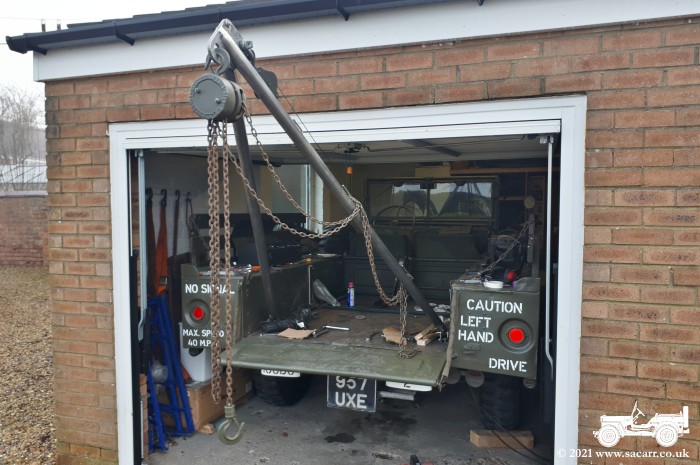
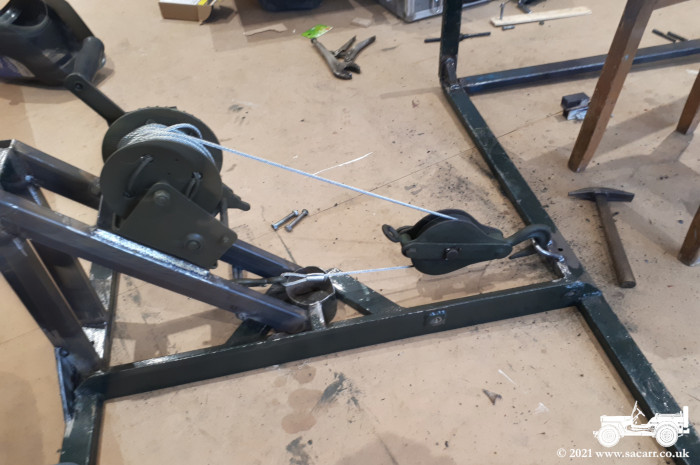
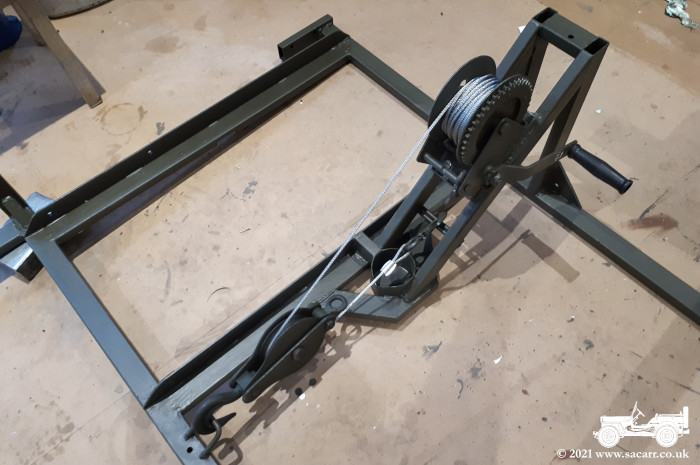
After a few tack welds, the A-Frame was lifted and propped up on a piece of wood to see how it looked. I was rather pleased with myself and the way it looked. It then occured to me there was nothing stopping me from rigging it up properly, so I went to the workshop and brought the winch and chain hoist back out. The winch was bolted in place and the cable strung to the A-Frame. It was winched up and the chain hoist hooked in place for some pictures. |
|||
|
|
||
|
It was after 1pm and I was feeling hungry. I didn't want to leave it hanging unattended while I was still working on it, so lifted the A-Frame a bit higher, allowing me to close the tailgate to help support the crane while I was away. With the chain hook attached to the Dodge tow hook, I could probably drive around an event quite safely like this. I plan to weld some small hooks to the bars so the hoisting chain can be wrapped over them and secured. I think it is better dismantled for on the road travelling to events.
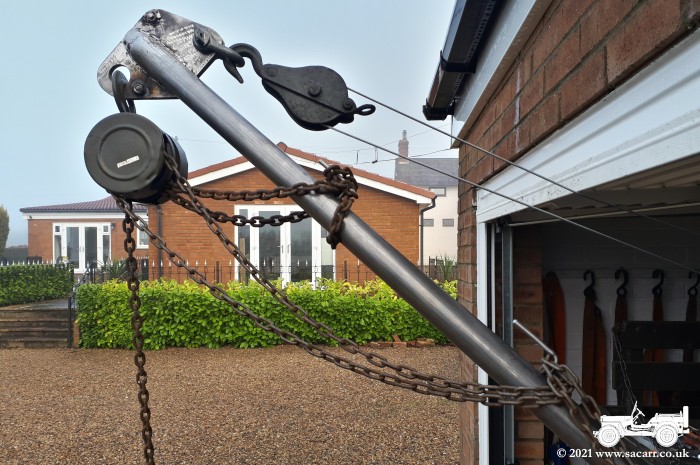
Back from lunch and I welded up the hinge mounts fully and also the crane head. I used the tips from the tube offcuts to cap the ends of the tubes against the crane
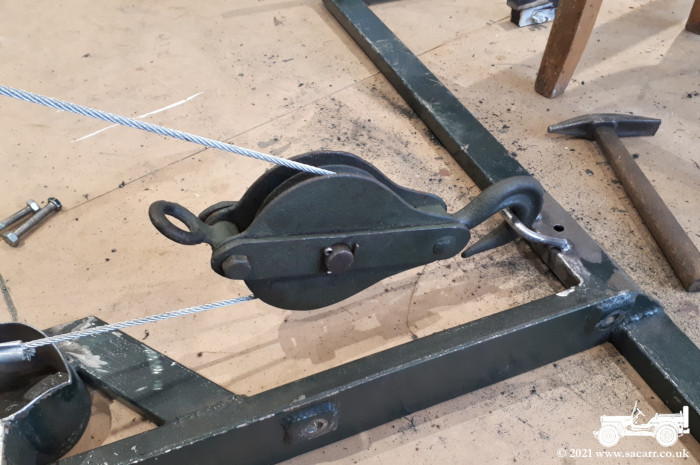
head to keep water out if it rains. When I bought the Dodge, it also had some
shackles, plus a hook and pulley in one of the lockers. They were probably
accessories from a WC52. So the crane was lowered and re-rigged with the hook
and pulley at the top end of the crane, looping the winch wire back to the
winch. This rigging halves the load on the winch and I think makes it look more
interesting. |
|||
|
|
||
|
Below is a closer view of the crane head and pulley. I like this system better, but would like to make some form of guard on the hook to prevent it from accidentally unhooking. Once complete, I'll need to start testing it under various loads to see what it can manage. For now, I know it will support at least 14 stone - me with my warm clothing and work boots on! By late afternoon, it was getting pretty cold outside, so I de-rigged the crane and packed up for the day. |
|||
|
|
||
|
-----
December 18th - Crane Construction Final fettling work today. Another hole was drilled in the crane head for
a second bolt to hold the two plates together. The welding distorted them slightly, so the additional bolt in the lower half helps to keep them together. Three hooks were welded to
the right side A-Frame bar next. If I want to drive, I need to stop everything
swinging around. The hoist lifting hook is a good fit in the Dodge tow hook, so
that can be fastened in there and the slack taken up against the pull of the
winch cables. The hoist chains can then be wrapped around the A-Frame bars and
over the hooks, keeping them out of the way. |
|||
|
|
||
|
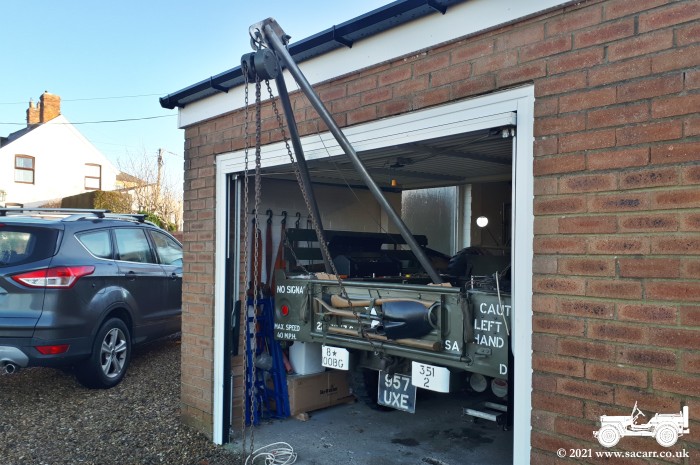
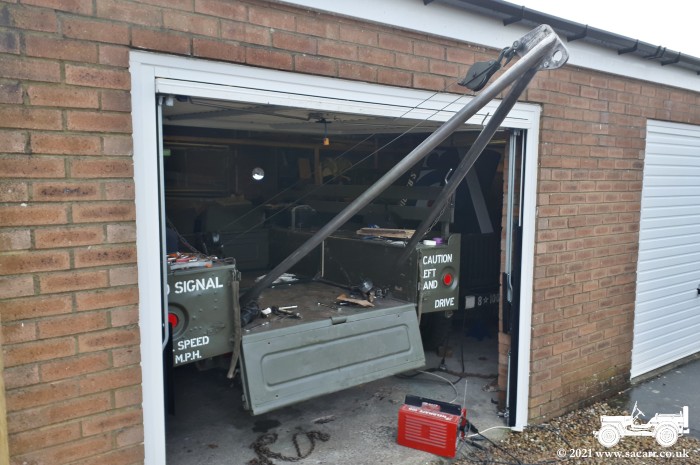
Some heavier loads would be better lifted with the crane raised higher, putting more weight down the A-Frame, rather than loading the winch cable. This would bring the load closer to the rear of the truck, but then the tailgate could be in the way of the lift. |
|||
|
|
||
|
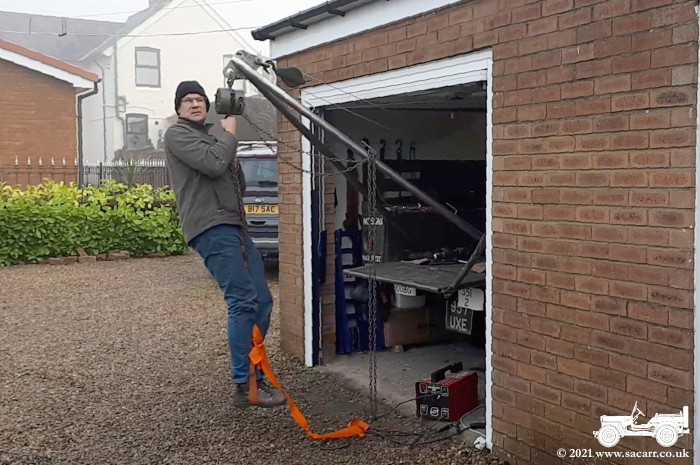
To allow the tailgate to fold down out of the way of any heavy lifts, the pioneer tool rack was removed. Now any heavy loads can be lifted near the back of the truck, passed the lowered tailgate. If the load can be lifted high enough, the tailgate could be raised beneath it, allowing it to be lowered onto the tailgate and pushed into the truck bed for transport. The tool rack will probably be mounted inside the truck, possibly on the bench seat back rest, next to the child seat. Before moving on, I did another load test with me swinging from the crane. |
|||
|
|
||
|
After that, I dismantled the crane and then removed the floor frame. With the frame out, I was able to finish the welding that couldn't be reached with the frame fitted in the truck. It was then taken into the workshop where a nut was welded into the hinge mount and a quick release bolt made for the hinge pin. It's now all ready for a final clean up and prime, followed by top coat painting. |
|||
|
|
||
|
-----
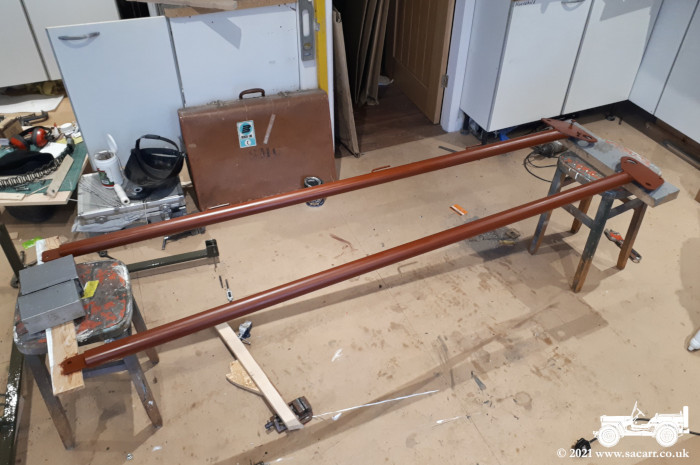
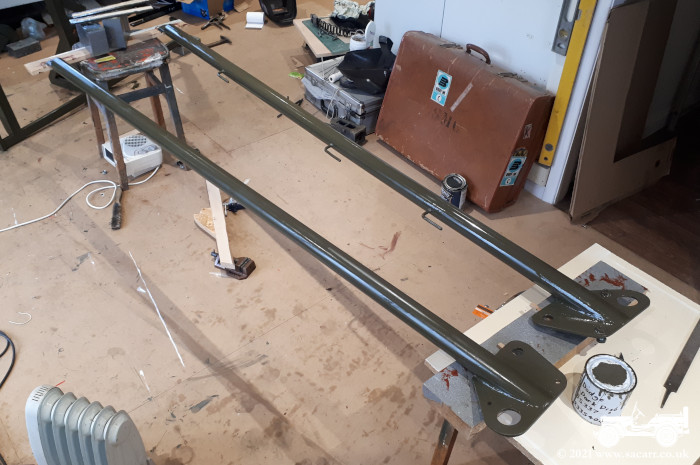
December 19th - Crane Construction Sunday the 19th was a bit of an easier day
with just a little welding and some painting. The two A-Frame bars were cleaned
down with thinners and given a coat of red oxide primer. While they were left
to one side, I welded some triangle reinforcing pieces to the uprights that
support the winch, then added a loop for the pulley block to hook onto when not
in use. |
|||
|
|
||
|
The old observer's seat support tube needed trimming down a bit so that it wouldn't rub on the winch cable, but now that the pulley has somewhere to hook onto, it stops the cable unravelling from the reel. The original dull dark green floor frame paint was given a quick sand all over, then all the upper surfaces were painted in the same olive drab as the Dodge. That was as far as I could go until the first layers of paint dried. |
|||
|
|
||
|
-----
December 20th - Crane Construction
Nothing much to report other than the bars got their first coat
of olive drab and the floor frame underside was painted, plus a second coat on
the upper and side surfaces. |
|||
|
|
||
| ----- | |||
|
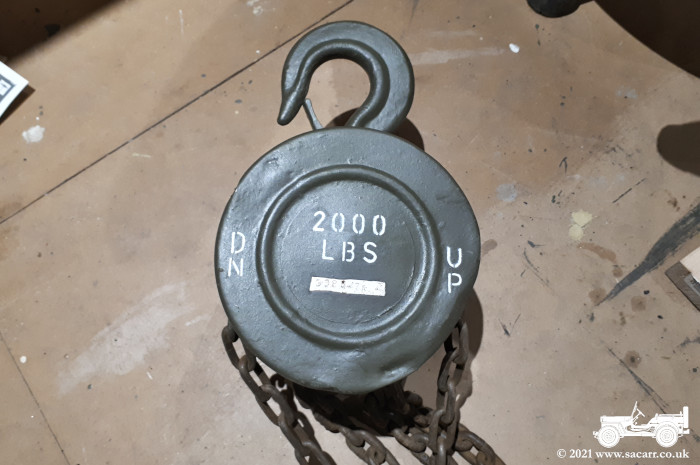
December 21st & 22nd - Final Details The A-Frame bars received a second coat of olive drab today and were once again left to dry. The winch was mounted onto the floor frame and the handle painted with 'UP' and an arrow to avoid confussion due to the gearing, as the handle rotates the opposite direction to the reel. The reel was fully unwound too, as the inner crimped end was getting snagged on the cable as it wound onto the core of the reel. To solve this, the inner crimped end was cable tied to the centre bar of the reel and taped over with duct tape to give a more even surface for the cable to wind onto. Approximately half of the 20 metre cable was carefully wound onto the reel and this was then given a couple of wrappings of duct tape. I don't need the full length of the cable anyway and this keeps at least half the reel from unravelling if there's no tension on the wire. The rest of the wire was then wound onto the reel, forming a nice even coil side to side as it was wound into place. On the 22nd, the chain hoist was stencilled to avoid confusion as to which chain to pull. It's actually a 1 tonne hoist, but wanting it to represent US wartime, I stencilled it slightly under rated at 2,000 pounds. |

|
||
|
|
||
|
-----
December 23rd - Frame & Seat Fitting On the afternoon of the 23rd, the frame was carried back out to the Dodge for fitting. Most of the bolts were reused as they were, but a couple that went through the floor needed around a half inch trimming off. The wooden shims at the front fixings needed a little trimming, but everything went together without problems. Once it was all fitted securely, I brought the A-Frame bars out and fitted those to establish the position of the wooden blocks I wanted to add. They were epoxied in place and left to set for a while. |
|||
|
|
||
|
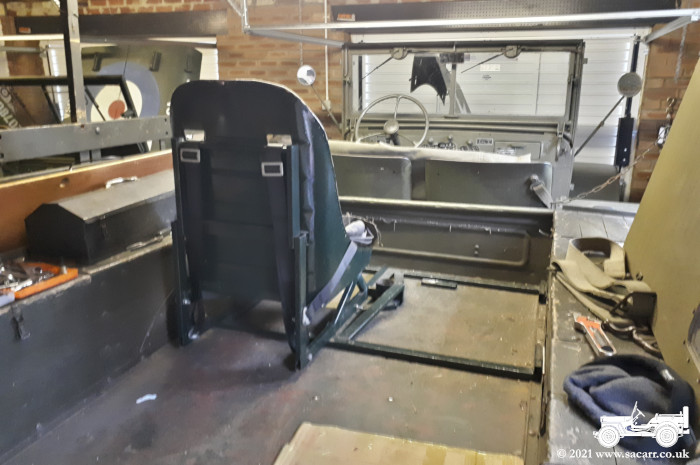
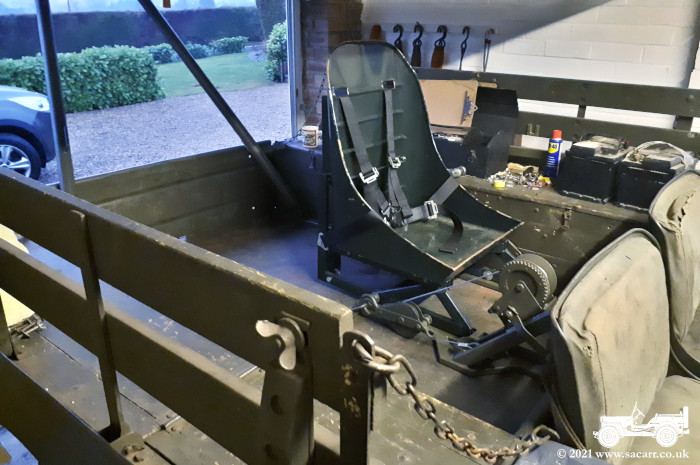
While the epoxy was setting, my daughter's child seat was fitted back into the Dodge. It now sits much lower down than before, so she can see what's going on during a trip out and is probably further out of the draft from the cab roof. She currently still fits the modern child seat which fastens into this dummy B-17 pilot's seat, but before long, we're going to have to make a new padded seat and back rest. The four point harness is attached to the seat frame, as the modern seat relied on using the car seat belt. Before locking up the garage, all the bolts were given a coat of olive drab. Once the epoxy had cured
sufficiently to hold the wooden blocks in place, the bars were de-rigged
and taken back to the workshop where they were drilled for some self
tapping screws. The screws were a little reluctant to cut through the
3mm steel, so a UNC thread was cut into the metal with a tap and that
gave the screw the help it needed to start threading itself. With the
screws in, both blocks were given a coat of olive drab and may need one
more before they have good coverage. Other than some stowage for the
bars and mounting the pioneer tool rack ( probably to the left of the
seat ), I think it's all done. I can't wait to get the Dodge and Jeep
out and do a little photoshoot with it all set up. |
|||
|
|
||
|
-----
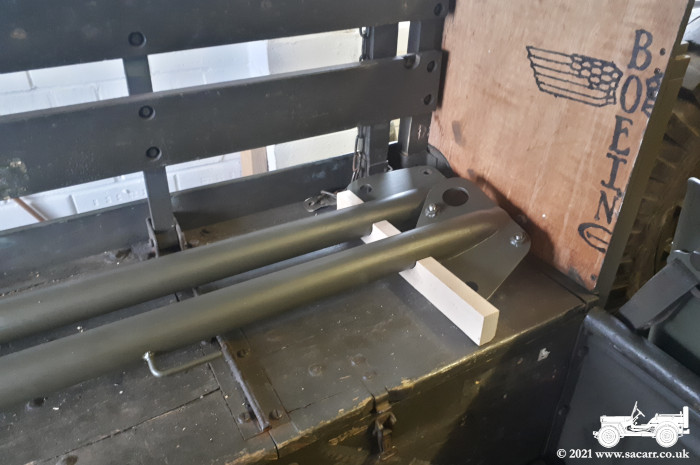
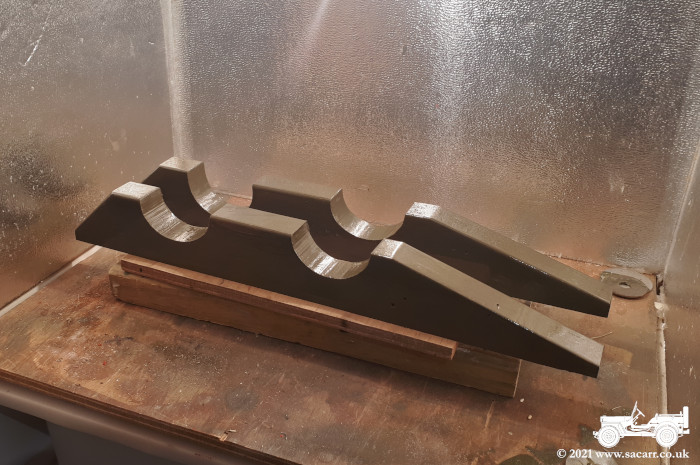
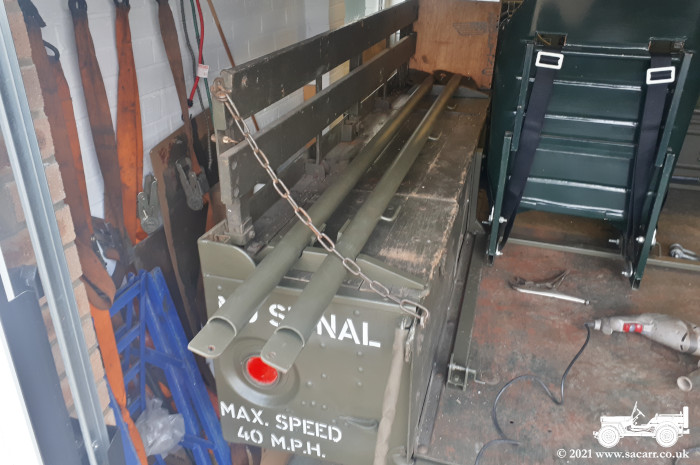
While many are winding down and relaxing in
preparation for Christmas, I've still been busy with the Dodge, pushing it
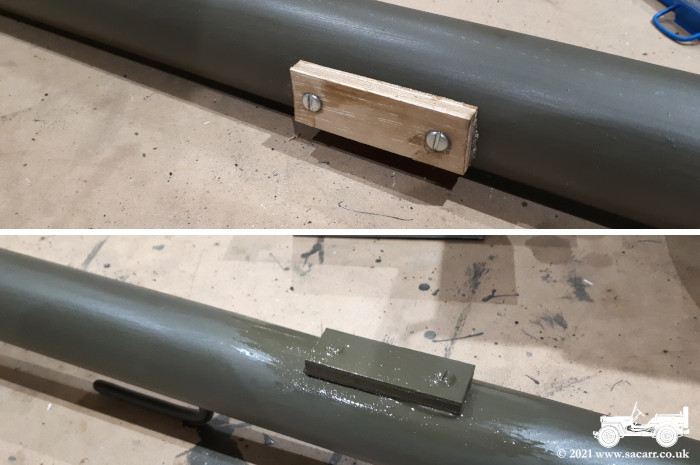
towards completion for hopefully a trip out in a few days. Two hardwood rests
were cut for the bars. They will be screwed to the locker lids but won't
prevent the lids from opening. With the rear rest mounted right at the back of
the locker lid, it doesn't stop anyone from sitting on the bench seat if the
crane is mounted rather than stored. |
|||
|
|
||
|
The crane head tucks in between the rest and the front of the truck bed. There's probably enough weight in them to keep them there, but if needed, I'll add something to hold them down. The rests were trimmed down and then given a coat of olive drab. The first coat is always a bit thin, so they probably need a second coat. They are currently baking in my curing cabinet. |
|||
|
|
||
|
-----
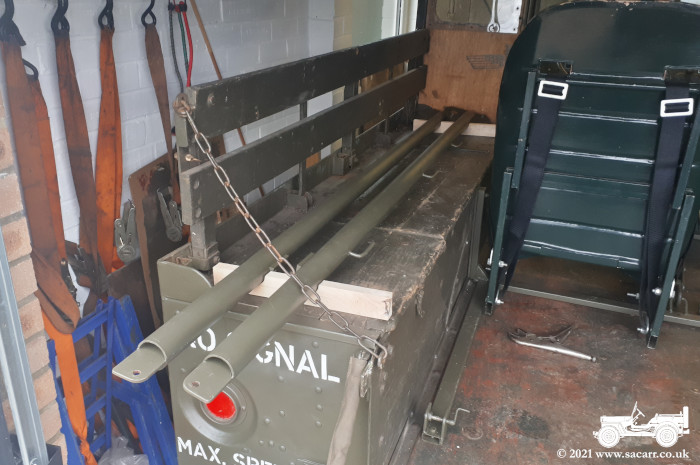
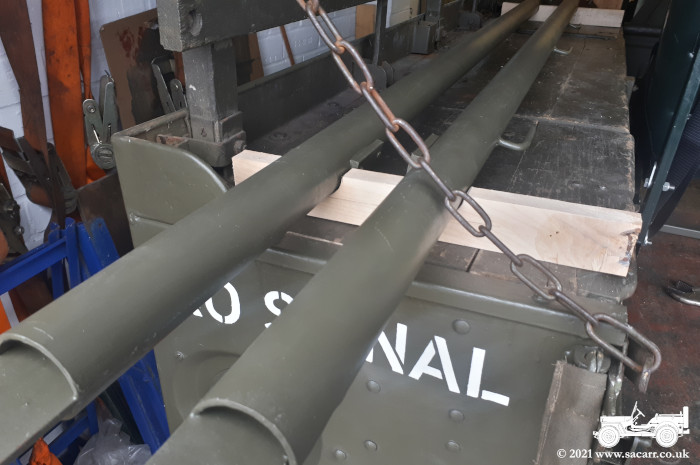
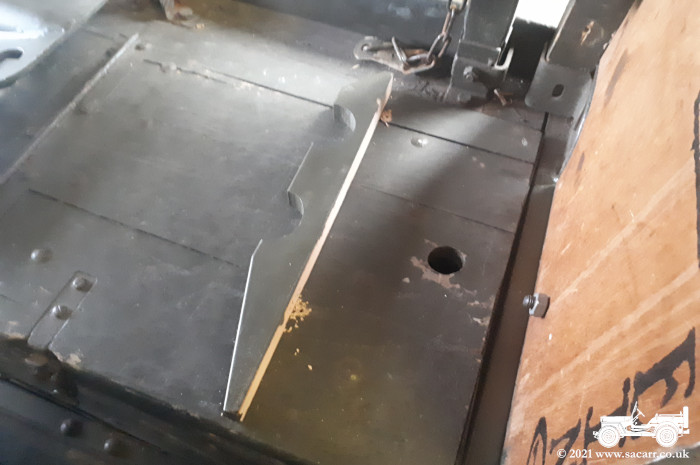
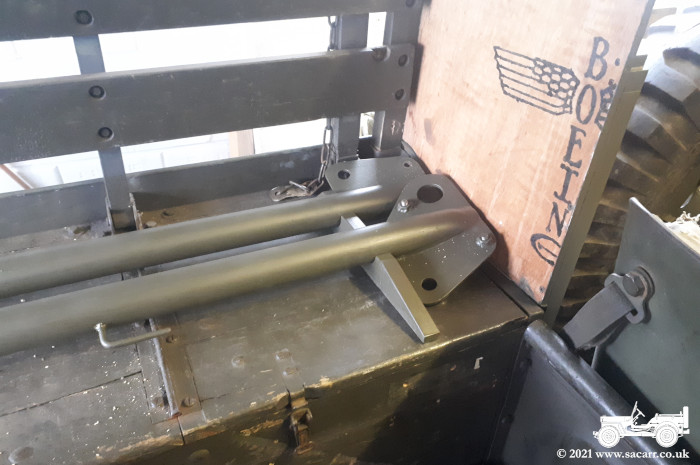
December 25th - Finishing Touches Last job on the crane was a quick ten
minute task to fit the crane bar supports. Just two woodscrews in each one,
hold them in place. Two small holes were drilled through the locker lid,
countersunk on the rear. The bar rests were held in place and a pilot hole for
the screws drilled through the lid and into the rest. |
|||
|
|
||
|
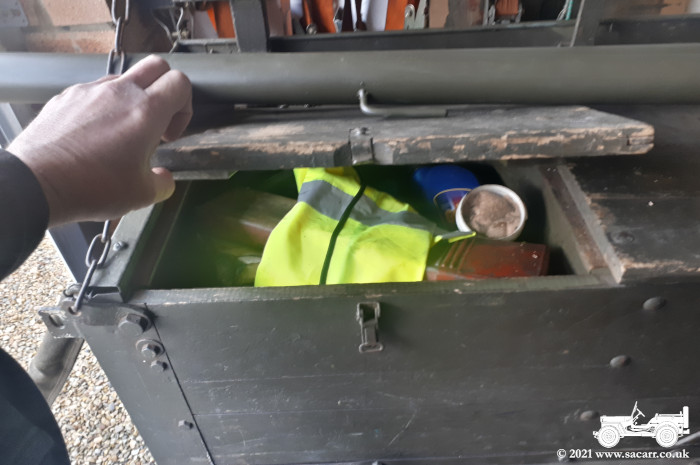
Even with the bars in place, the rear locker can still be accessed if needed. I keep a few spares and fluids in that locker and will probably empty the rear right locker to keep the chain hoist and shackle in. They'll be easily accessible from that locker. I need to look for a shorter tool box which will probably go in the front left locker. The long tool box I had, used to live under the false floor along with the spare wheel. That is too long to fit in any of the lockers and I don't want it on show. Now I just need a dry day to get the toys out for some pictures. |
|||
|
|
||