Ongoing Work in 2009
-----
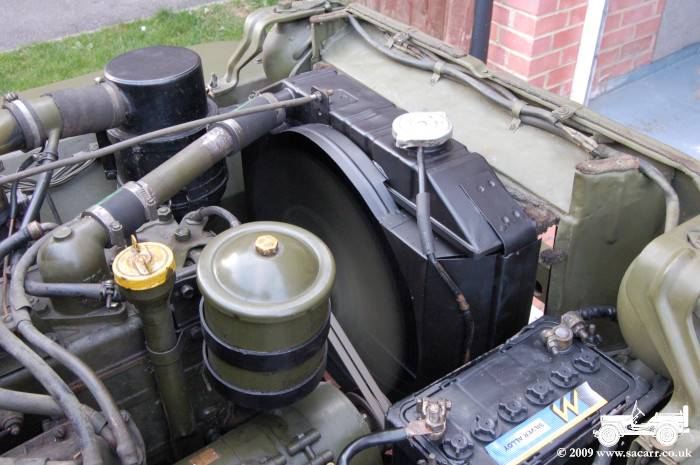
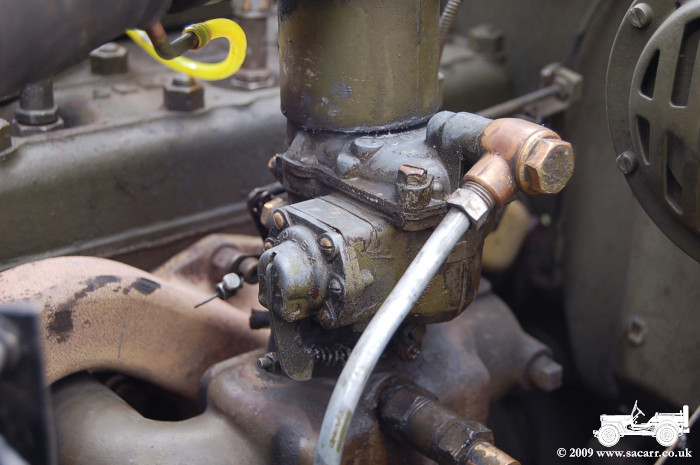
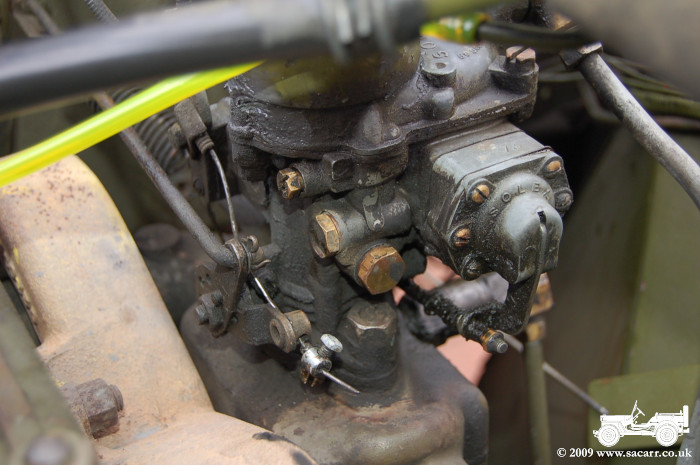
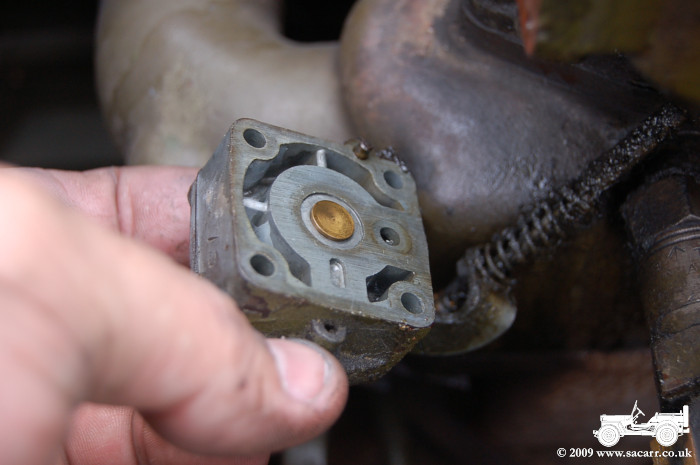
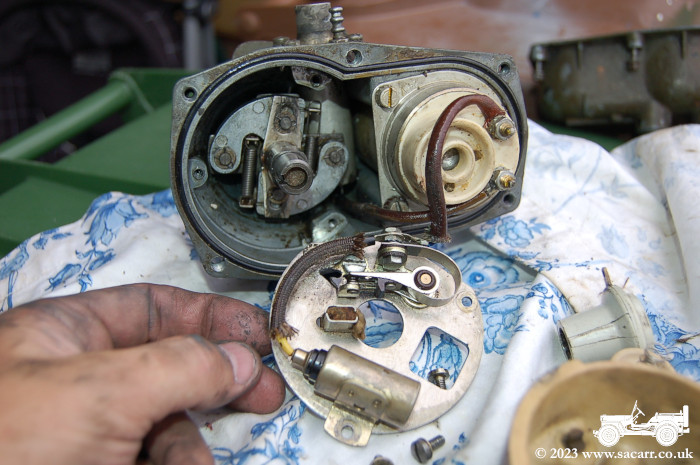
| Aug 16th '09 - Ignition Fuel System Check
Over
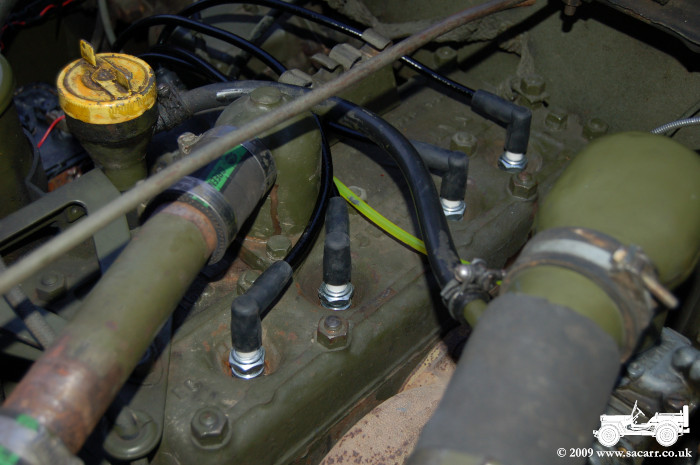
the last few weeks, the Jeep engine has been miss-firing every so often,
particularly under acceleration loads. In an attempt to narrow down what
the problem was, I stripped down the carburettor to clean it and the
distributor to swap parts with a spare I had. The carburettor is
seen below in the first picture from the front left, showing the main
fuel feed pipe leading into the float chamber. The second picture is
from the front right, showing the throttle linkage to the left and
acceleration pump on the front.
|
 |
 |
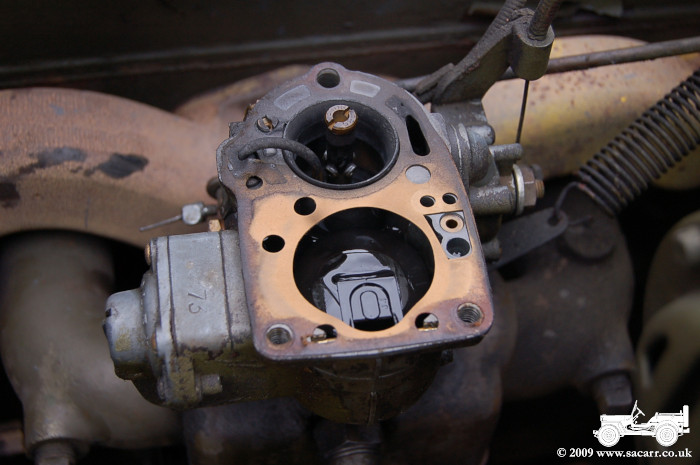
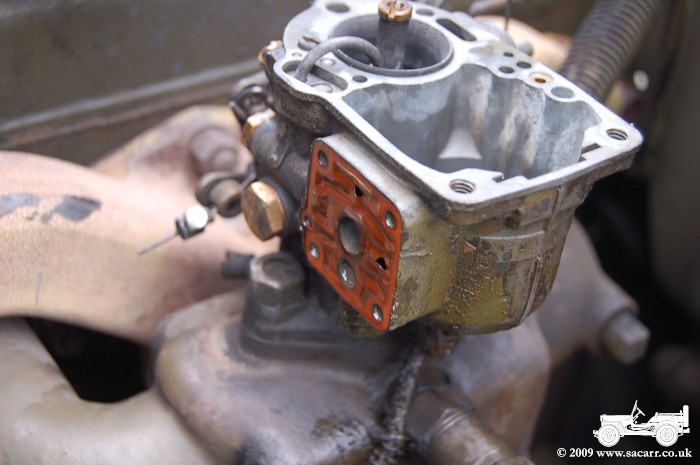
The
fuel pipe was disconnected from the fuel pump, and then the top of the
carb removed to reveal the float chamber ( below left ). The float was
removed and the bowl cleaned out of sediment. The cover plate had the
one way ball valve checked.
|
 |
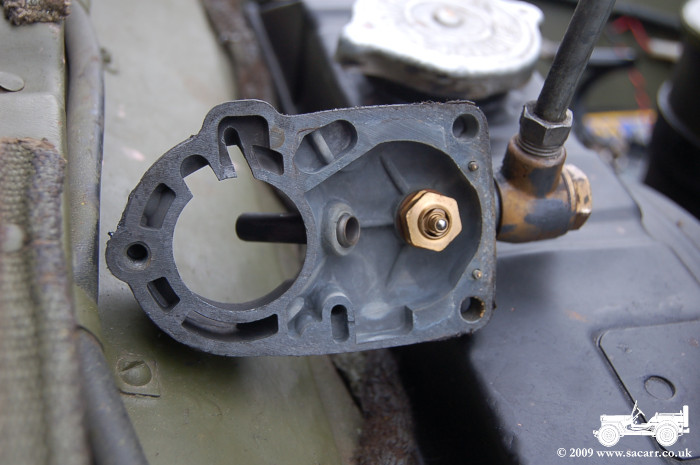 |
Next
the accelerator pump was removed and the pump checked that it was still
pumping fuel through the port. Several other jet screws were removed and
the areas flushed out.
|
 |
 |
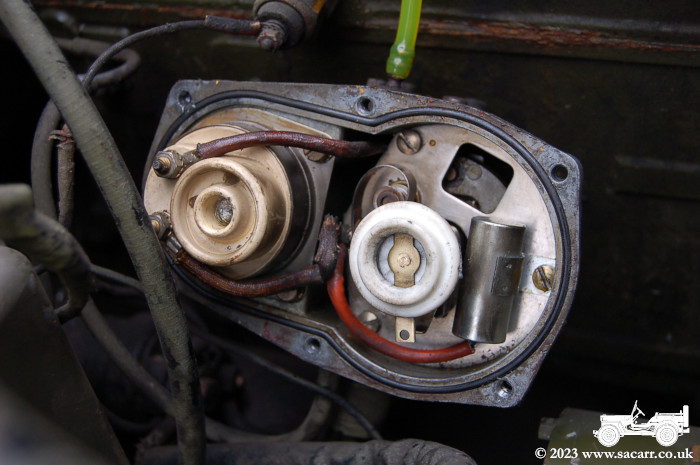
| The
distributor had the points cleaned and re-gapped, and the condenser
swapped for another old one off a spare distributor. The plugs were
removed, cleaned, re-gapped. At each stage the engine was test run to
check for improvements. |
 |
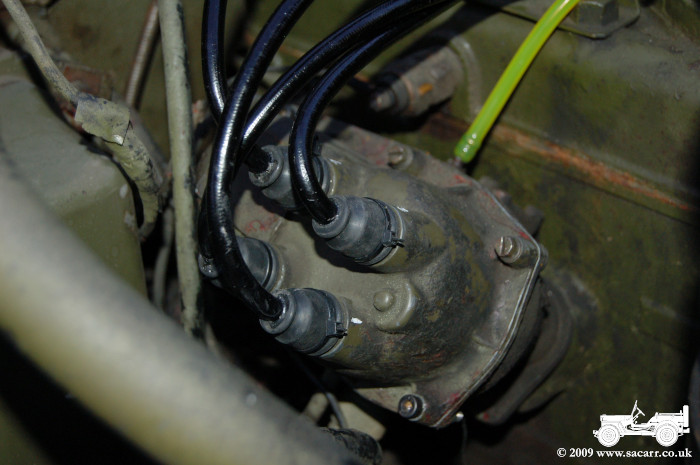
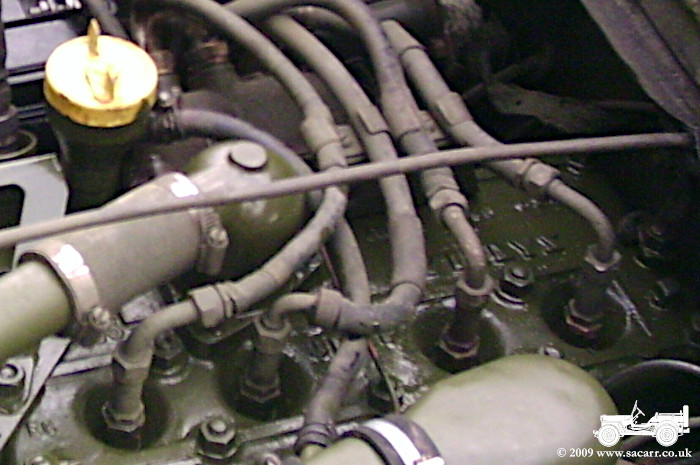
| The plugs in
cylinders 1 & 2 were running colder than 3 & 4, so they were
swapped with 3 & 4 and the engine re-run. This showed the plugs to
be ok as the plugs in cylinders 1 & 2 were still colder. No 1 &
2 HT leads were then swapped resulting in smoother running 99% of the
time. It seemed the HT leads were likely to be suspect, either
fractured or shorting.
First
thing Monday, I ordered some new points, condenser, HT leads and plugs
from Tony Sudds. Unfortunately Hotchkiss leads aren't that common so I
ordered Willys leads that would need altering to get them to fit the
screw to distributor.
|
 |
-----
|
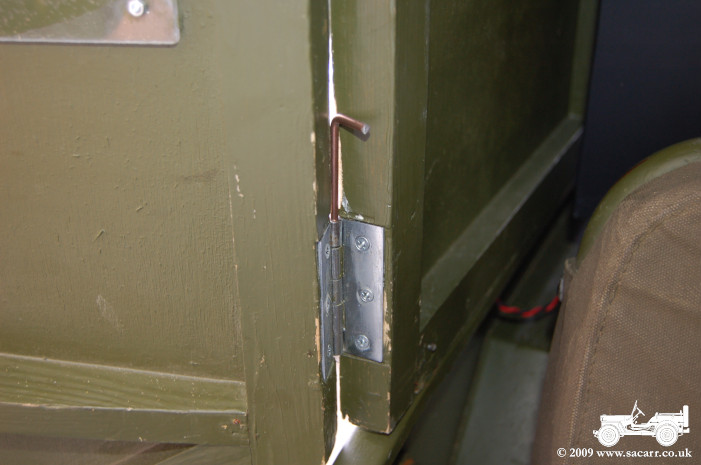
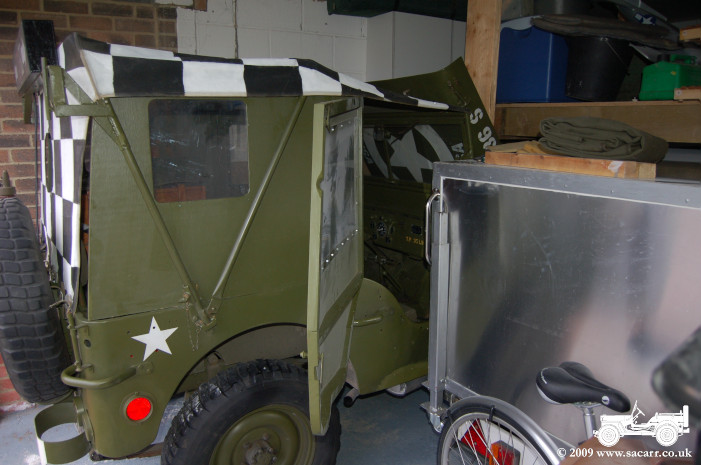
July 7th '09 - Door Modifications
At
last weekends event at Ingleton, we spent some of the time with the
front section of the doors unscrewed when it was warm, but it was a pain
screwing them back on when it rained.
I decided to make
them quick release so if I was driving with them removed, they could be
quickly re-fitted. To achieve this, I filed off the end of the
hinge pin, and replaced it with an 'L' shaped pin that would allow it to
be easily drawn out of the hinge.
The parts of the hinge can now remain screwed
to the doors, while the pin can be easily withdrawn and replaced along
with the doors. |
 |
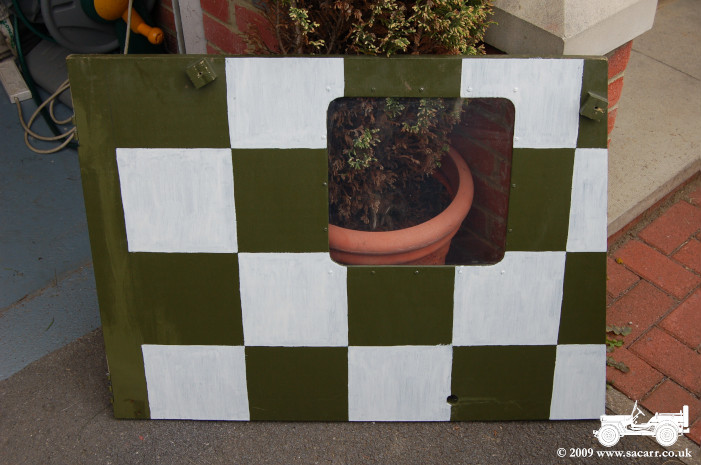
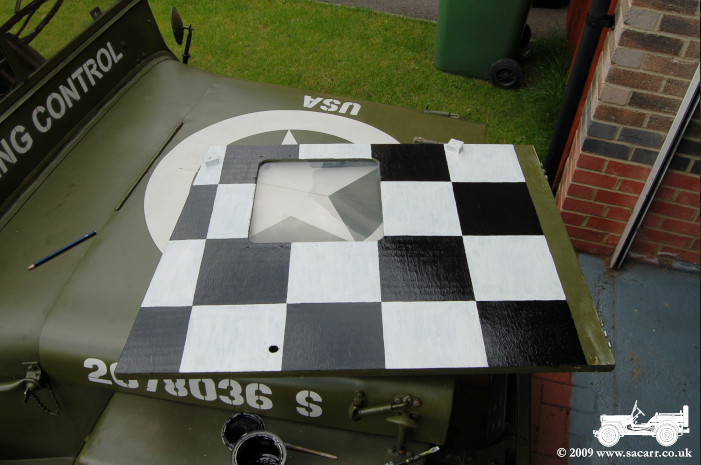
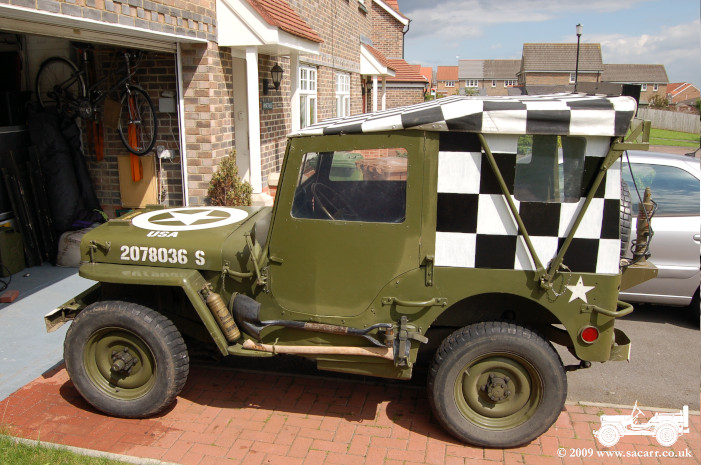
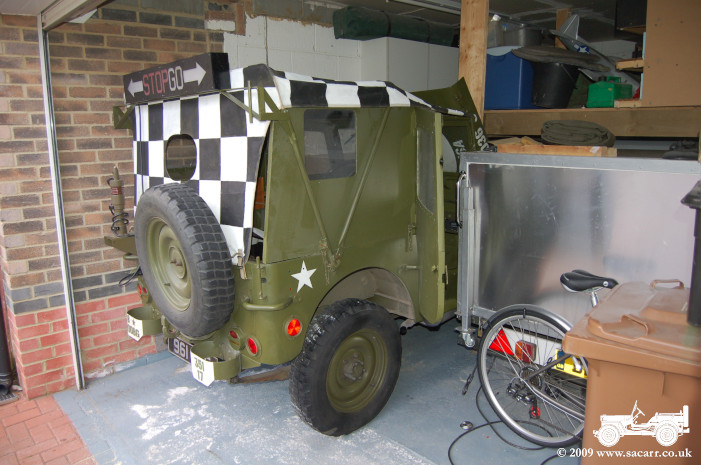
| To further enhance
the Flying Control look to the Jeep, the rear sections
of the door sets were also painted checkered today. This more resembles the
100th Bomb Group Follow Me Jeep in my 100th archives photo album. |
 |
 |
 |
June 28th '09 - Distributor
Continuing from the plug clean, the
24v distributor as stripped and all the contacts cleaned. When it all went back
together, the engine wouldn't start! Two hours later after checking everything,
it still wouldn't start, but I had narrowed things down. There was a spark at
the points, and I was getting power through on the HT side contact on the
distributor. From there however, it wasn't delivering the power to the rotor arm
and on through the HT leads. After further cleaning and checking, I used a model
railroading product called 'Electro-lube', an electrically conductive oil. This
was added to the contact between the electrics and the distributor cap, and
between the contact in the cap and the rotor arm. It was all put back together
yet again and finally the engine started much to my relief!
-----
June 27th '09 - Plugs & Air Filter
The Jeep engine has been missing
occasionally and seemed down on power recently, so today the plugs were stripped
and cleaned. Unlike the standard Willys plugs, these are the sealed type with
the screw on ignition leads. Each plug can be split in two, and buy unscrewing
the top section, the centre terminal can be withdrawn allowing cleaning of it
and the contacts within the plug body. All the plugs were re-gapped and checked
for spark before fitting. The air filter was also removed, stripped, cleaned, a
load of creamy sludge removed from the bottom, re-oiled and re-fitted. A quick
road test showed the engine to be running much better.
-----
|
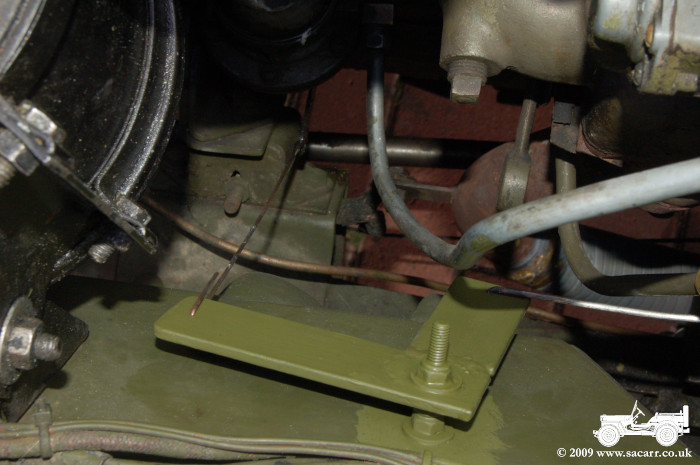
April 4th '09 - Engine Primer Modification
If
the Jeep hasn't been run for a while, the engine needs a prime before starting,
otherwise the batteries and starter get un-necessary use pulling the fuel
through. Previously I had fitted a
welding rod through the hole in the primer arm, and the
other end hung over the horn bracket. With the hood open I could pull this wire.
Reaching this wire is impossible when the
doors are fitted.
Today I
made this little bellcrank modification. The steel bellcrank was welded
up from scraps I had kicking around, and bolted through an existing hole
in the fender. The original priming wire was cut short and fastened to
one end of the bellcrank.
|
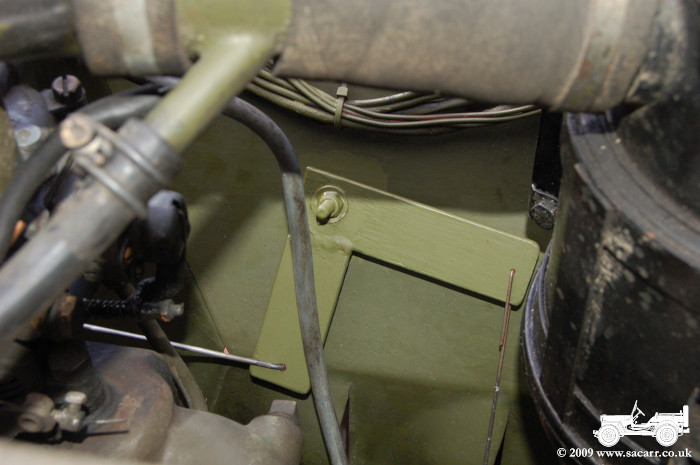 |
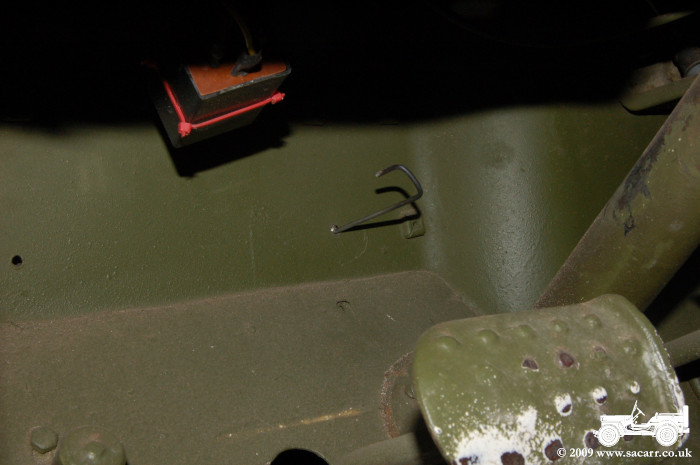
A piece of 2.5mm piano wire went into the
other bellcrank arm, and through an existing hole in the firewall,
exiting near the pedals and steering column. Now I can park with the
doors on and the hood shut, and to prime, just reach down by my feet and
push the little wire a few times. Job done!
|
 |
 |
-----
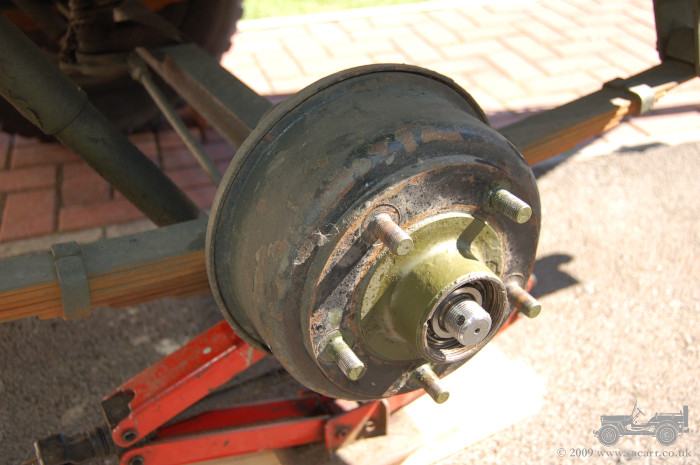
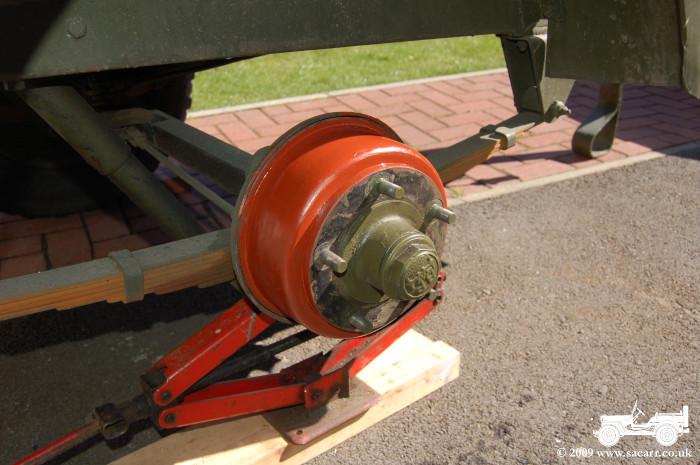
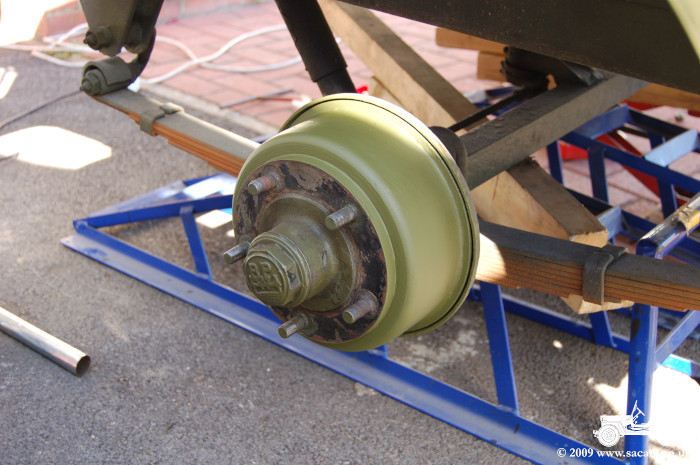
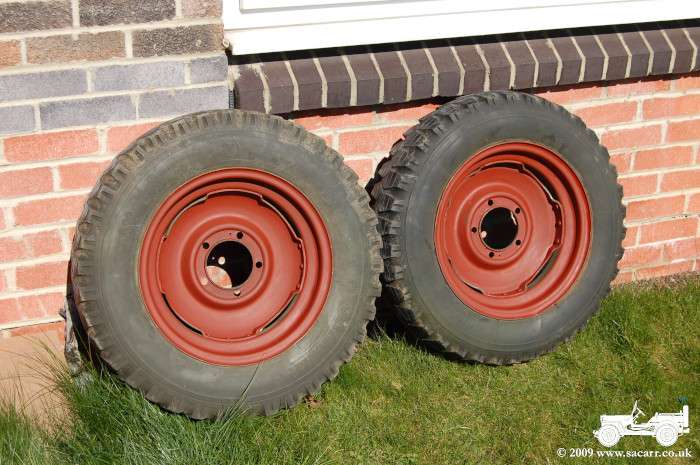
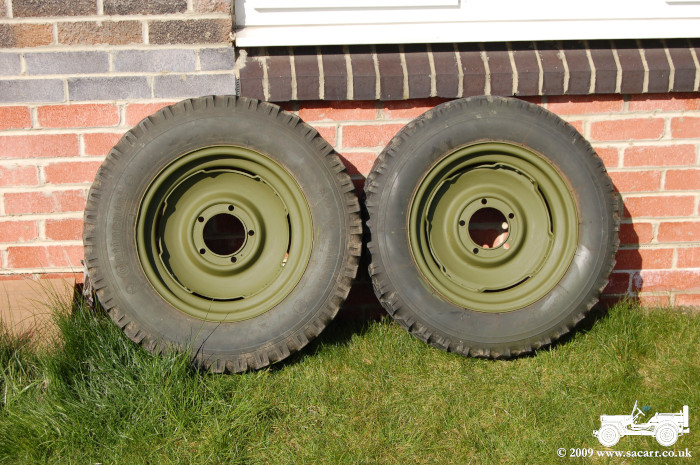
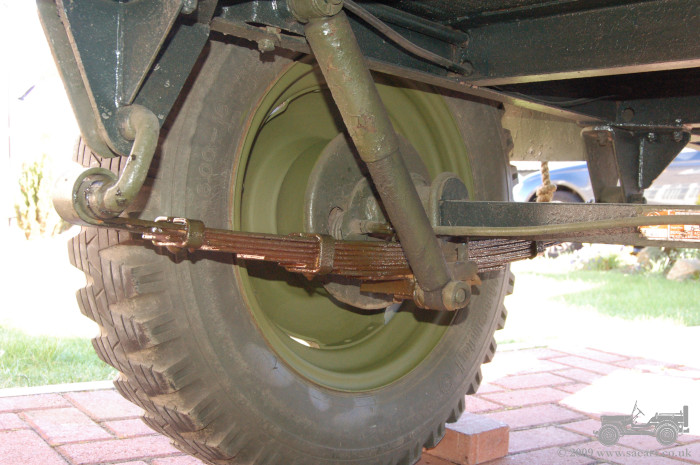
March 29th '09 - Trailer Wheel Bearings & Rust Treatment
With another good day
forecast, I had the trailer wheels to bits, mainly to grease the wheel bearings.
I also cleaned the loose paint and rust off the hubs and wheels, re-painted
them, greased the spring shackles, towing eye and oiled the springs. The Winter
Doors also had their plastic windows polished, as over the last couple of years,
they had become covered in tiny scratches, reducing the visibility through them.
-----
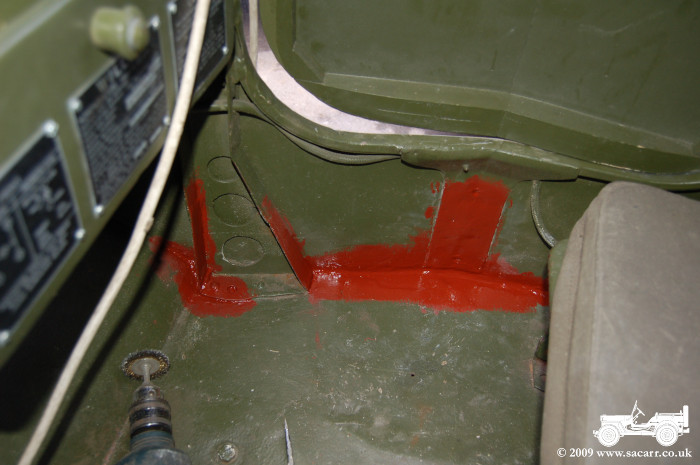
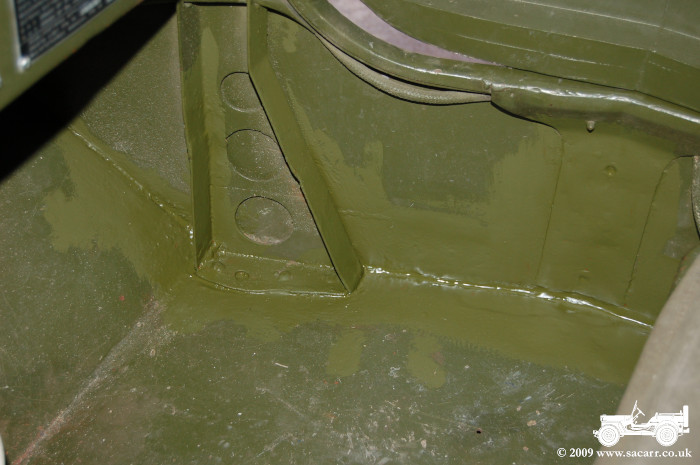
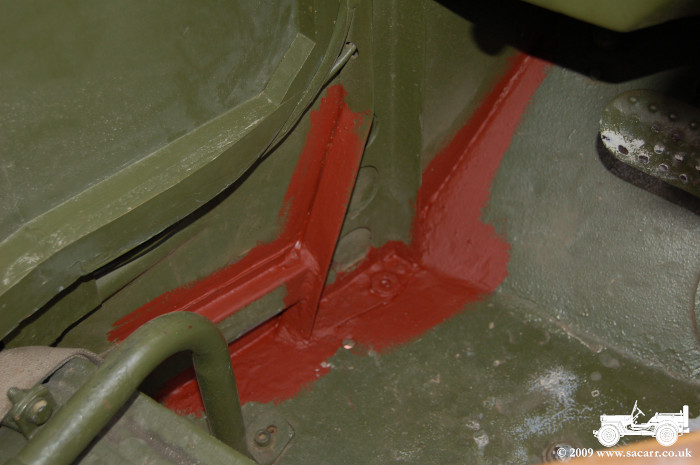
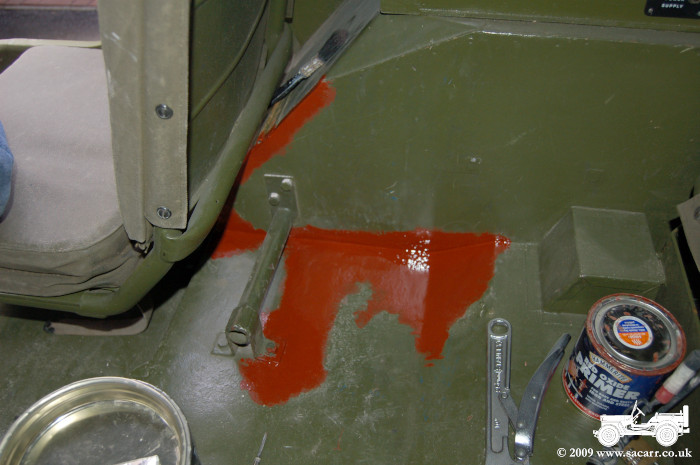
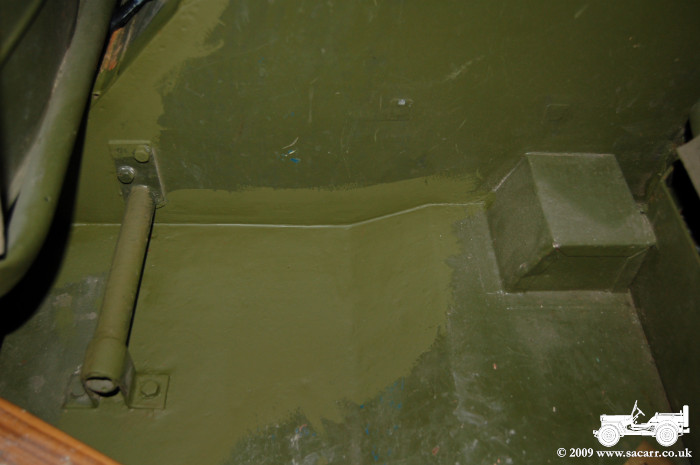
March 28th '09 - Rust Treatment
This weekend saw the inside
of the Jeep being treated for areas of rust along various seams. It was a cold
day which did slow up the painting, but because the doors were still on, I had a
2Kw fan heater in there with me which certainly made it a more pleasant job, and
did speed up the drying times! I'm sure it won't take long for the new
paint to weather in to match the old.
-----
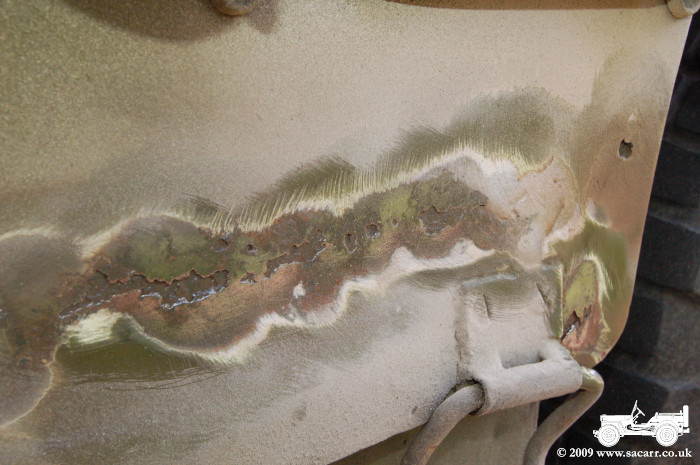
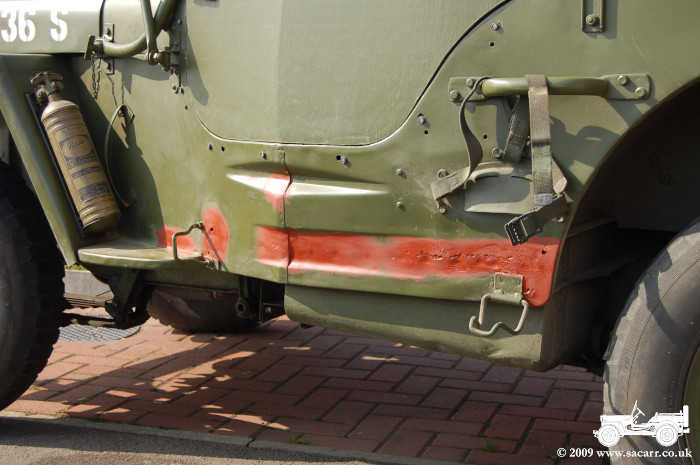
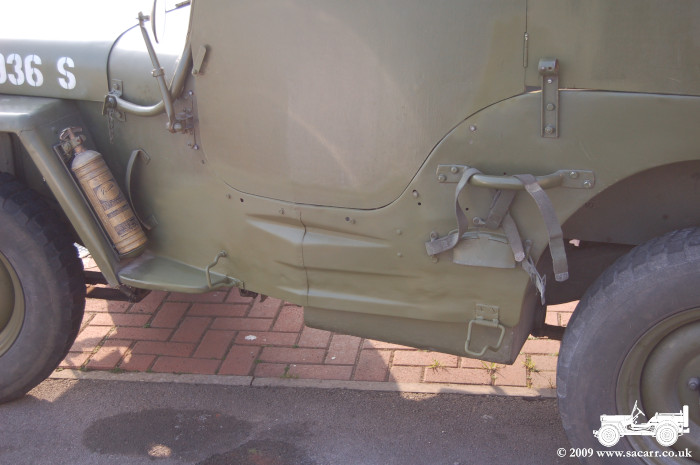
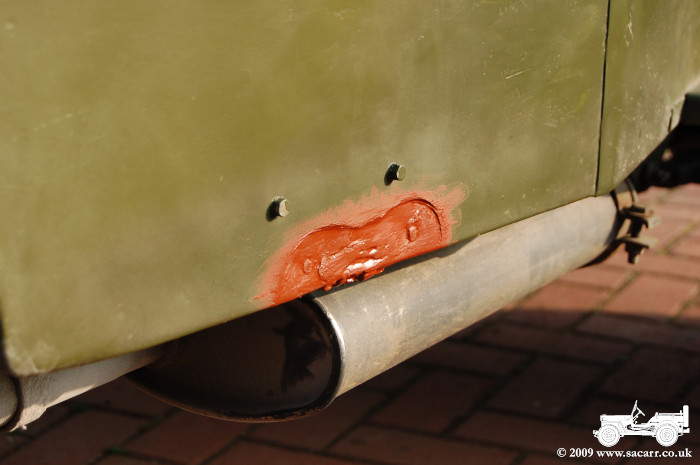
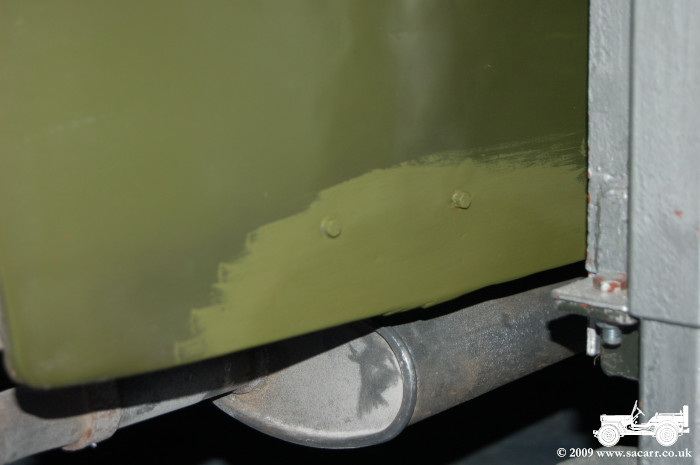
March 21st '09 - Rust Treatment
For some time I've noticed a
row of rust blisters on the paint behind the axe and shovel. It was a nice day
today and while I was tinkering with other odds and ends on the Jeep I decided
it was time to deal with them. As with previous rust treatments, the affected
area was ground out with a wire brush, red oxide primed, filled level, re-primed
and the final colour coat painted. The axe and shovel were also cleaned and
woodwork waxed ready for re-fitting once the paint has hardened.
There was also a small area
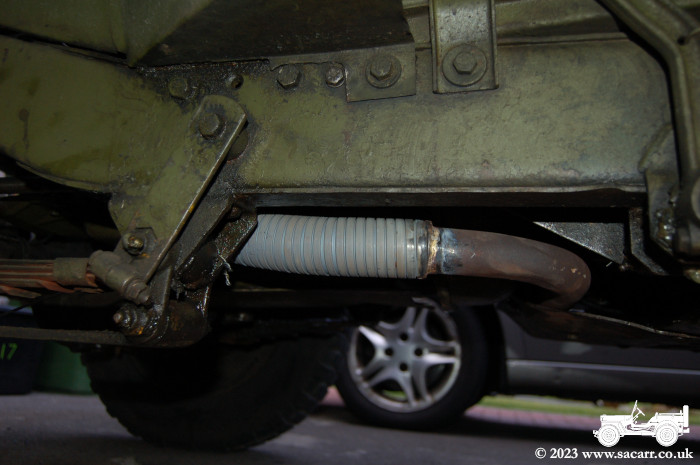
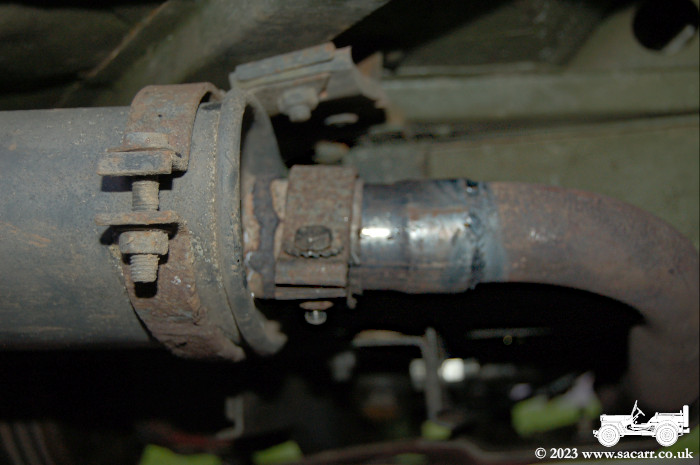
just above the exhaust which needed the same treatment.
-----
| Winter Door Re-fit
The other
main job for the day was to modify the winter side doors to fit the
checkered canvas. With this canvas being slightly tighter, the front
edges of the doors needed trimming where they butt up against the
screen. Getting out of the Jeep in the garage is now a tight fit!
Smaller jobs done were to repair the
glazing on one of the trailer indicators and to start making a 'Follow
Me' sign to fit above the light box.
|
 |
|
 |
-----
March 17th '09 - Major Maintenance
The Jeep is now back from its
second round of maintenance at Croft Engineering. This time the major job was
the clutch replacement, but while it was in and stripped down, several minor
things came to light. Two oil seals were replaced, one on the transfer case and
the other on the front diff. The handbrake shoes were also replaced as one was
broken and they were covered in oil from the leaking oil seal.
-----
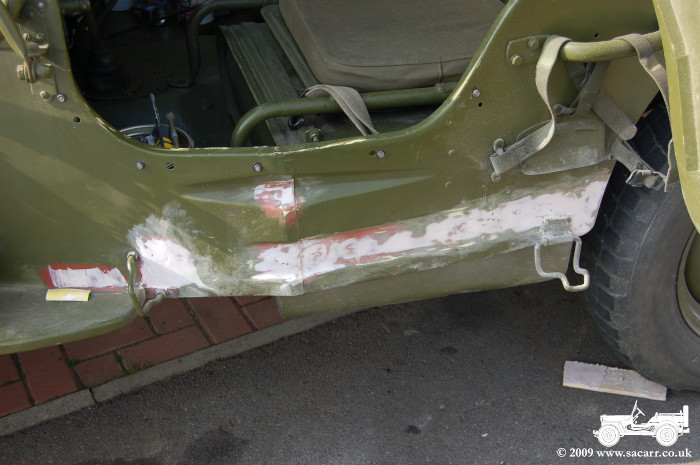
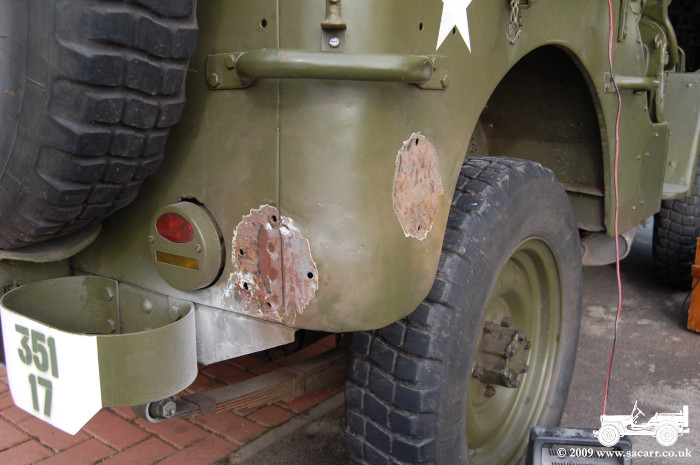
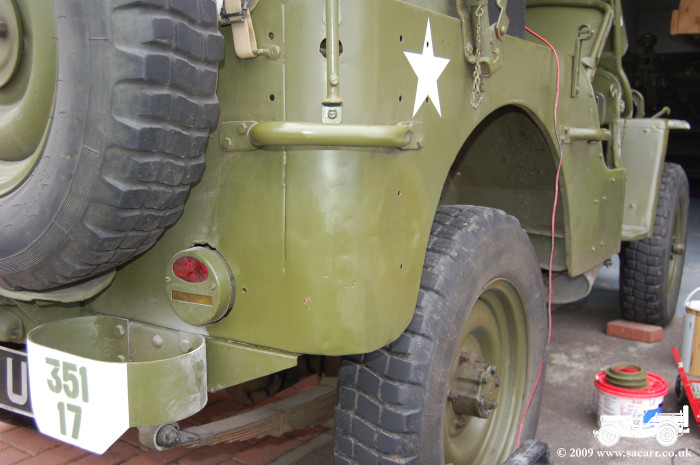
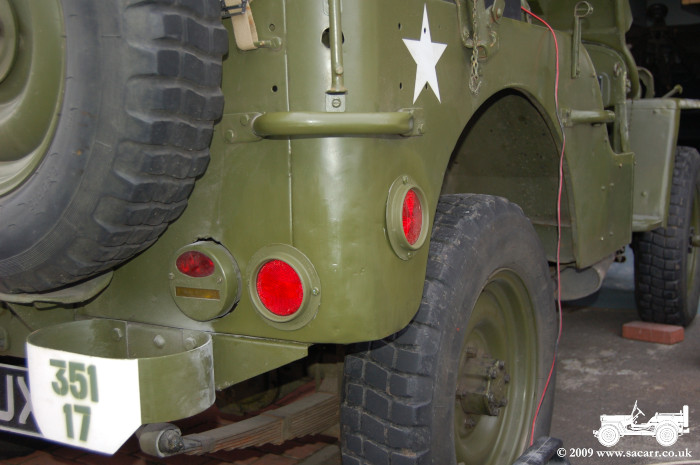
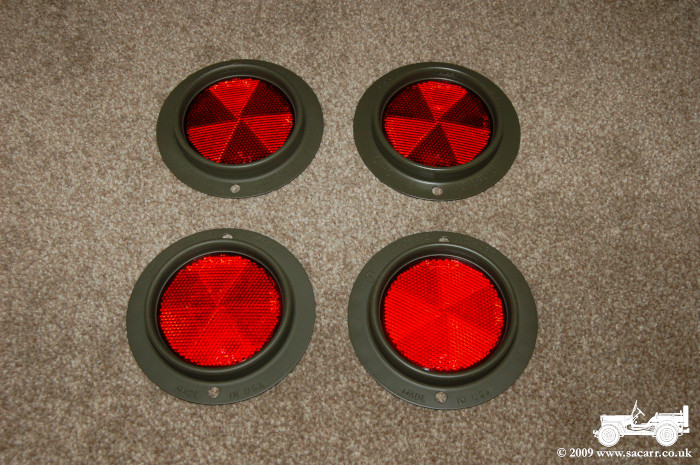
March 7th '09 - Fitting Reflectors
What I expected to be a quick
job actually took five hours. The bolts holding the old reflectors on were
rusted solid and had to be ground off with the angle grinder. The bodywork
behind had lots of surface rust and was very uneven where it had been pulled in
at the welds, so after the rust was removed and the surface red oxide primed, it
was filled and sanded to a more even level so as not to distort the reflectors
when they were bolted up. It was primed once again before a final brushed coat
of green. In the summer when it is warmer, I'll give the area a light sand and a
sprayed coat of green. Once the paint was dry, the new reflectors were bolted
on.
-----
-----
February 24th to 26th '09 - Major
Maintenance
Jessie went for some major
work that I was unable to do myself, which includes replacing the steering
bellcrank kingpin. I've tried on a couple of occasions to remove it and failed.
Croft Engineering, who did the work, finally managed to remove it with A LOT of
heat and a puller. The other work included replacing the steering gearbox
bearings, fitting the new brake shoes bought at Stoneleigh in 2008, re-setting
the valves, and a tune up.
During the Jeep's overhaul, I
was advised that the clutch needs replacing, something I've suspected for a
while. While it isn't slipping yet, we have several long trips planned this year
with the trailer, so it's likely to go back to Croft Engineering to have this
work done before the season really gets going. I've had the Jeep almost four
years and covered 7500 miles and this is the first major work it has needed so
it isn't doing too bad for a 51 year old vehicle, with some parts such as the
engine, 65 years old. The engine itself was given a leak down test and is
looking good with cylinder pressures all fairly close, ranging from 115 to 121
psi.
-----
|
February 1st '09 - Stoneleigh
Military Fair Purchases
Something that's been a bit
tatty for a while is the reflectors, Hotchkiss ones, one of which was cracked.
Because the Jeep I originally copied was an early type, I got some NOS 'Tiger Ey'
reflectors.
|
 |
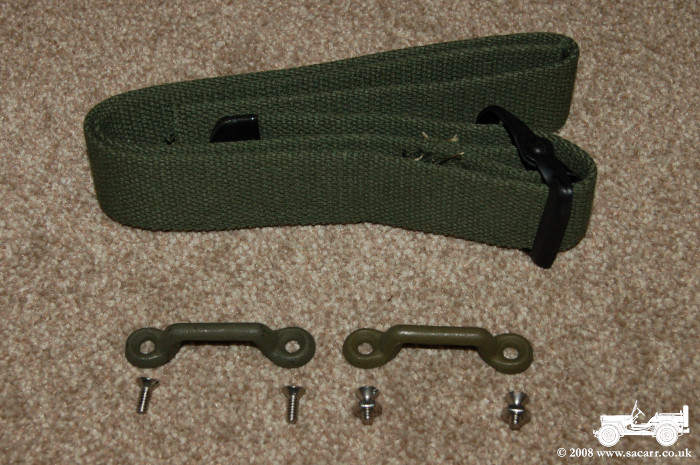
| Also purchased was a Jerry Can strap and two footman loops. The
loops will be fixed to the back of the drivers seat and floor to hold the Jerry
Can on longer distance trips where we don't have the trailer.
|
The last purchase for the
Jeep was a bearing set for the steering gearbox which has been showing signs of
play in the output shaft.
|
Home