| Five
Page Updates -
April 2015 -
June 25th '19 -
June 27th '19 -
November 24th '19 -
December 8th '19 |
|
| Since the Jeep is
marked up as the 100th Photo Lab vehicle, I thought it would be nice to
have a little display along the same theme. Fortunately, I already had
some equipment that would work, and I've been getting some other odds
and ends together. |
|
|
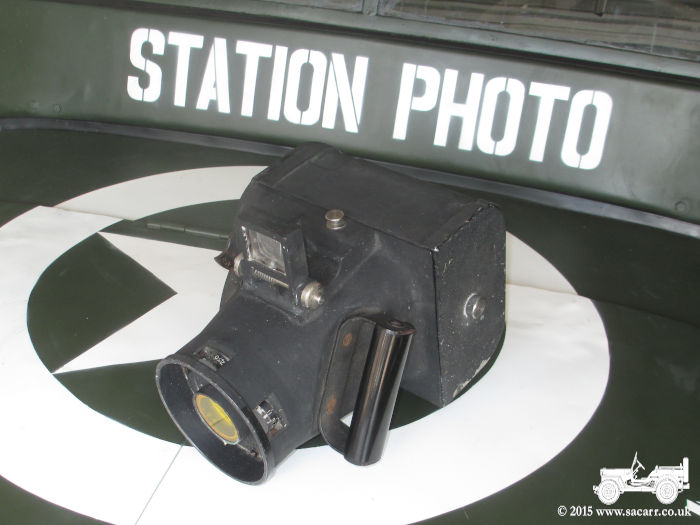
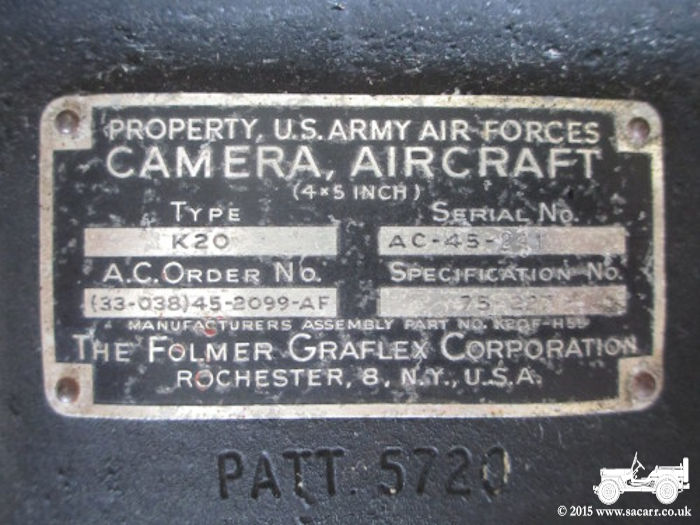
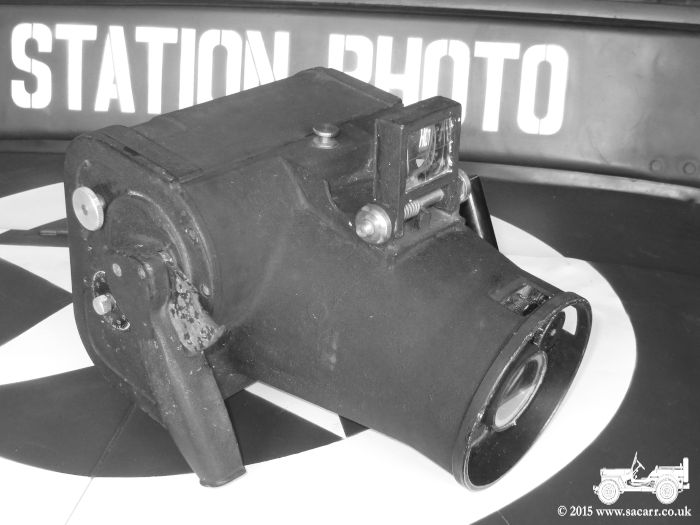
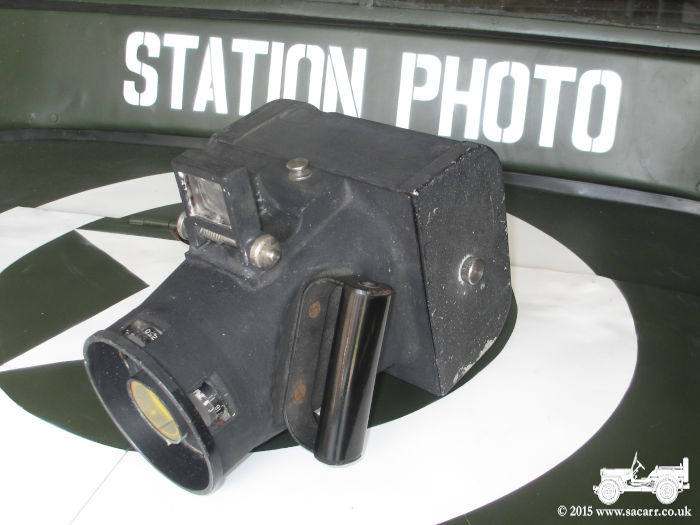
In early April 2015, I spotted this Folmer
Graflex Corp K-20 aerial camera on Ebay. It was missing its case, but as
a result, didn't reach the price that boxed versions have done. Based on
the serial number, it appears to have been manufactured in 1945. It
will make a great display item to join the rest of my photographic
items.
The K20 was designed by Fairchild, and approximately 15,000 were manufactured under licence by Folmer Graflex Corp in Rochester, NY between 1941 and 1945. It used a 5 1/4" wide film on reels from 20 to 200 feet in length, producing a 5 x 4 inch image. The lens is a 6 3/8" f4.5 with an adjustable diaphragm, and made by Kodak, Ilex and Bausch & Lomb. It weighs 11 3/4 pounds loaded, and measures 9 1/2 x 7 1/2 x 11 inches. It will give 50 images with a 1/2 inch space between negatives from a 20 feet long reel of film. |
|
|
|
|
|
|
|
|
|
|
|
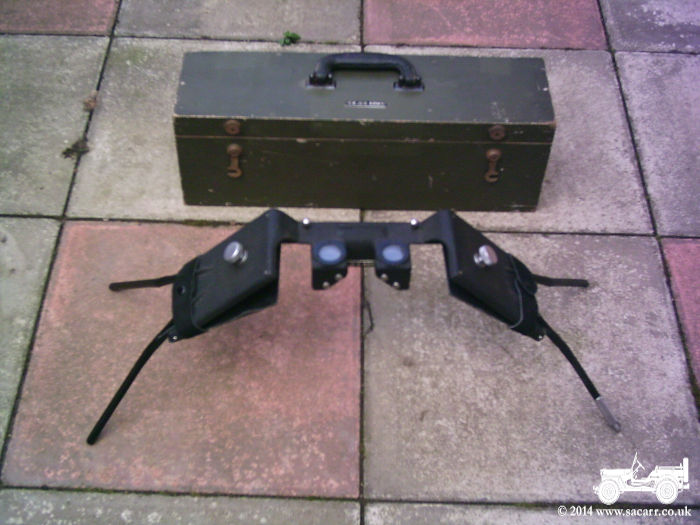
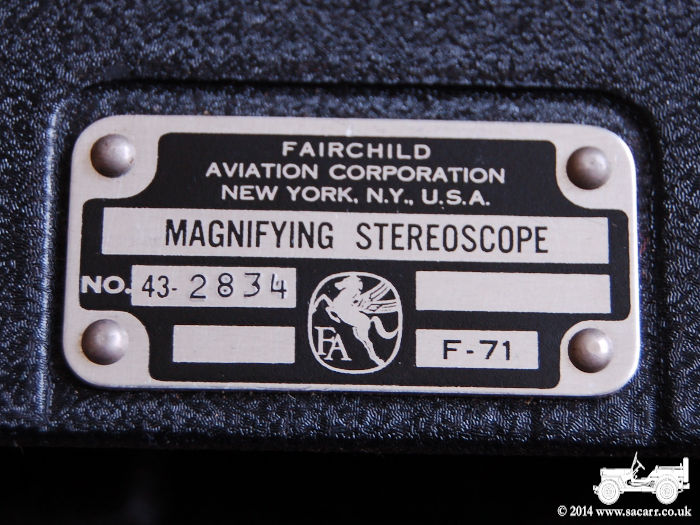
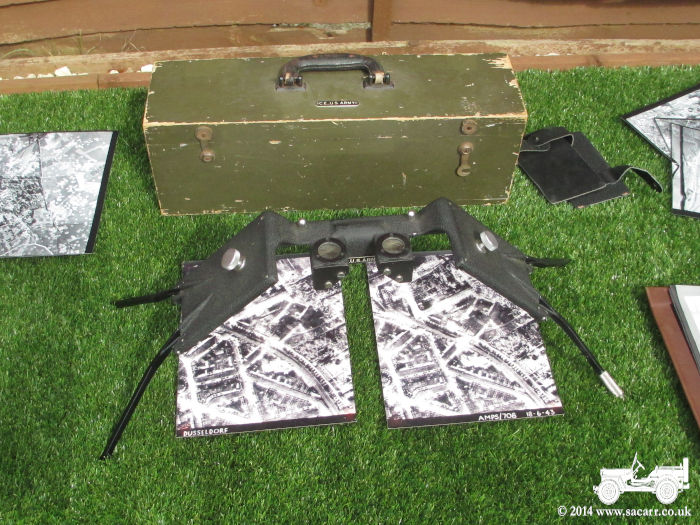
The Fairchild F-71 Stereoscope was
purchased a few years ago, but is a very suitable display item to go
along with the new Jeep. |
|
 |
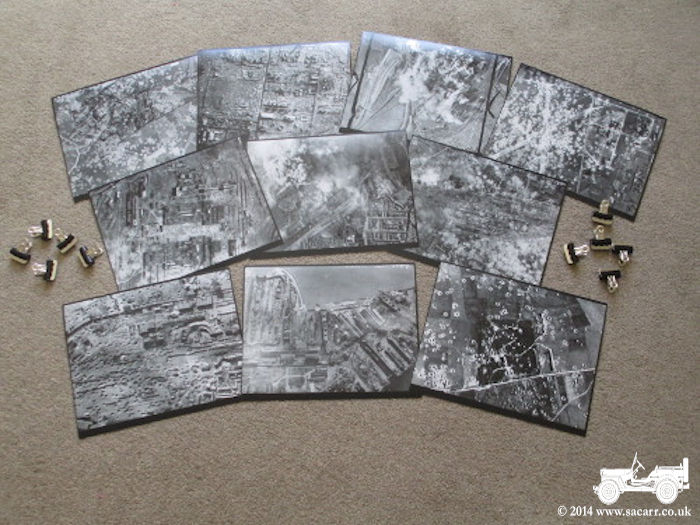 |
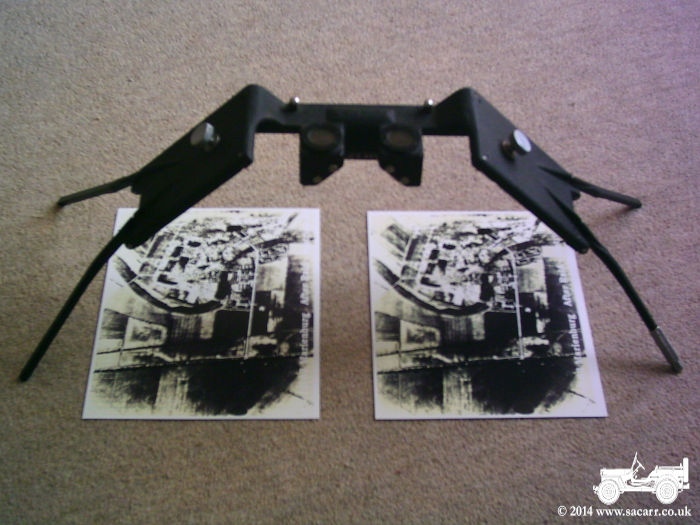
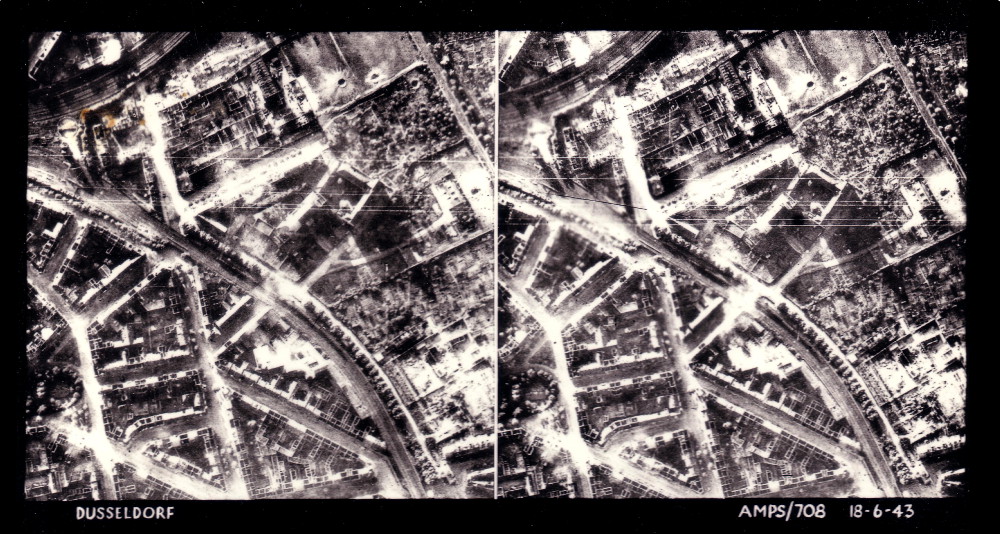
| After much searching on the internet, I finally found a stereoscopic target photograph on Ebay. There are plenty of target photos on line, but stereoscopic pictures seem hard to come by. The original picture I bought was only printed at about 2.5 inches square, but after scanning and cleaning up, it was enlarged to give a decent size image to use under the stereoscope. |
|
 |
|
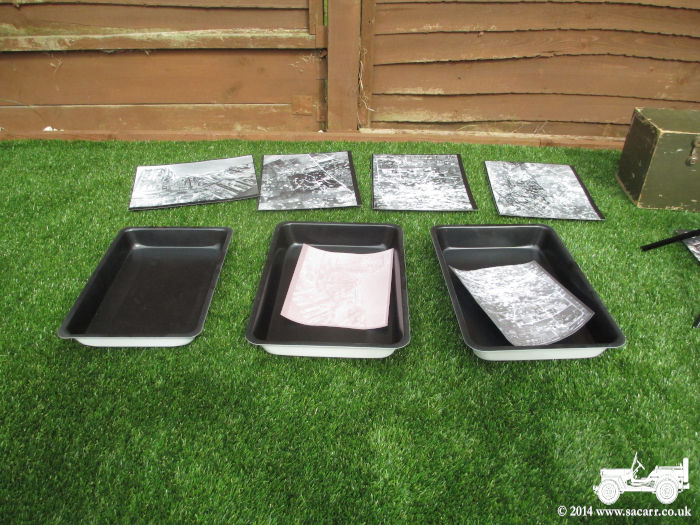
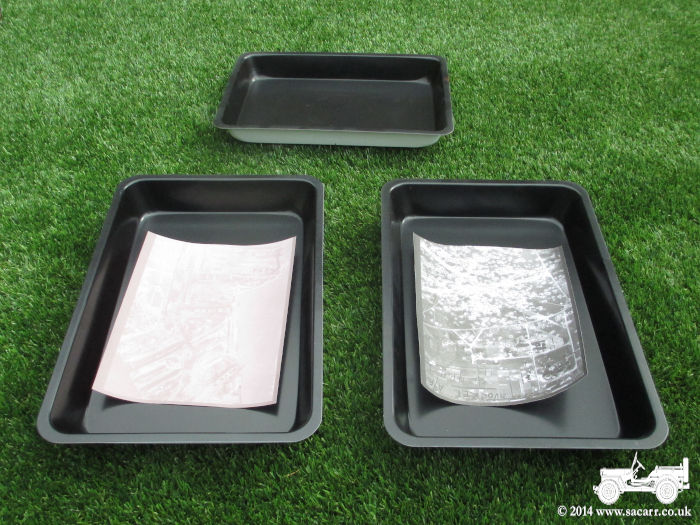
| I found some very cheap baking trays on Ebay recently, which will make ideal developing trays for the photos. The bottoms were resprayed white from the original red, which makes them look much better. So with a nice sunny day, I got all the bits and pieces out for a picture. |
|
|
|
| I printed out some additional target photos which will be laminated in clear plastic. They will then be able to be left in the trays full of water to look like they are still developing. One has been printed quite faded, showing the picture as it would part way through the developing process. |
|
|
|
|
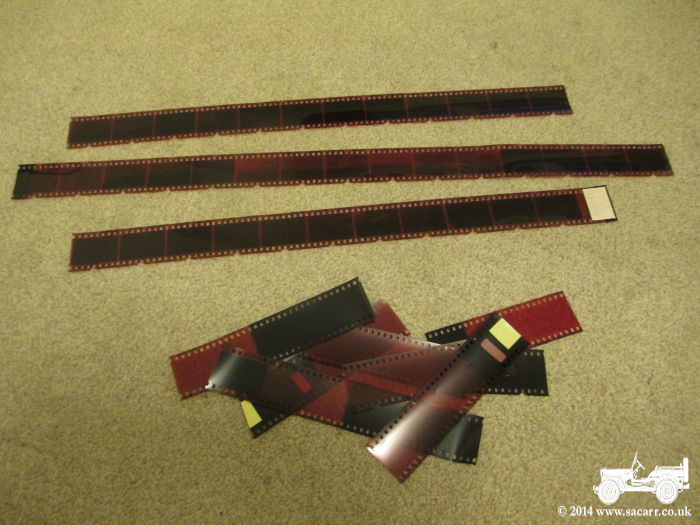
Something else that the younger
generation probably have no knowledge of is photographic film/negatives.
While I don't have any strike camera negatives, I do have some old 35mm
aviation negatives, and these will make a nice addition and talking
point. |
|
|
|
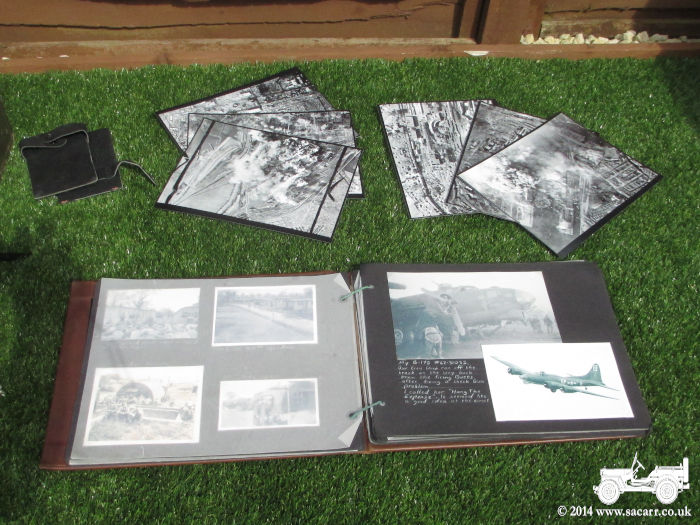
| Together with my photo album of 100th Bomb Group pictures, they will make a nice display. I also bought two six feet long wood strips and with some string between them, will make a drying line to hang some of the pictures on. |
|
| June
25th - Additional Equipment
Just in time for the Bowes Railway
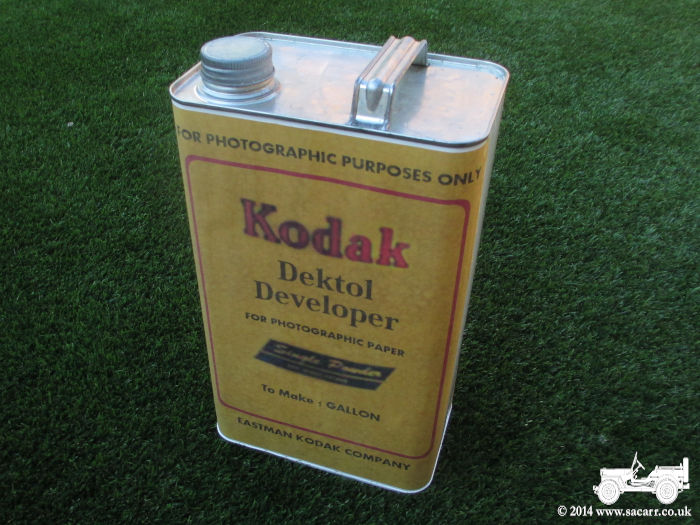
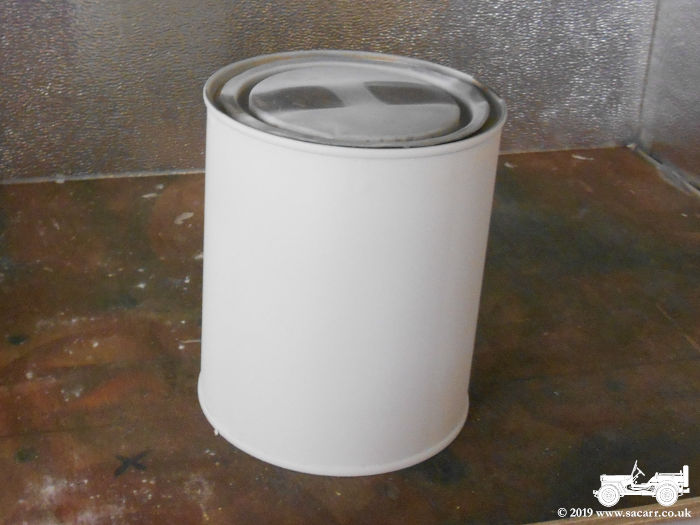
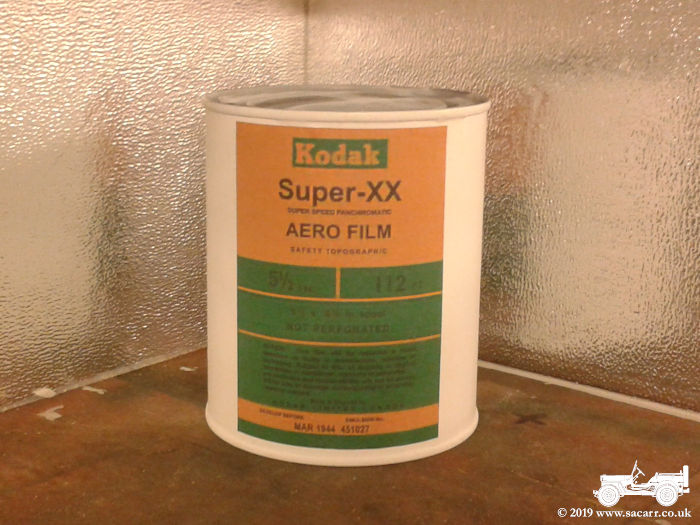
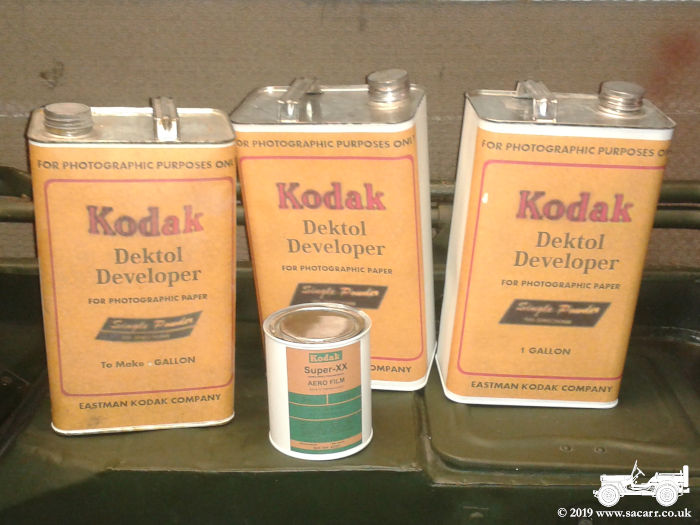
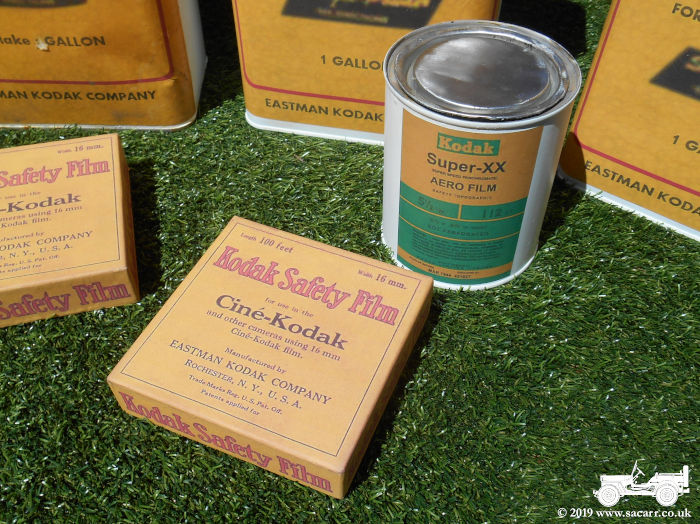
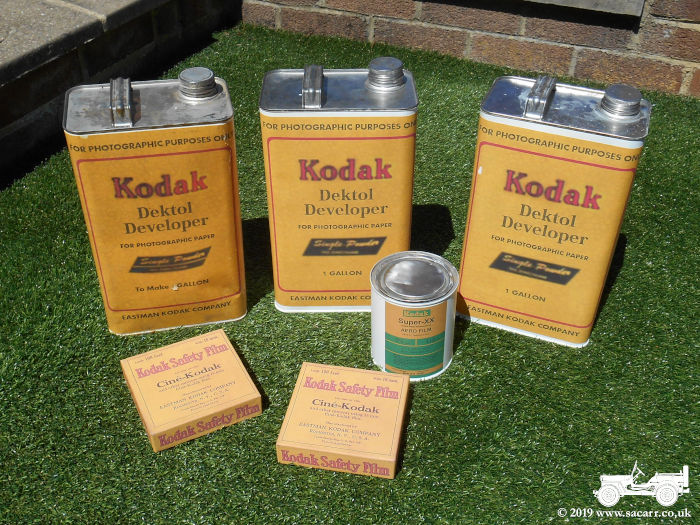
event, I've added three more tins to the display. I've made two more one
gallon Kodak developer tins, recycled from 20/50W engine oil tins. I've
also used an old paint tin to make a Kodak Super-XX film tin. The tins
were cleaned of oil and paint, primed with cellulose and then sprayed
white. |
|
|
|
| Labels were taken from photos online, redrawn to eliminate perspective distortions and then printed out on white paper. The labels were then cut out and glued with waterproof PVA glue to the tins. The whole tin was then given multiple coats of dilute PVA to seal and waterproof the labels. |
|
|
|
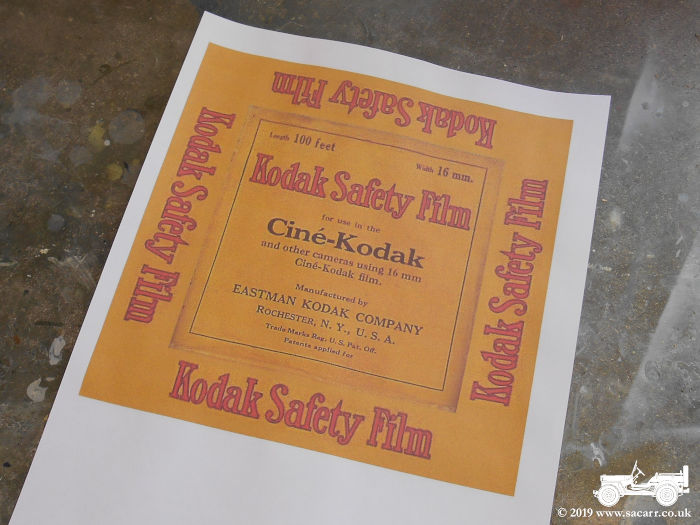
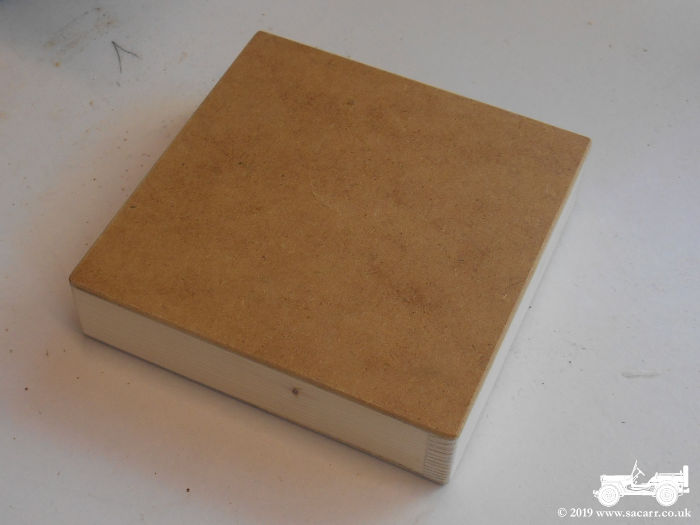
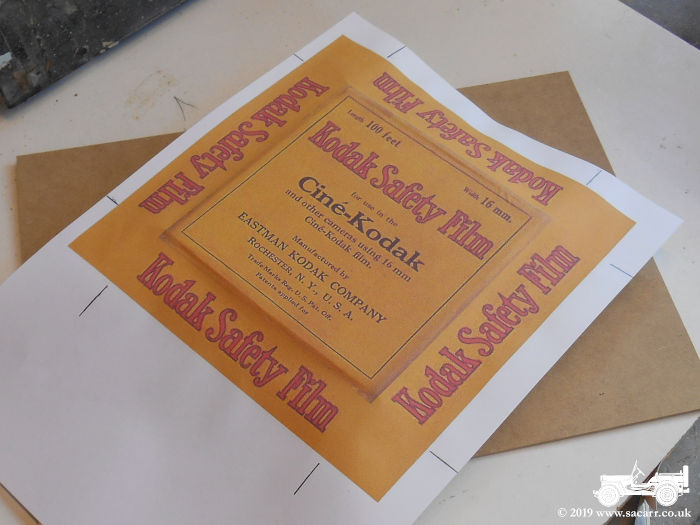
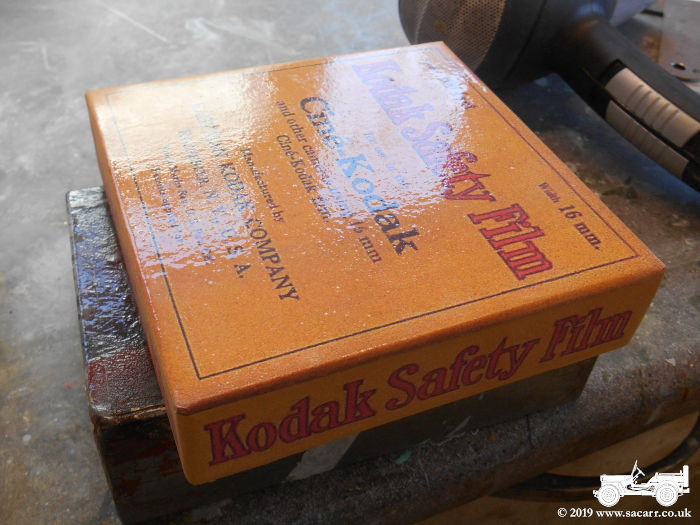
| June 27th - 16mm Film Reel Boxes Another prop made on the 27th were a
couple of film reel boxes, again using original artwork found online.
The graphics were reworked, squared up and sides made for the box print
out. A wooden box was made onto which the print out would be glued. |
|
|
|
| After coating the top of the box with a thin coat of PVA glue, the print out was stuck down, leaving the sides until the top was dry. Opposide sides were then glued down, left to dry and then the last two sides. Once the attaching glue had time to set, the boxes were given several sprayed coats of dilute PVA glue to water proof them and toughen up the paper. |
|
|
|
| I'm quite pleased with the finished result. Along with the other photographic equipment, they should make a nice display and I'll have t get some photos at the weekend of it all together. |
|
|
|
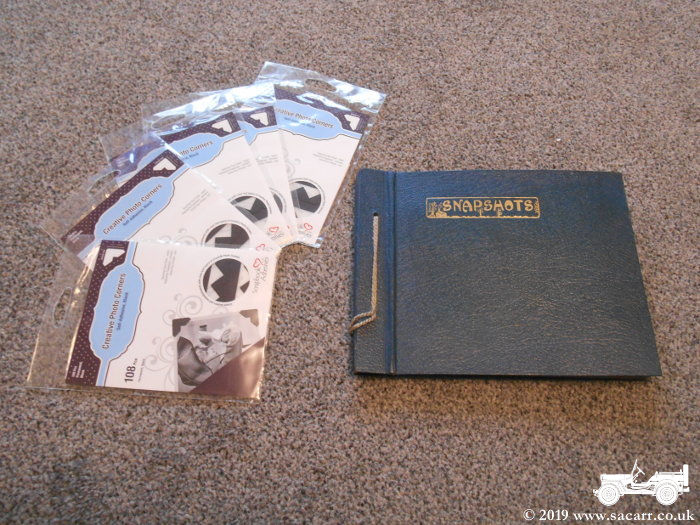
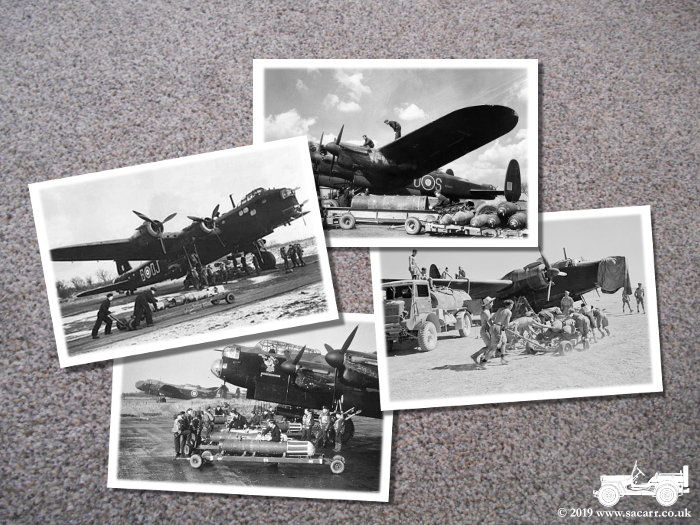
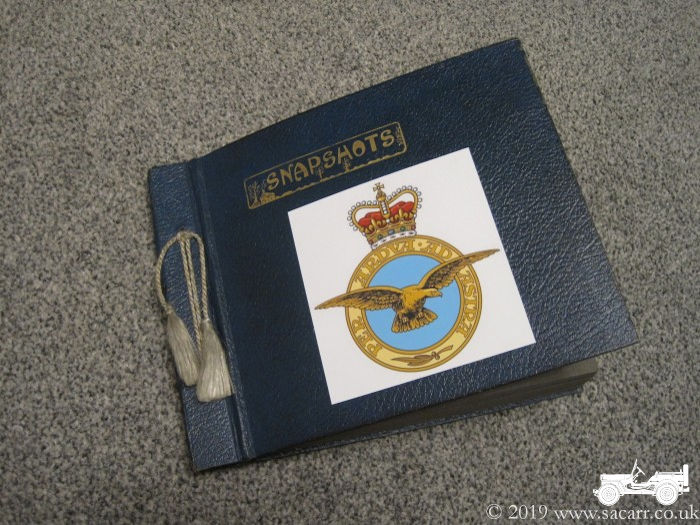
| November 24th - RAF Photo Album I've already got a US Army Air Force
photo album, full of pictures from the 100th Bombardment Group of the
8th Air Force. I decided that I could do with an RAF album for when
'Hope' is in RAF markings, to go along with the other photographic
display items. I found an vintage looking album on Ebay and some paper
photo corners. Since the album is quite small, I had to size the
pictures fairly small to give a reasonable selection.
I've already got a US Army Air Force
photo album, full of pictures from the 100th Bombardment Group of the
8th Air Force. I decided that I could do with an RAF album for when
'Hope' is in RAF markings, to go along with the other photographic
display items. I found an vintage looking album on Ebay and some paper
photo corners. Since the album is quite small, I had to size the
pictures fairly small to give a reasonable selection. |
|
|
|
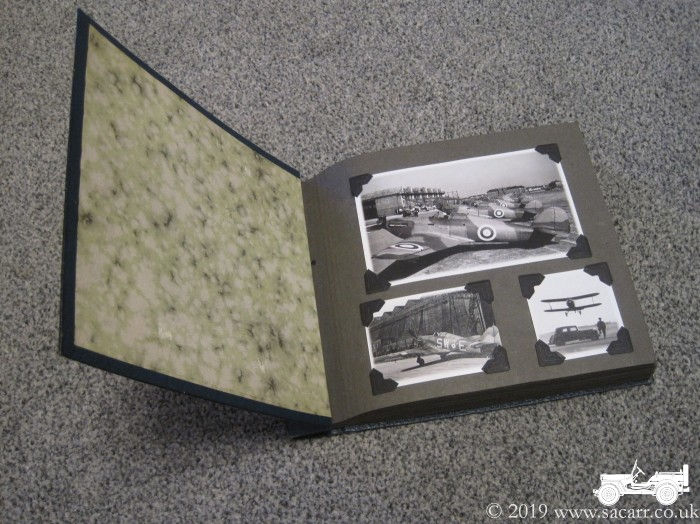
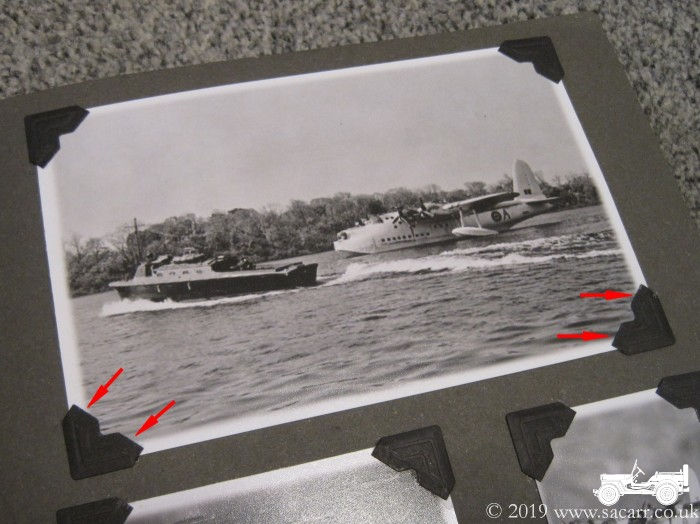
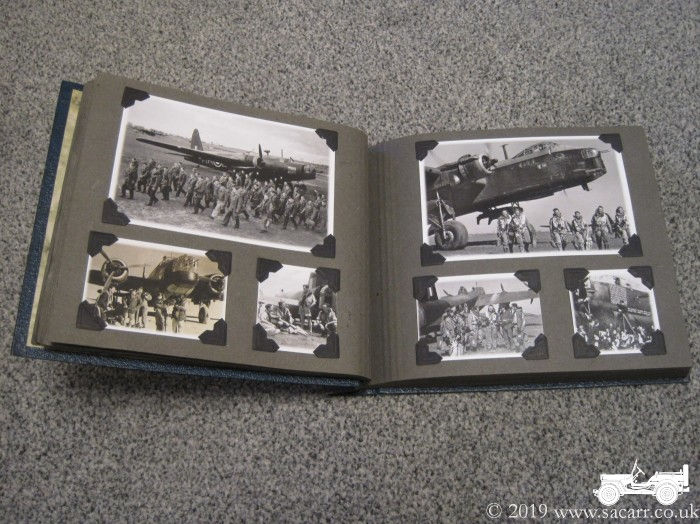
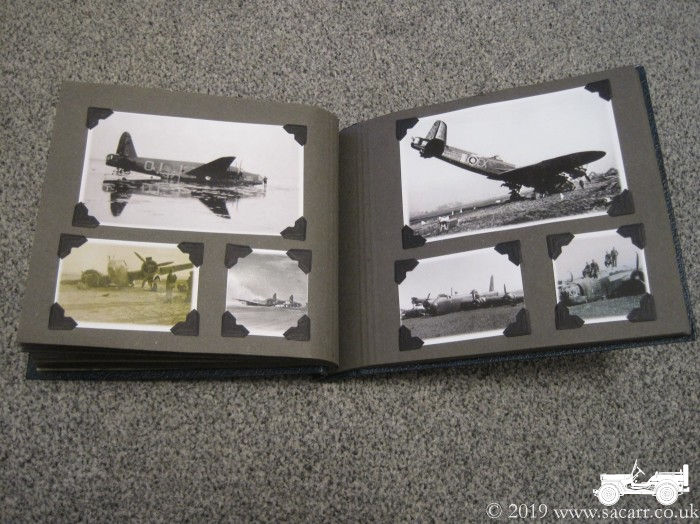
| The album has 48 sides, so having three photos per page gave almost 150 photos to cover various aspects of the RAF. I've gone for a 5 x 3 inch main picture, with a 3 x 2 and a 2 x 2 inch below. Looking through my dad's old merchant navy albums, many of the pictures are similar sizes and I recall him saying that larger prints cost a lot more to print! I've split the photos into a number
of categories covering Bomber Command, Fighter Command, Coastal Command,
Air and Ground Crews, Armourers, Vehicles, Crash and Battle Damage and
100 Group's Electronic Counter Measures and Clandestine Operations. The
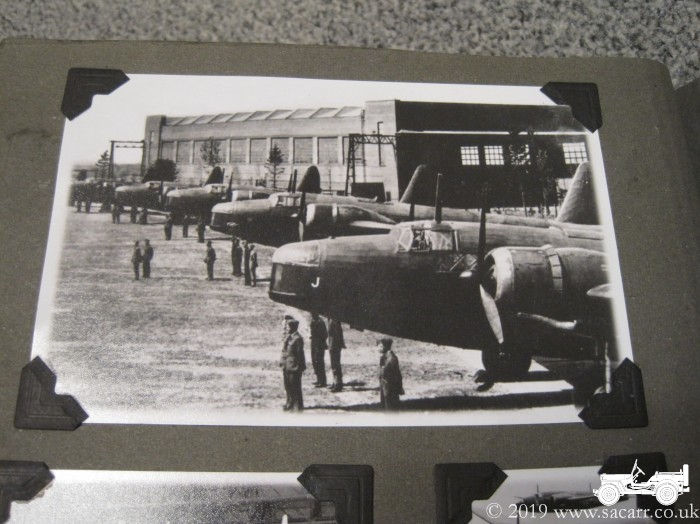
photos are currently being printed and should arrive in a few days. The
last picture gives an example of a typical page but I'll add a heading
to start each new section of RAF activity. |
|
|
|
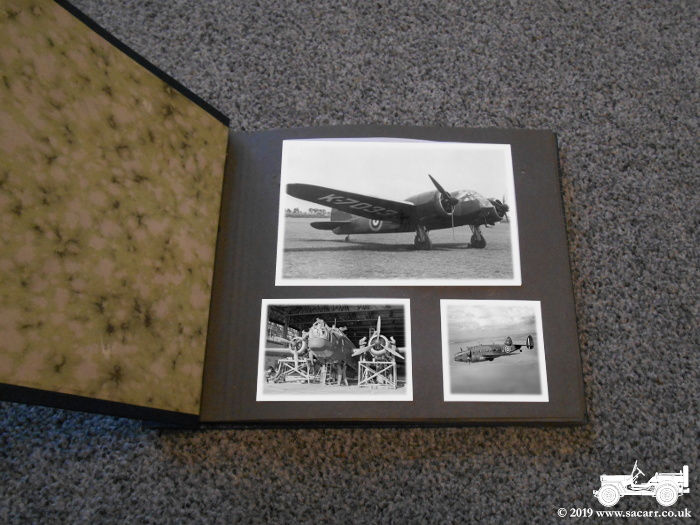
| December 8th - RAF Photo Album Update I Finally finished assembling my RAF photo album, but it took quite a while longer than expected! |
|
|
|
| As can be seen in the Sunderland Flying Boat image, each corner has two little flaps which made an ideal pocket to catch the edge of the corners on the opposite page. There was only one solution, a little PVA glue under each one. 150 photos, 600 corners, 1200 little paper flaps to lift and glue down!! A little cross eyed, I finished them last night. I also unbound the album, and added a little PVA glue along the edges of the pages at the binding end, hopefully preventing the pages fanning. It was all tied back together this afternoon and I'm very pleased with the finished
result. |
|
|
|
| Next trip to my dad's house in Beverley, I need to bring the Typewriter home to make some headings for each section of the album. |
|
|
|