|
Page Updates -
May 3rd Brake Hoses - May
4th Service - May 5th Observers Seat
Mod - May 8th Signal Lamp Overhaul |
|
| May
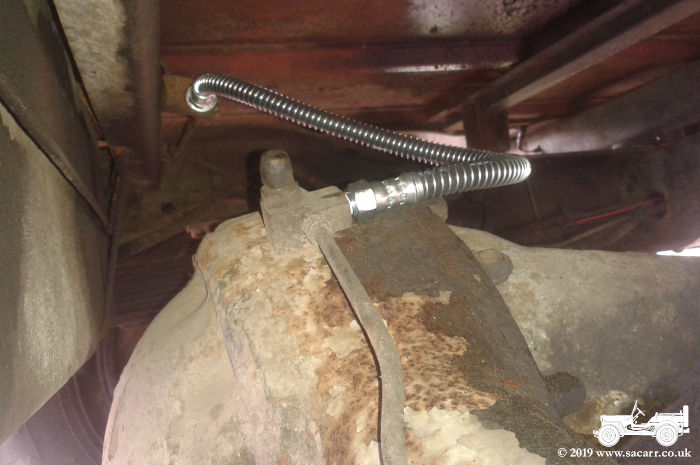
3rd - Flexi-Brake Hoses
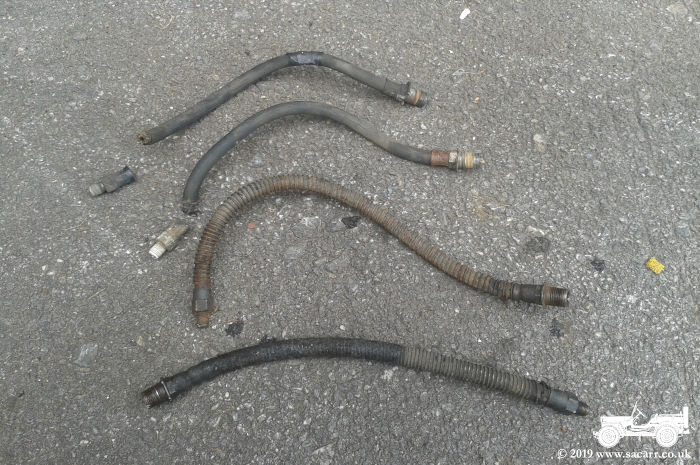
For a while, the brake shoes have been dragging after pressing the pedal. I'd previously checked the springs, and the tension seemed good, so suspected the problem lay elsewhere. Another symptom was that for the first press of the brakes, the pedal almost went to the floor to get braking, but as I drove a while, the pedal free play reduced to almost nothing. Since buying the Dodge, I've replaced the master cylinder and all four wheel cylinders. I've also relined all eight brake shoes. The only part of the system not touched were the four flexi-hoses - one on the rear axle and three on the front axle. This is where I suspected the problem was. After refitting the battery after
the winter lay up, I brought the Dodge home and set to work. I
began at the back, opening one of the bleed nipples and pumping out as
much fluid as possible. Next I removed the old hose and fitted the first
of the new hoses. This went fairly easily but I had a feeling that the
front wouldn't go so well! |
|
|
|
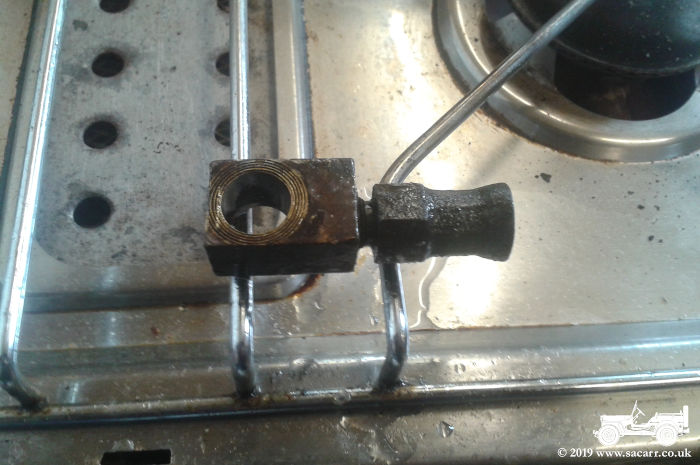
| Moving to the front, I started on one of the steering knuckle flexi-pipes. The inner end unscrewed without too much fuss, but the wheel end wouldn't budge from the brass union. I ended up removing the pipe and union together and put them over a camping stove flame to heat the parts to help release them. After a couple of minutes cooking,
there was a large bang and the union/pipe fitting went one way while the
hose shot off the other way! This seemed to confirm that at least one
hose had collapsed internally and the pressure of the heated and
expanding brake fluid finally blew the rubber pipe out of its fitting.
Shortly after, a vice and a spanner finally freed the fitting from the
union. The second steering knuckle hose was stuck fast the same way and
that union had to be removed too. It was also heated on the stove and an
identical bang separated the rubber from its fitting. Another collapsed
and partially blocked hose! Like the first, the union was freed as a
result of the heat treatment. Both of the new flexi-hoses were fitted
without problems. |
|
|
|
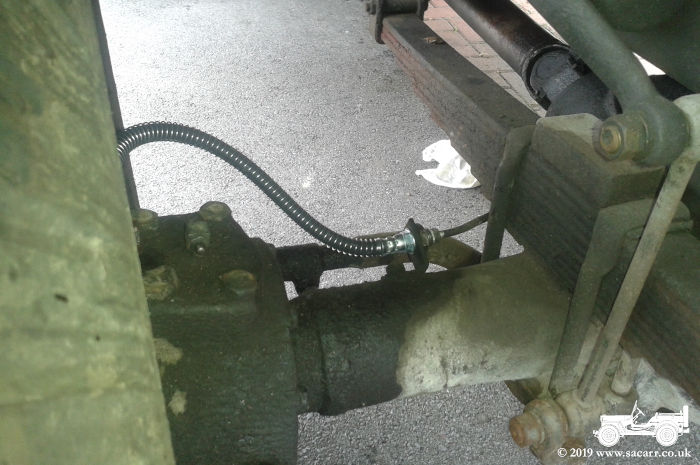
| The last hose was the chassis to axle hose which was rather difficult to remove and refit. The large spanners needed to fit the hose fittings were too big to move in the space available. The chassis fitting also had a bracket with electrical wires running right in front of the access to the pipe fittings. The same wires also restricted access to the bolt head that held the brake pipe bracket and wire support bracket. Eventually I got that bolt undone, freeing the wire and hose bracket which then made the rest of the job fairly easy. I got all the hoses fitted by about 1:30pm, then stopped for lunch. After lunch, I began to top up the extra brake fluid reservoir and started pumping fluid through the system. I went around the four corners three times as during the first attempt, fluid started pouring from the front right wheel. I realised the copper washer had dropped out from behind the brass union and once refitted, held firm. The brake pedal free play was set up next and there was just enough time for a quick test drive before the school run. I didn't have much time, so the
drive was short, but the brakes worked well, other than a slight pull to
the right. The free play remained unchanged and the pedal was firm and
consistent throughout. Tomorrow I'll adjust the shoes to try and balance
the braking and there's the usual Springtime work, such as cleaning and
gapping the plugs and points etc. The first trip out for the Dodge will
probably be in a couple of weeks to Blyth Battery. |
|

|
|
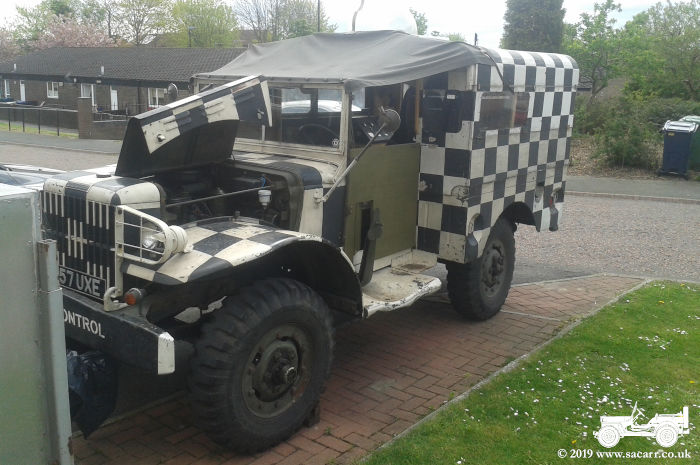
| May 4th - Service and Additional Work Day two was a general service and a few other odds and ends. All the usual stuff like cleaning and gapping the plugs and points, greasing, oils etc. When I collected the Dodge from the container, there was quite a bit of oil had dripped from the air filter onto the exhaust manifold. It was checked once home and wasn't over filled, so the leak must have been coming from elsewhere. I drained the oil, cleaned it up and had a closer look. The oil hadn't been pouring out, but standing for a few months in the container, there must have been a steady seeping. I suspected the seam around the central tube and the turned over edge did look like it had lifted in places. It was cleaned up with a small rotary wire brush and soft soldered all around the seam. Time will tell if this has sorted the drip. After the other servicing jobs, I jacked up the front wheels and gave the shoes a provisional clearance setting with the wheels spinning freely. After a short delay due to a rain shower, I took the Dodge out for a test drive. It was still pulling to the right a bit, so I stopped a couple of times to make further adjustments. I clocked up eleven miles during which the brakes behaved themselves, with the free play and pedal position remaining constant. Tomorrow, I'll be looking at my
daughter's child seat. Inconsiderately, since first making the seat,
she's continued growing and now needs more legs room. I should be able
to move the seat back and modify the existing supports. We'll see
tomorrow! |
|
|
|
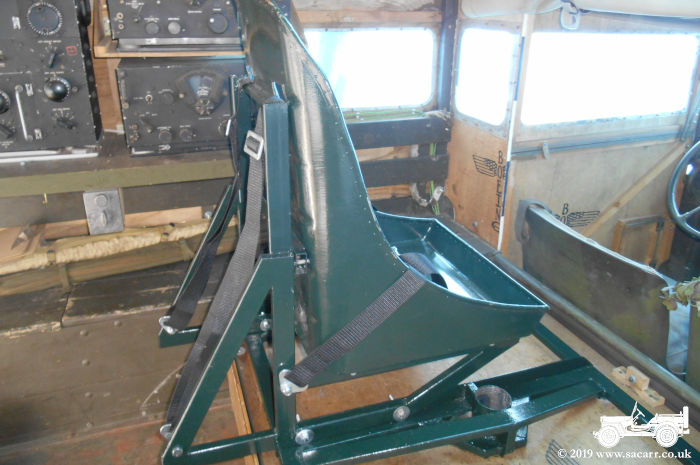
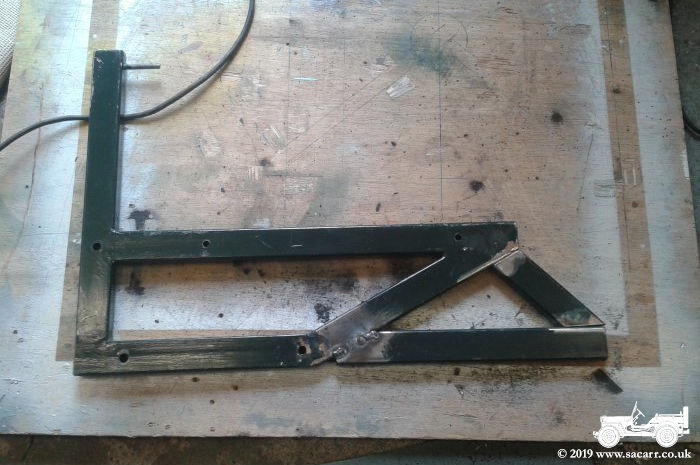
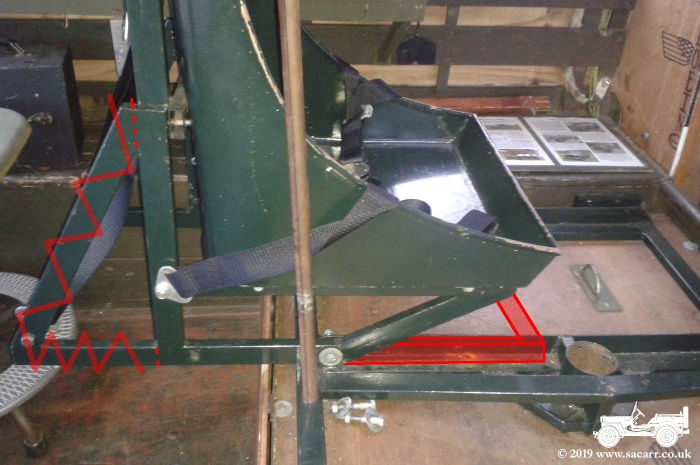
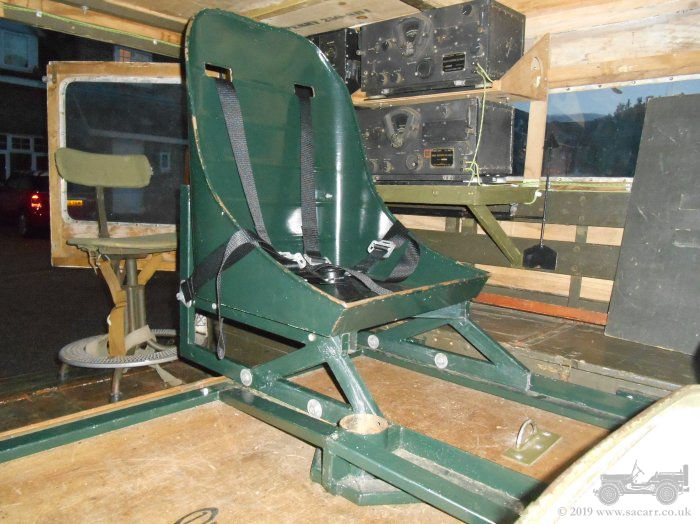
| May 5th - Observer's Seat Modification Day three! It's been four years
since I made the seat and my daughter has now outgrown the leg room
originally provided. The first picture shows the original configuration,
quite close to the driver's seat. Looking at the supports, it looked
like I would be able to cut away the rear diagonal and reuse them added
to the front of the supports. This would then provide support for the
front of the seat and new material for the bolt hole that fastens the
seat to the floor rails. The second picture shows the cut from the rear
and additions to the front. Cutting the rear away would also mean the
seat wouldn't encroach too much into the cargo area, required for
camping gear when we don't have the trailer ( currently fitted with 24
volt bulbs for one of the Jeeps ). |
|
|
|
|
|
|
|
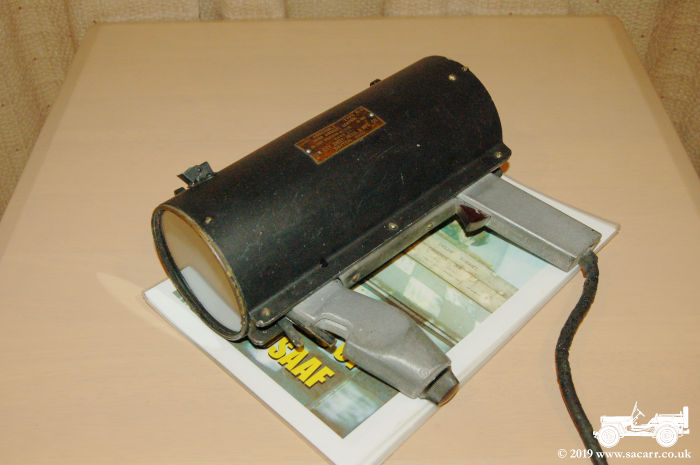
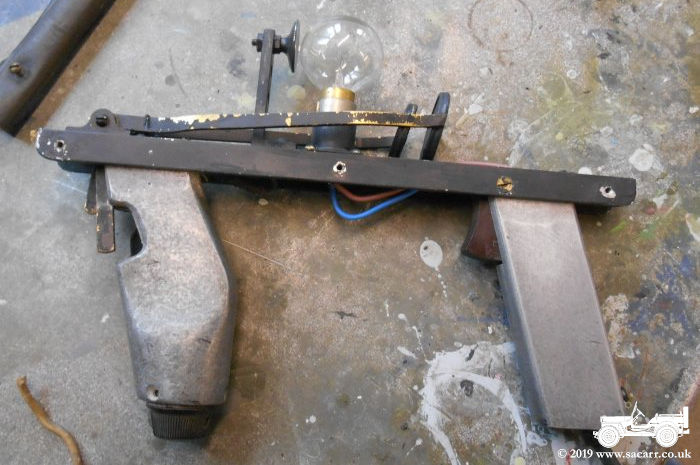
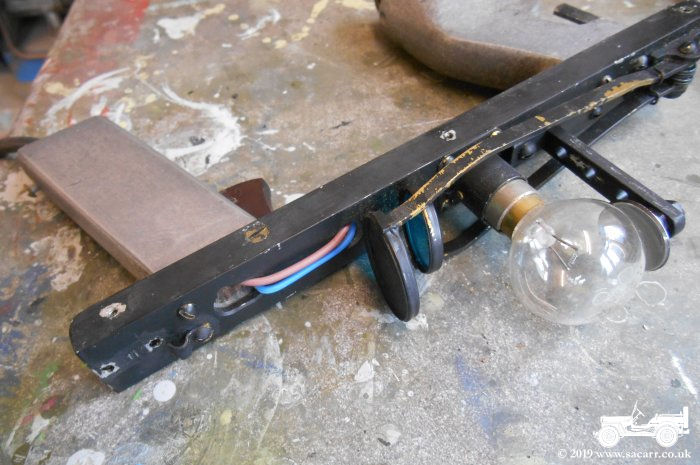
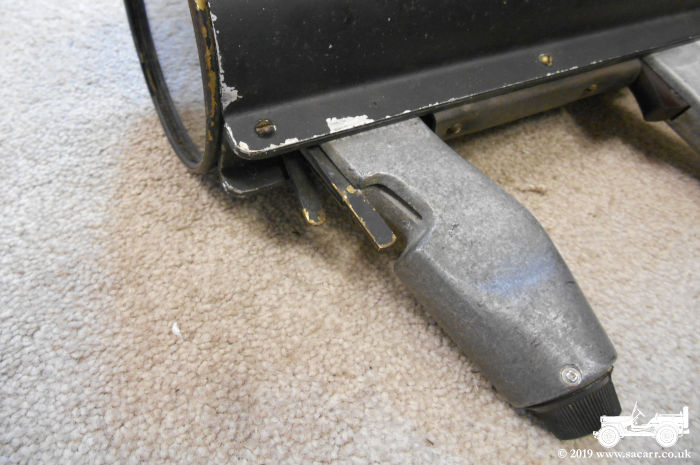
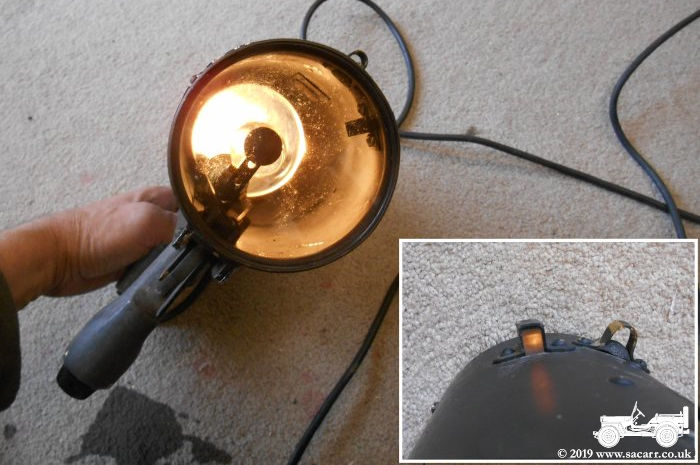
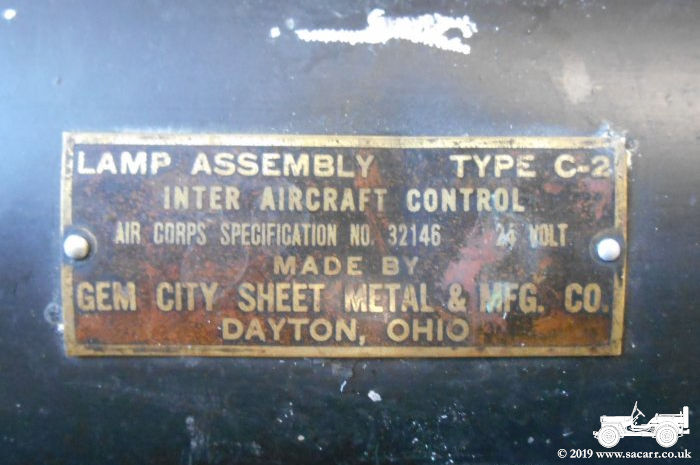
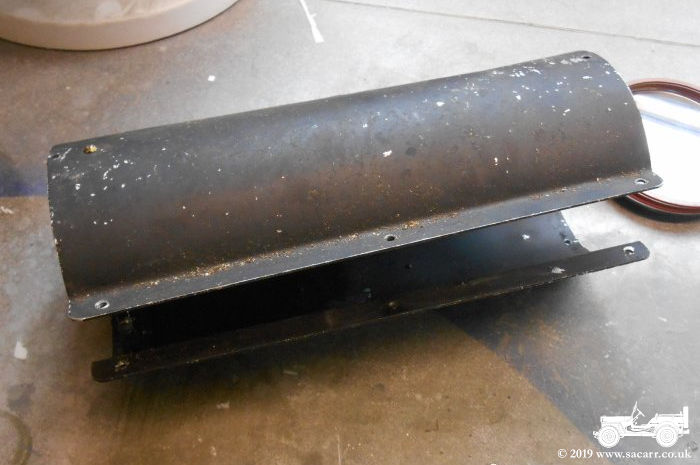
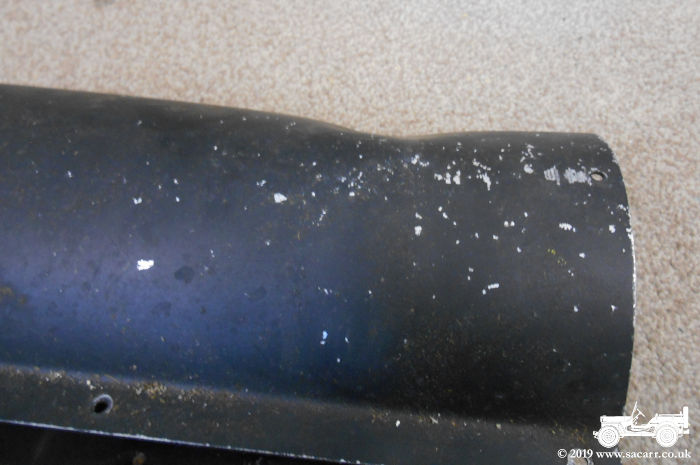
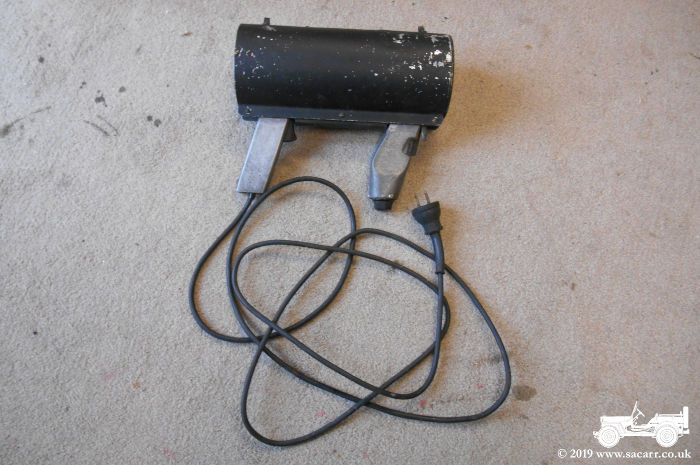
| May 8th - C-2 Signal Lamp Overhaul I've had this C-2 Signal Lamp since
buying the Truck in August 2010. It has often been displayed along with
the other accessories I have, but not until today did I have a look to
see if I could get it working. In the seventy odd years since it was
made, it has been battered about and has suffered from aging. |
|
|
|
|
|
|
|
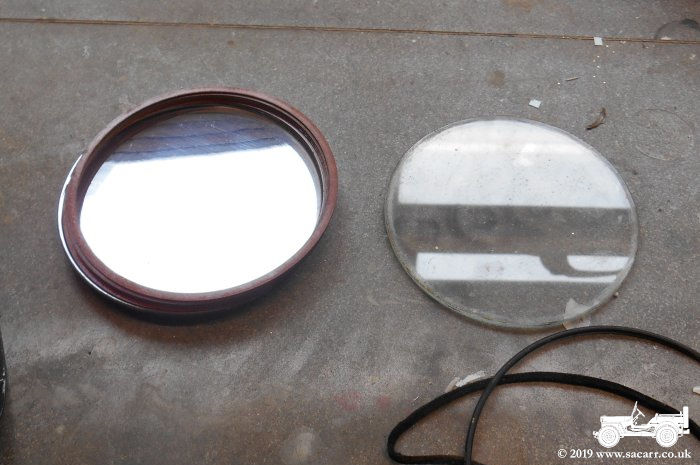
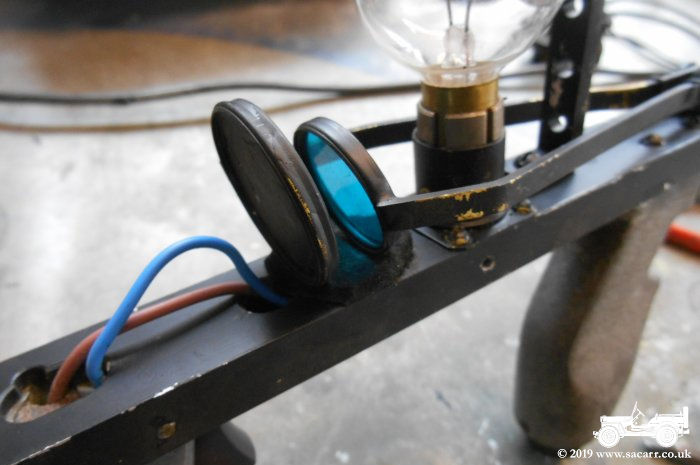
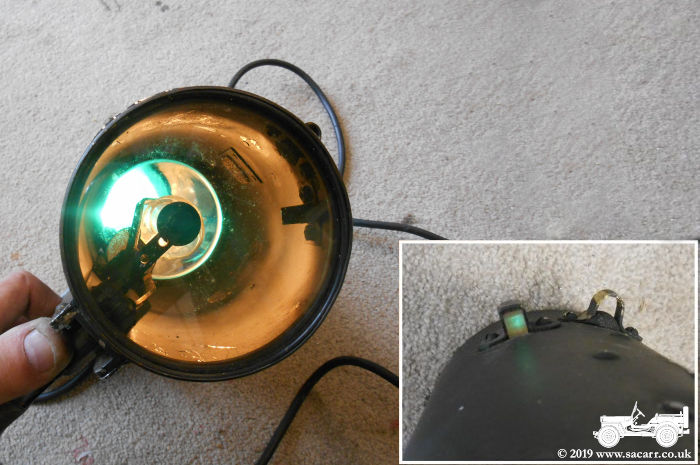
Also visible once the case was
removed, were two trigger operated levers. The two triggers are mounted
on the front handle. One operates a blanking plate, shielding the mirror
from the bulb. The other has a blue/green filter to give a green light
when required. The front glass and reflecting surface were in good
condition and just needed a light clean. |
|
|
|
|
|
|
|
|
|
|
|
|
|
|
|
|
|
|
|