| October
22nd~November 5th
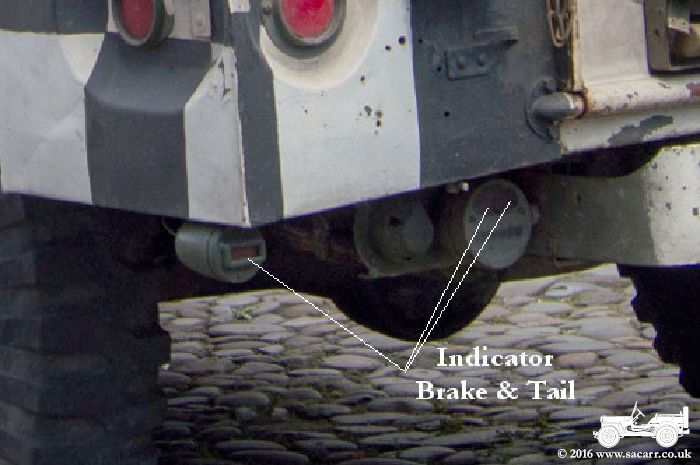
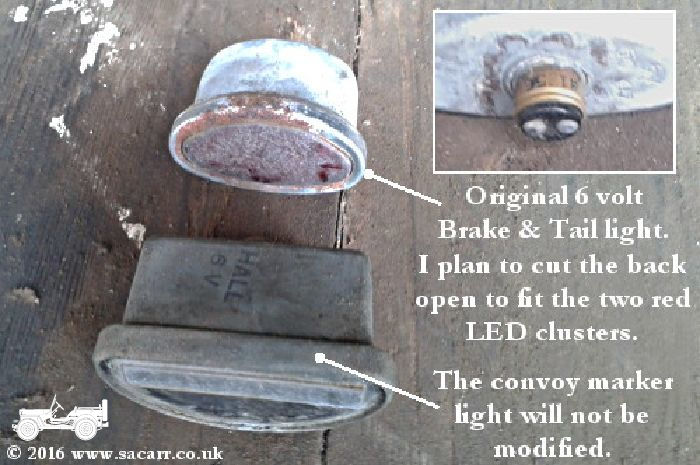
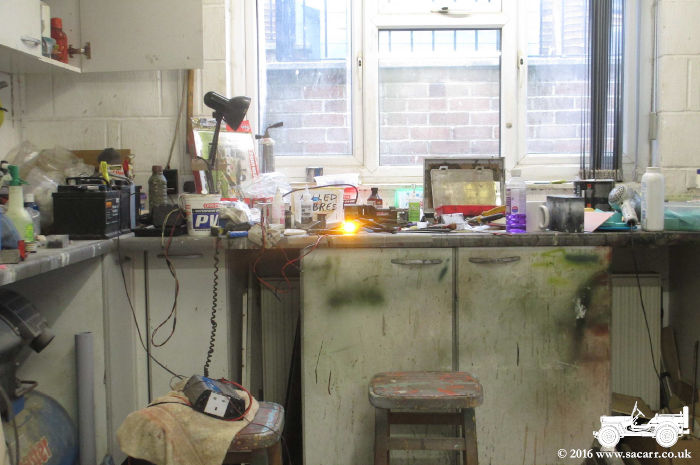
For some time, I've been concerned about the visibility of the lights on the Dodge. I rarely drive it at night, but always drive with the lights on to make the Dodge as visible as possible, due to its slow speed. However, the 6 volt lights aren't that bright, and the 5w indicators virtually pointless. So I decided it was time to upgrade. Many of the replacement LED bulbs that are available, have the majority of the diodes mounted on the side, pointing to what would be the reflector in a normal car. Due to the shape of the housings, and the lack of a parabolic reflector, these aren't very useful. I decided I would have to find or make something more suitable. After a quick internet search, I
found some ultra-bright 12 LED clusters designed for 6 volts. The brake
and tail light will have two clusters fitted into the original 6 volt
sealed bulb, but I can't do that until I have the Dodge back home. |
|
|
|
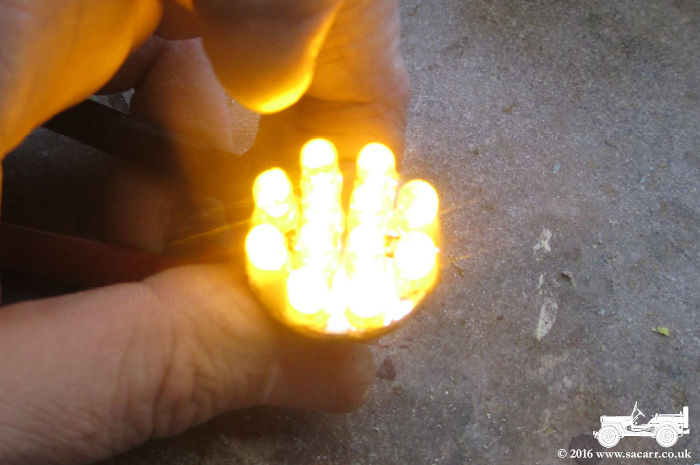
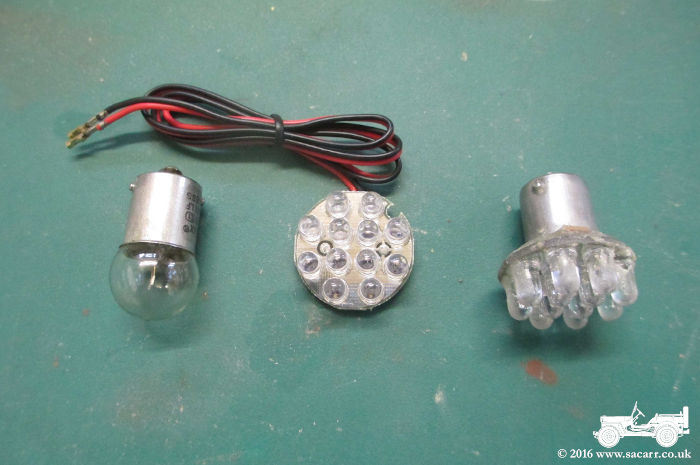
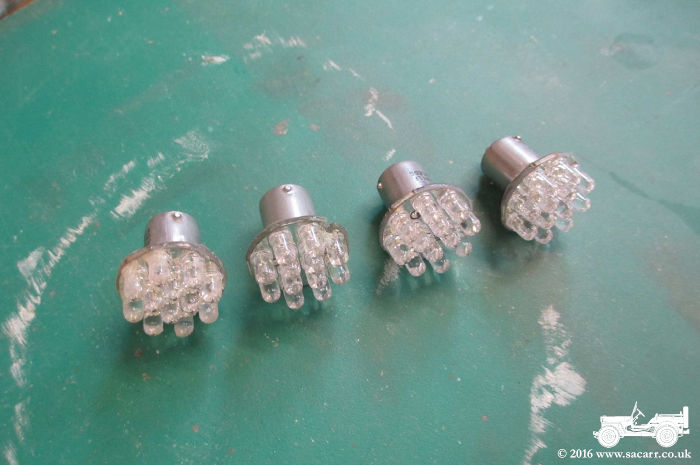
| So the first conversions were the indicators. I had some spare 12 volt BA15S bulbs which would be the donor for the fitting. The glass was smashed and the filament and support wires pulled out. The centre terminal was drilled out and a new brass pin glued in, with the solder built up the base again for the contact, and the LED cluster wire attached to the other. The negative wire was soldered to the inside of the metal fitting. The cluster was then epoxied onto the end of the fitting. |
|
|
|
| One was made as a test example first, to find out the best way to make it, and to test the result. The photo doesn't give a realistic impression of brightness, as the camera kept trying to adjust the exposure to suit the bright window, workshop and LED, but from 20 feet away at the other end of my workshop, it was magnitudes brighter than the 5 watt traditional bulbs on 6 volts. The other three were made soon after. |
|
|
|
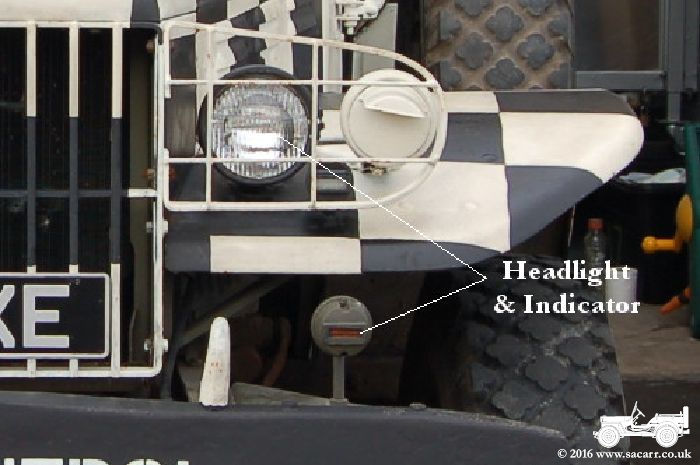
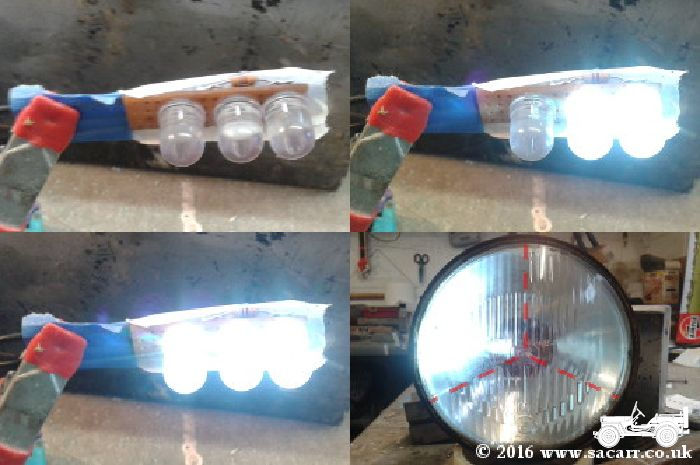
| I searched the internet for hours to find a suitable 6 volt LED headlight. Unless I was prepared to pay £40 to £50 in shipping from the USA, there was nothing I could find in the UK or Europe. 12 volt and 24 volt, no problem, but nothing 6 volt, so I decided I'd have a go at making something. I bought some large 10mm LED's which I soldered up into strips of three, wired as a single and a pair. The reflector from my Hotchkiss was removed to test the LED's. Only one strip of three was fitted for the test. |
|
|
|
| Once the strip of three was tested, I made the other two strips for one complete cluster. A resin board triangular core was made, with one LED in the end, and the other three strips of LED's were epoxied to the edges. The next step will be to use a diamond burr to cut open the back of one of the sealed beam headlights, one of which already has one failed filament. |
|

|
|
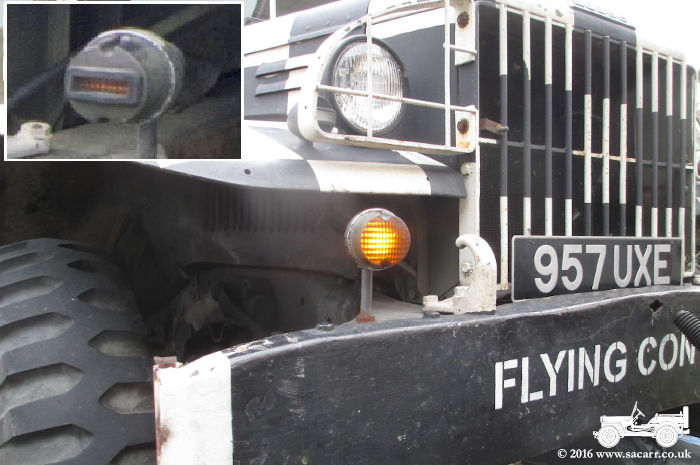
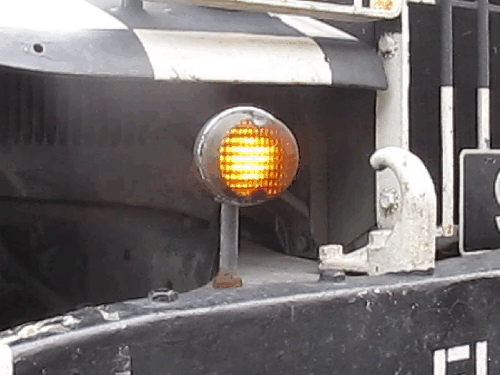
| November 3rd On November 3rd, I brought the Dodge
home ready for a school visit the following day. Before the afternoon
rain came, I got the front indicator covers stripped of their paint and
rubber slits, and cleaned and polished the plastic to reveal a much
larger area of amber. The inset image shows how it used to look. It
doesn't look quite so good, but it's far more visible to other drivers.
I also got my first two amber LED clusters fitted. The LED's have a nice
clean cut off between on and off, unlike the filament bulbs. |
|
|
|
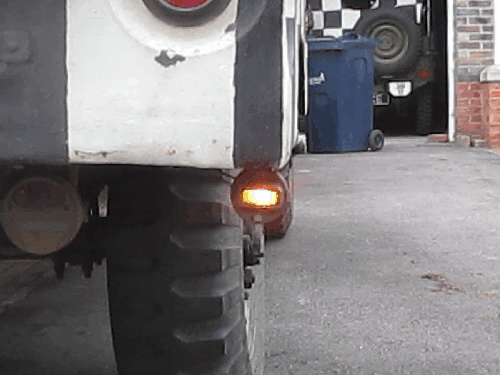
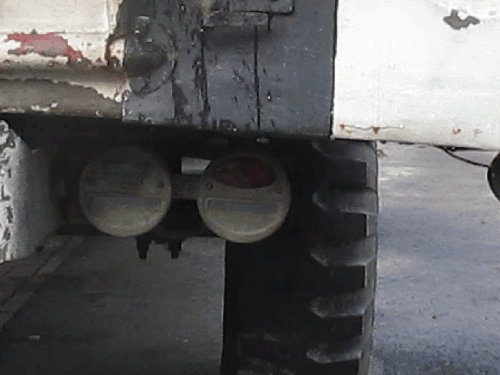
| I tried fitted the other amber LED's to the rear, but there wasn't enough resistance in the circuit, and the LED's stayed on permanently, rather than flashing. I'm sure I can sort this with resistors to increase the load, but that can wait until it is warmer next year. It was too cold to be messing around for long outdoors. So for now, I've fitted some 21 watt filament bulbs to replace the 5 watt bulbs that were fitted. They are much brighter, but don't really flash, as the filament doesn't cool down enough before powering on again. So currently they alternate between bright and dim. The gif animation below is from two frames of a video of the light to give an impression of how it is currently. I'll do another next year once the LED's are fitted and the circuit resistance sorted. The tail lights haven't been touched
yet, although I may get a chance to make a start over the weekend. The
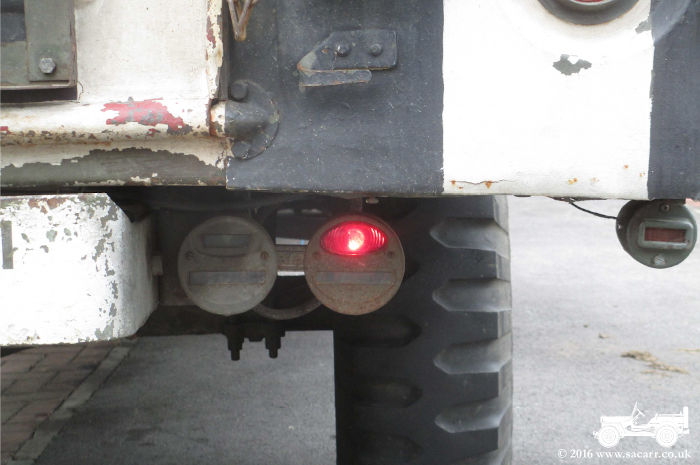
picture below shows the tail lights as they are currently with bulbs.
Before cutting open the sealed tail light to modify it, I'd like to wire
up the two LED clusters next to the existing light, and compare
brightness and visibility at a distance. |
|
|
|
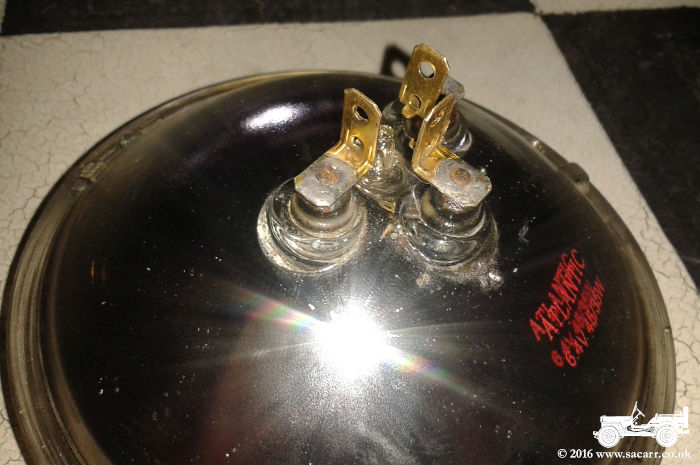
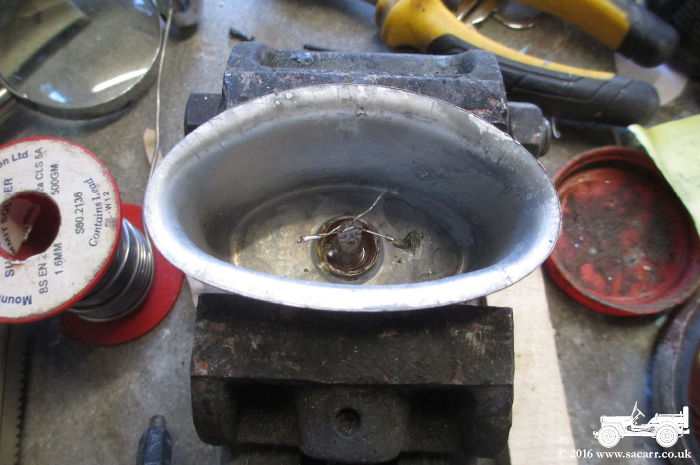
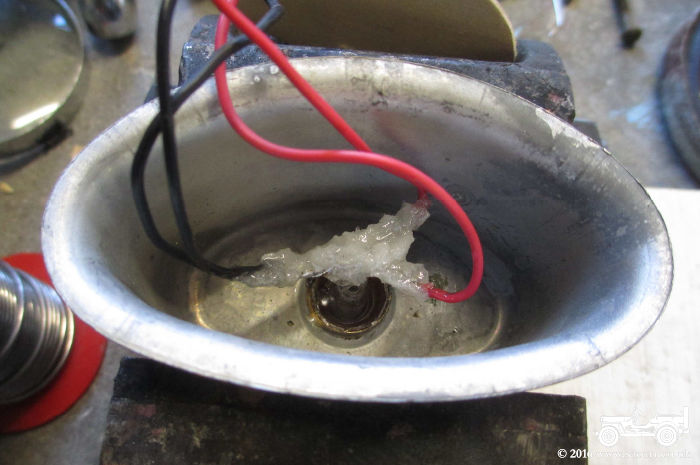
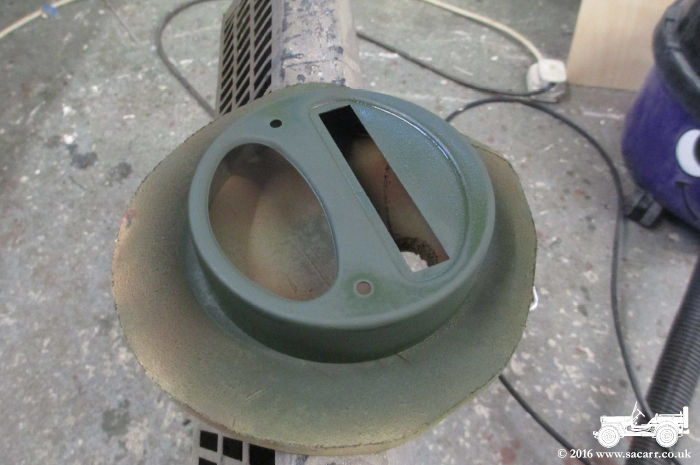
| November 5th Today I removed the brake/tail
lights to convert them to LED's. Originally I thought I was going to
have to cut open the metal bulb housing, but realised I was able to
prise open the glazed end that was crimped over the main body. This
allowed access to the bulb, which was carefully smashed, leaving the
filament wires behind. |
|
|
|
|
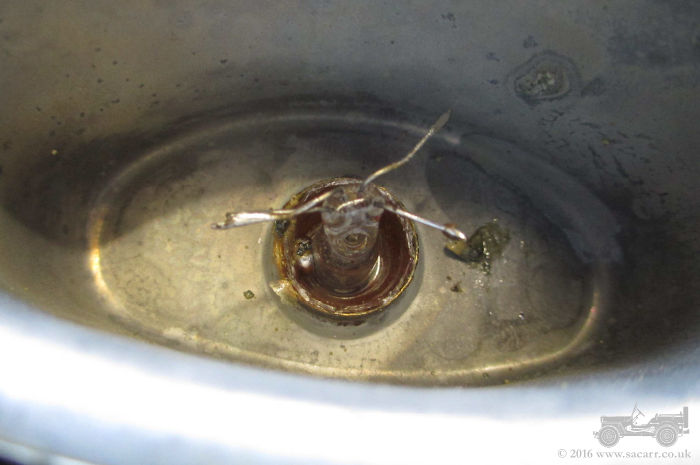
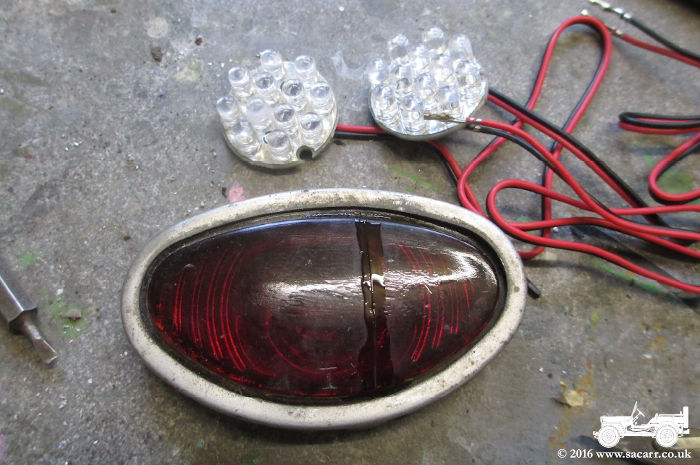
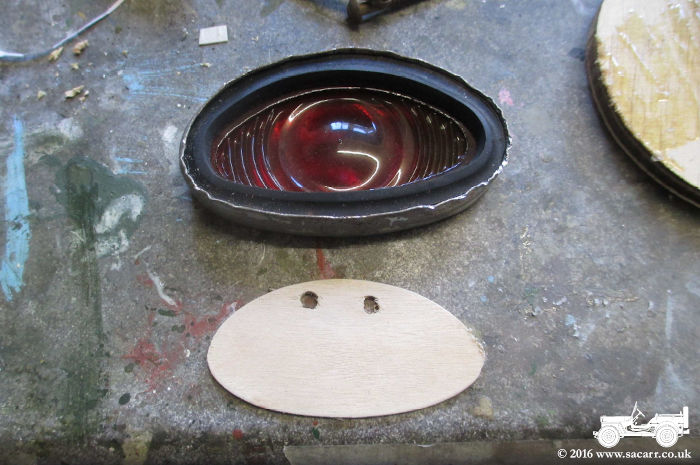
One of the coloured lenses had been cracked for some time, so I ran some cyanoacrylate glue into the crack. The LED clusters had their wires shortened a bit, and they were epoxied onto a plywood plate which would go into the bulb housing. |
|
|
|
|
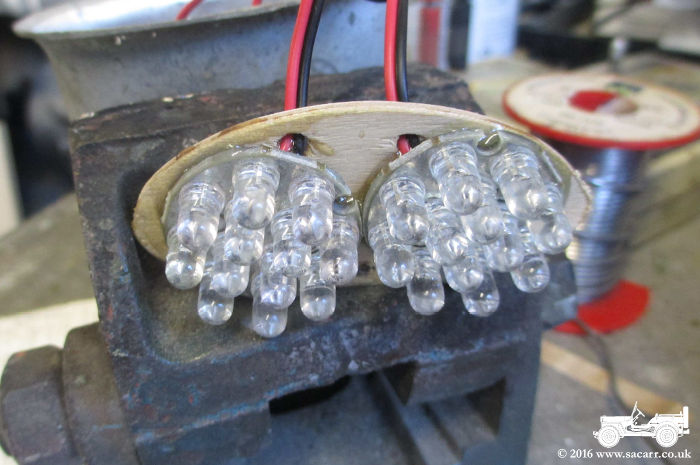
The LED wires were then soldered to the tinned filament wires and covered in epoxy to give a little vibration protection to the solder joints. Once the LED's were epoxied to their mounting plate, the plate was epoxied into the housing. |
|
|
|
|
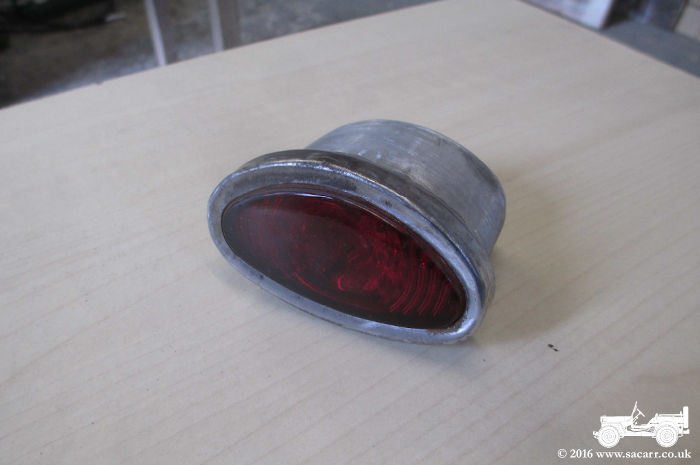
The front housing and lens were then crimped back onto the housing. One of the light covers had quite a bit of surface rust, so it was stripped back to metal, primed and resprayed green. |
|
|
|
|
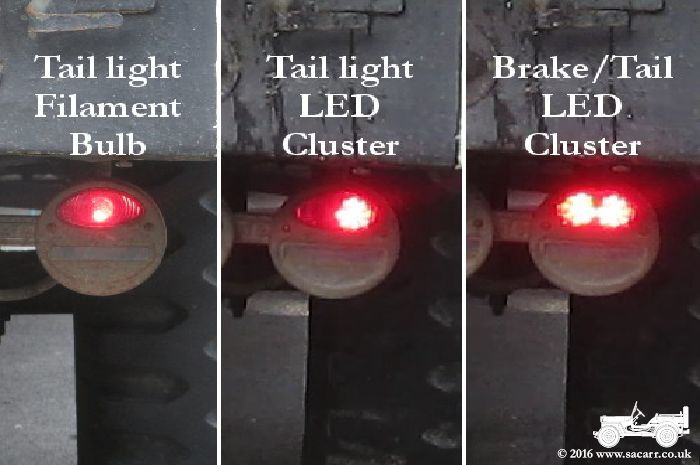
The animated gif below is compiled from a video shot during testing. It shows the tail light LED coming on first, followed by the brake light. Each LED cluster is quite close behind the coloured glass, and so doesn't illuminate the whole glass as the bulb did, but the light is much more intense. |
|
|
|