| May 19th | |
| For
a while now, small rust spots have been appearing through the paintwork,
and it was time to deal with it. I think the long term goal will be to
strip the paint from all the bodywork, grind out any rust spots and then
repaint. This will probably have to be done over the next couple of
years, panel by panel.
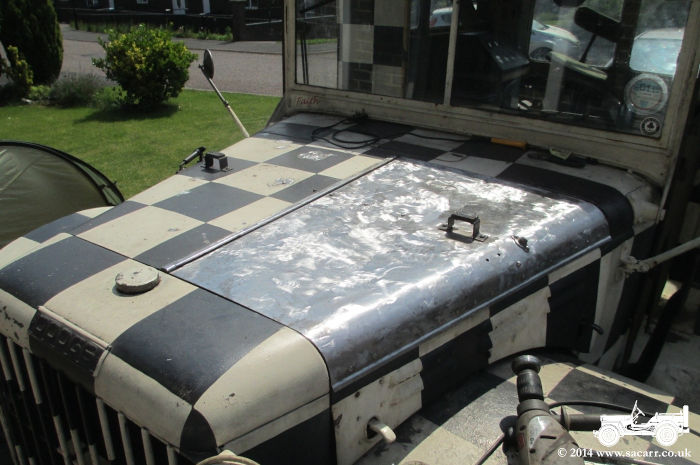
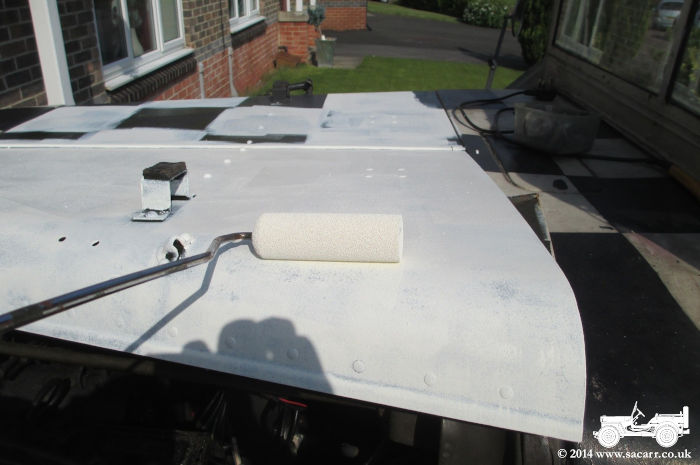
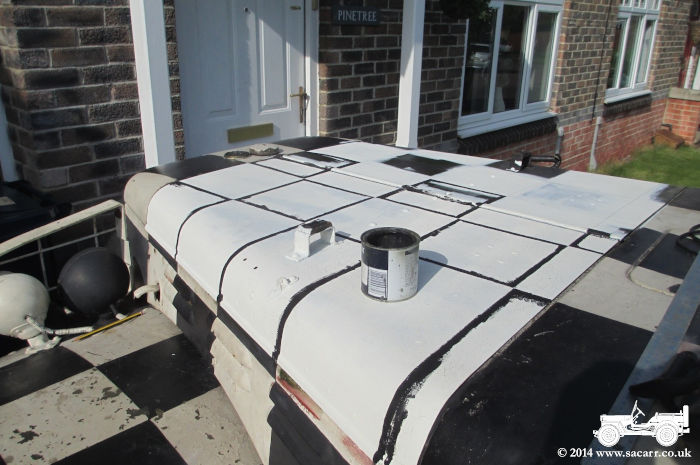
There were a couple of bad areas on the hood, and also on the rear body. These areas would be looked at first. The left side hood top was completely stripped to bare metal, while the right side just had the serious rust spots taken back to metal. The hood was then primed while other areas were looked at. |
|
|
|
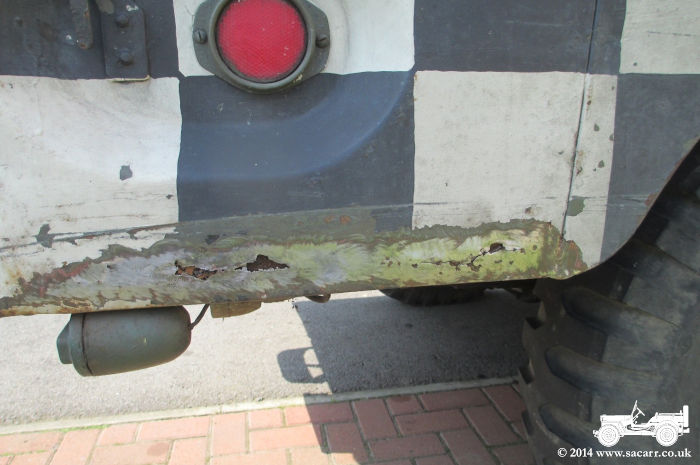
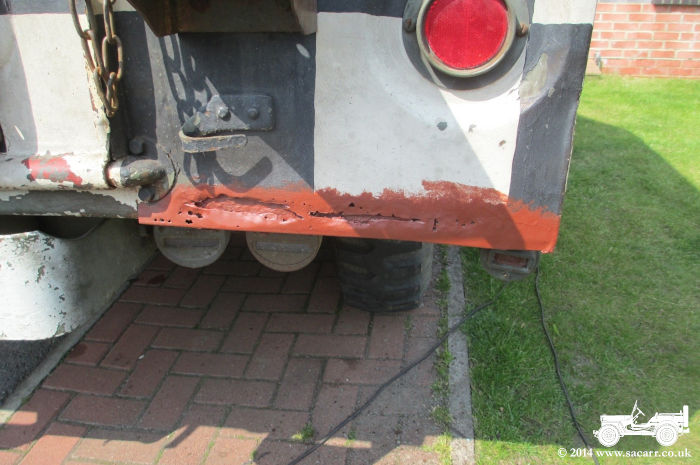
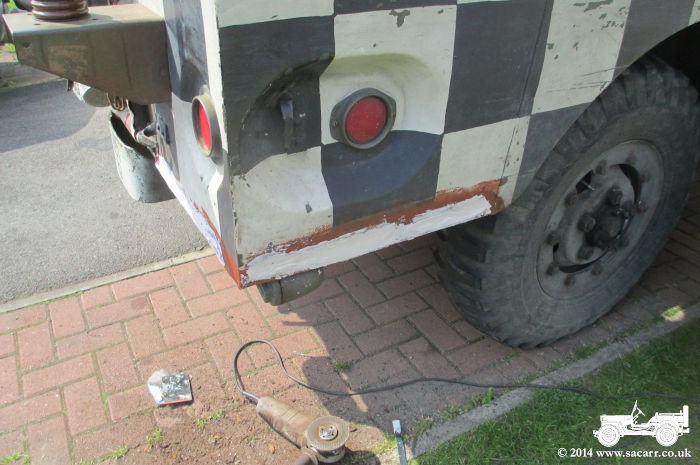
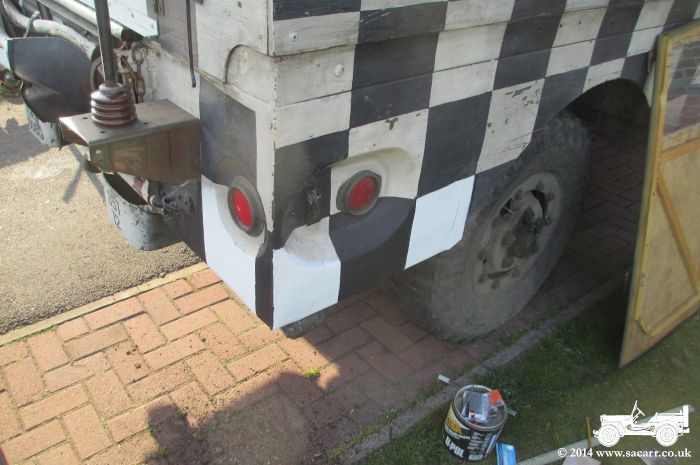
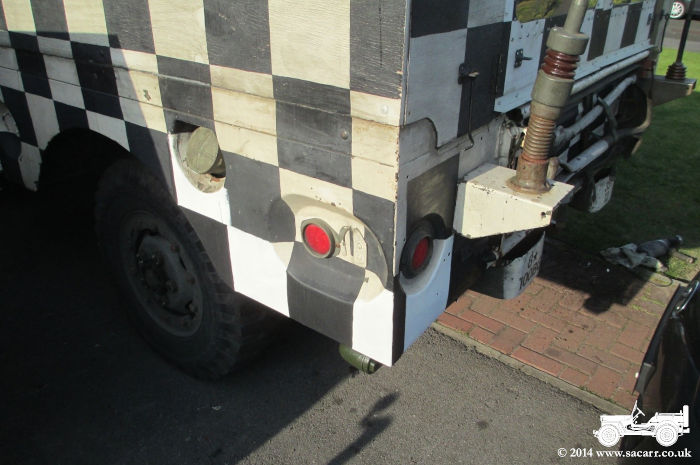
| The rear body on both sides were also showing rusted areas, the right worse than the left. On the right, the outer skin had rusted through, though the angle behind was solid. On the left side, it was just surface rust. | |
|
|
| The rusted areas were ground out and the underlying metal cleaned as best as possible, The sharp edges were hammered inwards and it was then primed. By this time the hood was ready for the olive drab top coat. | |
|
|
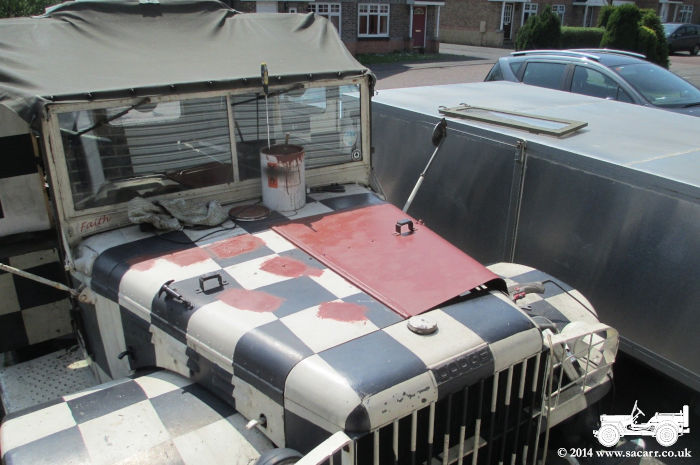
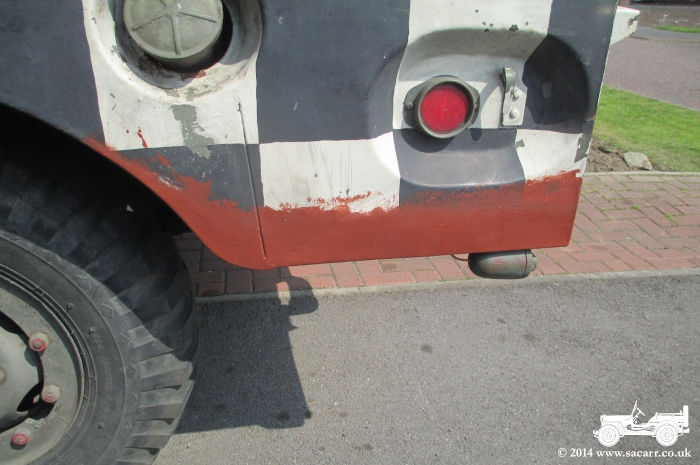
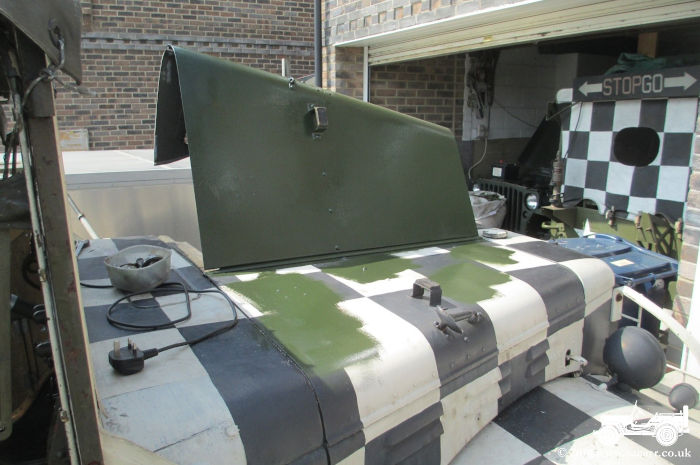
| The rotten areas of the rear body were then filled with car body filler. This is just a temporary repair to this area. In time, it will need the metal cut out and new material welded in. While the filler cured, the hood received its white base coat for the checkers. All painting was done with a small roller. | |
|
|
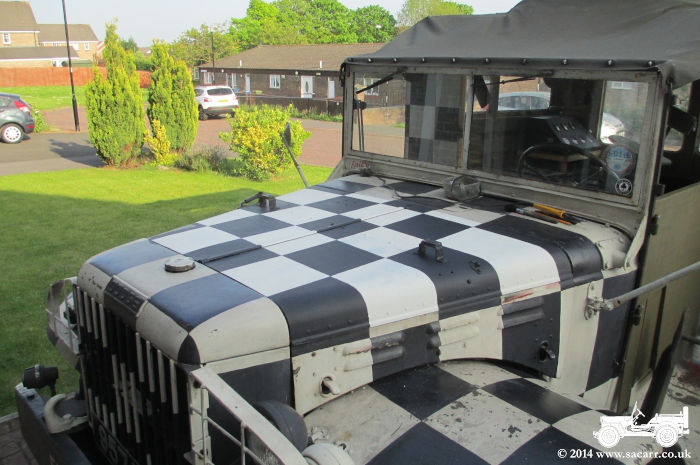
| When the white was dry, the checkers were marked out in pencil and then the edges painted first, then the rest of the black was then filled in. The white is a bit bright at present, but once fully hardened, the paint work can be wiped over with a dirty rag to dull it down. | |
|
|
|
|
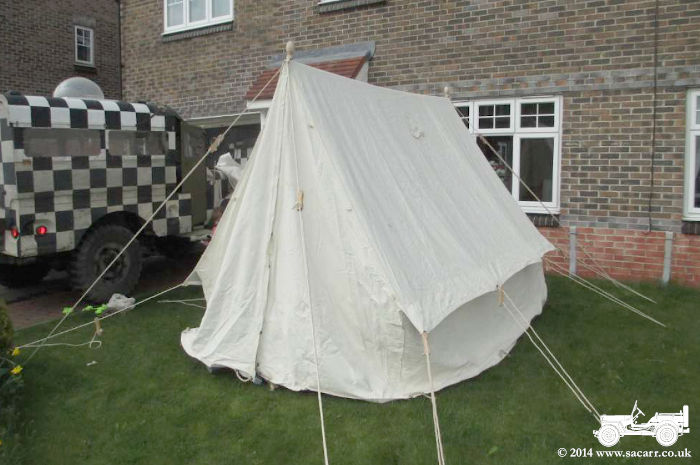
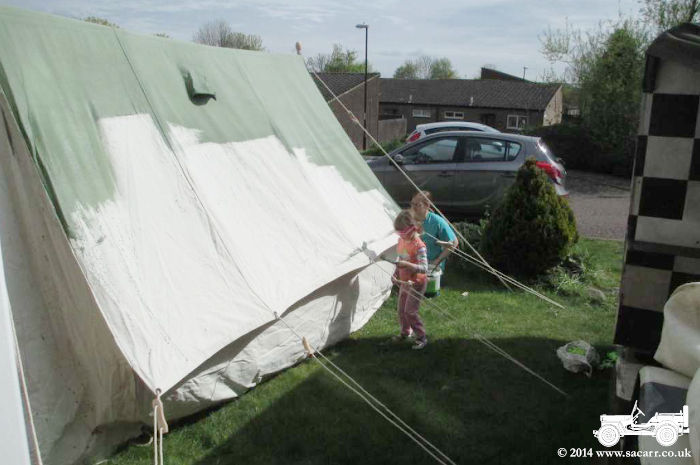
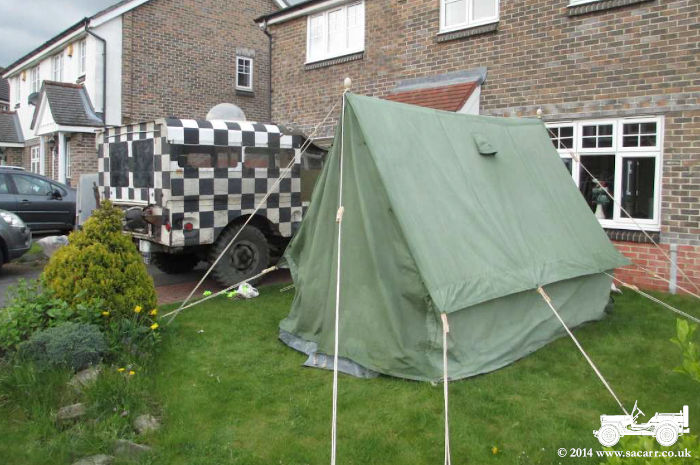
| May 04th For some time, when I've been away on my own with one of the vehicles, I've camped in a little 3 second pop-up tent, on the front of which I've made a small cooking shelter from a fly sheet. This was usually covered with a large camo net. It worked well, though I did have to do quite a bit of crawling around! ( See below left ) There are plenty of reproduction canvas military tents available, usually for several hundred pounds, which I wasn't prepared to pay for very occasional use. However, last year, a local Girl Guides unit was disposing of some canvas tents, and we got this white first aid tent rather cheap. There was nothing wrong with the tent, other than colour, but we were told by a friend, that shed/fence paint was really good for staining canvas. |
|
|
|
| It was a nice day today, so after a trip to B&Q for some paint, we took the opportunity to put up the tent for the first time and to get it painted. Best of all, my pop-up tent fits inside it, so I can have a nice warm tent to sleep in, with a built in ground sheet to keep dry. There is enough space left at the front of the ridge tent for my cooker and cool box, so I no longer have to grovel on the floor to cook and eat, and from the outside, the tent fits in with other military tents. | |
|
|
|
April 29th ~ May 03th
Later than usual this year, I brought the
Dodge home for its Spring check over. This included all the usual stuff like
cleaning and gapping the plugs, fluid level checks, charging the clock battery,
checking all the lights etc. There was one intermittent indicator due to a bad
earth and a leaking tyre valve, but otherwise, everything was ok. |
|
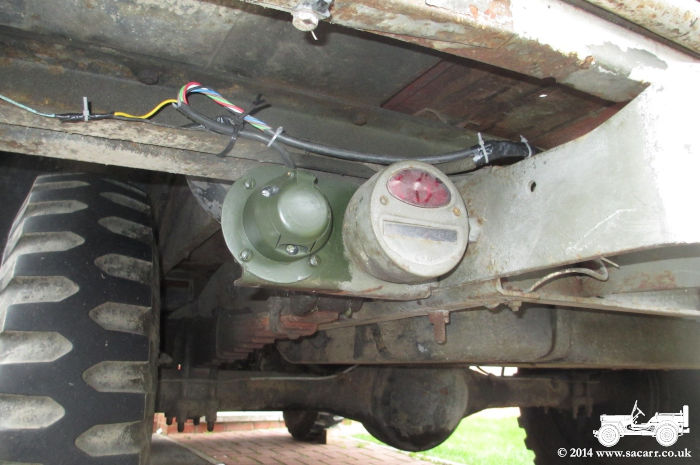
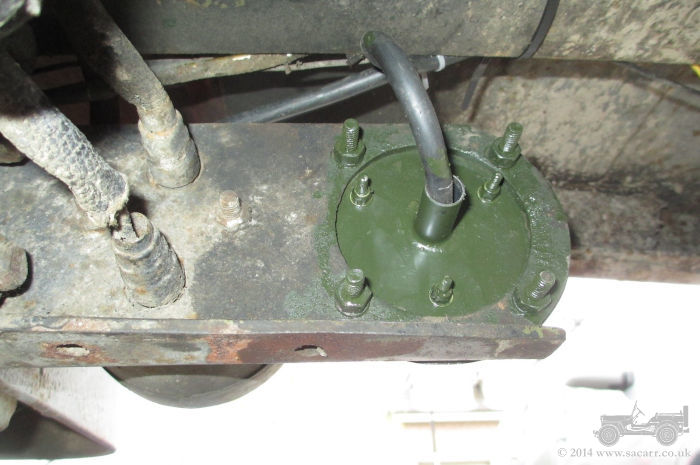
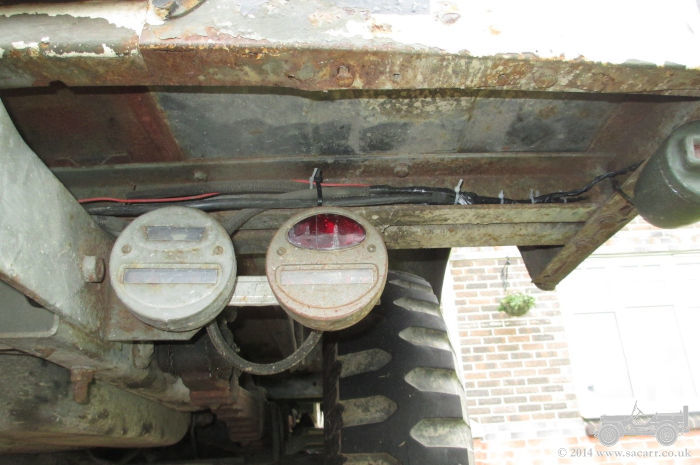
| Another job I've wanted to do for a while, and finally got around to today, was to fit a trailer socket so I could pull the Jeep trailer. This would allow us to pack the tent and other stuff away at the end of a show, without filling the back of the Dodge and spoiling the display. The Dodge had an original four pin socket fitted, but the Jeep trailer was fitted some time ago with a modern plug, so I needed to fit a modern socket. This required a steel adapter plate making, to bolt into the original mount, allowing the new socket to also bolt on. A steel tube cable support was brazed on, and the gap around the cable will be filled with silicone to keep the water out. I'll need to swap the trailer bulbs, as currently it is set up for the 24 volt Jeep, while the Dodge is still 6 volt. I also replaced quite a bit of wiring across the back of the truck, as who ever fitted the indicators and rewired the rear lights, did a proper bodge job, with a mix of wire gauges, and some wires crimped while others were just twisted together and taped up. The new connections are all soldered, taped up and cable ties to keep the insulation tight and the cables fastened out of the way. |
|
|
|