| April 29th - Spring Maintenance Complete | |
|
The brakes were all fitted back on the Dodge
today, bled and tested. After an initial leak which required the seals to be
fitted to one of the other old cylinders, the brakes were sorted. I still need
to check them for leaks over the next couple of days, but they are working so
much better than before, and I'm able to lock the wheels up now when braking. |
|
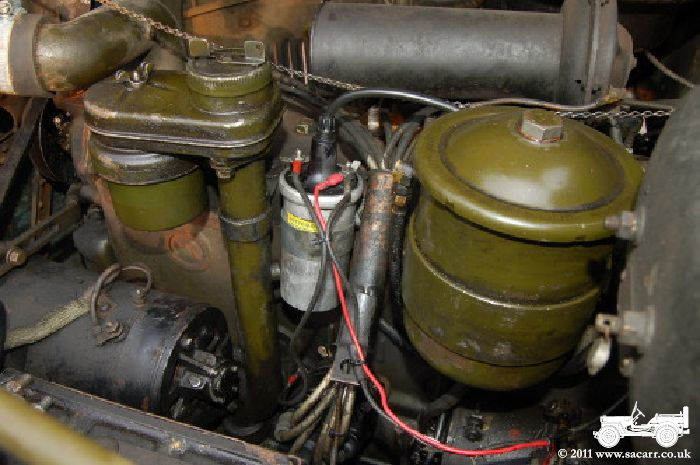
| After the brakes were sorted, the coil was re-fitted the correct way up. The King lead was too short, and as a result, when the coil had been fitted, it was mounted inverted. Since they are oil cooled, they work better the right way up, so a new king lead was made, allowing correct orientation. | The horn wire runs near the HT leads, but there was one bare area that needed some insulation. Upon further inspection, there were a number of fractures along its length, then the whole thing fell out of the steering column! Once I worked out how the horn button came off, I re-wired the horn. |
|
|
|
| April 27th - Spring Maintenance |
|
|
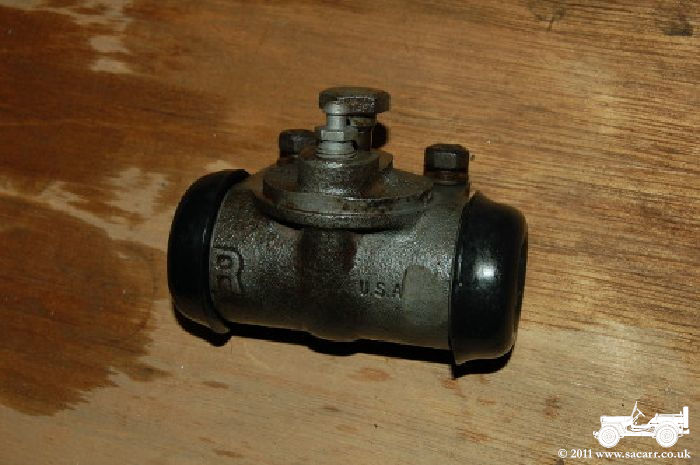
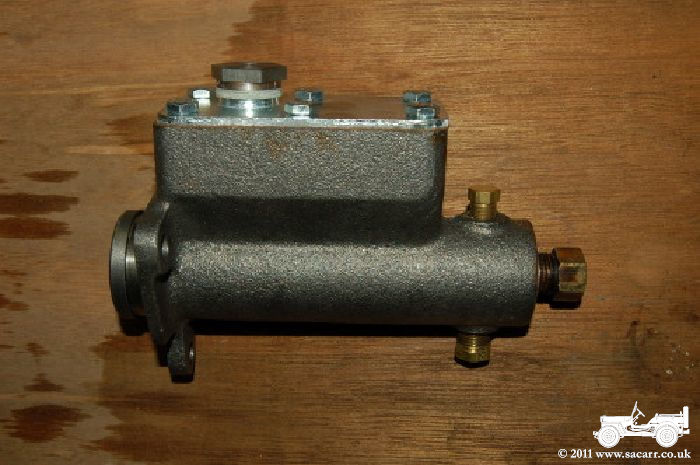
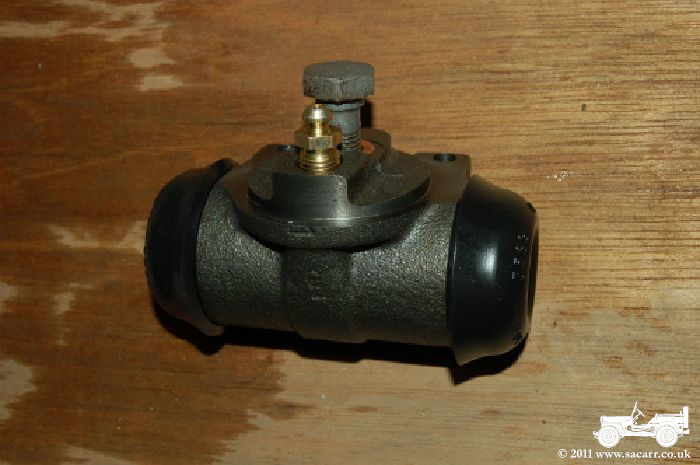
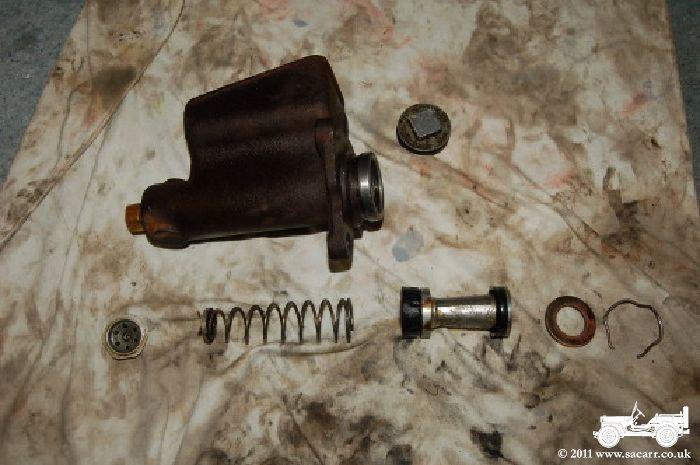
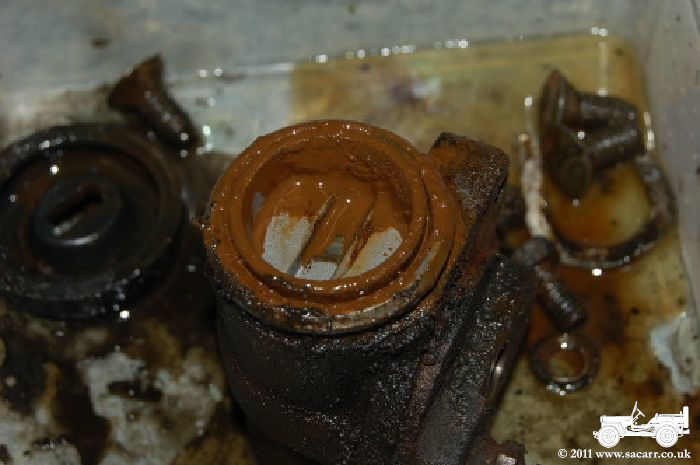
The new master brake cylinder and wheel
cylinders arrived today. I struggled for some time trying to removed the brass
pipe fitting from the end of the old cylinder, including using extreme heat and
force before it finally gave way.
Below left is one of the better old cylinders, now fitted with a new seal kit. I'll put the two old cylinders on the rear, and below right is one of the new cylinders. These will be fitted to the front of the truck.
|
|
|
|
|
| April 25th - Spring Maintenance |
|
|
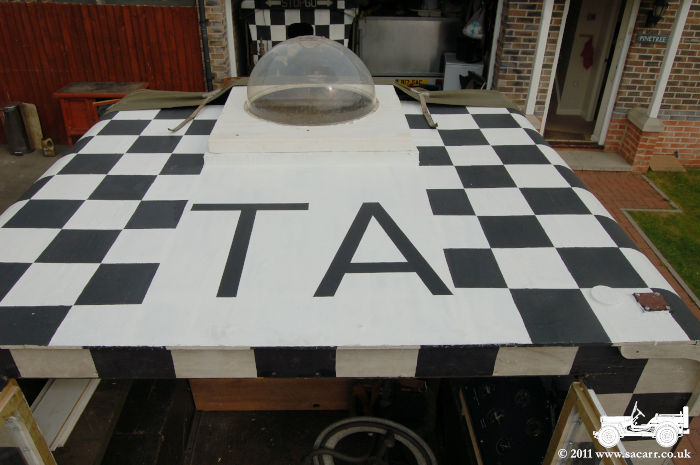
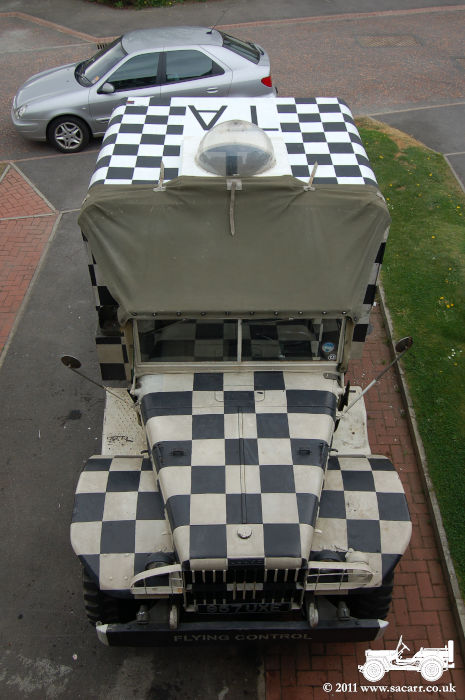
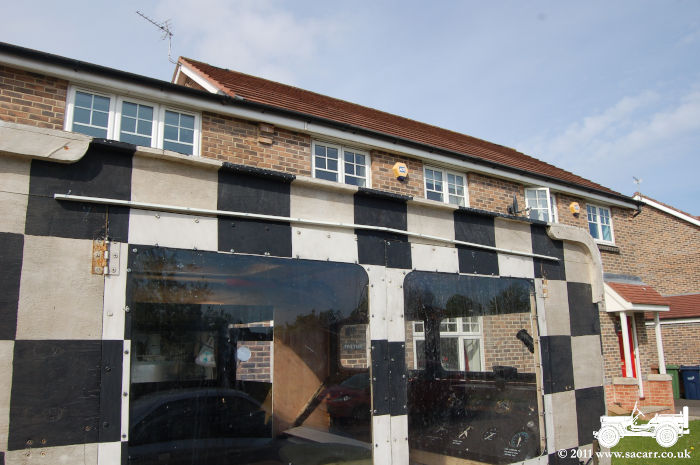
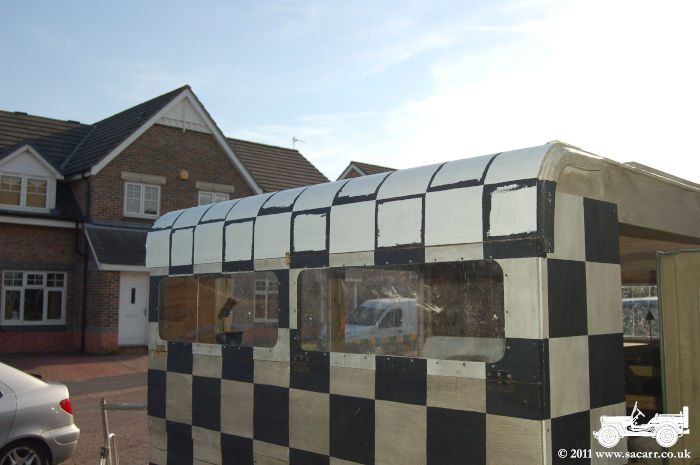
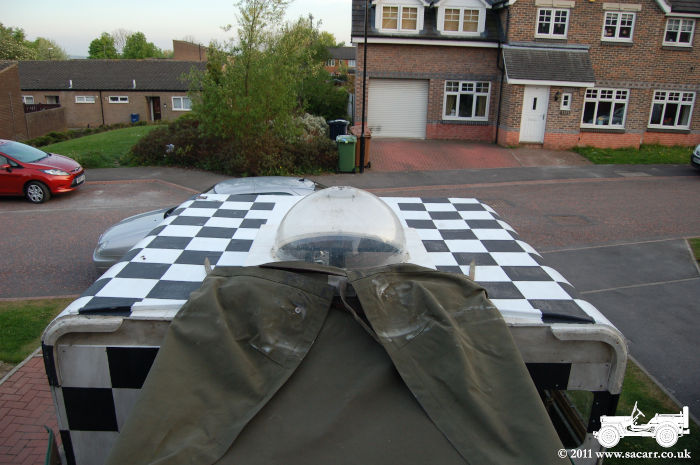
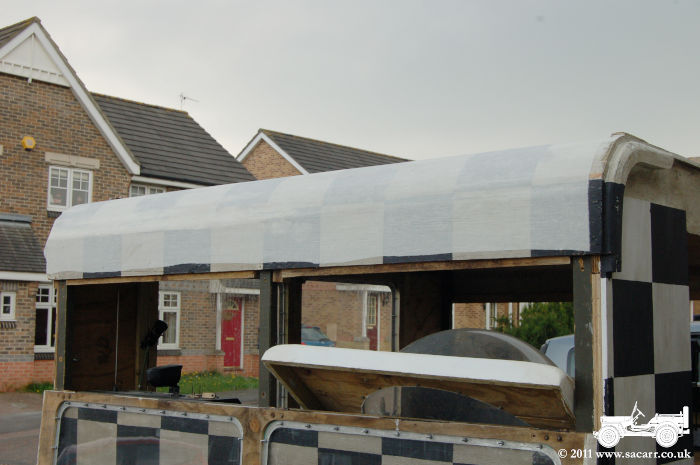
When Rupert first painted the checkers, he
started a full square on each side of the front of the rear body. Because of
the different lengths of each side of the rear body, it means the checkers
don't line up when extended over the roof. Rupert used two black lines to
separate the checkers which can be seen in the photo where the roof was first
covered in material. I wasn't keen on this, so left the centre white with the
airfield identity letters painted on, TA being Thorpe Abbotts.
|
|
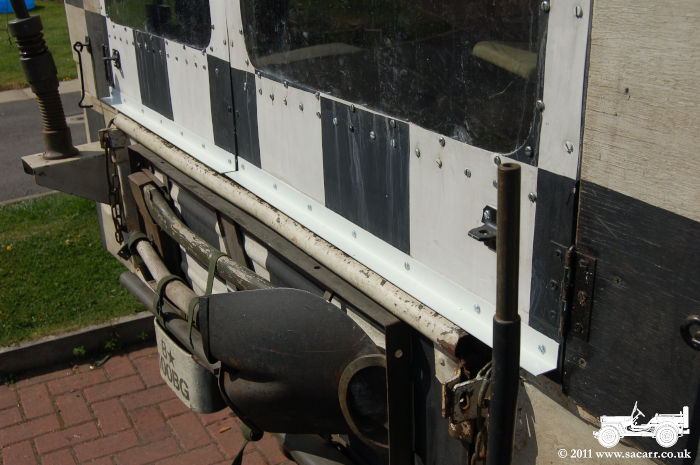
| Another small job was to add some guttering on and over the doors. The larger 'L' section aluminium was fastened to the bottom of the doors to stop rain from running down the doors and inside the tail gate. The smaller 'L' section was fitted above the doors to stop water entering the top edge. Small self tapping screws held the pre-drilled aluminium angles in place. | |
|
|
|
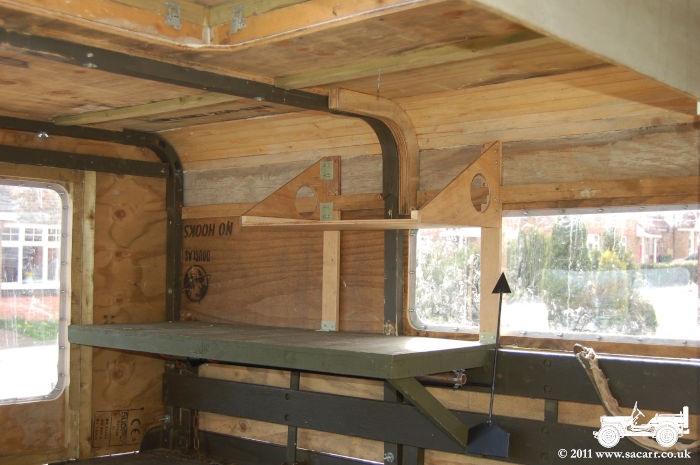
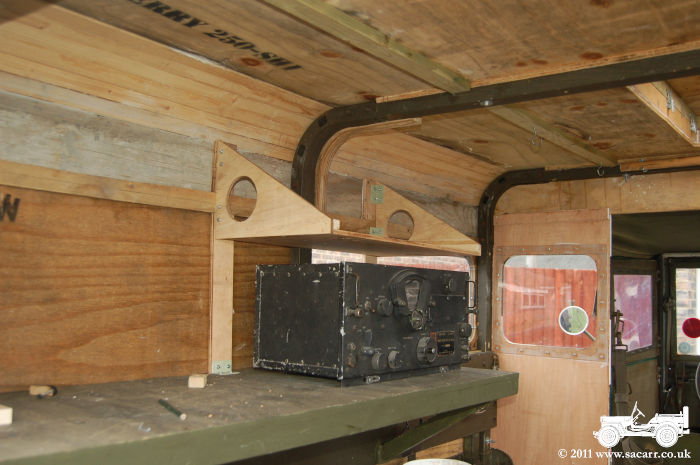
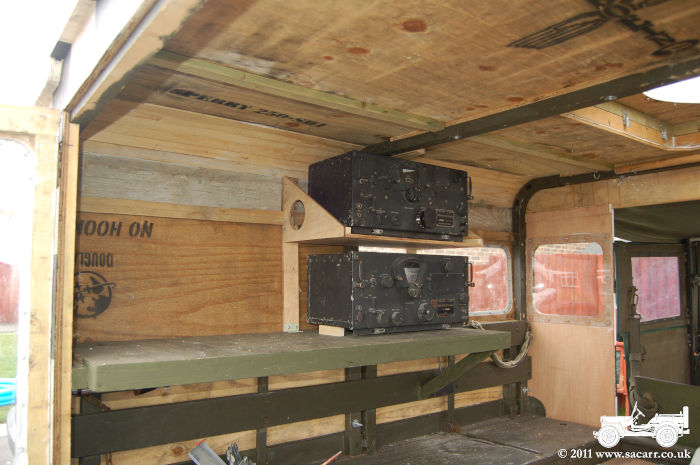
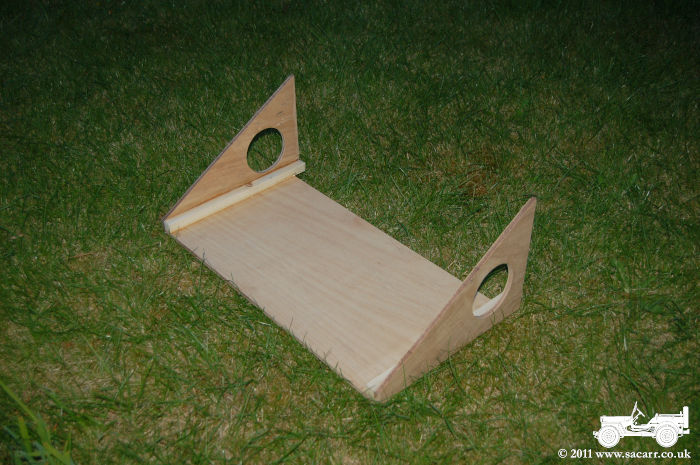
The radio tray made yesterday was fitted
into the back of the truck today. Four aluminium angle brackets were bolted to
the tray, and they were then bolted to 1/2 inch ply strips fastened up the side
of the truck. They were bolted to the green radio table at the bottom, and the
horizontal cross member above, allowing the side windows to still hinge down if
needed.
The tray was mounted allowing just enough height below and above for each BC-348 receiver to have its metal mount fitted once made. The large space to the left is for the BC-375 transmitter when I get around to making it. |
|
|
|
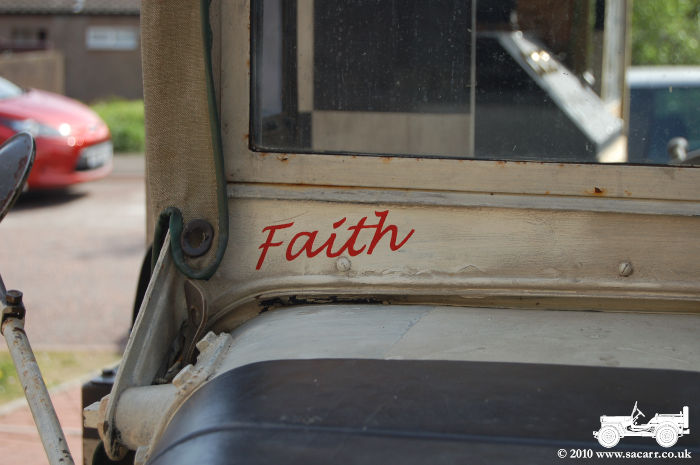
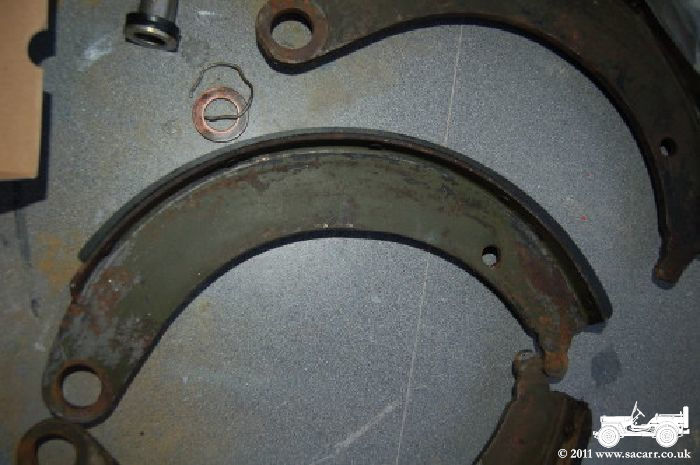
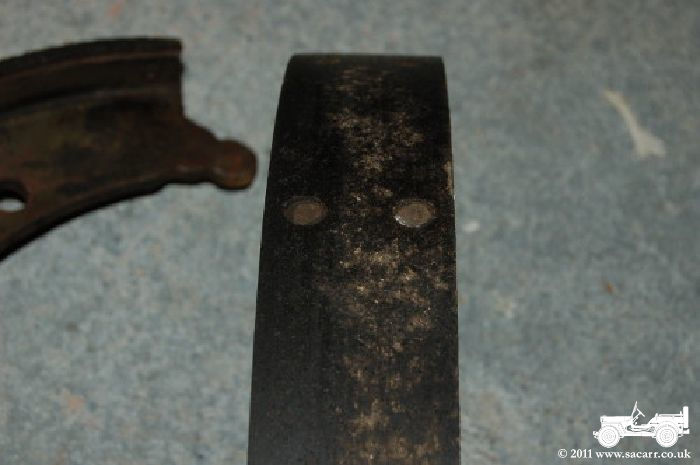
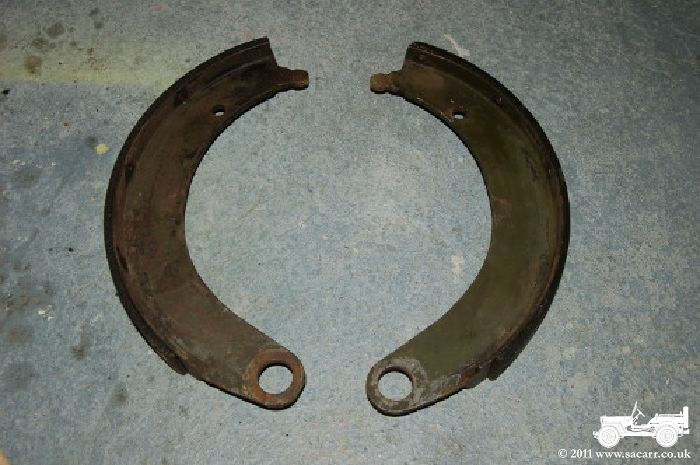
| Another small job waiting for time and good weather was the painting of the truck's name. | This is the brake shoe that has been binding. The lining tips are about 3/16 inch, but the centre is only 1/8. |
|
|
| April 24th - Spring Maintenance |
|
|
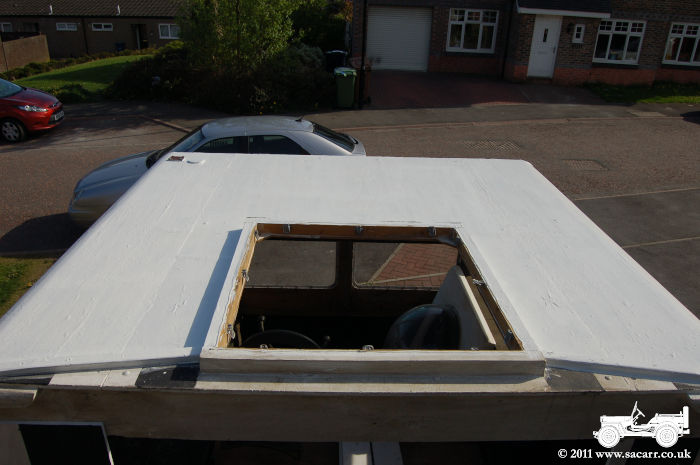
It was another bright sunny day this morning,
so to make the most of the suns heat, I started work on the roof. Last night
after the fabric had been applied, it was just dry and it started to rain! I
rushed out and spread the canvas roof over to protect the PVA as it wasn't
fully cured.
This morning it seemed to have survived the rain and so was given a second coat of thinned PVA. Once that was dry, the next coat was an exterior white. Even with the sun all day, it was going to take a long time for that to harden, so I moved onto the remaining wheel hub. I returned to the roof at the end of the day to apply the black checkers with a quick drying emulsion. |
|
|
|
|
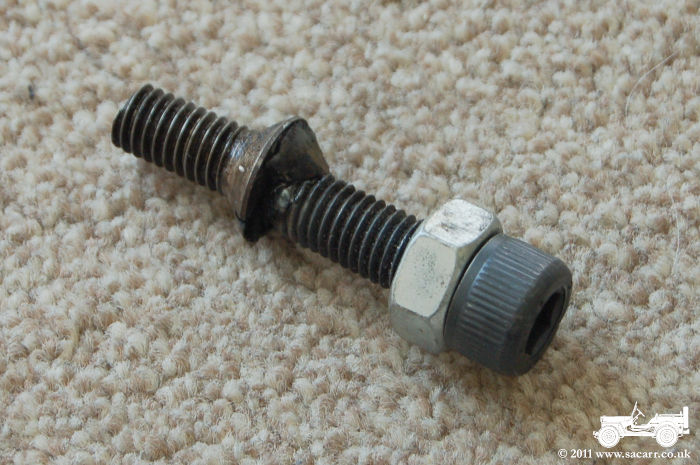
I posted my troubles with the stubborn screw
on a Dodge forum. Someone suggested welding a bolt to the screw and using a
spanner to get it out. Sounded better than drilling it out, and after being
very careful not to weld the screw into the hole, out it came, with very little
effort.
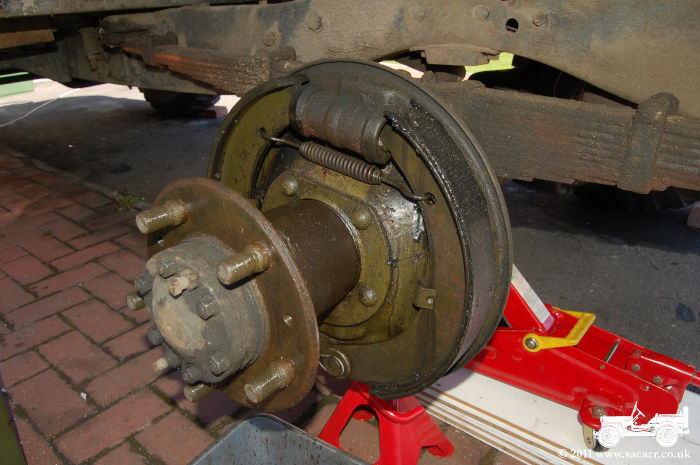
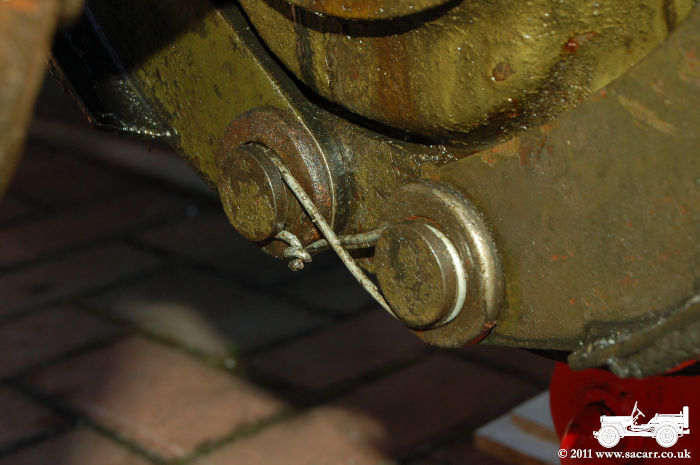
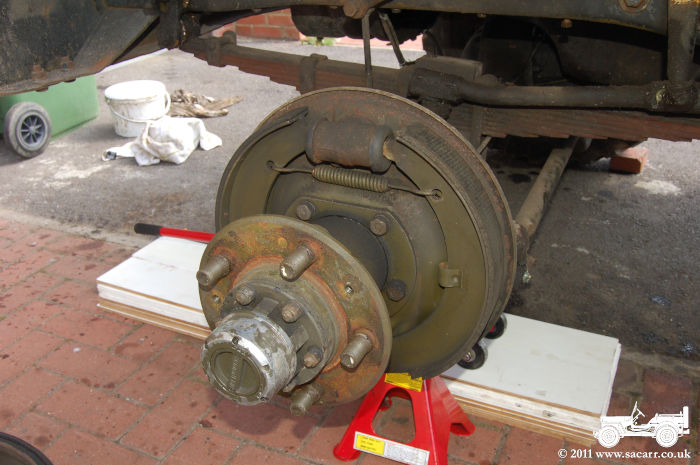
The hardest part was jigging the bolt up against the screw to allow welding. I ended up with the bolt in mole grips, the mole grips in a large vice, and the vice positioned so as to hold the bolt at the correct height and angle against the screw. With the hub removed, there were signs of leaking. The 'C' clips that hold the base of the brake shoes onto their pivots were missing, and a novel alternative was found in their place. |
|
|
|
|
Another small job done today was to make a
mount for one of the BC-348 radios. I wanted the two BC-348's stacked one above
the other. One will sit on the green radio table, the other will be mounted in
this tray above it. The metal mounts that I'm making for the radios will bolt
to this tray.
The design is based on a type used in the radio room of B-17 Fortresses. |
|
| April 22nd-23rd - Spring Maintenance |
|
| Since
I bought the Dodge, the weather has got steadily worse heading into the
winter, not really giving me any chance to do any serious maintenance.
The first jobs were engine oil change, then checking the diffs,
transmission and transfer case, topping up where neccessary. Steering
gear came next, followed by greasing all the nipples and oil cups. All
of that went fairly smoothly.
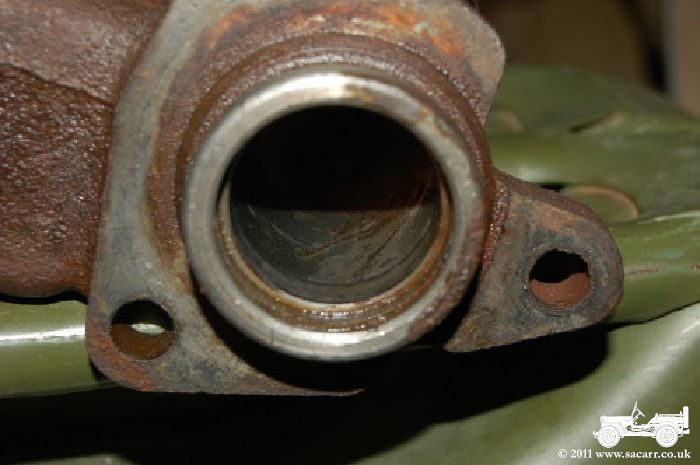
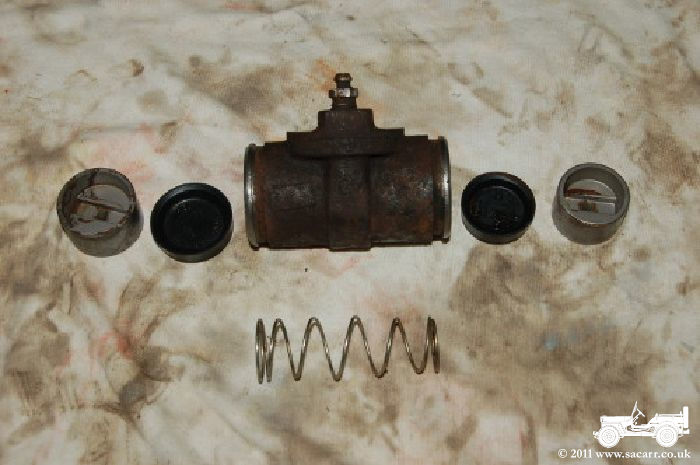
The next task was to reset the brake shoes, as the Dodge has been pulling right during braking. After adjusting the front sets, a quick test drive showed the braking to be straighter, but the left front shoes kept sticking on, and the brake pedal was spongey. Bleeding the brakes didn't help, pointing the way to a problem with the master brake cylinder or the wheel cylinders. The rubber boot around the plunger on the master brake cylinder was pulled back, revealing brake fluid, so that was leaking and needed removing for the seals or the full cylinder to be replaced. Once stripped down, the cylinder showed signs of corrosion and pitting. With the Dodge braking being a single line system, I decided a complete new master cylinder was the best option. |
|
|
|
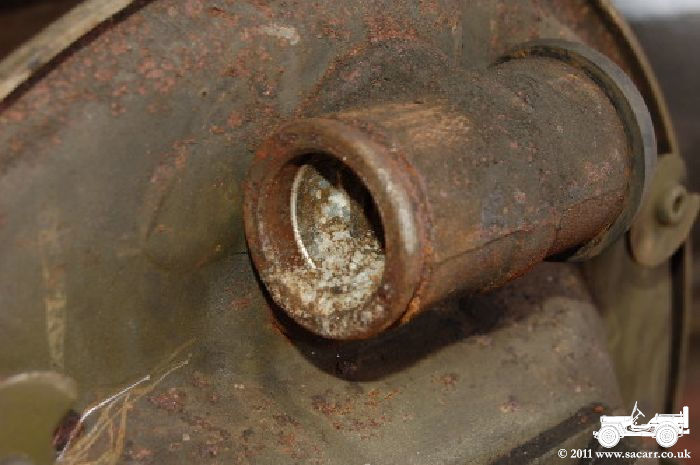
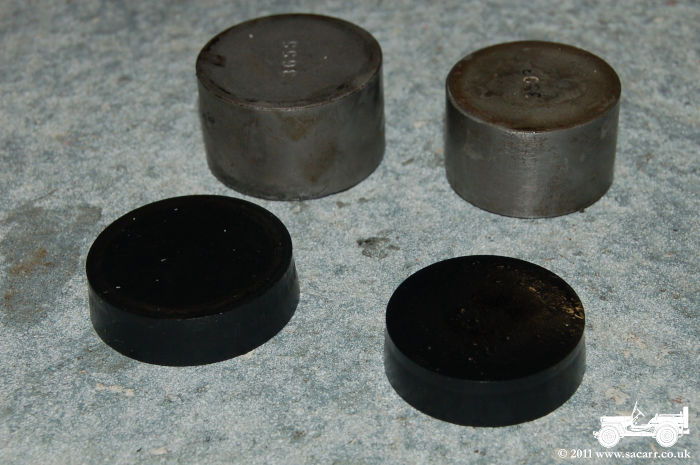
| The front left cylinder looked clean once the hub was off, so no leaks. Once the brake shoes came off, followed by the rubbers, it was soon clear why it wasn't leaking; one half of thr cylinder was severely corroded ( below right ). | |
|
|
| The rear right cylinder had been leaking badly, pouring fluid all over the hub and brake shoes. The shoes were left in a petrol bath for some time before being scrubbed with a toothbrush to make sure they were clean. They were then left on top of a heater to make sure there was no more fluid bleeding out of the brake lining. | |
|
|
| The cylinder was marked like the master, but may clean up, allowing new seals to be fitted. Below right are the cleaned shoes. | |
|
|
| Here's the rear right cylinder removed and stripped. The seals look fine, but these were the ones that were leaking badly. | |
|
|
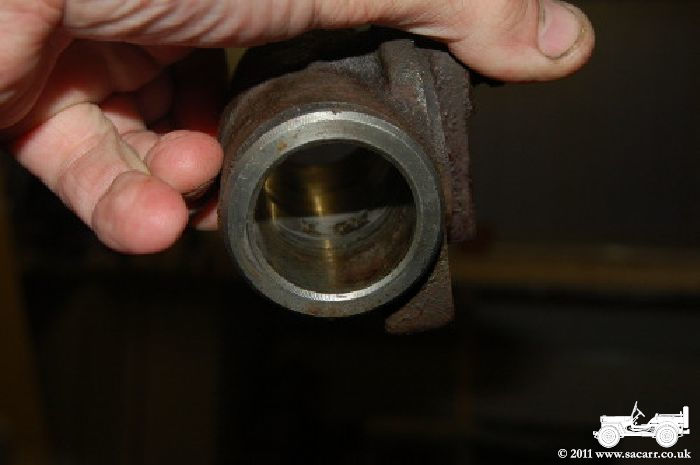
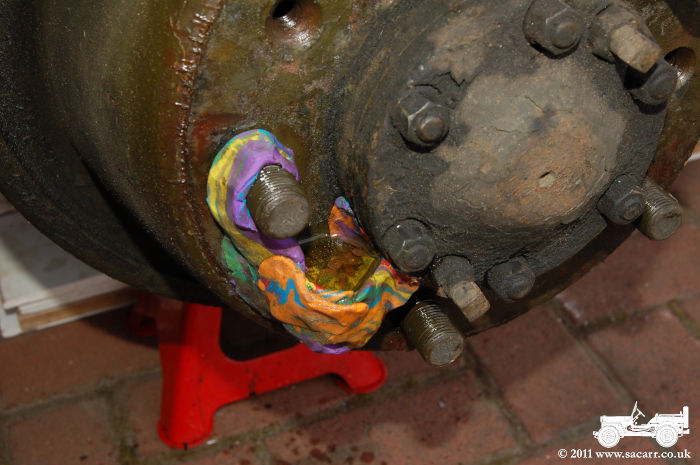
| The front right side looked good, and it was the only one I knew worked, because that's the way the truck pulled when braking! While this is working fine, it makes sense to replace the seals in the cylinder while it's apart. | The rear left couldn't be accessed due to one of the hub screws being solid. I tried a cup fashioned out of plastercine with a release agent in it and left the screw to soak. I came back after a while but it still wouldn't shift. A drill is the next option! |

|
|
| With as much stripped down as I could and needing parts, I started one of the other jobs before the heat of the day was gone. For a while now, the roof has leaked in the rain at the joints in the wooden sheeting. To fix this, I opted for a similar method as used on the wooden de Havilland Mosquito. Some thin fabric was stretched over the roof, and glued down to form a waterproof skin. Once painted over, this will hopefully add to the waterproofing. | |

|
|